Embed Size (px)
Citation preview
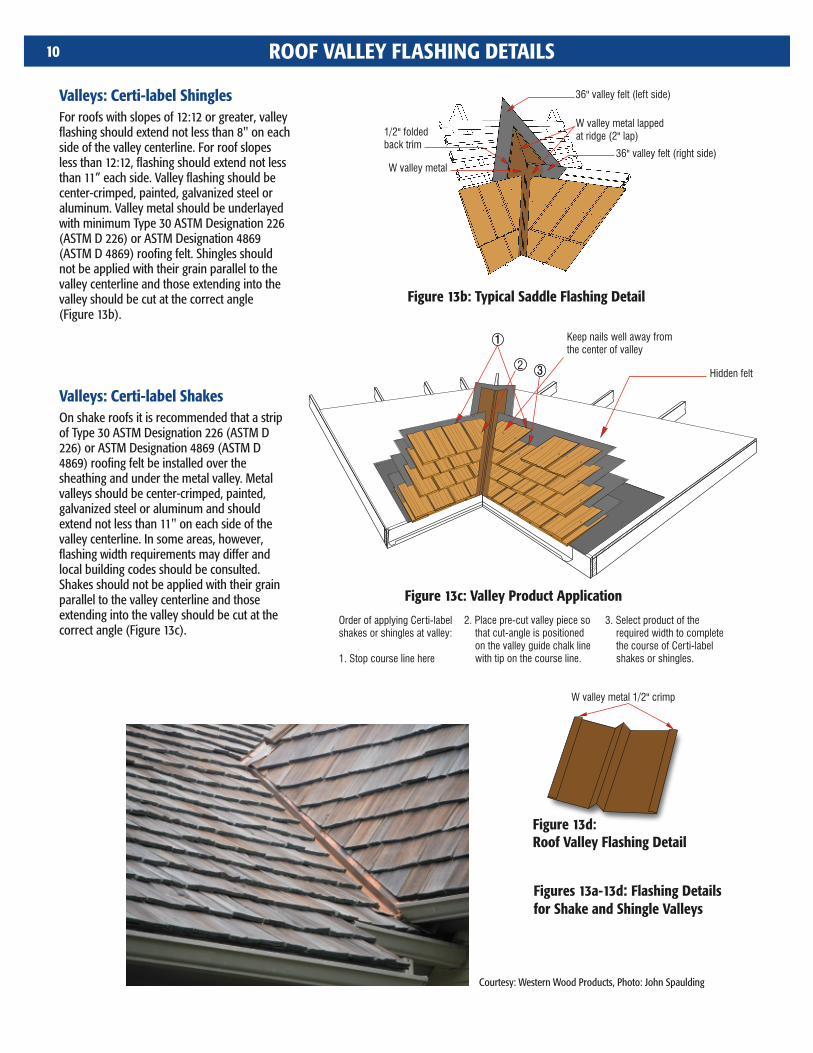
W valley metal 1/2" crimp
11
2 33
Figures 13a-13d: Flashing Details for Shake and Shingle Valleys
Figure 13c: Valley Product Application
Figure 13d: Roof Valley Flashing Detail
For roofs with slopes of 12:12 or greater, valley flashing should extend not less than 8" on each side of the valley centerline. For roof slopes less than 12:12, flashing should extend not less than 11” each side. Valley flashing should be center-crimped, painted, galvanized steel or aluminum. Valley metal should be underlayed with minimum Type 30 ASTM Designation 226 (ASTM D 226) or ASTM Designation 4869 (ASTM D 4869) roofing felt. Shingles should not be applied with their grain parallel to the valley centerline and those extending into the valley should be cut at the correct angle (Figure 13b).
On shake roofs it is recommended that a strip of Type 30 ASTM Designation 226 (ASTM D 226) or ASTM Designation 4869 (ASTM D 4869) roofing felt be installed over the sheathing and under the metal valley. Metal valleys should be center-crimped, painted, galvanized steel or aluminum and should extend not less than 11" on each side of the valley centerline. In some areas, however, flashing width requirements may differ and local building codes should be consulted. Shakes should not be applied with their grain parallel to the valley centerline and those extending into the valley should be cut at the correct angle (Figure 13c).
Valleys: Certi-label Shingles
Valleys: Certi-label Shakes
ROOF VALLEY FLASHING DETAILS10
Figure 13b: Typical Saddle Flashing Detail
36" valley felt (left side)
36" valley felt (right side)
1/2" folded back trim
W valley metal
W valley metal lappedat ridge (2" lap)
Order of applying Certi-labelshakes or shingles at valley:
1. Stop course line here
2. Place pre-cut valley piece so that cut-angle is positioned on the valley guide chalk line with tip on the course line.
3. Select product of therequired width to completethe course of Certi-label shakes or shingles.
Keep nails well away fromthe center of valley
Hidden felt
Courtesy: Western Wood Products, Photo: John Spaulding