Embed Size (px)
Citation preview
1
The Three Different Methods To Reflash Your BIOS on SuperMicro C7 Motherboards 1. Update the BIOS from Window (SuperDoctor 5.0/SD5)
SuperDoctor 5 (SD5) is a system agent that runs on monitored hosts designed by Supermicro to provide local system health and information. SD5 supports a Web-based interface and a command-line interface on the Windows platforms.
Installation a. Execute the SD5 installer. Note that you must have Administrator privileges to install and run SD5. b. Click the “Next” button to continue.
2
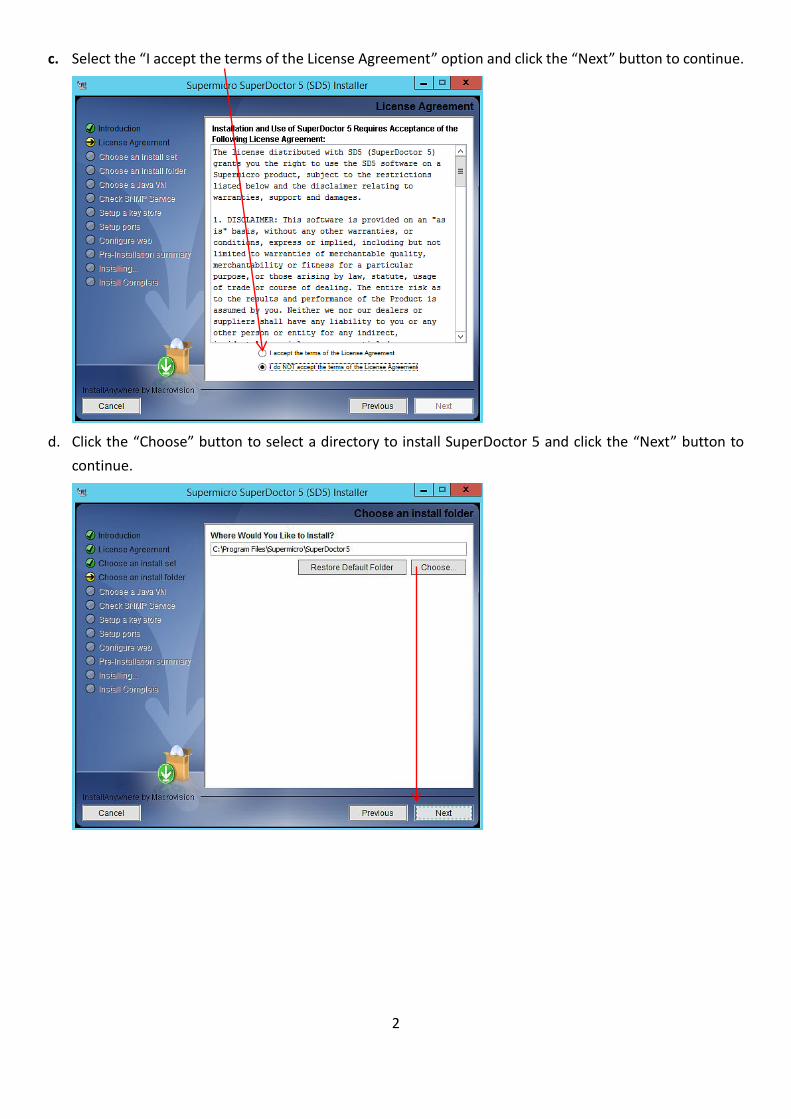
c. Select the “I accept the terms of the License Agreement” option and click the “Next” button to continue.
d. Click the “Choose” button to select a directory to install SuperDoctor 5 and click the “Next” button to
continue.
3
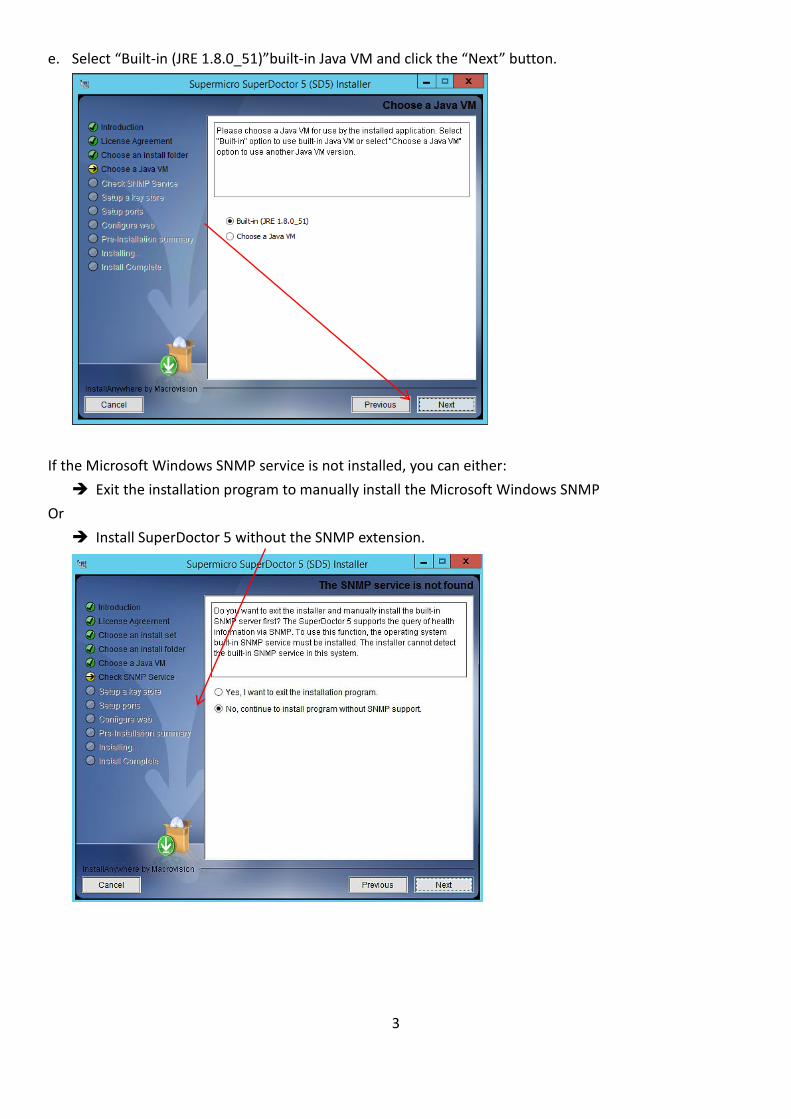
e. Select “Built-in (JRE 1.8.0_51)”built-in Java VM and click the “Next” button.
If the Microsoft Windows SNMP service is not installed, you can either: Exit the installation program to manually install the Microsoft Windows SNMP
Or Install SuperDoctor 5 without the SNMP extension.
4
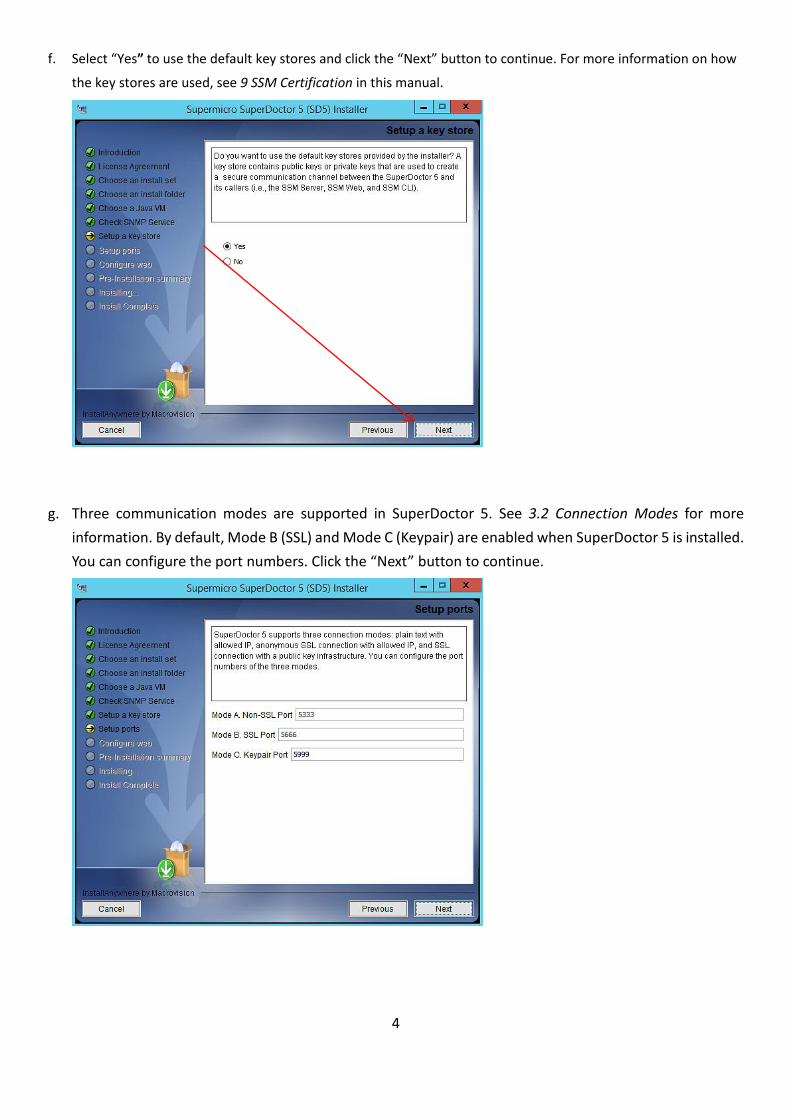
f. Select “Yes” to use the default key stores and click the “Next” button to continue. For more information on how
the key stores are used, see 9 SSM Certification in this manual.
g. Three communication modes are supported in SuperDoctor 5. See 3.2 Connection Modes for more
information. By default, Mode B (SSL) and Mode C (Keypair) are enabled when SuperDoctor 5 is installed. You can configure the port numbers. Click the “Next” button to continue.
5
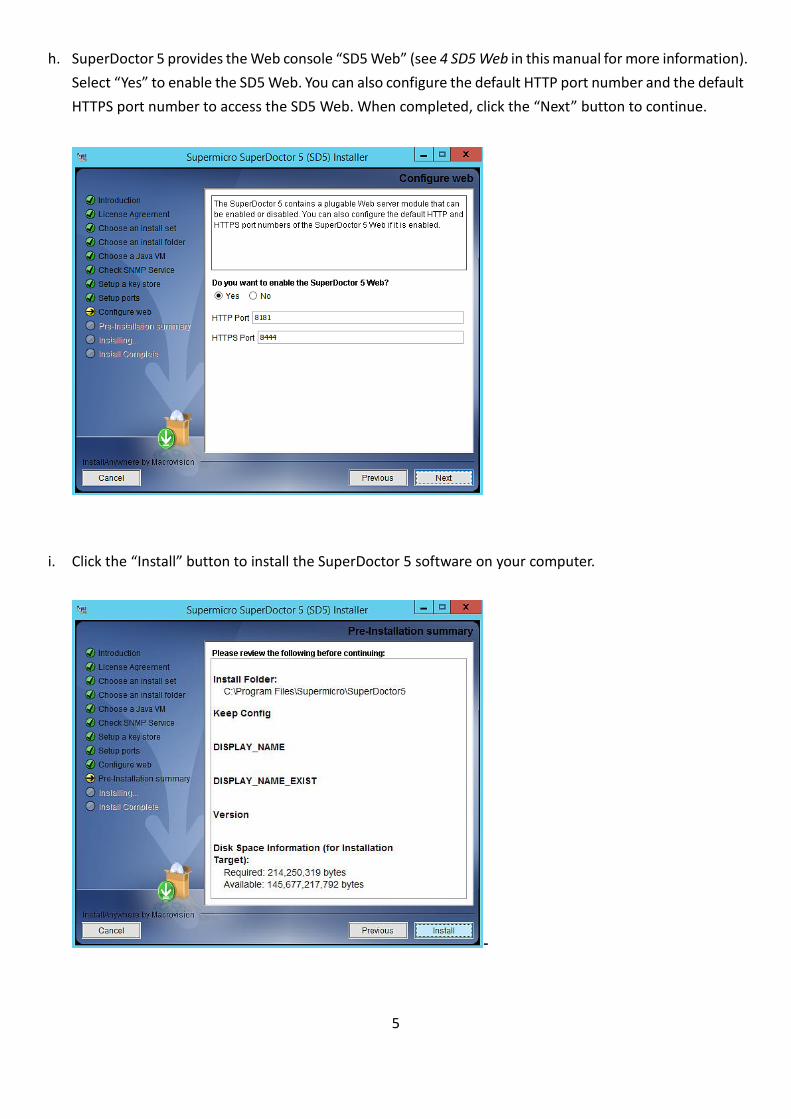
h. SuperDoctor 5 provides the Web console “SD5 Web” (see 4 SD5 Web in this manual for more information). Select “Yes” to enable the SD5 Web. You can also configure the default HTTP port number and the default HTTPS port number to access the SD5 Web. When completed, click the “Next” button to continue.
i. Click the “Install” button to install the SuperDoctor 5 software on your computer.
-
6
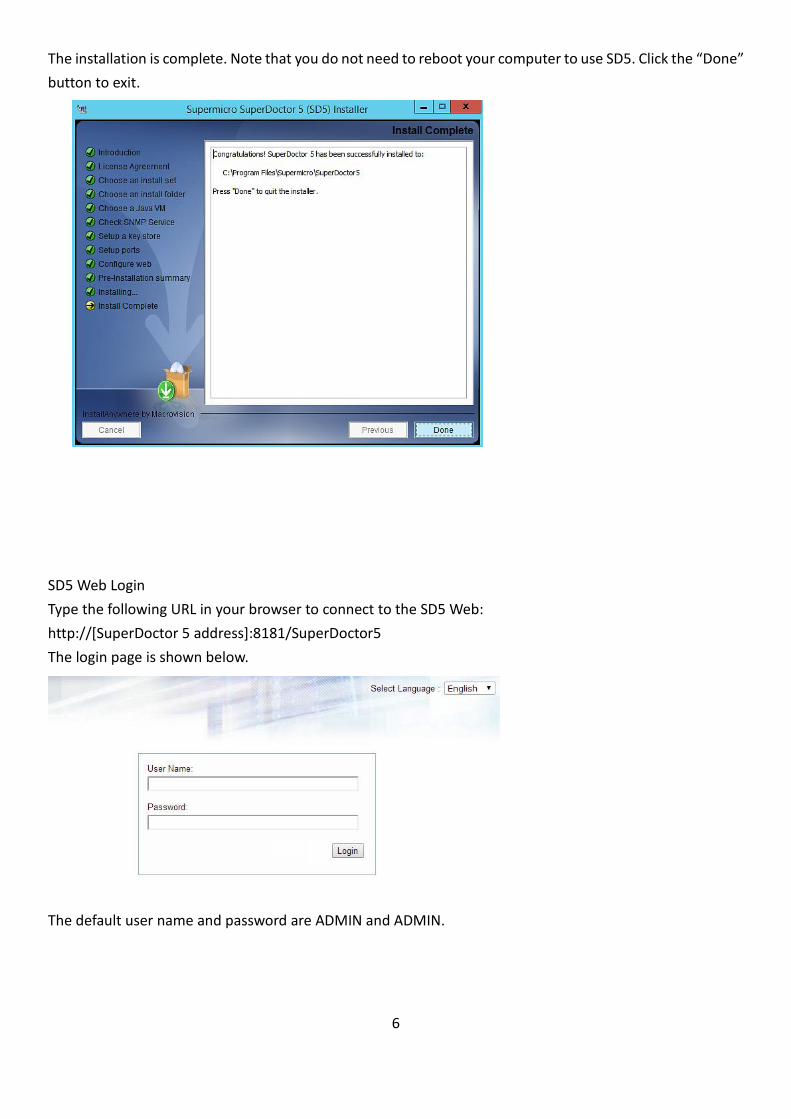
The installation is complete. Note that you do not need to reboot your computer to use SD5. Click the “Done” button to exit.
SD5 Web Login Type the following URL in your browser to connect to the SD5 Web: http://[SuperDoctor 5 address]:8181/SuperDoctor5 The login page is shown below.
The default user name and password are ADMIN and ADMIN.
7
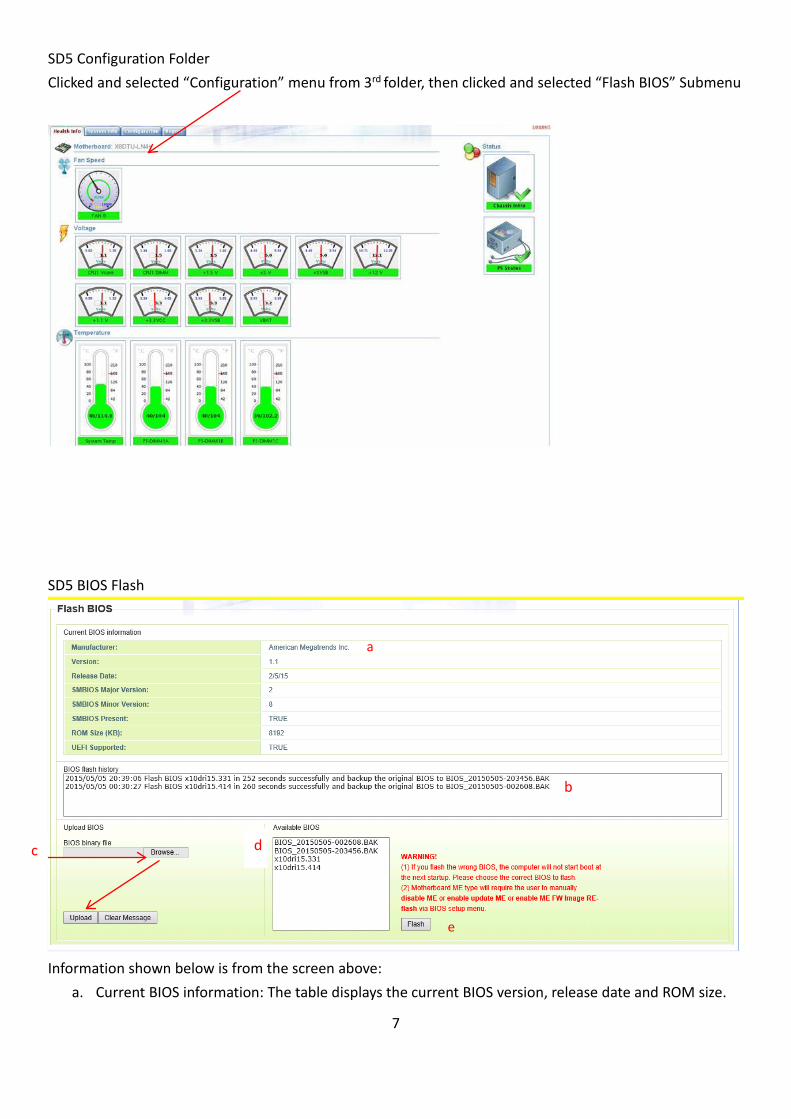
SD5 Configuration Folder Clicked and selected “Configuration” menu from 3rd folder, then clicked and selected “Flash BIOS” Submenu
SD5 BIOS Flash
Information shown below is from the screen above:
a. Current BIOS information: The table displays the current BIOS version, release date and ROM size.
e
a
b
d c
8
b. BIOS flash history: The BIOS flashing activities via SuperDoctor 5 is logged in the list. The flashing is logged whether it is successful or not. If you have never used SD5 to flash the BIOS before, the history field is empty.
c. Upload BIOS: A user can browse and select the correct BIOS file either from our website or Supermicro Technical Support. Click “Browse” to select the desired BIOS binary file and then click “Upload” to upload the file to the “Available BIOS” field. If you have never uploaded a BIOS binary file in SD5, the “Available BIOS” field will be empty.
d. Available BIOS block: The list contains BIOS binary files backed up or uploaded in SD5. Note that to prevent the BIOS from being corrupted, you are required to disable ME (Intel Management Engine) before updating the BIOS. Find disable or enable update ME or enable ME FW Image RE-flash in the BIOS setup menu.
e. Flash BIOS: When you select the BIOS binary file from “Available BIOS” block, you may click the “Flash” button then SD5 will run rest of the BIOS flash procedure automatically.
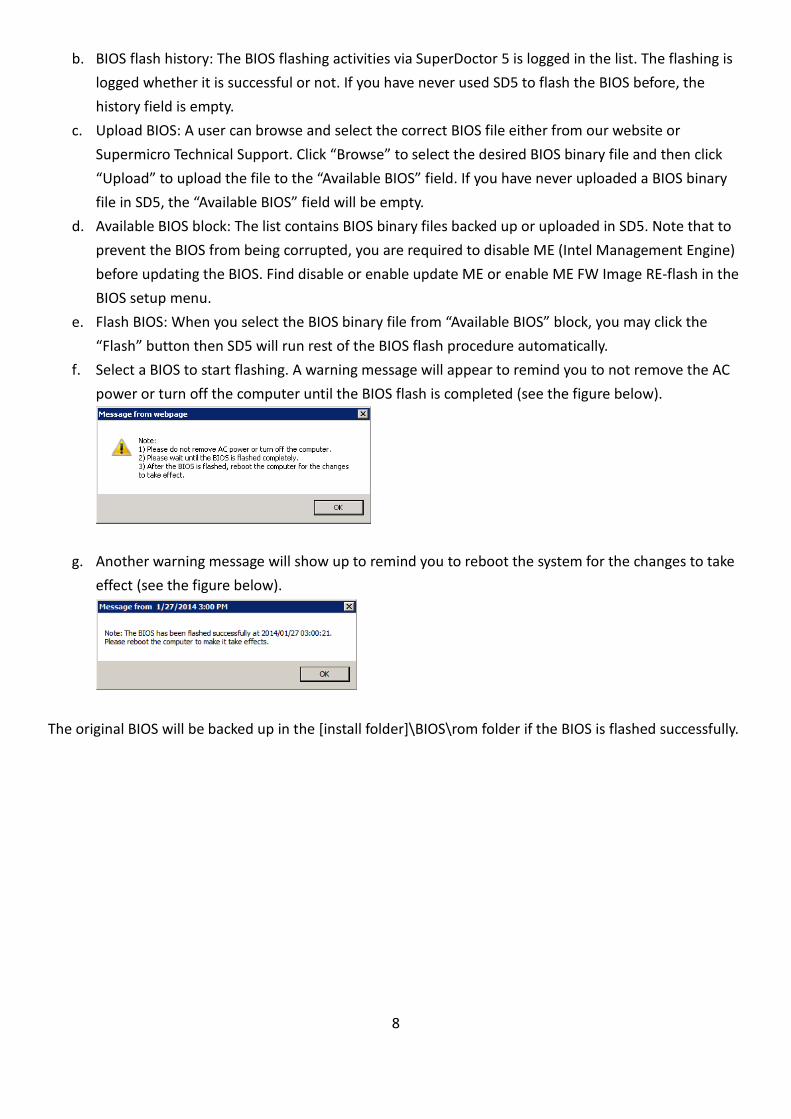
f. Select a BIOS to start flashing. A warning message will appear to remind you to not remove the AC power or turn off the computer until the BIOS flash is completed (see the figure below).
g. Another warning message will show up to remind you to reboot the system for the changes to take effect (see the figure below).
The original BIOS will be backed up in the [install folder]\BIOS\rom folder if the BIOS is flashed successfully.
9
2. Update the BIOS from DOS If you choose to update the BIOS from DOS, you will need to:
a. Create a bootable drive (USB memory stick, CD/DVD, external HDD) b. Copy the BIOS file(s) to the bootable drive. c. Then reboot your system and boot from this drive.
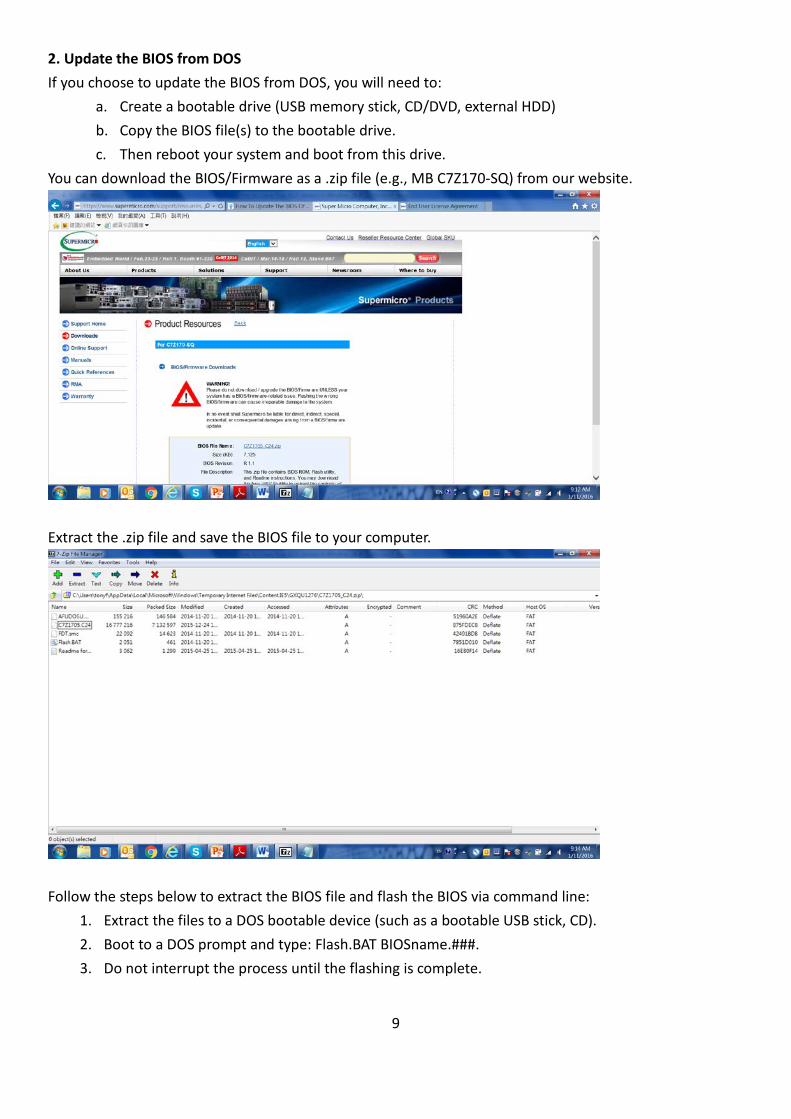
You can download the BIOS/Firmware as a .zip file (e.g., MB C7Z170-SQ) from our website.
Extract the .zip file and save the BIOS file to your computer.
Follow the steps below to extract the BIOS file and flash the BIOS via command line:
1. Extract the files to a DOS bootable device (such as a bootable USB stick, CD). 2. Boot to a DOS prompt and type: Flash.BAT BIOSname.###. 3. Do not interrupt the process until the flashing is complete.
10
4. After you see the BIOS is complete message, uplug the AC, clear the CMOS, plug in the AC power cord and power on the system.
5. Go to the BIOS setup screen and press F3 to load the default and press F4 to save and exit.
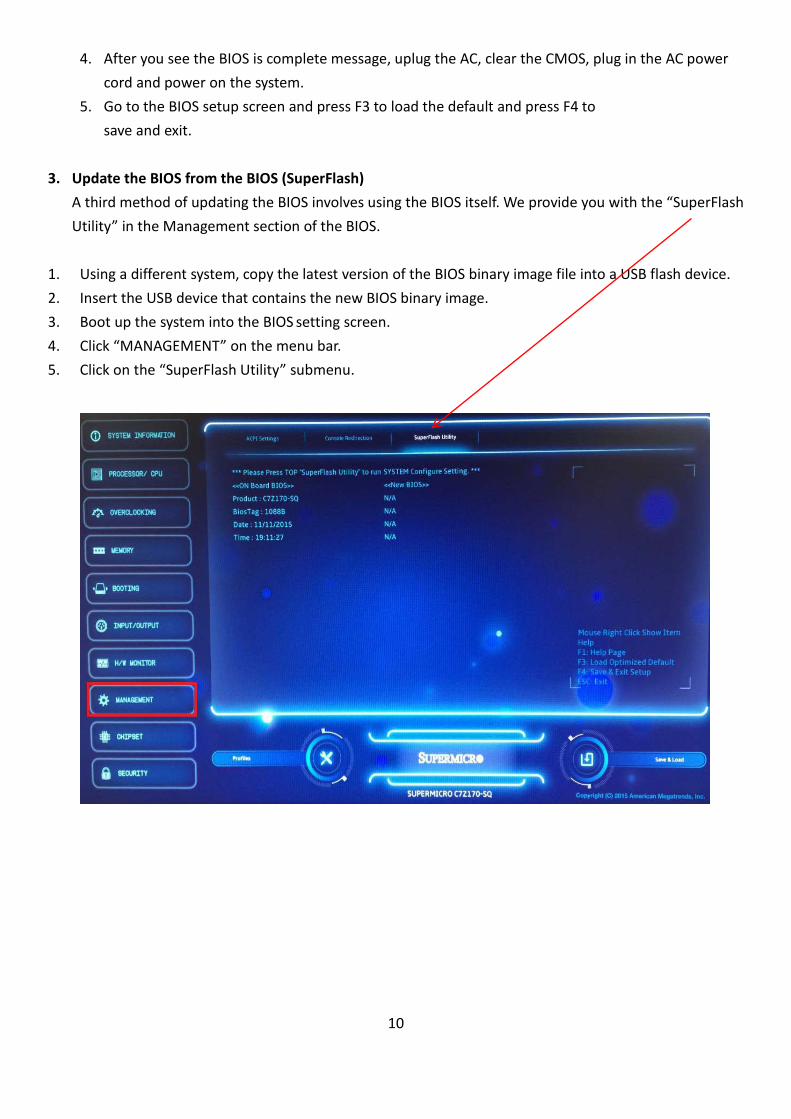
3. Update the BIOS from the BIOS (SuperFlash)
A third method of updating the BIOS involves using the BIOS itself. We provide you with the “SuperFlash Utility” in the Management section of the BIOS.
1. Using a different system, copy the latest version of the BIOS binary image file into a USB flash device. 2. Insert the USB device that contains the new BIOS binary image. 3. Boot up the system into the BIOS setting screen. 4. Click “MANAGEMENT” on the menu bar. 5. Click on the “SuperFlash Utility” submenu.
11
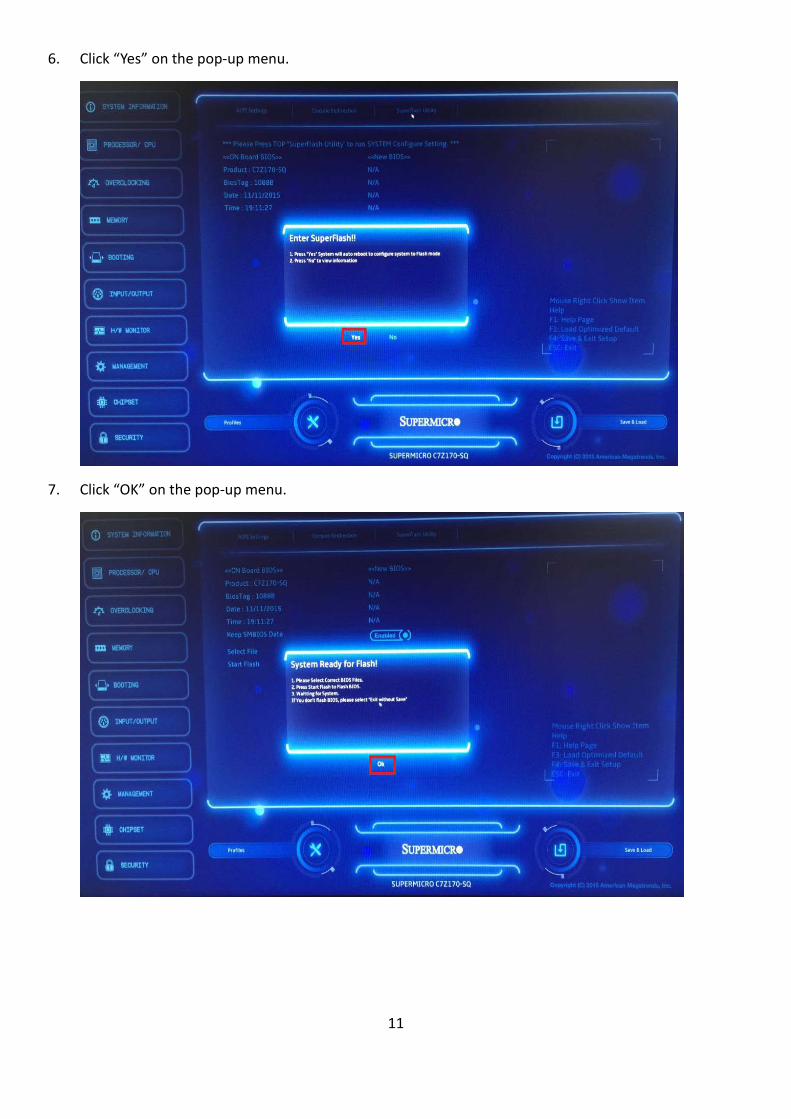
6. Click “Yes” on the pop-up menu.
7. Click “OK” on the pop-up menu.
12
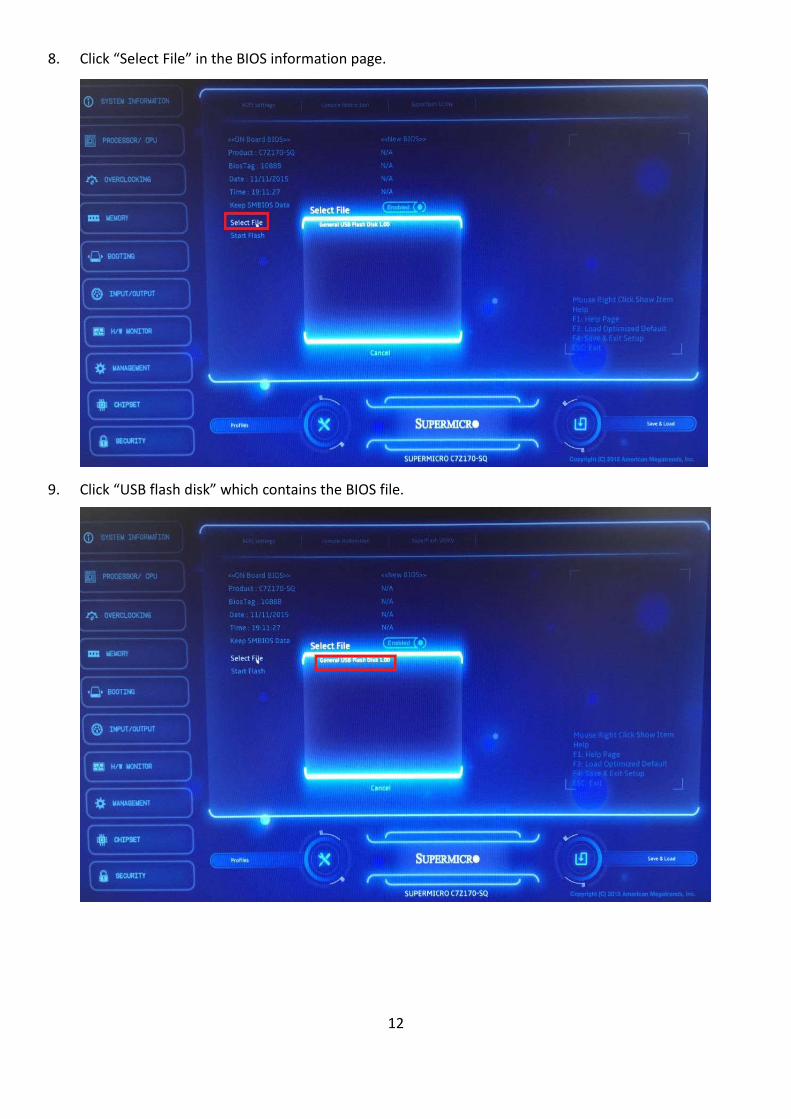
8. Click “Select File” in the BIOS information page.
9. Click “USB flash disk” which contains the BIOS file.
13
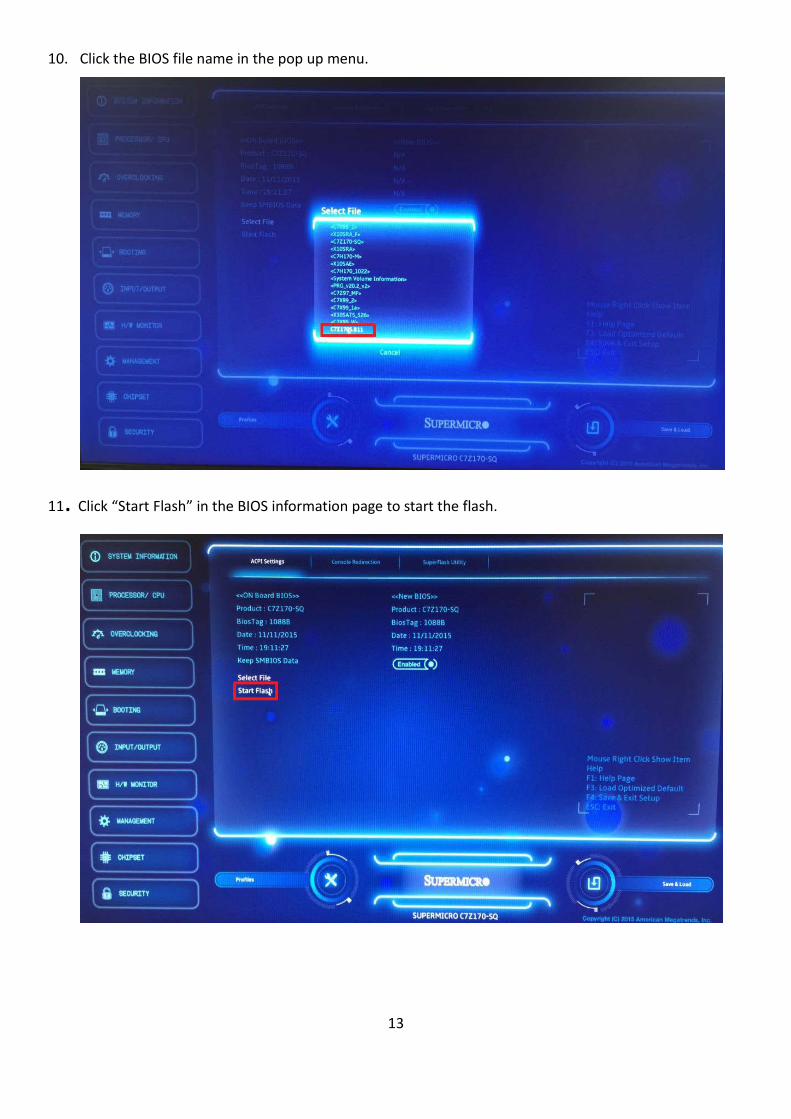
10. Click the BIOS file name in the pop up menu.
11. Click “Start Flash” in the BIOS information page to start the flash.
14
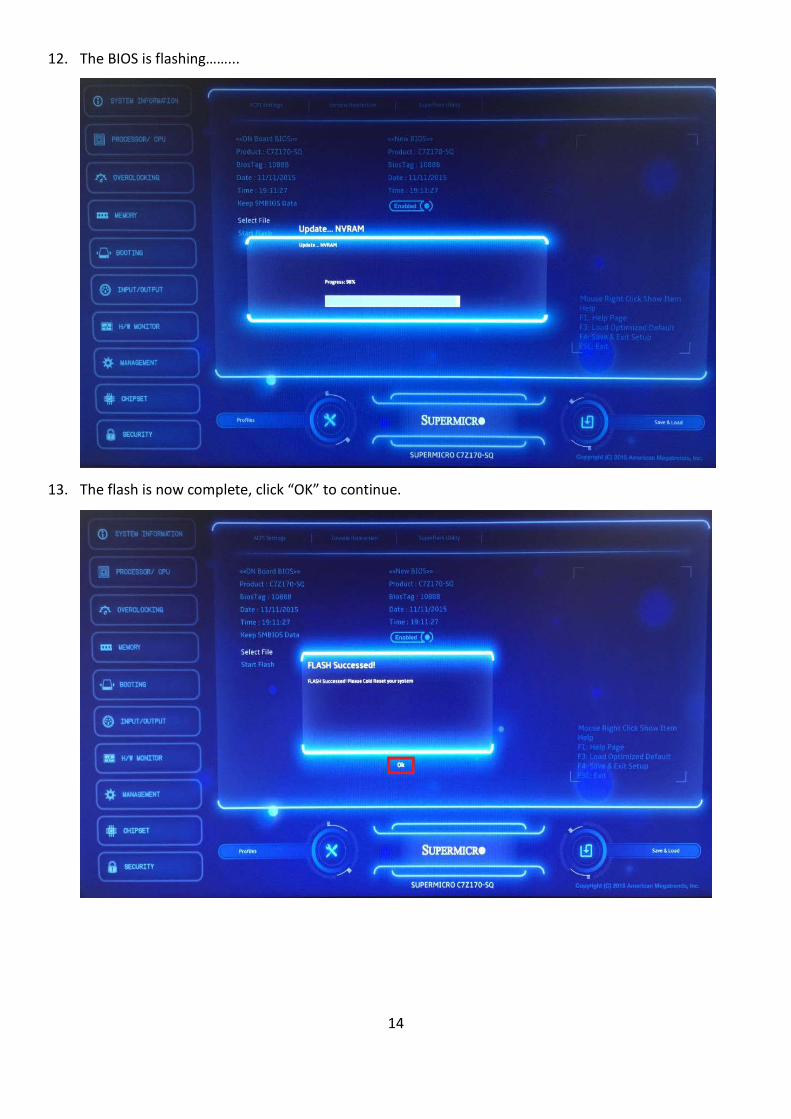
12. The BIOS is flashing……...
13. The flash is now complete, click “OK” to continue.
15
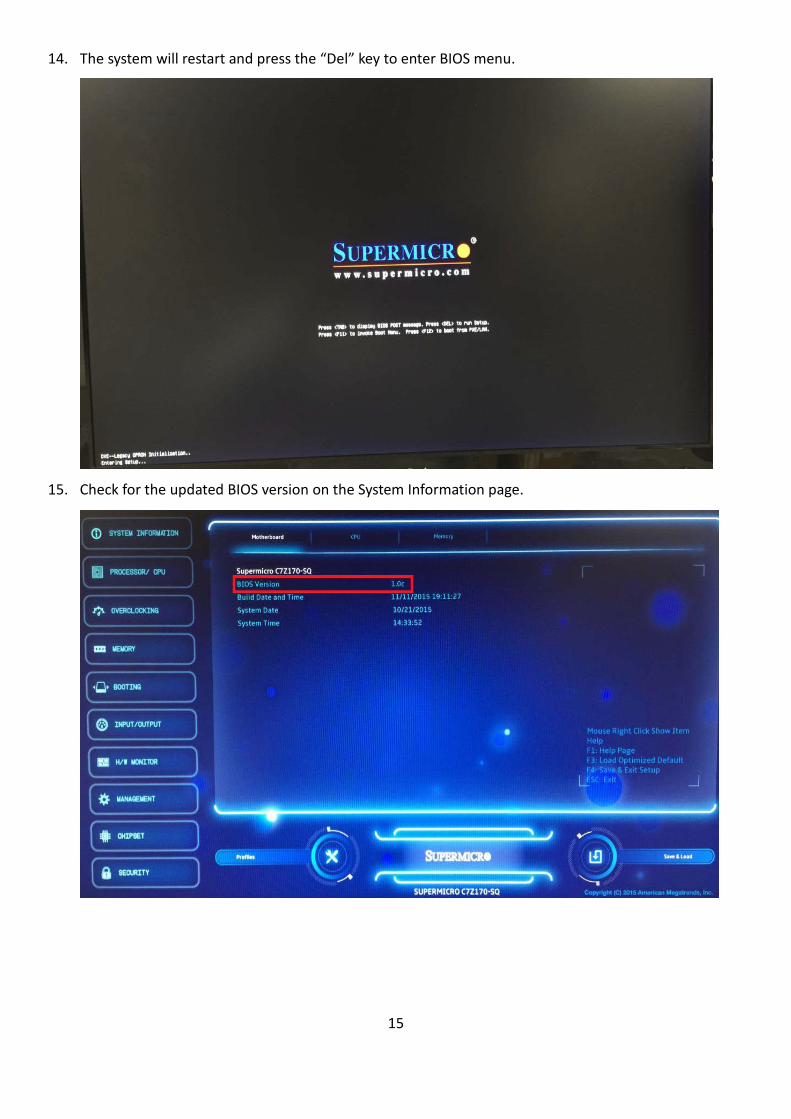
14. The system will restart and press the “Del” key to enter BIOS menu.
15. Check for the updated BIOS version on the System Information page.
16
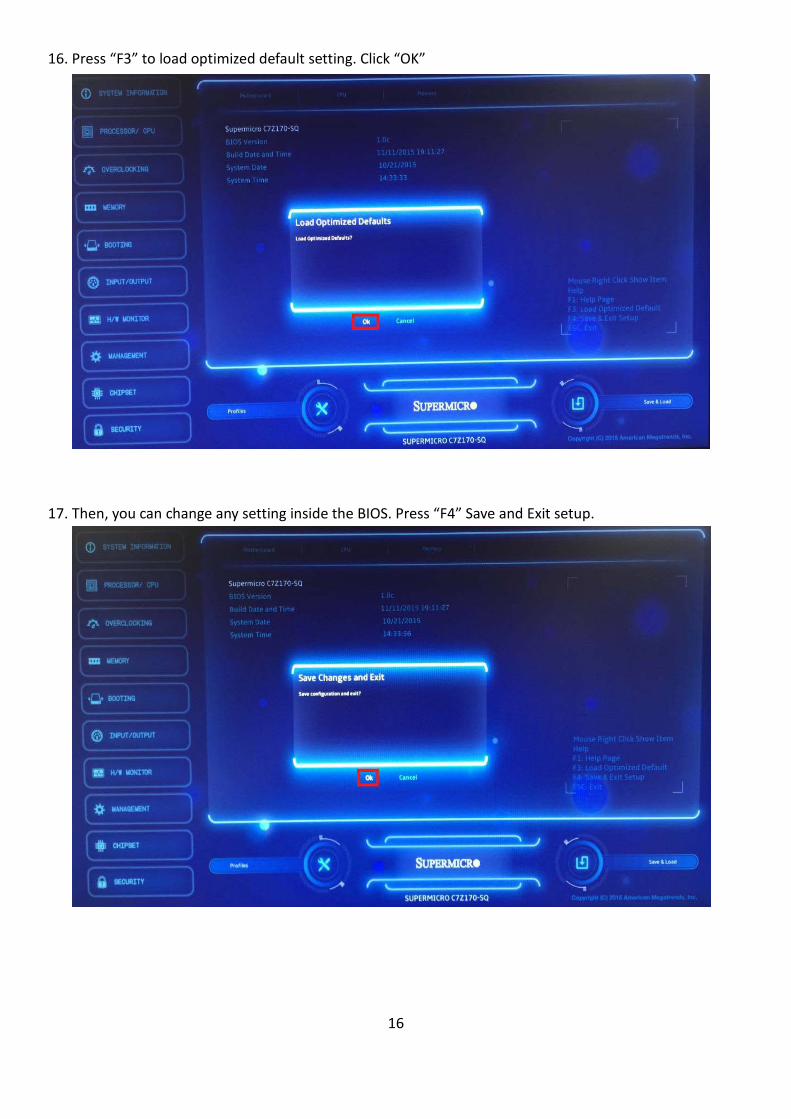
16. Press “F3” to load optimized default setting. Click “OK”
17. Then, you can change any setting inside the BIOS. Press “F4” Save and Exit setup.