Embed Size (px)
Citation preview

Megvii Technology Access Control System Based
on Facial Recognition
User's Guide
Project name Project version Document author Document date
Megvii Technology
Access Control
System Based on
Facial Recognition
1.0 Dai Xin 2015-10-1
Megvii Technology 1.4 Wang Haolong 2016-4-14

Access Control
System Based on
Facial Recognition
Megvii Technology
Access Control
System Based on
Facial Recognition
1.5 Dai Xin 2016-8-18
Megvii Technology
Access Control
System Based on
Facial Recognition
1.5.1 Wang Qi 2017-4-28
Megvii Technology
Access Control
System Based on
Facial Recognition
1.6 Wang Qi 2017-8-16
Megvii Technology
Access Control
System Based on
Facial Recognition
1.7 Wang Qi 2018-01-05
Megvii Technology Limited.
ContentsMegvii Technology Access Control System Based on Facial Recognition..............................1
User's Guide...................................................................................................1Megvii Technology Limited................................................................................2
1. Introduction.......................................................................................................32. Terminal Configuration Page..................................................................................3
2.1 Bind Host.................................................................................................3

3. Back-end Management Website..............................................................................54. Function Usage..................................................................................................5
4.1 Home Page................................................................................................54.2 User Management.......................................................................................6
4.2.1 Staff Management..............................................................................64.2.2 Visitor Management............................................................................84.2.3 Delete Person..................................................................................10
4.3 Calendar Settings......................................................................................104.4 History...................................................................................................114.5 Access Control Management........................................................................12
4.5.1 Access Control Devices......................................................................124.5.2 Access Control Settings......................................................................134.5.3 Access Control Permission Settings.......................................................13
4.6 Account Management.................................................................................145. Usage of the Welcome Function............................................................................15
5.1 TV Box Configuration................................................................................155.2 Cloud Custom Themes...............................................................................18
1. Introduction
Megvii Technology Access Control System Based on Facial Recognition Koala is an access
control system created using world-leading image recognition and biometric technology. It
provides a set of intelligent facial recognition-based access control solutions according to the
needs of specific scenes.
2. Terminal Configuration Page
Please use the browser to access the terminal configuration interface. The address is: Host IP:
8866.
The default IP address of the host is 192.168.1.50.
The username is admin and the password koala.
2.1 Bind Host
You can bind the account of the company's management website on the 8866 page. Company
account creation requires access to the host IP/admin2 page. For more details, please refer to the
implementation manual or ask implementation personnel.


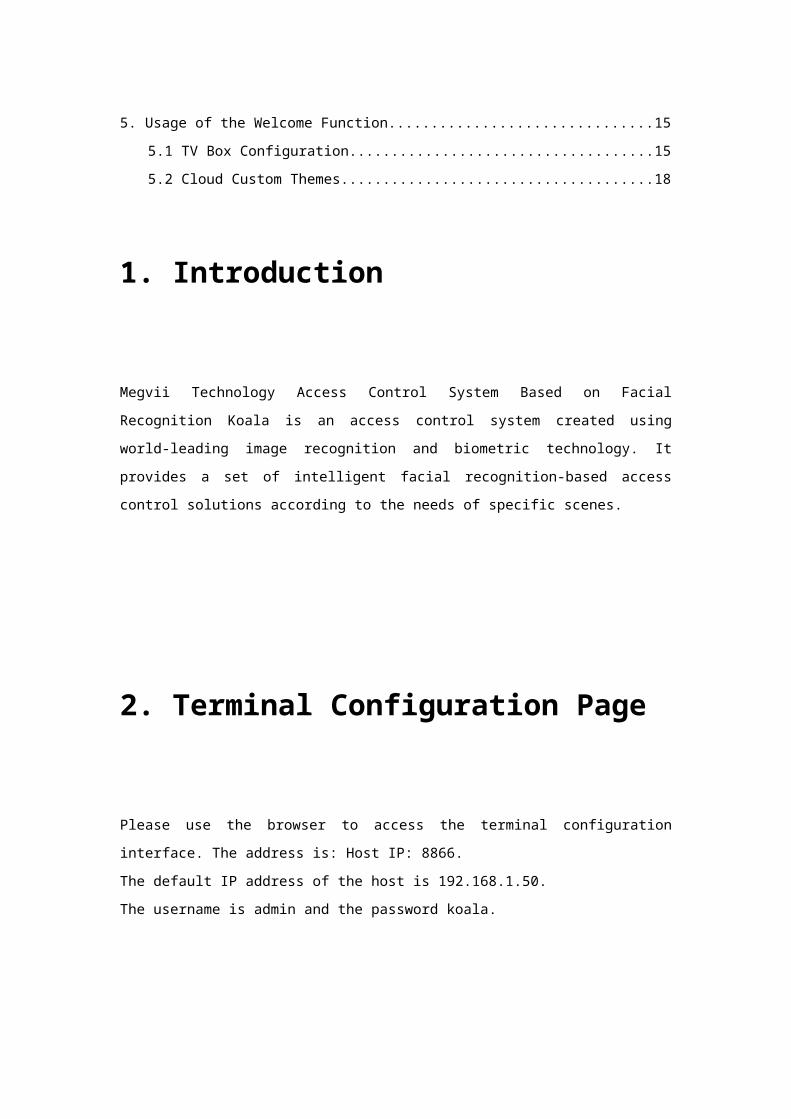
3. Back-end Management Website
Open the back end management interface. Enter the host IP address in the browser (please use
Google Chrome). (The initial IP address is 192.168.1.50)
• Log in using the created account.
• You can manage devices and personnel through the cloud website. Most of the following
functions are implemented through the cloud web website.
4. Function Usage
4.1 Home Page
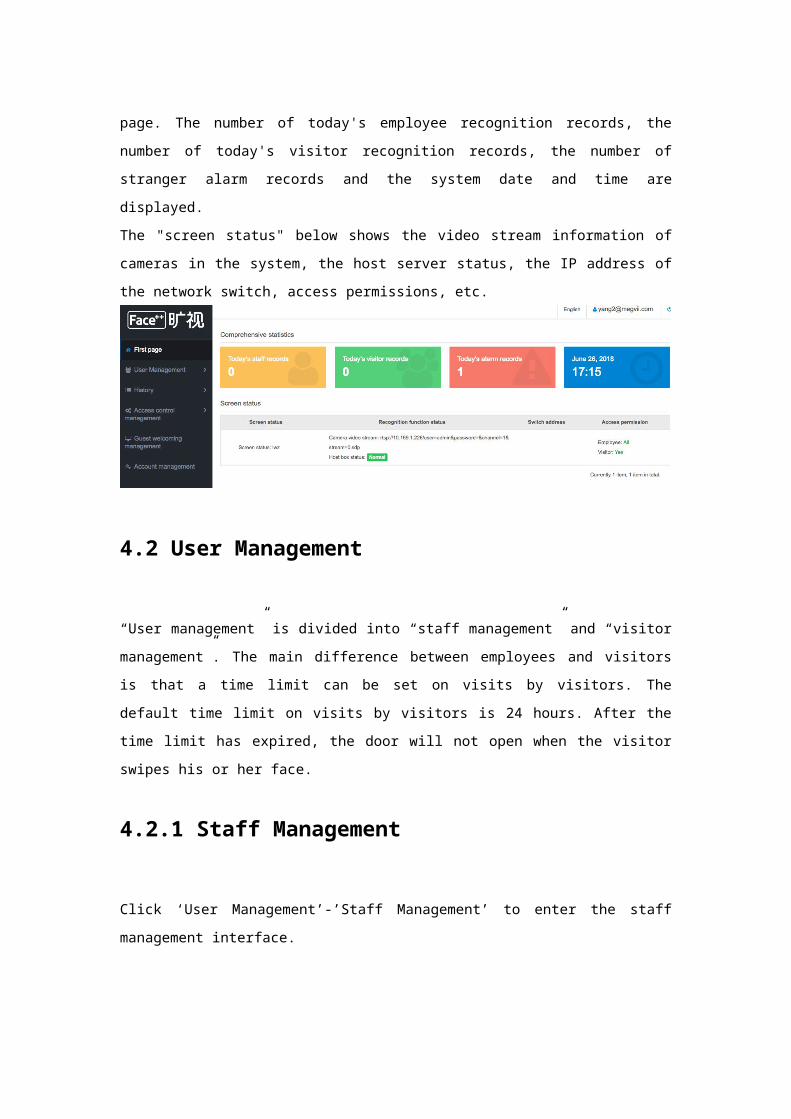
"Comprehensive Statistics" is displayed at the top of the home page. The number of today's
employee recognition records, the number of today's visitor recognition records, the number of
stranger alarm records and the system date and time are displayed.
The "screen status" below shows the video stream information of cameras in the system, the host
server status, the IP address of the network switch, access permissions, etc.
4.2 User Management
“User management” is divided into “staff management” and “visitor management”. The main
difference between employees and visitors is that a time limit can be set on visits by visitors. The
default time limit on visits by visitors is 24 hours. After the time limit has expired, the door will
not open when the visitor swipes his or her face.
4.2.1 Staff Management
Click ‘User Management’-’Staff Management’ to enter the staff management interface.
Create employee
The information required for an employee record is “user name”. If the face of the employee
needs to be recognized, upload ‘recognize photo’.
Up to 3 ‘recognize photos’ can be uploaded. The system will automatically determine whether the
uploaded photo conforms to the criteria for photos for recognition and only capture the face in the
photo. You can also refer to the "photo example" next to "Recognize Photo".
"Display profile image" is a custom avatar displayed on the welcome screen. It may not be a real
photo.
If "display profile image" is empty, the system will display the first photo for recognition by
default.
For other information, please refer to the interface and fill in the information according to the
actual situation.
"Email": An employee's email address is used by the employee to log in to the app. The initial
password is 123456. The user will be prompted to change the password upon first login.
If you enter the two dates “date of employment” and “employee birthday", a special welcome pop-
up will appear on the TV App on the employee's work anniversary or birthday.
"Signature" will display relevant information on the TV App.
Batch import
"Import form" and "import photo" can be used to batch import employee information and
employee photos for recognition. At present, you can only batch import employee information,

and then manually add photos for recognition, or batch add photos and then manually maintain
employee information.
"Import ZIP package" is used to restore the "employee information package“. "Export" will back
up employee information and photos at the same time. When the ZIP package is imported, it will
be completely imported.
4.2.2 Visitor Management
Click ‘user management’-‘visitor management’ to enter the visitor management interface.

Add visitor
The information required for a visitor record is user name, purpose of visit, access control on and
access control off.
Visitors are divided into ordinary visitors and VIP visitors. VIP visitors are no different except for
the welcome pop-up.
Up to 3 ‘recognize photos’ can be uploaded. The system will automatically determine whether the
uploaded photo conforms to the criteria for photos for recognition and only capture the face in the
photo.
"Display profile image" is a custom avatar displayed on the welcome screen. It may not be a real
photo.
If "display profile image" is empty, the system will display the first photo for recognition by
default.
For other information, please refer to the interface and fill in the information according to the
actual situation.

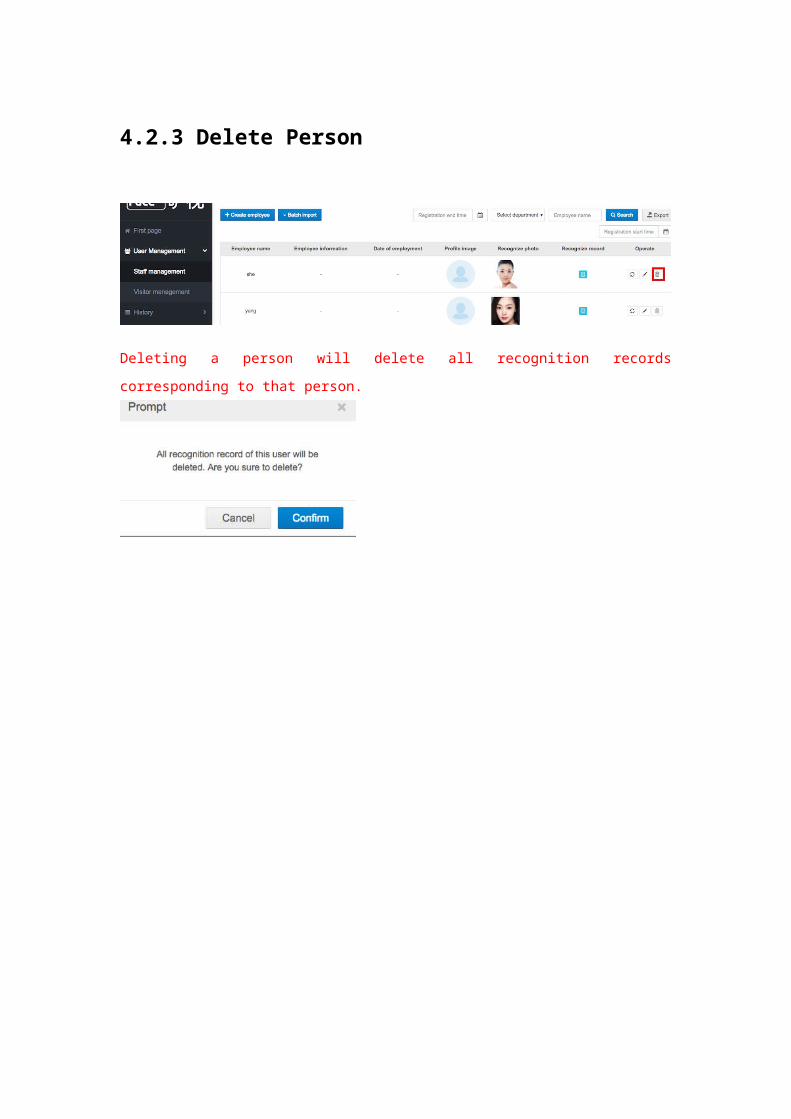
4.2.3 Delete Person
Deleting a person will delete all recognition records corresponding to that person.
4.3 Calendar Settings
You can easily choose days off and working days according to national holidays and

compensatory time off and set advanced date settings.
4.4 History
History contains all users' access records
• You can search by name, capture location, user type, time, etc. Exporting by search criteria is
supported.
• If you enable the "alarm when strangers are identified" function in the access control settings, the
'stranger records' item will be added to the history menu. It contains only strangers' access records
and a subset of all user records, and will prompt when a new record is generated.
Records older than six months (180 days) are checked and deleted on a daily basis. Records for
more than half a year (180 days) are checked and deleted on a daily basis. Or, old records are
deleted on a monthly basis until the amount of free space is greater than 5G.
4.5 Access Control Management
On the access control management page you can bind cameras and network switches, and set
access control permissions.
4.5.1 Access Control Devices
• Click Create to bind a camera and network switch to the recognition host.
Host box is a list of all hosts on the network. Select one of them.
• Video stream address: Fill in the rtsp video stream address of the corresponding camera. For
video stream addresses for different types of cameras, please visit the technical support site

(http://techsupport.megvii.com/hc/kb/article/202280).
• Define this binding relationship with Capture Location.
• Click "Create" to save.
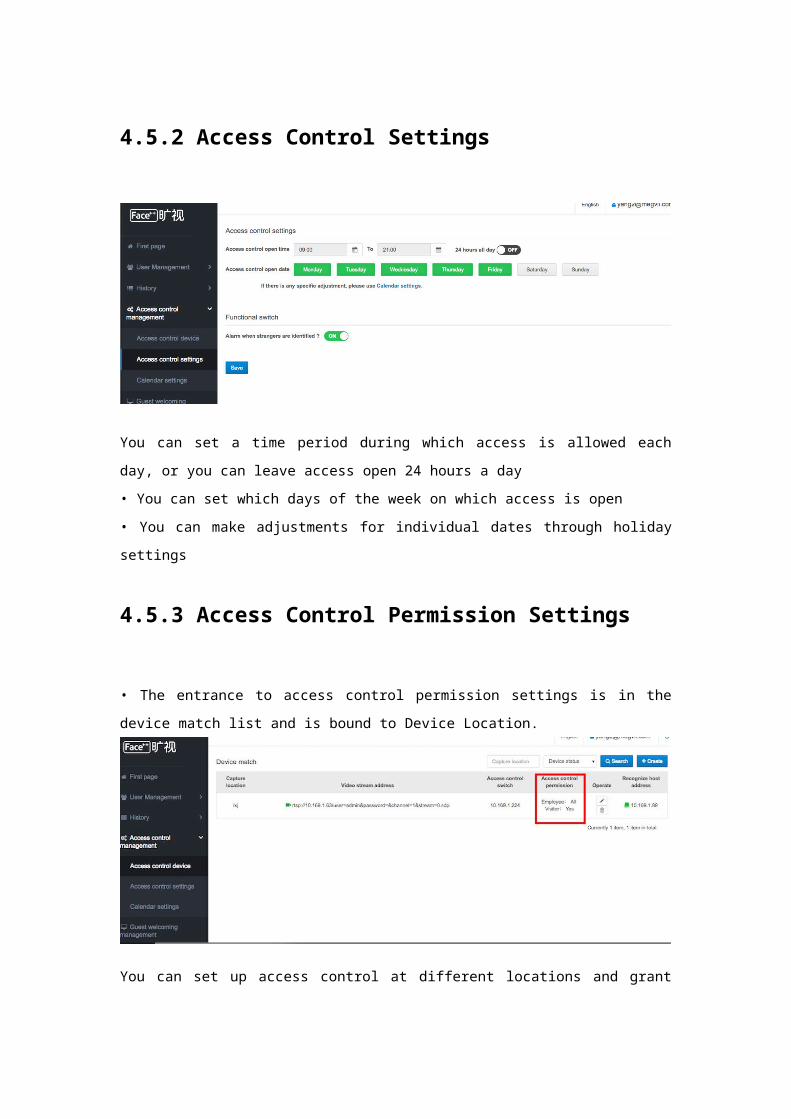
4.5.2 Access Control Settings
You can set a time period during which access is allowed each day, or you can leave access open
24 hours a day
• You can set which days of the week on which access is open
• You can make adjustments for individual dates through holiday settings
4.5.3 Access Control Permission Settings
• The entrance to access control permission settings is in the device match list and is bound to
Device Location.

You can set up access control at different locations and grant access to different people. Click on
the content of the “access control permission” column in the figure above.
You can grant access to all Class 2 users
• You can deny access to all visitors
• You can selectively grant access to employees
• People who are not in the permission list are considered strangers
4.6 Account Management
• The administrator can create sub-accounts. Permissions can be divided into “add employee”,
“add visitor” and “view stranger”.

5. Usage of the Welcome Function
5.1 TV Box Configuration
With the new version of the Remix TV box, the TV App interface automatically opens after
booting. Press the Settings button on the TV box to open the system settings page for the TV App.
First, fill in the network server address http:// host IP. The default address is v2.koalacam.net and
needs to be replaced. Click Next.
• If the scheme is different, you can modify the network server address here.
Select host:
Bind camera: select the camera or cameras for which a pop-up will appear upon recognition,
Photos captured by the selected camera or cameras will pop up on this screen.
Bind display video stream: select one video stream displayed on the screen.

Enter Theme Settings: press the Settings button to enter Theme Selection.
You can choose from a variety of themes.
If you choose a local video theme, you need to first select the video stream to be played on the
System Settings interface.

5.2 Cloud Custom Themes
• All screens involved in 5.1 are automatically synchronized to the cloud management platform.
• You can switch between themes on the cloud management platform. You can also customize the
3 elements of the Welcome theme. You can preview the custom effects on the left:

(1) For the background image, it is recommended that you upload an image with a 16:9 image
ratio;
(2) For the company logo, it is recommended that you upload an image with a resolution of 200 *
72.
• When you are done, you can view the effects on the "Megvii TV" app.


![Welcome [] · Zülküf Küçüközer TriangleCanvas.java import javax.microedition.lcdui.Graphics; import javax.microedition.lcdui.game.*; import javax.microedition.m3g.*;](https://img.pdfslide.us/doc/110x75/5d31f91d88c9937a3b8ccf67/welcome-zuelkuef-kuecuekoezer-trianglecanvasjava-import-javaxmicroeditionlcduigraphics.jpg)


![PySession4 - it.uu.se filePySession4 February 5, 2019 In [1]: import pandas as pd import numpy as np import matplotlib.pyplot as plt import sklearn.preprocessing as skl_pre import](https://img.pdfslide.us/doc/110x75/5cb2863a88c993f5708be449/pysession4-ituuse-february-5-2019-in-1-import-pandas-as-pd-import-numpy.jpg)