Embed Size (px)
Citation preview
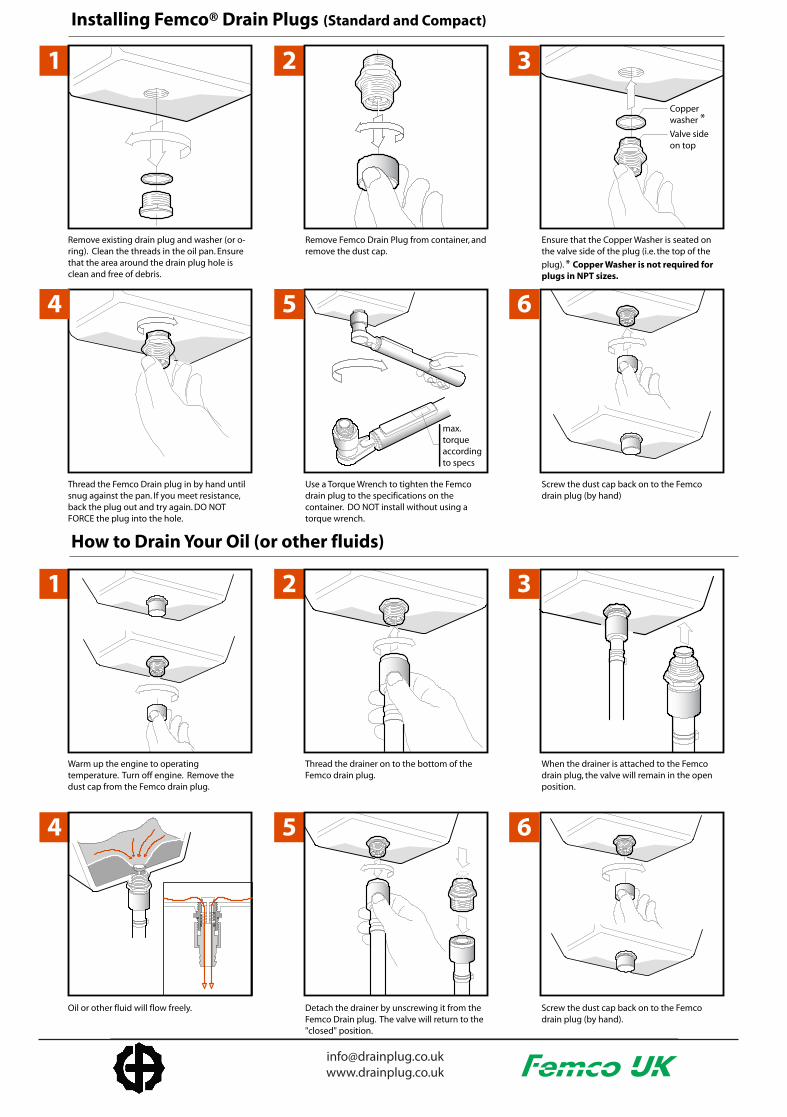
Warm up the engine to operating temperature. Turn off engine. Remove the dust cap from the Femco drain plug.
Thread the drainer on to the bottom of the Femco drain plug.
When the drainer is attached to the Femco drain plug, the valve will remain in the open position.
Oil or other fluid will flow freely. Detach the drainer by unscrewing it from the Femco Drain plug. The valve will return to the "closed" position.
Screw the dust cap back on to the Femco drain plug (by hand).
How to Drain Your Oil (or other fluids)
1 2 3
4 5 6
Valve side on top
Copper washer
max. torque according to specs
Remove existing drain plug and washer (or o-ring). Clean the threads in the oil pan. Ensure that the area around the drain plug hole is clean and free of debris.
Remove Femco Drain Plug from container, and remove the dust cap.
Ensure that the Copper Washer is seated on the valve side of the plug (i.e. the top of the
plug). * Copper Washer is not required for plugs in NPT sizes.
Thread the Femco Drain plug in by hand until snug against the pan. If you meet resistance, back the plug out and try again. DO NOT FORCE the plug into the hole.
Use a Torque Wrench to tighten the Femco drain plug to the specifications on the container. DO NOT install without using a torque wrench.
Screw the dust cap back on to the Femco drain plug (by hand)
Installing Femco® Drain Plugs (Standard and Compact)
1 2 3
4 5 6
*