Embed Size (px)
Citation preview
C H A P T E R 7
Backup and Restore The Backup and Restore procedures are used in conjunction with one another; you need to make a backup of your INtools database if you want to be able to restore a corrupted / damaged database from a previously backed up database.
Caution
• During the lifetime of your instrumentation data, you store in your INtools database important data and spend a lot of time on creating it. Therefore, it is imperative that you maintain backup procedures, and back up the appropriate INtools data regularly.
• If you have saved external files, when restoring your INtools database, keep the original external file paths the same on all client machines.
Each RDBMS has its own backup utility, therefore INtools does not have its own backup utility and relies on you to correctly use the backup utility of the selected database.
If you have installed INtools for WATCOM, we recommend that you use a simple copying procedure, or better yet an extracting utility to backup your database.
Caution
• Shut down all engines that use your database (for example, InfoMaker) before backing up/restoring your database.
This chapter includes information about using the backup and restore procedures in SQL Server and Oracle. The information provided here is not intended to substitute the information given in the relevant RDBMS manual but to supplement it with requirements specific to INtools. Therefore, we strongly recommend that you familiarize yourself with the backup and restore procedures described in your Oracle and SQL Server user guides before you read this chapter.

INtools 6.0 – Backup and Restore 2
In addition to regular backups, it is highly recommended to backup the INtools database in the following special cases:
•
•
•
•
•
•
° ° ° °
After completing a revision
Before upgrading the version of the software
Before and after creating a new domain
Before and after a massive import
At any milestone in your set of tasks (for example, when you finish creating your domain)
It is also recommended to test the backup of your data, and restore it once prior to the first major modifications to your data
Perform backup.
Make some changes to your database.
Perform restore.
Make sure you have your previous version of data.
INtools 6.0 – Backup and Restore 3
Backing up and Restoring an INtools Database for SQL Server
This section contains back up and restore instructions for SQL Server. All backup and restore tasks are performed using the MS SQL Server Query Analyzer. The procedure is divided into backup tasks, preliminary restore, and restore tasks.
Backing up an INtools Database The following procedure describes how to back up your INtools database on another server. All the tasks are performed in the MS SQL Server Query Analyzer. You start the procedure by running the MS SQL Server Query Analyzer on the source server where you create a new dump device that will be used for your backup. Then, you back up your INtools database to the new dump device. This allows you to copy the dump device data file to another server, which completes the backup procedure.
Caution
• You cannot include the existing user-defined database views in your INtools database backup. To be able to use these views, you must make a separate backup of all your user-defined database views before backing up your INtools database. Then, after restoring the INtools database, you need to recreate the user-defined views using InfoMaker or the database utilities of your platform.
To create a dump device on the source server
1. Run the MS SQL Server Query Analyzer. Make sure that you log in as the System Administrator.
2. In the Query window of the MS SQL Server Query Analyzer, enter the following stored procedure: SP_ADDUMPDEVICE with the following parameters:
First parameter — <DISK> •
•
•
•
Second parameter — <BACKUP DEVICE LOGICAL NAME>
Third parameter — <data file filepath’ (including the data file)>
Fourth parameter — 2 (without quotation marks)
3. Click Execute Query.
INtools 6.0 – Backup and Restore 4
To back up the INtools database to the new dump device on the source server
1. Run the MS SQL Server Query Analyzer. Make sure that you login as the System Administrator.
2. In the Query window, type:
BACKUP DATABASE <intools database name> to <dump device logical name> WITH BLOCKSIZE = 2048, INIT, STATS=5 GO
3. Click Execute Query.
You can copy the dump device data file to the target server.
Restoring a Backed up INtools Database The following section explains how to restore a backed up INtools database on the target server. The restore procedure is divided into preliminary tasks, restore tasks, and post-restore tasks.
Preliminary Restore Tasks Before restoring an INtools database on the target server, you need to carry out the preliminary tasks described below.
To carry out the preliminary tasks
1. Run the MS SQL Server Query Analyzer on the source server and login as the System Administrator.
2. In the Query window, type the following:
EXEC XP_MSVER EXEC SP_HELPSORT EXEC SP_HELPDB EXEC SP_HELPDB <INtools database name> EXEC SP_HELPLOGINS EXEC SP_HELPSERVER GO USE <INtools database name> GO EXEC SP_HELPUSER EXEC SP_HELPFILEGROUP EXEC SP_HELPFILE EXEC SP_HELPGROUP EXEC SP_HELPROLE EXEC SP_HELPROLEMEMBER GO
3. Click Execute Query.
INtools 6.0 – Backup and Restore 5
4. Save the results in a text file so that you can use them to plan your restore and post-restore tasks correctly.
5. Run the MS SQL Server Query Analyzer on the target server and login as the System Administrator.
Cautions
• You must have SQL Server installed on your target server with exactly the same character set and sort order as on the source server.
• Make sure that you have enough disk space for each data file. To improve the restore performance, create the Indexes, Data, and Log files on different physical disks if possible.
6. Create an initial INtools database that contains 4 filegroups:
° ° °
Admin data
Admin indexes
Log file To create these filegroups, in the Query window, type the following:
CREATE DATABASE <source INtools database> ON PRIMARY (NAME = <source Admin data filename>, FILENAME = ‘<data file filepath>‘, SIZE = <source Admin data data file size>MB, MAXSIZE = UNLIMITED, FILEGROWTH = 10%), FILEGROUP <source Admin indexes filegroup name> (NAME = <source Admin indexes filename>, FILENAME = ‘<data file filepath>‘, SIZE = <source Admin indexes data file size>MB, MAXSIZE = UNLIMITED, FILEGROWTH = 10%), LOG ON (NAME = <source log file name>, FILENAME = ‘<data file filepath>‘, SIZE = <source log file size>MB, MAXSIZE = UNLIMITED, FILEGROWTH = 10%) GO
7. Click Execute Query.
8. Add to the initial INtools database the required filegroups for all existing domains in the source database. For each additional domain, run the following queries:
ALTER DATABASE <source INtools database name> ADD FILEGROUP <source domain data filegroup name> GO

INtools 6.0 – Backup and Restore 6
ALTER DATABASE <source INtools database name> ADD FILE (name = <source domain data filename>, FILENAME = ‘<data file filepath>‘, SIZE = <source domain data data file size>MB, MAXSIZE = UNLIMITED, FILEGROWTH = 10%) TO FILEGROUP <source domain data filegroup name> GO ALTER DATABASE <source INtools database name> ADD FILEGROUP <source domain indexes filegroup name> GO ALTER DATABASE <source INtools database name> ADD FILE (NAME = <source domain indexes filename>, FILENAME = ‘<data file filepath>‘, SIZE = <source domain indexes data file size>MB, MAXSIZE = UNLIMITED, FILEGROWTH = 10%) TO FILEGROUP <SOURCE DOMAIN INDEXES FILEGROUP NAME> GO
Restoring the INtools Database on the Target Server Use the following procedure to restore the INtools database on the target server.
To restore the INtools database
1. Copy the source dump device data file from the source server if you have not done so yet.
2. On the target server, create a dump device for the source dump device as follows:
a) In the Query window of the MS SQL Server Query Analyzer, enter the following stored procedure: SP_ADDUMPDEVICE with the following parameters:
First parameter — ‘disk‘ •
•
•
•
Second parameter — ‘backup device logical name‘
Third parameter — ‘data file filepath‘ (of the copied data file on the target server)
Fourth parameter — 2 (without quotation marks)
b) Click Execute Query.
3. Restore the INtools database by running the following operands in the Query window:
RESTORE DATABASE <source INtools database name> FROM <target dump device name> WITH MOVE ‘<source Admin file name>‘ TO ‘<target Admin data filename filepath>‘, MOVE ‘<source Admin index file name>‘ TO ‘<target Admin index file filepath>‘, MOVE ‘<source domain data file name>‘ TO ‘<target domain data filename filepath>‘,
INtools 6.0 – Backup and Restore 7
MOVE ‘<source domain index file name>‘ TO ‘<target domain index filename filepath>‘, MOVE ‘<source INtools Log file name>‘ TO ‘<target INtools Log file filepath>‘, REPLACE,STATS=5 GO
Note
• For each additional domain, before the MOVE operand for the Log file, enter two MOVE operands: one for the data file and one for the index file.
4. Click Execute Query.
Post-Restore Tasks After your INtools database has been restored, you have to create all the required schema logins, define their default database, and grant appropriate access rights. You perform all the post-restore tasks in the MS SQL Server Query Analyzer.
To perform the post-restore tasks
1. Run the MS SQL Server Query Analyzer on the target server and login as the System Administrator.
2. Create the Admin and Encryption schema logins and two logins for each domain. Do the following:
a) In the Query window, type:
EXEC SP_ADDLOGIN ‘<Admin schema name>‘, ‘<Admin schema password>‘, ‘<INtools database name>‘ EXEC SP_ADDLOGIN ‘INTOOLS_LOGIN‘, ‘INTOOLS_LOGIN‘, ‘<INtools database name>‘ EXEC SP_ADDLOGIN ‘<domain schema name>‘, ‘<domain schema password>‘, ‘<INtools database name>‘ EXEC SP_ADDLOGIN ‘<domain view schema name>‘, ‘<domain view schema password>‘, ‘<INtools database name>‘
b) Repeat the last two EXEC commands for each existing domain in your database.
c) Click Execute Query.
3. When the domain type is Operating owner, create the AsBuilt schema login for each domain. Also, for each project, create Project and Combined Project schema logins. Do the following:
a) In the In the Query window, type:
EXEC SP_ADDLOGIN ‘<domain schema name>_A_1‘, ‘<domain schema password>_A_1‘, ‘<INtools database name>‘

INtools 6.0 – Backup and Restore 8
EXEC SP_ADDLOGIN ‘<domain schema name>_E_<Project Number>‘, ‘<domain schema password>_E_<Project Number>‘, ‘<INtools database name>‘ EXEC SP_ADDLOGIN ‘<domain schema name>_C_<Project Number>‘, ‘<domain schema password>_C_<Project Number>‘, ‘<INtools database name>‘
b) Repeat the last two EXEC commands for each project defined in each domain.
c) Click Execute Query.
4. Define a default database for each new login that you have just created. Do the following:
a) In the Query window, type:
EXEC SP_DEFAULTDB ‘<admin schema name>‘, ‘<INtools database name>‘ EXEC SP_DEFAULTDB ‘INTOOLS_LOGIN‘, ‘<INtools database name>‘ EXEC SP_DEFAULTDB ‘<domain schema name>‘, ‘<INtools database name>‘ EXEC SP_DEFAULTDB ‘<domain view schema name>‘, ‘<INtools database name>‘
b) Repeat the last two EXEC commands for each existing domain in your database.
c) Click Execute Query.
5. When the domain type is Operating owner, define a default database for each AsBuilt schema login for each domain. Also, define a default database for each project, create Project and Combined Project schema logins. Do the following:
a) In the In the Query window, type:
EXEC SP_DEFAULTDB ‘<domain schema name>_A_1‘, ‘<INtools database name>‘ EXEC SP_DEFAULTDB ‘<domain schema name>_E_<Project Number>‘,‘<INtools database name>‘ EXEC SP_DEFAULTDB ‘<domain schema name>_C_<Project Number>‘,‘<INtools database name>‘
b) Repeat the last two EXEC commands for each project defined for each domain.
c) Click Execute Query.
6. Check the relationship between the SQL Server logins and the SQL Server database users in the restored database. Run the following SQL to generate the login-user relationship report:
EXEC SP_CHANGE_USERS_LOGIN ‘REPORT’
INtools 6.0 – Backup and Restore 9
7. Fix the database user logins according to the generated report if required. Do the following:
a) In the Query window, type:
USE <INtools database name> GO EXEC SP_CHANGE_USERS_LOGIN ‘UPDATE_ONE‘, ‘<admin schema name>‘, ‘<admin login name>‘ EXEC SP_CHANGE_USERS_LOGIN ‘UPDATE_ONE‘, ‘INTOOLS_LOGIN‘, ‘INTOOLS_LOGIN‘ EXEC SP_CHANGE_USERS_LOGIN ‘UPDATE_ONE‘, ‘<domain schema name>‘, ‘<domain login name>‘ EXEC SP_CHANGE_USERS_LOGIN ‘UPDATE_ONE‘, ‘<domain view schema name>‘, ‘<domain view login name>‘
b) Repeat the last two EXEC commands for each existing domain in your database.
c) Click Execute Query.
8. When the domain type is Operating owner, for each AsBuilt schema of each domain and also for each Project and Combined Project schemas, do the following to fix the database user logins according to the generated report, if required.
Do the following:
a) In the Query window, type:
USE <INtools database name> GO EXEC SP_CHANGE_USERS_LOGIN ‘UPDATE_ONE‘, ‘<domain schema name>_A_1‘,‘<domain schema login name>_A_1‘, EXEC SP_CHANGE_USERS_LOGIN ‘UPDATE_ONE‘, ‘<domain schema name>_E_<Project Number>‘, ‘<domain schema login name>_E_<Project Number>‘ EXEC SP_CHANGE_USERS_LOGIN ‘UPDATE_ONE‘, ‘<domain schema name>_C_<Project Number>‘, ‘<domain schema login name>_C_<Project Number>‘
b) Repeat the last two EXEC commands for each project defined for each domain.
c) Click Execute Query.
9. Create an entry in the security system that allows a user to work with the data in the restored INtools database. Do the following:
a) In the Query window, type:
USE ‘<INtools database name>‘ GO GRANT ALL TO <admin schema name> GRANT ALL TO INTOOLS_LOGIN GRANT ALL TO <domain schema name> GRANT ALL TO <domain view schema name>
INtools 6.0 – Backup and Restore 10
b) Repeat the last two GRANT commands for each existing domain.
c) Click Execute Query.
10. When the domain type is Operating owner, do the following to create an entry in the security system that allows a user to work with the data in the restored INtools database. Do the following:
a) In the Query window, type:
USE ‘<INtools database name>‘ GO GRANT ALL TO <domain schema name>_A_1 GRANT ALL TO <domain schema name>_E_<Project Number> GRANT ALL TO <domain schema name>_C_<Project Number>
b) Repeat the last two EXEC commands for each project defined for each domain.
c) Click Execute Query.
INtools 6.0 – Backup and Restore 11
Backing up and Restoring the INtools Database for Oracle
This section contains back up and restore instructions for Oracle 8.x. The backup and restore procedures described here are performed using the Oracle Export and Oracle Import utilities. This way you will be able to write data from an existing INtools database into a transportable operating system file. Then you can run the Oracle Import utility to read this file back into a target INtools database.
Note
• Note the procedures described below are intended specifically for INtools. For more information about exporting and importing Oracle databases, refer to the Oracle documentation.
Backing up an INtools Database The following procedure describes how to back up your INtools database on the same or another server. All the tasks are performed using the Oracle Export utility that writes data from a source database into an operating system file in binary format. This file is stored outside the database, and it can be read into another Oracle database using the Oracle Import utility.
Caution
• You cannot include the existing user-defined database views in your INtools database backup. To be able to use these views, you must make a separate backup of all your user-defined database views before backing up your INtools database. Then, after restoring the INtools database, you need to recreate the user-defined views using InfoMaker or the database utilities of your platform.
To back up your INtools database
1. Invoke the operating system Command Prompt on the source file server.
2. At the prompt, for Oracle 8.x, type:
EXP80 System/Manager@<Oracle instance alias> FULL=Y FILE=<export file full filepath> BUFFER=5000000 LOG=<log file full filepath>
3. Press Enter.
INtools 6.0 – Backup and Restore 12
Note
• For UNIX, make sure that the data file location complies with UNIX regulations.
4. Once export is complete, you can check the log file for details.
This completes the export task. You can now copy the new dump file to another computer if needed.
Restoring an INtools Database The following procedure describes how to restore your INtools database on another Oracle server. You use the Oracle Import utility to restore the required database. The Oracle Import utility reads the binary dump file created by the Oracle Export utility back into an Oracle database.
Preliminary Restore Tasks You have to perform some preliminary steps before you can import the data from a dump file. It is imperative that you perform these steps in the order presented below.
To perform the preliminary tasks
1. Check the macro design of the source database:
a) Run the SQL Plus utility.
b) In the Log On dialog box, enter the required values to log on as the system manager.
c) In the Oracle SQL Plus window, type and then press Enter after each command:
SPOOL <result text file full filepath> Press Enter. Type the following: SELECT TABLESPACE_NAME,FILE_NAME,BYTES FROM DBA_DATA_FILES ORDER BY TABLESPACE_NAME,FILE_NAME; Press Enter. Type the following: SELECT USERNAME,DEFAULT_TABLESPACE,TEMPORARY_TABLESPACE FROM DBA_USERS ORDER BY USERNAME; Press Enter. Type the following: SELECT * FROM DBA_SYS_PRIVS ORDER BY GRANTEE,PRIVILEGE; Press Enter. Type the following: SELECT * FROM V$NLS_PARAMETERS; Press Enter. Type the following: SELECT * FROM V$LOGFILE;
INtools 6.0 – Backup and Restore 13
Press Enter. Type the following: SPOOL OFF Press Enter.
2. On the target server, create a new Oracle instance with a new database. Follow the instructions given in the INtools Installation Guide to create the new instance compatible with INtools. Note that the new database must have the same character set as the source database.
3. To improve the restore performance, create the Indexes, Data, Rollback, Temporary, and Log files on different physical disks if possible.
4. Create additional Redo-log files and an additional Rollback tablespace, add another data file for the SYSTEM tablespace, and create additional rollback segments for the INtools database. In the Oracle SQL Plus window, type and then press Enter after each command:
ALTER DATABASE ORC2 ADD LOGFILE (‘<first Redo-log file full filepath>’, ‘<second Redo-log file full filepath>’) SIZE 2M, Press Enter. Type the following: ALTER TABLESPACE SYSTEM ADD DATA FILE ‘<additional SYSTEM tablespace data file full filepath>’ SIZE 25M AUTOEXTEND ON NEXT 2M MAXSIZE 3000M Press Enter. Type the following: CREATE PUBLIC ROLLBACK SEGMENT RBS_SYS1 TABLESPACE SYSTEM STORAGE (INITIAL 500K NEXT 500K); Press Enter. ALTER ROOLBACK SEGMENT RBS_SYS1 ONLINE ; Press Enter. Type the following: CREATE TABLESPACE <INtools rollback tablespace name> DATA FILE ‘<additional rollback tablespace data file full filepath>’ SIZE 50M REUSE AUTOEXTEND ON NEXT 5M MAXSIZE 3000M DEFAULT STORAGE (INITIAL 500K NEXT 500K MINEXTENTS 2 MAXETENTS 249 PCTINCREASE 10) ONLINE PERMANENT; Press Enter. Type the following: CREATE PUBLIC ROLLBACK SEGMENT RBS1 STORAGE (INITIAL 500K NEXT 500K) TABLESPACE <intools rollback tablespace name>; Press Enter. Type the following: ALTER ROLLBACK SEGMENT RBS1 ONLINE; Press Enter. Type the following: CREATE PUBLIC ROLLBACK SEGMENT RBS2 STORAGE (INITIAL 500K NEXT 500K) TABLESPACE <intools rollback tablespace name>; Press Enter.
INtools 6.0 – Backup and Restore 14
Type the following: ALTER ROLLBACK SEGMENT RBS2 ONLINE; Press Enter. Type the following: CREATE PUBLIC ROLLBACK SEGMENT RBS3 STORAGE (INITIAL 500K NEXT 500K) TABLESPACE <intools rollback tablespace name>; Press Enter. Type the following: ALTER ROLLBACK SEGMENT RBS3 ONLINE; Press Enter. Type the following: CREATE PUBLIC ROLLBACK SEGMENT RBS4 STORAGE (INITIAL 500K NEXT 500K) TABLESPACE <intools rollback tablespace name>; Press Enter. Type the following: ALTER ROLLBACK SEGMENT RBS4 ONLINE; Press Enter.
5. Create tablespaces for Admin data, Admin indexes, Admin temporary data, Domain data, Domain indexes, and temporary data for each domain. In the SQL Plus window, type and then press Enter as follows:
CREATE TABLESPACE <Admin data tablespace name> DATA FILE '<Admin data file full filepath>' SIZE <admin data file size>M REUSE AUTOEXTEND ON NEXT 2M MAXSIZE 3000M DEFAULT STORAGE (INITIAL 500K NEXT 500K MINEXTENTS 1 MAXEXTENTS 249 PCTINCREASE 50) ONLINE PERMANENT; Press Enter. Type the following: CREATE TABLESPACE <Admin indexes tablespace name> DATA FILE '<Admin indexes file full filepath>' SIZE <Admin indexes file size>M REUSE AUTOEXTEND ON NEXT 5M MAXSIZE 3000M DEFAULT STORAGE (INITIAL 500K NEXT 500K MINEXTENTS 1 MAXEXTENTS 249 PCTINCREASE 50) ONLINE PERMANENT; Press Enter. Type the following: CREATE TABLESPACE <Admin temporary data tablespace name> DATA FILE '<Admin temporary data file full filepath>' SIZE <Admin temporary data file size>M REUSE AUTOEXTEND ON NEXT 5M MAXSIZE 3000M DEFAULT STORAGE (INITIAL 500K NEXT 500K MINEXTENTS 1 MAXEXTENTS 249 PCTINCREASE 50) ONLINE TEMPORARY; Press Enter. Type the following: CREATE TABLESPACE <Domain data tablespace name> DATA FILE '<Domain data file full filepath>' SIZE <Domain data file size>M REUSE AUTOEXTEND ON NEXT 5M MAXSIZE 3000M DEFAULT STORAGE (INITIAL 500K NEXT 500K
INtools 6.0 – Backup and Restore 15
MINEXTENTS 1 MAXEXTENTS 249 PCTINCREASE 50) ONLINE PERMANENT; Press Enter. Type the following: CREATE TABLESPACE <Domain indexes tablespace name> DATA FILE '<Domain indexes file full filepath>' SIZE <Domain indexes file size>M REUSE AUTOEXTEND ON NEXT 5M MAXSIZE 3000M DEFAULT STORAGE (INITIAL 500K NEXT 500K MINEXTENTS 1 MAXEXTENTS 249 PCTINCREASE 50) ONLINE PERMANENT; Press Enter. Type the following: CREATE TABLESPACE <Domain temporary data tablespace name> DATA FILE '<Domain temporary data file full filepath>' SIZE <Domain temporary data file size>M REUSE AUTOEXTEND ON NEXT 5M MAXSIZE 3000M DEFAULT STORAGE (INITIAL 500K NEXT 500K MINEXTENTS 1 MAXEXTENTS 249 PCTINCREASE 50) ONLINE PERMANENT; Press Enter.
Repeat the last three CREATE commands for each required domain (as in the source database).
If the source database domains have only two tablespaces, do not repeat the third CREATE command.
6. Create database users for the INtools Admin, Encryption, Domain, and AsBuilt schemas. Also, create the INtools_Engineer Database role. In the SQL Plus window, type and press Enter as follows:
CREATE USER <Admin schema login name> IDENTIFIED BY <Admin schema login password> DEFAULT TABLESPACE <Admin data tablespace name> TEMPORARY TABLESPACE <Admin temporary data tablespace name>; Press Enter. Type the following: CREATE USER INTOOLS_LOGIN IDENTIFIED BY INTOOLS_LOGIN DEFAULT TABLESPACE <Admin data tablespace name> TEMPORARY TABLESPACE <Admin temporary data tablespace name>; Press Enter. Type the following: CREATE USER <Domain schema login name> IDENTIFIED BY <Domain schema login password> DEFAULT TABLESPACE <Domain data tablespace name> TEMPORARY TABLESPACE <Domain temporary data tablespace name>; Press Enter.
INtools 6.0 – Backup and Restore 16
Type the following: CREATE USER <Domain view schema login name> IDENTIFIED BY <Domain view schema login password> DEFAULT TABLESPACE <Domain data tablespace name> TEMPORARY TABLESPACE <Domain temporary data tablespace name>; Press Enter.
7. If the source database contains AsBuilt schemas, enter the following CREATE commands for each project in the domain:
CREATE USER <AsBuilt schema login name> IDENTIFIED BY <AsBuilt scheme login password> DEFAULT TABLESPACE <Domain data tablespace name> TEMPORARY TABLESPACE <Domain temporary data tablespace name>; Press Enter. Type the following: CREATE USER <Project schema login name> IDENTIFIED BY < Project schema login password> DEFAULT TABLESPACE <Domain data tablespace name> TEMPORARY TABLESPACE <Domain temporary data tablespace name>; Press Enter. Type the following: CREATE USER <Combined project schema login name> IDENTIFIED BY <Combined project schema login password> DEFAULT TABLESPACE <Domain data tablespace name> TEMPORARY TABLESPACE <Domain temporary data tablespace name>; Press Enter.
Notes
• A Combined Project schema is the schema of the AsBuilt and project.
• All AsBuilt schema login names contain the _A_ string.
• All Project schema login names contain the _E_ string.
• All Combined Project schema login names contain the _C_ string.
8. Repeat the last two CREATE commands for each required combination of Project and Combined Project in the source domain.
CREATE ROLE INTOOLS_ENGINEER IDENTIFIED BY INTOOLS_ENGINEER; Press Enter. Type the following: REVOKE INTOOLS_ENGINEER FROM SYSTEM; Press Enter.
INtools 6.0 – Backup and Restore 17
9. Grant system privileges and roles to the INtools database users for the following:
Admin schema •
•
•
•
•
Encryption schema
Domain schemas
AsBuilt schemas
INtools_Engineer Database role
In the SQL Plus window, type and press Enter as follows:
GRANT UNLIMITED TABLESPACE TO <Admin schema login name> WITH ADMIN OPTION; Press Enter. GRANT CREATE SESSION TO INTOOLS_LOGIN; Press Enter. GRANT CREATE TABLE TO INTOOLS_LOGIN; Press Enter. GRANT CREATE SESSION TO INTOOLS_ENGINEER; Press Enter. GRANT CREATE TABLE TO INTOOLS_ENGINEER; Press Enter. GRANT CREATE SYNONYM TO INTOOLS_ENGINEER; Press Enter. GRANT CREATE VIEW TO INTOOLS_ENGINEER; Press Enter. GRANT CREATE SEQUENCE TO INTOOLS_ENGINEER; Press Enter. GRANT AUDIT ANY TO INTOOLS_ENGINEER; Press Enter. GRANT CREATE PROCEDURE TO INTOOLS_ENGINEER; Press Enter. GRANT CREATE TRIGGER TO INTOOLS_ENGINEER; Press Enter. GRANT CREATE TRIGGER TO <domain schema login name>; Press Enter. GRANT EXECUTE ANY PROCEDURE TO <domain schema login name>; Press Enter. GRANT UNLIMITED TABLESPACE TO <domain schema login name>; Press Enter. GRANT CREATE SESSION TO <domain view schema login name>; Press Enter. GRANT CREATE SYNONYM TO <domain view schema login name>; Press Enter.
10. Repeat the last five GRANT commands for each required domain.

INtools 6.0 – Backup and Restore 18
11. If the source database contains AsBuilt schemas, enter the following GRANT commands for each project in the domain:
GRANT UNLIMITED TABLESPACE TO <AsBuilt schema login name>; Press Enter. GRANT EXECUTE ANY PROCEDURE TO <AsBuilt schema login name>; Press Enter. GRANT UNLIMITED TABLESPACE TO < Project schema login name>; Press Enter. GRANT EXECUTE ANY PROCEDURE TO < Project schema login name>; Press Enter. GRANT UNLIMITED TABLESPACE TO <Combined project schema login name>; Press Enter. GRANT EXECUTE ANY PROCEDURE TO <Combined project schema login name>; Press Enter.
12. Repeat the last two GRANT commands for each required combination of Engineering and Combined project in the source domain.
13. Continue setting the GRANT options:
GRANT DBA TO <Admin schema login name> WITH ADMIN OPTION; Press Enter. GRANT INTOOLS_ENGINEER TO SYSTEM WITH ADMIN OPTION; Press Enter.
14. Continue setting the GRANT options:
GRANT CONNECT TO <domain schema login name>; Press Enter. GRANT RESOURCE TO <domain schema login name>; Press Enter. GRANT INTOOLS_ENGINEER TO <domain schema login name>; Press Enter.
15. Repeat the last three GRANT commands for each required domain (as in the source database).
16. Continue setting the GRANT options:
GRANT CONNECT TO <AsBuilt schema login name>; Press Enter. GRANT RESOURCE TO <AsBuilt schema login name>; Press Enter. GRANT INTOOLS_ENGINEER TO <AsBuilt schema login name>; Press Enter. GRANT CONNECT TO < Project schema login name>; Press Enter. GRANT RESOURCE TO < Project schema login name>; Press Enter.
INtools 6.0 – Backup and Restore 19
GRANT INTOOLS_ENGINEER TO < Project schema login name>; Press Enter. GRANT CONNECT TO <Combined project schema login name>; Press Enter. GRANT RESOURCE TO <Combined project schema login name>; Press Enter. GRANT INTOOLS_ENGINEER TO <Combined project schema login name>; Press Enter.
17. Repeat the last six GRANT commands for each required combination of Project and Combined Project in the source domain.
18. Continue setting the ALTER options:
ALTER USER INTOOLS_LOGIN DEFAULT ROLE ALL; Press Enter. ALTER USER <Admin schema login name> DEFAULT ROLE ALL; Press Enter. ALTER USER <Domain view schema login name> DEFAULT ROLE ALL; Press Enter. ALTER USER <Domain schema login name> DEFAULT ROLE ALL; Press Enter.
19. Repeat the last two ALTER commands for each required domain.
ALTER USER <AsBuilt schema login name> DEFAULT ROLE ALL; Press Enter. ALTER USER < Project schema login name> DEFAULT ROLE ALL; Press Enter. ALTER USER <Combined schema project schema login name> DEFAULT ROLE ALL; Press Enter.
20. Repeat the last two ALTER commands for each required combination of Project and Combined Project in the source domain.
21. Continue setting the ALTER options:
ALTER USER <Admin schema login name> QUOTA UNLIMITED ON <Admin data tablespace name>; Press Enter. ALTER USER INTOOLS_LOGIN QUOTA UNLIMITED ON <Admin data tablespace name>; Press Enter. ALTER USER <Domain schema login name> QUOTA UNLIMITED ON <Domain Indexes tablespace name> QUOTA UNLIMITED ON <Domain Data tablespace name>; Press Enter. ALTER USER <Domain view schema login name> QUOTA UNLIMITED ON <Domain Data tablespace name>; Press Enter.

INtools 6.0 – Backup and Restore 20
22. Repeat the last two ALTER commands for each required domain.
23. Continue setting the ALTER options:
ALTER USER <AsBuilt schema login name> QUOTA UNLIMITED ON <Domain Data tablespace name>; Press Enter. ALTER USER < Project schema login name> QUOTA UNLIMITED ON <Domain Data tablespace name>; Press Enter. ALTER USER <Combined project schema login name> QUOTA UNLIMITED ON <Domain Data tablespace name>; Press Enter.
24. Repeat the last two ALTER commands for each required combination of Engineering and Combined project in the source domain.
25. Add the roolback_segments parameter to the target database configuration file. In the SQL Plus window, type:
ROLLBACK_SEGMENTS = (<rollback segment names that were created with the new instance, see step 2 on page 13 and the ones added to the database in step 4 on page 13 >)
26. Restart the target database.
Restore Tasks Once you have completed the preliminary restore tasks, you can start restoring your backed up database, i.e., reading the new dump file back into your INtools database.
To restore a backed up database
1. Copy the new dump file from the source database to the target server.
2. Import the Admin schema from the dump file. At the operating system command prompt, type:
IMP80 SYSTEM/MANAGER@<new instance alias> FROMUSER=<Admin schema login name> TOUSER=<Admin schema login name> FILE=<target dump file full filepath> IGNORE=Y BUFFER=5000000 LOG=<import Admin schema log file full filepath> Press Enter.
3. If in the Encryption schema of the source database contains table INTOOLS_LOGIN, import the source Encryption schema from the dump file. At the operating system command prompt, type:
IMP80 SYSTEM/MANAGER@<new instance alias> FROMUSER=INTOOLS_LOGIN TOUSER=INTOOLS_LOGIN FILE=<target dump file full filepath> IGNORE=Y BUFFER=5000000 LOG=<import Encryption schema log file full filepath> Press Enter.
INtools 6.0 – Backup and Restore 21
4. Import the source domain schemas from the dump file. For each required domain schema, type the following at the operating system command prompt:
IMP80 SYSTEM/MANAGER<new instance alias> FROMUSER=<domain schema login name> TOUSER=<domain schema login name> FILE=<target dump file full filepath> IGNORE=Y BUFFER=5000000 LOG=<import domain schema log file full filepath> Press Enter.
5. Import the required source domain view schemas from the dump file. For each required domain view schema, type the following at the operating system command prompt:
IMP80 SYSTEM/MANAGER<new instance alias> FROMUSER=<domain view schema login name> TOUSER=<domain schema view login name> FILE=<target dump file full filepath> IGNORE=Y BUFFER=5000000 LOG=<import domain view schema log file full filepath> Press Enter.
6. If the source database contains an AsBuilt schema, import the source AsBuilt schemas from the dump file. At the operating system command prompt, type:
IMP80 SYSTEM/MANAGER@<new instance alias> FROMUSER=<AsBuilt schema login name> TOUSER=<AsBuilt schema login name> FILE=<target dump file full filepath> ignore=Y BUFFER=5000000 LOG=<import AsBuilt schema log file full filepath> Press Enter.
7. To import the Project schemas from the dump file, for each required Project schema, at the operating system command prompt, type:
IMP80 SYSTEM/MANAGER@<new instance alias> FROMUSER= < Project schema login name> TOUSER=< Project schema login name> FILE=<target dump file full filepath> IGNORE=Y BUFFER=5000000 LOG=<import Project schema log file full filepath> Press Enter.
8. To import the Combined Project schemas from the dump file, for each required Combined Project schema, at the operating system command prompt, type:
IMP80 SYSTEM/MANAGER@<new instance alias> FROMUSER=<Combined Project schema login name> TOUSER=<Combined Project schema login name> FILE=<target dump file full filepath> IGNORE=Y BUFFER=5000000 LOG=<import Combined Project schema log file full filepath> Press Enter.
INtools 6.0 – Backup and Restore 22
Post-Restore Tasks Post restore tasks include procedures that verify the validity of the imported objects. You will also run SQL queries that correct the problems that you find.
To perform the post restore tasks
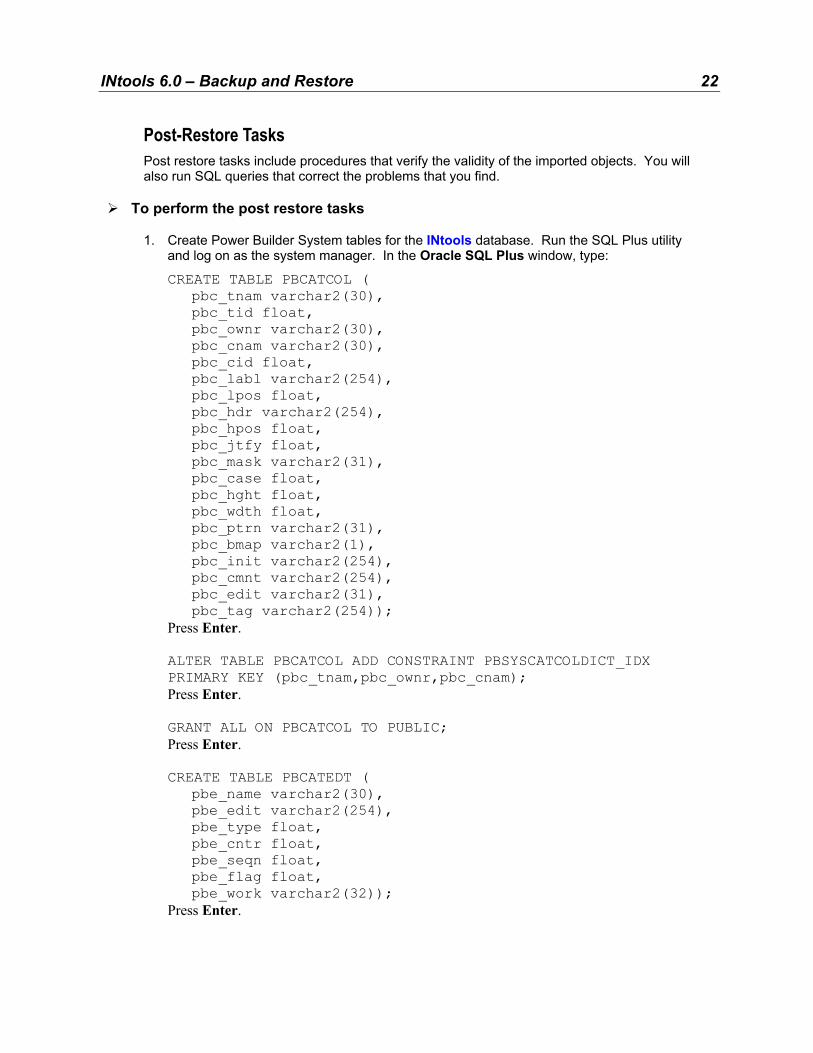
1. Create Power Builder System tables for the INtools database. Run the SQL Plus utility and log on as the system manager. In the Oracle SQL Plus window, type:
CREATE TABLE PBCATCOL ( pbc_tnam varchar2(30), pbc_tid float, pbc_ownr varchar2(30), pbc_cnam varchar2(30), pbc_cid float, pbc_labl varchar2(254), pbc_lpos float, pbc_hdr varchar2(254), pbc_hpos float, pbc_jtfy float, pbc_mask varchar2(31), pbc_case float, pbc_hght float, pbc_wdth float, pbc_ptrn varchar2(31), pbc_bmap varchar2(1), pbc_init varchar2(254), pbc_cmnt varchar2(254), pbc_edit varchar2(31), pbc_tag varchar2(254)); Press Enter. ALTER TABLE PBCATCOL ADD CONSTRAINT PBSYSCATCOLDICT_IDX PRIMARY KEY (pbc_tnam,pbc_ownr,pbc_cnam); Press Enter. GRANT ALL ON PBCATCOL TO PUBLIC; Press Enter. CREATE TABLE PBCATEDT ( pbe_name varchar2(30), pbe_edit varchar2(254), pbe_type float, pbe_cntr float, pbe_seqn float, pbe_flag float, pbe_work varchar2(32)); Press Enter.
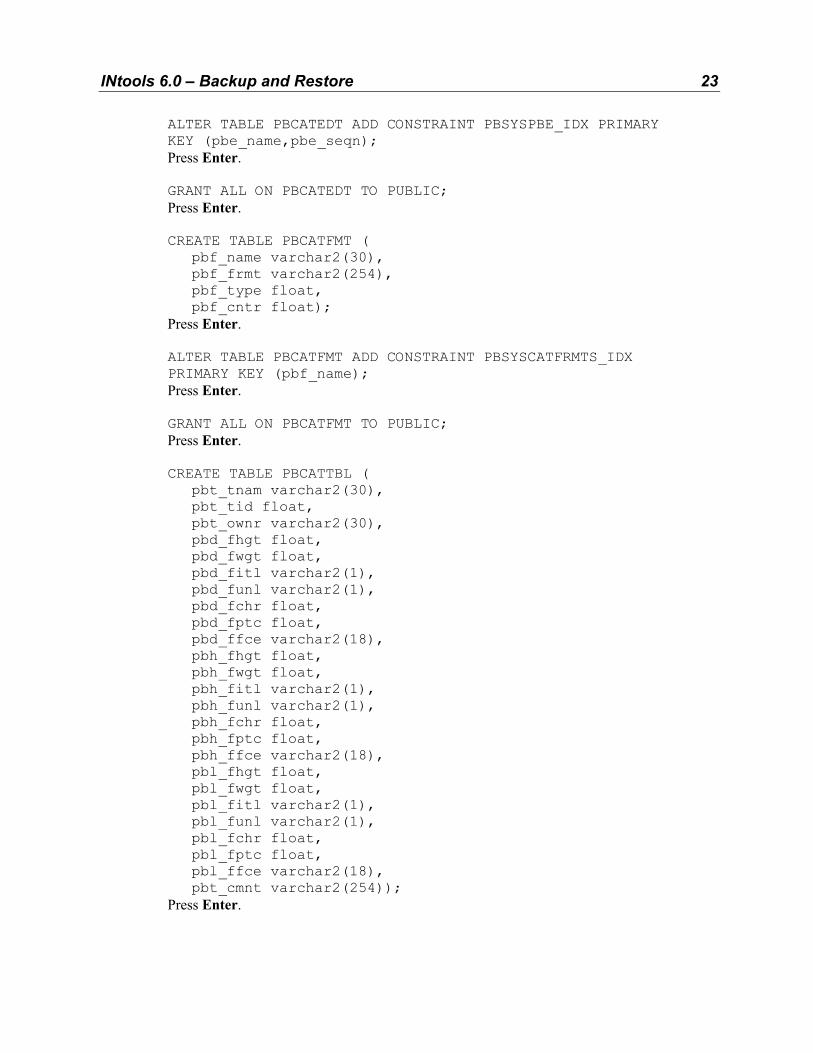
INtools 6.0 – Backup and Restore 23
ALTER TABLE PBCATEDT ADD CONSTRAINT PBSYSPBE_IDX PRIMARY KEY (pbe_name,pbe_seqn); Press Enter. GRANT ALL ON PBCATEDT TO PUBLIC; Press Enter. CREATE TABLE PBCATFMT ( pbf_name varchar2(30), pbf_frmt varchar2(254), pbf_type float, pbf_cntr float); Press Enter. ALTER TABLE PBCATFMT ADD CONSTRAINT PBSYSCATFRMTS_IDX PRIMARY KEY (pbf_name); Press Enter. GRANT ALL ON PBCATFMT TO PUBLIC; Press Enter. CREATE TABLE PBCATTBL ( pbt_tnam varchar2(30), pbt_tid float, pbt_ownr varchar2(30), pbd_fhgt float, pbd_fwgt float, pbd_fitl varchar2(1), pbd_funl varchar2(1), pbd_fchr float, pbd_fptc float, pbd_ffce varchar2(18), pbh_fhgt float, pbh_fwgt float, pbh_fitl varchar2(1), pbh_funl varchar2(1), pbh_fchr float, pbh_fptc float, pbh_ffce varchar2(18), pbl_fhgt float, pbl_fwgt float, pbl_fitl varchar2(1), pbl_funl varchar2(1), pbl_fchr float, pbl_fptc float, pbl_ffce varchar2(18), pbt_cmnt varchar2(254)); Press Enter.
INtools 6.0 – Backup and Restore 24
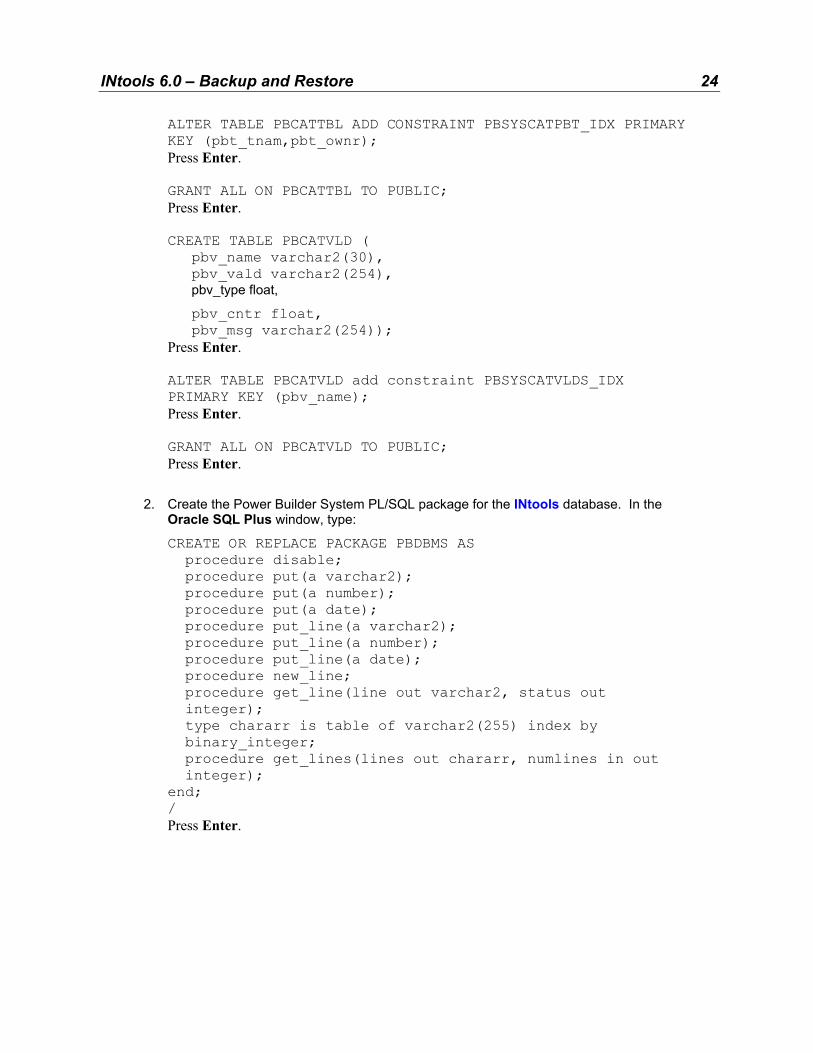
ALTER TABLE PBCATTBL ADD CONSTRAINT PBSYSCATPBT_IDX PRIMARY KEY (pbt_tnam,pbt_ownr); Press Enter. GRANT ALL ON PBCATTBL TO PUBLIC; Press Enter. CREATE TABLE PBCATVLD ( pbv_name varchar2(30), pbv_vald varchar2(254), pbv_type float,
pbv_cntr float, pbv_msg varchar2(254)); Press Enter. ALTER TABLE PBCATVLD add constraint PBSYSCATVLDS_IDX PRIMARY KEY (pbv_name); Press Enter. GRANT ALL ON PBCATVLD TO PUBLIC; Press Enter.
2. Create the Power Builder System PL/SQL package for the INtools database. In the Oracle SQL Plus window, type:
CREATE OR REPLACE PACKAGE PBDBMS AS procedure disable; procedure put(a varchar2); procedure put(a number); procedure put(a date); procedure put_line(a varchar2); procedure put_line(a number); procedure put_line(a date); procedure new_line; procedure get_line(line out varchar2, status out integer); type chararr is table of varchar2(255) index by binary_integer; procedure get_lines(lines out chararr, numlines in out integer); end; / Press Enter.
INtools 6.0 – Backup and Restore 25
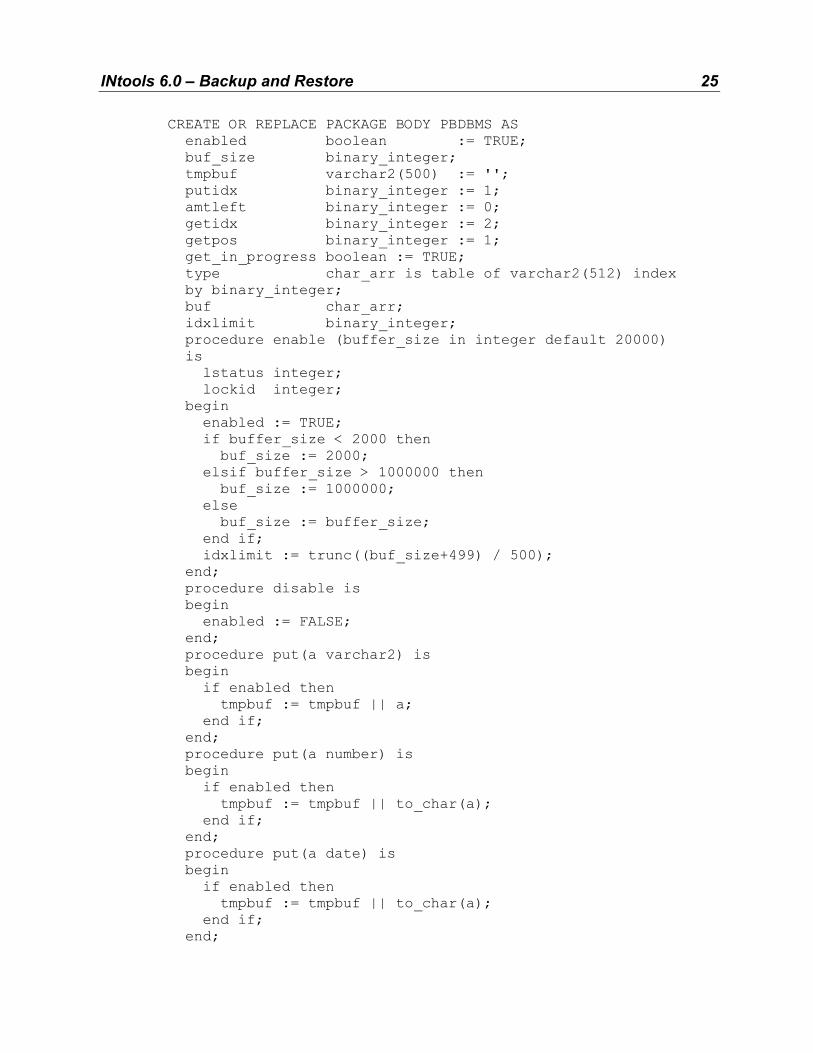
CREATE OR REPLACE PACKAGE BODY PBDBMS AS enabled boolean := TRUE; buf_size binary_integer; tmpbuf varchar2(500) := ''; putidx binary_integer := 1; amtleft binary_integer := 0; getidx binary_integer := 2; getpos binary_integer := 1; get_in_progress boolean := TRUE; type char_arr is table of varchar2(512) index by binary_integer; buf char_arr; idxlimit binary_integer; procedure enable (buffer_size in integer default 20000) is lstatus integer; lockid integer; begin enabled := TRUE; if buffer_size < 2000 then buf_size := 2000; elsif buffer_size > 1000000 then buf_size := 1000000; else buf_size := buffer_size; end if; idxlimit := trunc((buf_size+499) / 500); end; procedure disable is begin enabled := FALSE; end; procedure put(a varchar2) is begin if enabled then tmpbuf := tmpbuf || a; end if; end; procedure put(a number) is begin if enabled then tmpbuf := tmpbuf || to_char(a); end if; end; procedure put(a date) is begin if enabled then tmpbuf := tmpbuf || to_char(a); end if; end;
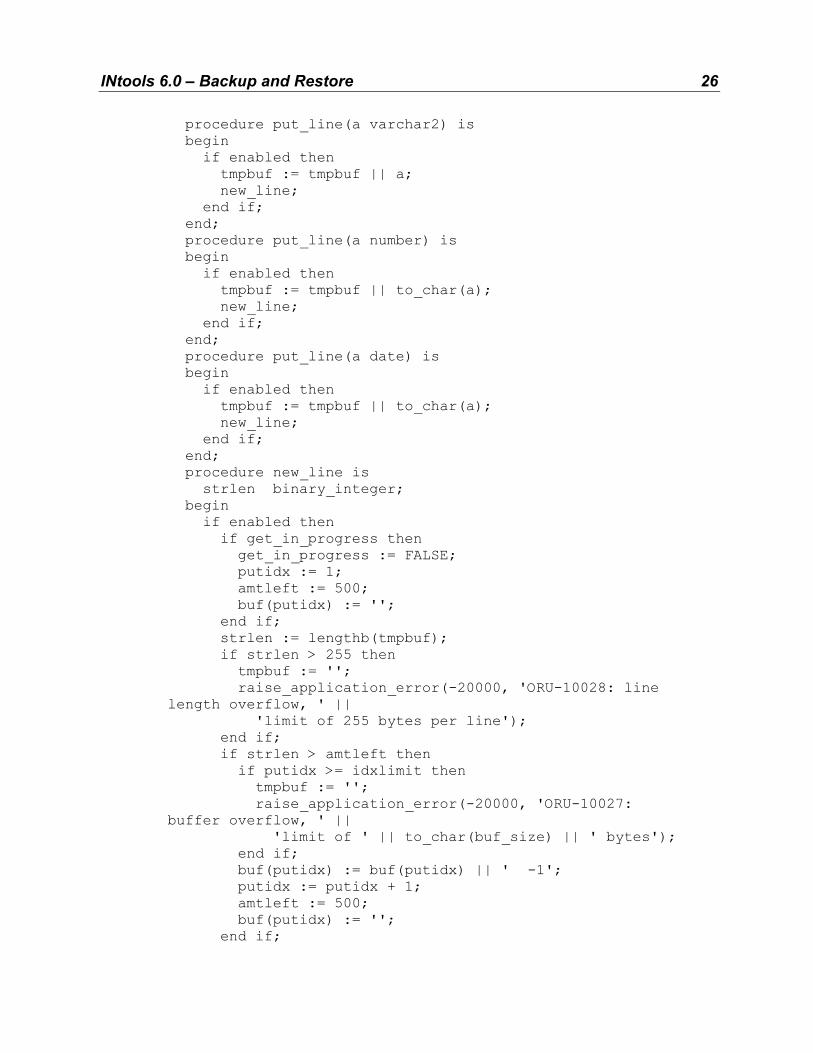
INtools 6.0 – Backup and Restore 26
procedure put_line(a varchar2) is begin if enabled then tmpbuf := tmpbuf || a; new_line; end if; end; procedure put_line(a number) is begin if enabled then tmpbuf := tmpbuf || to_char(a); new_line; end if; end; procedure put_line(a date) is begin if enabled then tmpbuf := tmpbuf || to_char(a); new_line; end if; end; procedure new_line is strlen binary_integer; begin if enabled then if get_in_progress then get_in_progress := FALSE; putidx := 1; amtleft := 500; buf(putidx) := ''; end if; strlen := lengthb(tmpbuf); if strlen > 255 then tmpbuf := ''; raise_application_error(-20000, 'ORU-10028: line length overflow, ' || 'limit of 255 bytes per line'); end if; if strlen > amtleft then if putidx >= idxlimit then tmpbuf := ''; raise_application_error(-20000, 'ORU-10027: buffer overflow, ' || 'limit of ' || to_char(buf_size) || ' bytes'); end if; buf(putidx) := buf(putidx) || ' -1'; putidx := putidx + 1; amtleft := 500; buf(putidx) := ''; end if;
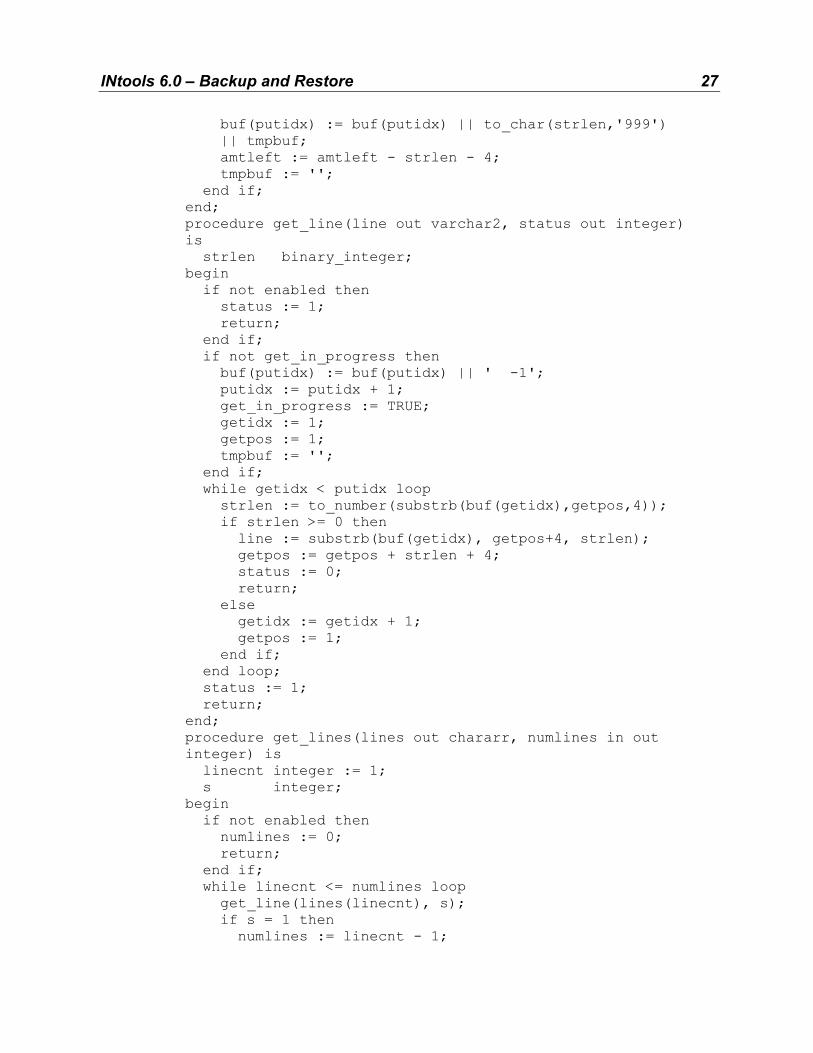
INtools 6.0 – Backup and Restore 27
buf(putidx) := buf(putidx) || to_char(strlen,'999') || tmpbuf; amtleft := amtleft - strlen - 4; tmpbuf := ''; end if; end; procedure get_line(line out varchar2, status out integer) is strlen binary_integer; begin if not enabled then status := 1; return; end if; if not get_in_progress then buf(putidx) := buf(putidx) || ' -1'; putidx := putidx + 1; get_in_progress := TRUE; getidx := 1; getpos := 1; tmpbuf := ''; end if; while getidx < putidx loop strlen := to_number(substrb(buf(getidx),getpos,4)); if strlen >= 0 then line := substrb(buf(getidx), getpos+4, strlen); getpos := getpos + strlen + 4; status := 0; return; else getidx := getidx + 1; getpos := 1; end if; end loop; status := 1; return; end; procedure get_lines(lines out chararr, numlines in out integer) is linecnt integer := 1; s integer; begin if not enabled then numlines := 0; return; end if; while linecnt <= numlines loop get_line(lines(linecnt), s); if s = 1 then numlines := linecnt - 1;

INtools 6.0 – Backup and Restore 28
return; end if; linecnt := linecnt + 1; end loop; numlines := linecnt - 1; return; end; end; / Press Enter. DROP PUBLIC SYNONYM PBDBMS ; Press Enter. CREATE PUBLIC SYNONYM PBDBMS FOR PBDBMS ; Press Enter. GRANT EXECUTE ON PBDBMS TO PUBLIC ; Press Enter.
3. Check if the imported database contains any invalid objects. In the Oracle SQL Plus window, type:
SELECT OWNER,OBJECT_TYPE,OBJECT_NAME FROM DBA_OBJECTS WHERE STATUS = 'INVALID' ORDER BY 1,2,3; Press Enter.
4. To fix the invalid objects, in the Oracle SQL Plus window, type:
BEGIN FOR REC IN (SELECT OWNER,OBJECT_TYPE,OBJECT_NAME FROM DBA_OBJECTS WHERE STATUS = 'INVALID'
ORDER BY 1,2,3) LOOP
DBMS_DDL.ALTER_COMPILE(REC.OBJECT_TYPE,REC.OWNER, REC.OBJECT_NAME);
END LOOP; END; / Press Enter.
5. To insure that the imported database is free of invalid objects, run the check again as explained in step 3 above.
INtools 6.0 – Backup and Restore 29
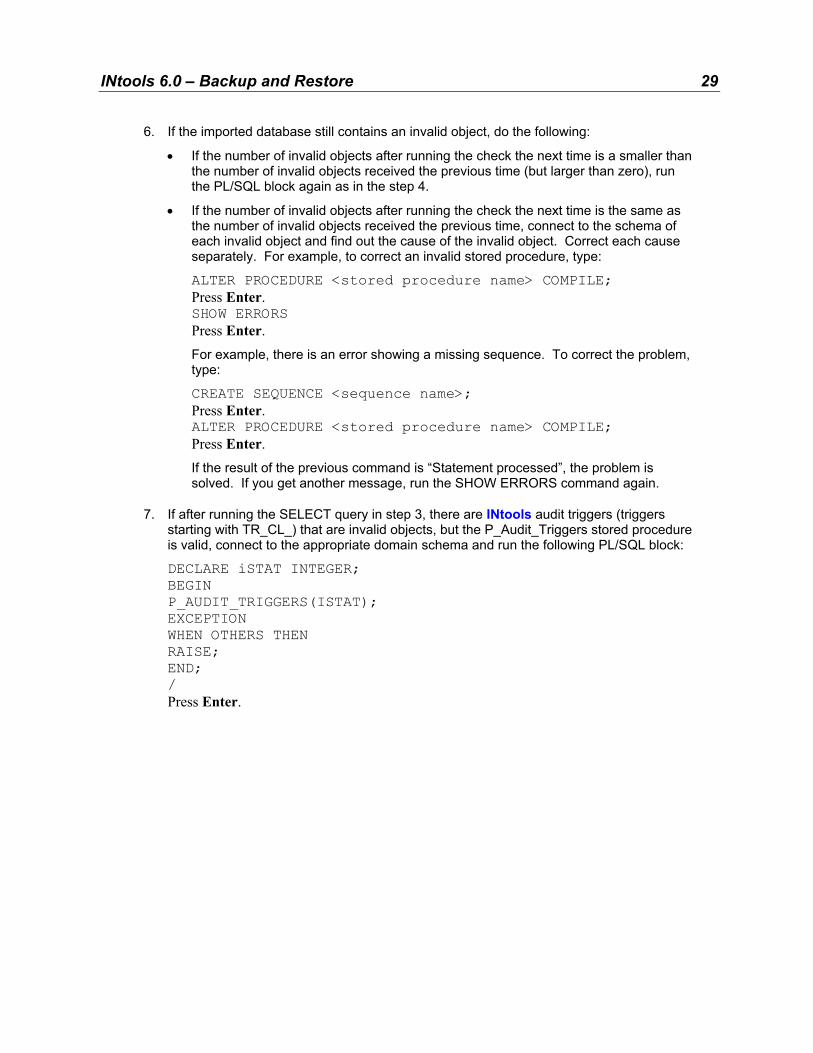
6. If the imported database still contains an invalid object, do the following:
If the number of invalid objects after running the check the next time is a smaller than the number of invalid objects received the previous time (but larger than zero), run the PL/SQL block again as in the step 4.
•
• If the number of invalid objects after running the check the next time is the same as the number of invalid objects received the previous time, connect to the schema of each invalid object and find out the cause of the invalid object. Correct each cause separately. For example, to correct an invalid stored procedure, type:
ALTER PROCEDURE <stored procedure name> COMPILE; Press Enter. SHOW ERRORS Press Enter. For example, there is an error showing a missing sequence. To correct the problem, type:
CREATE SEQUENCE <sequence name>; Press Enter. ALTER PROCEDURE <stored procedure name> COMPILE; Press Enter. If the result of the previous command is “Statement processed”, the problem is solved. If you get another message, run the SHOW ERRORS command again.
7. If after running the SELECT query in step 3, there are INtools audit triggers (triggers starting with TR_CL_) that are invalid objects, but the P_Audit_Triggers stored procedure is valid, connect to the appropriate domain schema and run the following PL/SQL block:
DECLARE iSTAT INTEGER; BEGIN P_AUDIT_TRIGGERS(ISTAT); EXCEPTION WHEN OTHERS THEN RAISE; END; / Press Enter.

INtools 6.0 – Backup and Restore 30
8. If you want to import only some of the existing source domains, do the following in the target database:
a) Run the SQL Plus utility.
b) Connect to the Admin schema.
c) Run the following SELECT query:
SELECT PROJ_ID,PROJ_NAME,PROJ_LOG_NAME,PROJ_LOG_PASS,PROJ_DEL FROM PROJECT;
d) Run the DELETE query where you specify the project IDs of the domains that you want to keep. The domains whose project Ids are not specified will be deleted. In the SQL Plus window, type:
DELETE FROM ACTIVITY_TRACKING WHERE PROJ_ID IN (SELECT PROJ_ID FROM PROJECT WHERE PROJ_DEL <> 'H' AND PROJ_ID NOT IN (<project ID to be kept>,<project ID to be kept>,)); Press Enter. DELETE FROM MODULE_LICENSE_PROJECT WHERE PROJ_ID IN (SELECT PROJ_ID FROM PROJECT WHERE PROJ_DEL <> 'H' AND PROJ_ID NOT IN (<project ID to be kept>,<project ID to be kept>),); Press Enter. DELETE FROM PROJECT WHERE PROJ_ID NOT IN (<project ID to be kept>,<project ID to be kept>,) AND PROJ_DEL <> 'H'; Press Enter. COMMIT; Press Enter.
INtools 6.0 – Backup and Restore 31
Backing up Files Containing Audit Trail Data The INtools System Administrator can trim audit trail data and save the data to external files. The format, location and path configuration of these files depends on the platform you are using (Oracle, SQL Server, or Sybase SQL Anywhere 7.0).
When using Oracle, these files appear as .sql files on your Windows NT 4.0, Windows 2000, or UNIX server.
•
•
•
When using SQL Server, these files appear as .txt files on your Windows NT 4.0 or Windows 2000 server.
When using WATCOM, these files appear as .txt files on a client machine where you have installed INtools.
You need to back up these files to enable loading of the trimmed audit trail data to the CHANGES_LOG table of a particular domain. The software records the audit trail data in the CHANGES_LOG table that exists in each INtools domain. To learn more about trimming and loading audit trail data, see User’s Guide, Administration Module, Audit Trail Mechanism.
The external file containing audit trail data has a filename made up of the date range within which the data was trimmed, the domain schema name, the CHANGES_LOG table name, and the filename which the System Administrator has defined in the Administration module before trimming. The following is an example of an external file with audit trail data:
20010614_20011015_<domain schema>#CHANGES_LOG#<user-defined filename>.
The audit trail period segment displays the date range in the following order: year, month, and day.
Backing up Files Containing Audit Trail Data on Oracle Trimming INtools audit trail data is available for Oracle database server 8.0.5, 8.0.6, 8.1.7, or 9i. Trimmed audit trail data is stored in .sql files located on your Windows NT 4.0, Windows 2000, or UNIX server in a predefined folder. For example, <drive>:\INTOOLSTORAGE\ORC1, where ORC1 is your Oracle server database name. You have set the path and specified the INTOOLSTORAGE folder when creating a new Oracle instance.
Note
• When creating additional Oracle instances, we recommend that you do not change the name INTOOLSTORAGE for any of the INtools databases. For details about creating the INTOOLSTORAGE folder in the source Oracle server, see Installing INtools on Oracle, Creating a New Oracle 8.0.5 Instance, and Creating a New Oracle 8.1.7 Instance with INtools Specifications.
INtools 6.0 – Backup and Restore 32
The following procedure describes how to back up the files containing trimmed audit trail data on Oracle 8.0.5, 8.0.6, 8.1.7,or 9i in the Windows NT 4.0, or Windows 2000 environment. The folder paths and names in the following procedure are set according to the conventions of Windows NT 4.0 and Windows 2000. When performing this procedure in UNIX, use the UNIX conventions for creating the folders.
To enable loading of the audit trail data saved to the SQL files in the <drive>:\INTOOLSTORAGE\ORC1 folder, you must create a backup of these files on your Windows NT 4.0, Windows 2000, or UNIX server in the following cases:
When moving an INtools database from one Oracle server to another. •
• When creating a new INtools database on the same Oracle server.
To back up files when moving an INtools database from one Oracle server to another.
1. On your target Windows NT 4.0, Windows 2000, or UNIX server, select a disk drive with 300 MB free disk space for the storage of about 1 million records.
2. Create a folder INTOOLSTORAGE.
3. Create a subfolder <drive>:\INTOOLSTORAGE\<name of new Oracle database server>.
Tip
• The name of the new Oracle database appears as the value of the DB_NAME parameter in the Oracle Instance Configuration file. For example, ORC2.
4. Do one of the following:
On Oracle 8.0.5 or 8.0.6, open the Oracle Instance Configuration file INIT<SID>.ORA, where <SID> stands for your new Oracle instance name.
•
• On Oracle 8.1.7 or 9i, open the Oracle Instance Configuration file INIT.ORA.
5. In the Oracle Instance Configuration file, add the following parameter line: utl_file_dir=<drive>:\INtoolStorage \orc2.
6. Copy the content of the folder ORC1 in the source path <drive>:\INTOOLSTORAGE to the folder ORC2 in the target path <drive>:\INTOOLSTORAGE.
7. Restart your computer.
INtools 6.0 – Backup and Restore 33
To back up files when creating a new INtools database on the same Oracle server
1. On your Windows NT 4.0, Windows 2000, or UNIX server, create a subfolder <drive>:\INTOOLSTORAGE\<name of new Oracle database>.
Tip
• The name of the new Oracle database appears as the value of the DB_NAME parameter in the Oracle Instance Configuration file. For example, ORC2.
2. In the target Oracle database, do one of the following:
On Oracle 8.0.5 or 8.0.6, open the Oracle Instance Configuration file INIT<SID>.ORA, where <SID> stands for your new Oracle instance name.
•
• On Oracle 8.1.7 or 9i, open the Oracle Instance Configuration file INIT.ORA.
3. In the Oracle Instance Configuration file, add the following parameter line: utl_file_dir=<drive>:\INtoolStorage\orc2.
4. Copy the content of the folder ORC1 in the path <drive>:\INTOOLSTORAGE\ to the folder ORC2.
5. Restart your computer.
INtools 6.0 – Backup and Restore 34
Backing up Files Containing Audit Trail Data on SQL Server Trimming INtools audit trail data is available for SQL Server database server 7.0 and 2000. The following procedure describes how to back up the files containing trimmed audit trail data in the Windows NT 4.0, or Windows 2000 environment.
The file with the audit trail data is a .txt file that appears on your Windows NT 4.0/2000 server in the path whose configuration depends on your SQL Server version.
When using a SQL Server 7.0, the system creates the file in the following path: <drive>:\INTOOLSTORAGE\<SQL Server server name>\<INtools database name>.
•
•
•
For example: e:\INtoolStorage\Develop1\INtools1, where the SQL Server server name DEVELOP1 corresponds to your source Windows NT 4.0/2000 server name.
When using a SQL Server 2000 with an INtools database created in a default instance, the system creates the file in the following path: <drive>:\INTOOLSTORAGE\<default instance name>\<INtools database name>.
For example: e:\INtoolStorage\Develop1\INtools1, where the default instance name Develop1 corresponds to your source Windows NT 4.0/2000 server name.
When using a SQL Server 2000 with an INtools database created in a named instance, the system creates the file in the following path: <drive>:\INTOOLSTORAGE\<SQL Server server name>\<named instance name>\< INtools database name>.
For example: e:\INtoolStorage\Develop1\INtools53\INtools1, where the SQL Server server name DEVELOP1 corresponds to your source Windows NT 4.0/2000 server name.
To enable loading of the audit trail data after moving an INtools database from one SQL Server server database to another, you must make a backup of the .txt files with the trimmed audit trail data on your Windows NT 4.0/2000 server.

INtools 6.0 – Backup and Restore 35
To back up files containing audit trail data on SQL Server
1. On your target Windows NT 4.0/2000 server, select a disk drive with 300 MB free disk space for the storage of about 1 million records.
2. Create a folder INTOOLSTORAGE.
3. Do one of the following:
On SQL Server 7.0, create the following path: <drive>:\INTOOLSTORAGE \<new SQL Server server name>\< INtools database name>.
•
•
•
•
•
•
For example: e:\INtoolStorage\Develop2\INtools1, where the new SQL Server server name DEVELOP2 corresponds to your target Windows NT 4.0/2000 server name.
On the SQL Server 2000 with an INtools database created in a default instance, create the following path: <drive>:\INTOOLSTORAGE\<default instance name of the new SQL Server server>\< INtools database name>.
For example: e:\INtoolStorage\Develop2\INtools1, where the default instance name DEVELOP2 corresponds to your target Windows NT 4.0/2000 server name.
On the SQL Server 2000 with an INtools database created in a named instance, create the following path: <drive>:\INTOOLSTORAGE\<new SQL Server server name>\<named instance name of the new SQL Server server>\<INtools database name>.
For example: e:\INtoolStorage\Develop2\ INtools53\INtools1, where the new SQL Server server name DEVELOP2 corresponds to your target Windows NT 4.0/2000 server name.
4. Do one of the following:
When using a SQL Server 7.0, copy the content of the folder INTOOLS1 in the source path e:\INtoolStorage\Develop1 to the folder INTOOLS2 in the target path e:\INtoolStorage\Develop2.
When using a SQL Server 2000 with an INtools database created in a default instance, copy the content of the folder INTOOLS1 in the source path e:\INtoolStorage\Develop1\ to the folder INTOOLS2 in the target path e:\INtoolStorage\Develop2\.
When using a SQL Server 2000 with an INtools database created in a named instance, copy the content of the folder INTOOLS1 in the source path e:\INtoolStorage\Develop1\INtools53 to the folder INTOOLS2 in the target path e:\INtoolStorage\Develop2\INtools53.
5. Restart your computer.
INtools 6.0 – Backup and Restore 36
Backing up Files Containing Audit Trail Data on WATCOM The following procedure describes how to back up the files containing trimmed audit trail data on WATCOM in the windows 2000, and Windows NT station 4.0 environment.
The file with the audit trail data is a .txt file that appears on a client machine where INtools is installed. The default path for this file is created automatically with INtools setup. INtools setup creates the following default path: <drive>:\<INtools homefolder>\INTOOLSTORAGE. The drive value corresponds to the drive where you have installed INtools.
You can view the file path as the value of the WATINSTORAGEDIR parameter in the [DATABASE] section of the INTOOLS.INI file.
File path value example:
WatINstorageDir=”c:\Program Files\ INtools \INtoolStorage”.
To enable loading of the audit trail data after moving an INtools database from one client machine to another, you must make a backup of the .txt files with the trimmed audit trail data on the target client machine.
To back up files with audit trail data on WATCOM
1. On the target client machine, select a disk drive with 300 MB free disk space for the storage of about 1 million records.
2. Do one of the following:
Copy the content of the default folder in the source client machine, for example, c:\Program Files\ INtools \INtoolStorage to the default folder in the new client machine, for example, c:\Program Files\ INtools \INtoolStorage.
•
• If you do not have enough disk space for copying audit trail data to the target drive where you have installed INtools, do the following:
a) In the required drive on the target client machine, create a folder INTOOLSTORAGE.
b) Open the INTOOLS.INI file.
c) In the [DATABASE] section, set the file path value of the parameter WATINSTORAGEDIR so that it matches the path you have created.
For example:
WatINstorageDir=”d:\ INtools \INtoolStorage”.
d) Copy the content of the default folder in the source client machine, for example, c:\Program Files\ INtools \INtoolStorage to the default folder in the new client machine, for example, d:\ INtools \INtoolStorage.
3. Restart your computer.