Embed Size (px)
Citation preview
Surrey Libraries’ Digital Friday Workshop – Nov. 2015Digital Storytelling for Creative Writers
(How to use inklewriter – a step by step guide)
Inklewriter is a free tool designed to allow anyone to write and publish online interactive stories that branch off in different directions. It’s gives creative writers new opportunities for developing narratives.
To begin
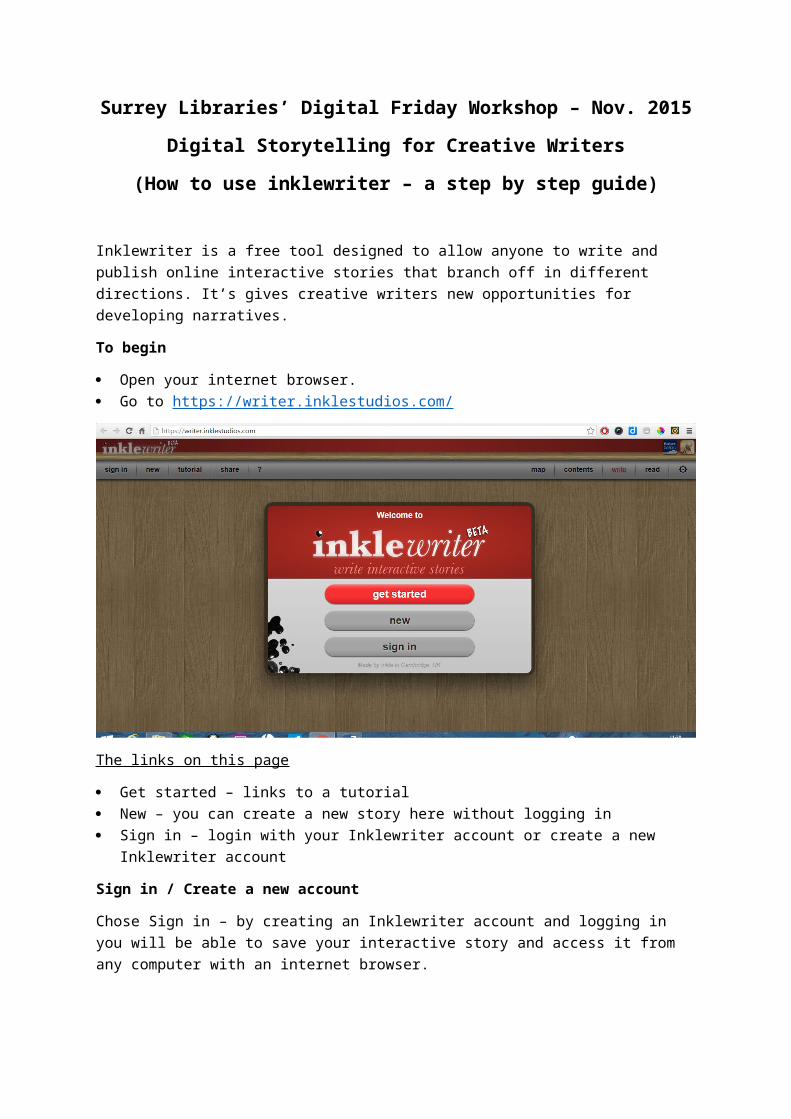
Open your internet browser. Go to https://writer.inklestudios.com/
The links on this page
Get started – links to a tutorial New – you can create a new story here without logging in Sign in – login with your Inklewriter account or create a new Inklewriter account
Sign in / Create a new account
Chose Sign in – by creating an Inklewriter account and logging in you will be able to save your interactive story and access it from any computer with an internet browser.
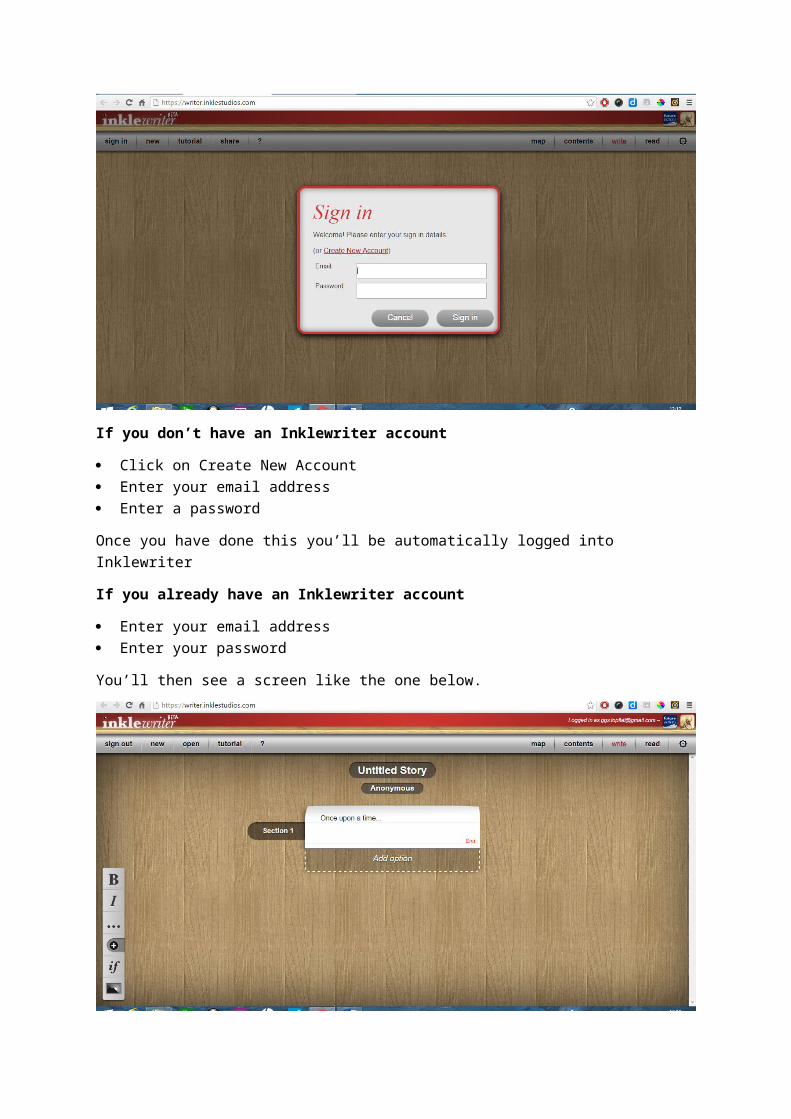
If you don’t have an Inklewriter account
Click on Create New Account Enter your email address Enter a password
Once you have done this you’ll be automatically logged into Inklewriter
If you already have an Inklewriter account
Enter your email address Enter your password
You’ll then see a screen like the one below.
What’s on Inklewriter’s home page
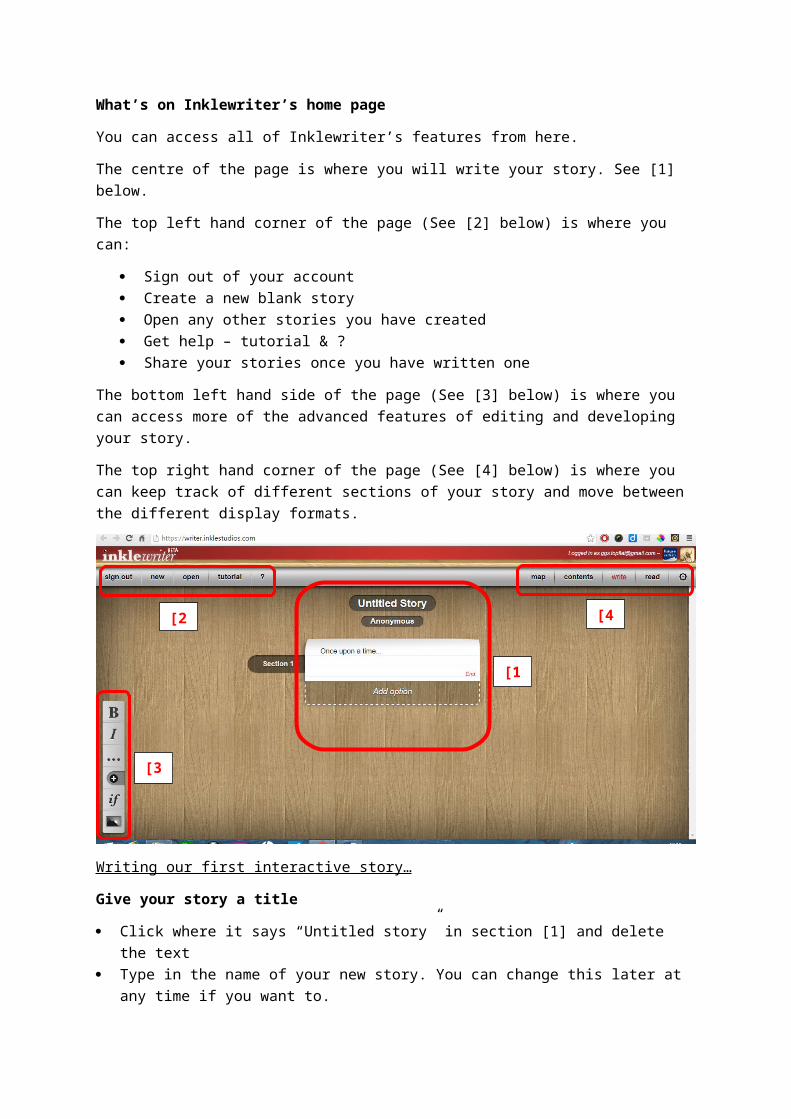
You can access all of Inklewriter’s features from here.
The centre of the page is where you will write your story. See [1] below.
The top left hand corner of the page (See [2] below) is where you can:
Sign out of your account Create a new blank story Open any other stories you have created Get help – tutorial & ? Share your stories once you have written one
The bottom left hand side of the page (See [3] below) is where you can access more of the advanced features of editing and developing your story.
The top right hand corner of the page (See [4] below) is where you can keep track of different sections of your story and move between the different display formats.
Writing our first interactive story…
Give your story a title
Click where it says “Untitled story” in section [1] and delete the text Type in the name of your new story. You can change this later at any time if you want to.
Add your name as the author
Click where it says “Anonymous” box in section [1] and delete the text Add your name here. You can change this later at any time if you want to.
Start writing Click where it says “Once upon a time…” in section [1] and delete the text Write the opening section of text for your story here. You can change the text later if you want
to. You will notice that the word “End” appears in red at the bottom of this text. This indicates that
there is no more story for the reader to read after this section.
[1]
[2]
[3]
[4]

Saving your story
When you are logged in Inklewriter will automatically save your story as you write it. Take a look at the top right side of the screen in the red bar – it should show your account email and “Saving” or “Saved”.
Create different directions for your story to go in from your opening section
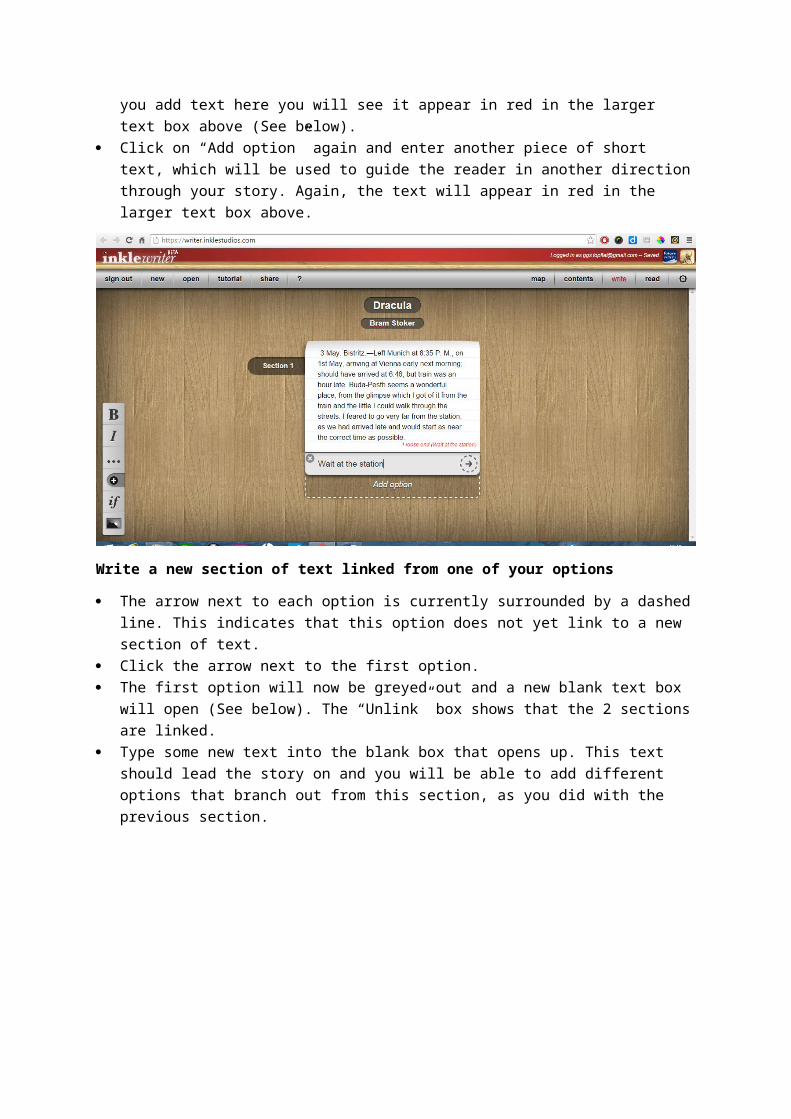
Click on “Add option” below the text you have entered - a new smaller blank text box will open. Type in a short piece of text which will be used to guide the reader in a specific direction through
your interactive story. As you add text here you will see it appear in red in the larger text box above (See below).
Click on “Add option” again and enter another piece of short text, which will be used to guide the reader in another direction through your story. Again, the text will appear in red in the larger text box above.
Write a new section of text linked from one of your options
The arrow next to each option is currently surrounded by a dashed line. This indicates that this option does not yet link to a new section of text.
Click the arrow next to the first option. The first option will now be greyed out and a new blank text box will open (See below). The
“Unlink” box shows that the 2 sections are linked. Type some new text into the blank box that opens up. This text should lead the story on and you
will be able to add different options that branch out from this section, as you did with the previous section.
Write another text section linking from the 2nd option
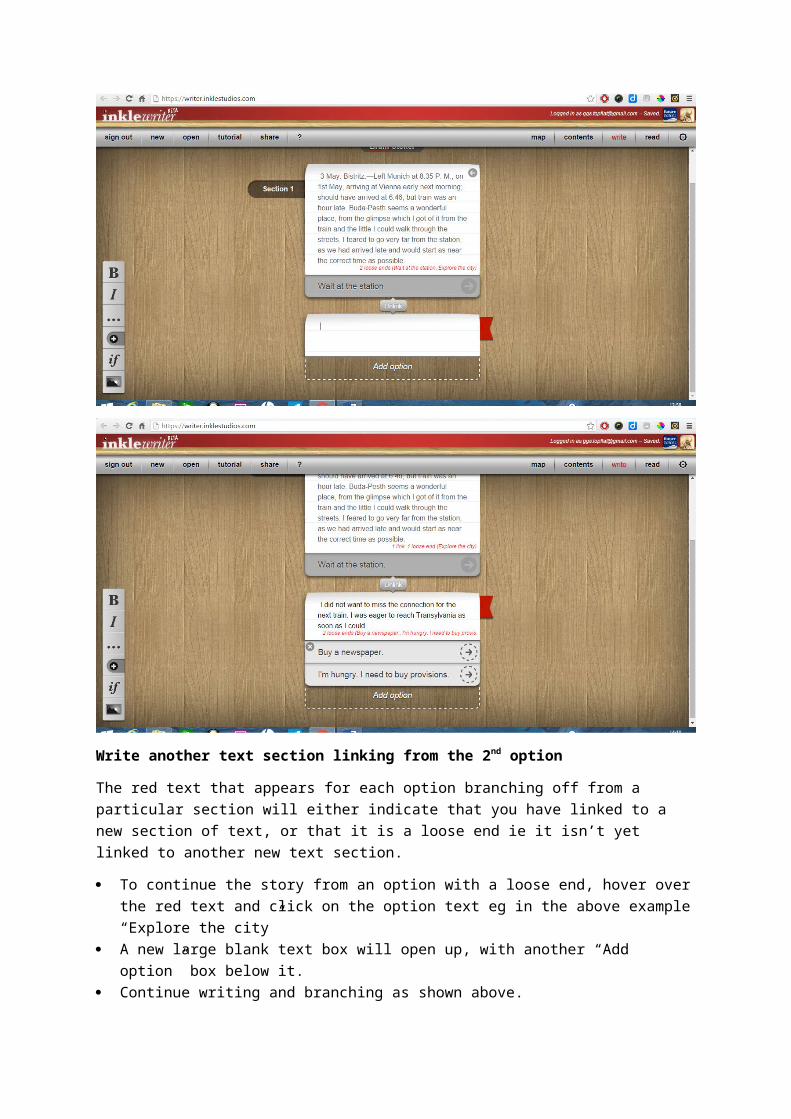
The red text that appears for each option branching off from a particular section will either indicate that you have linked to a new section of text, or that it is a loose end ie it isn’t yet linked to another new text section.
To continue the story from an option with a loose end, hover over the red text and click on the option text eg in the above example “Explore the city”
A new large blank text box will open up, with another “Add option” box below it. Continue writing and branching as shown above.
Alternative method:
Click on the small arrow in the top right of each large text box that points to the left. This will rewind the story to this point and all options for this section will appear again. Options with dashes surrounding the arrow indicate that they are loose ends.
Link to existing pieces of text in your story
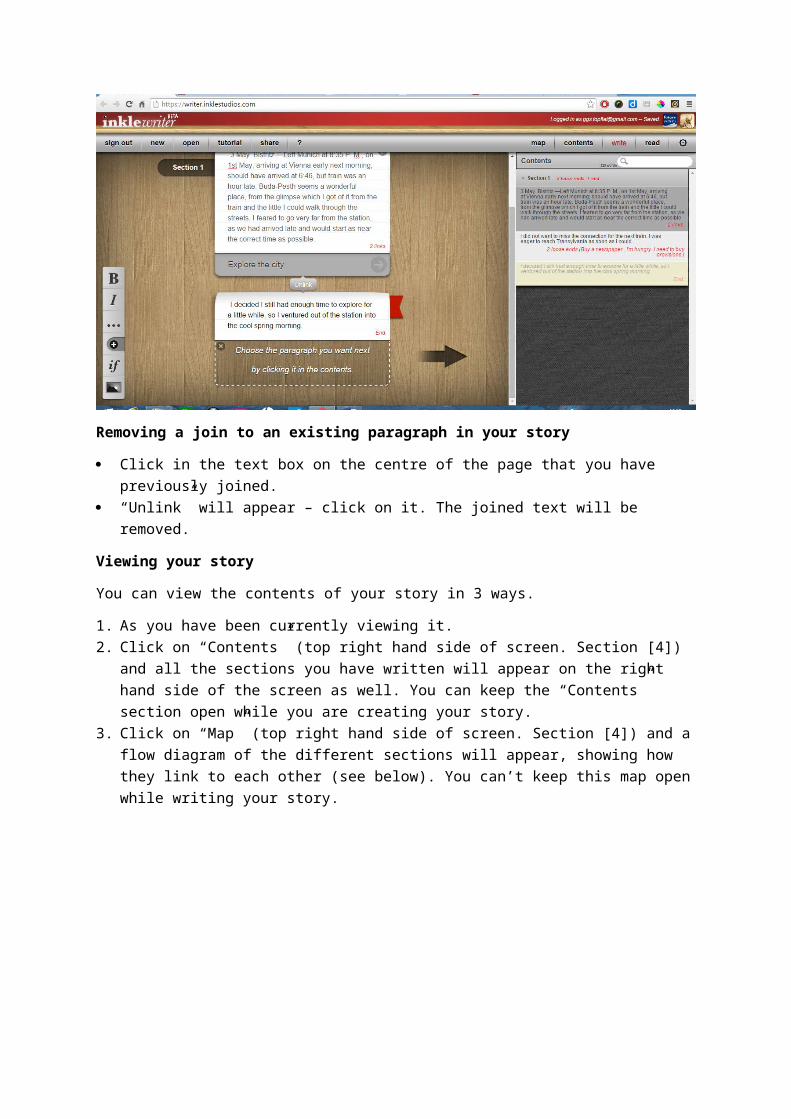
Once you have written more than one section of text you will see that as well as “Add option” there is a box containing the text “Join to an existing paragraph” (See below).
Click on “Join to an existing paragraph”. The Contents section will open on the right hand side. This displays all the sections of your story
you have written, as well as which sections have links and loose ends leading on from them. Hover of the section you want to link to and click on it. The text will be added to your story.

Removing a join to an existing paragraph in your story
Click in the text box on the centre of the page that you have previously joined. “Unlink” will appear – click on it. The joined text will be removed.
Viewing your story
You can view the contents of your story in 3 ways.
1. As you have been currently viewing it.2. Click on “Contents” (top right hand side of screen. Section [4]) and all the sections you have
written will appear on the right hand side of the screen as well. You can keep the “Contents” section open while you are creating your story.
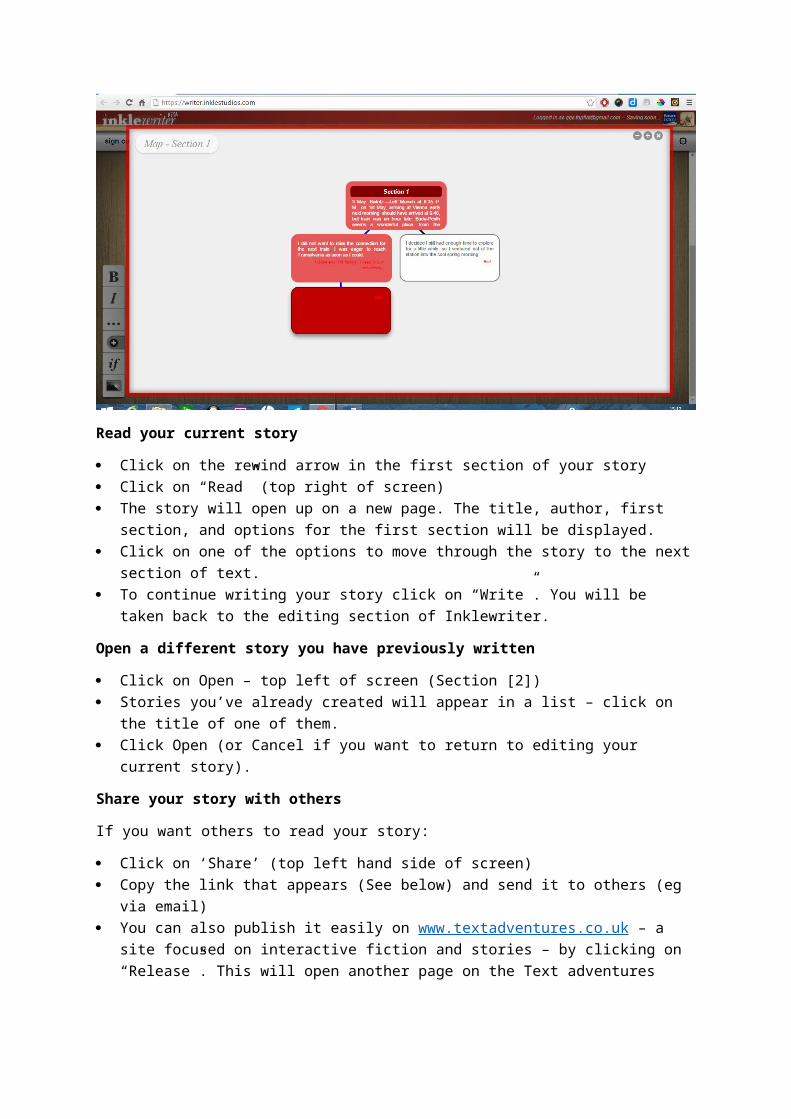
3. Click on “Map” (top right hand side of screen. Section [4]) and a flow diagram of the different sections will appear, showing how they link to each other (see below). You can’t keep this map open while writing your story.
Read your current story
Click on the rewind arrow in the first section of your story Click on “Read” (top right of screen) The story will open up on a new page. The title, author, first section, and options for the first
section will be displayed. Click on one of the options to move through the story to the next section of text. To continue writing your story click on “Write”. You will be taken back to the editing section of
Inklewriter.
Open a different story you have previously written
Click on Open – top left of screen (Section [2]) Stories you’ve already created will appear in a list – click on the title of one of them. Click Open (or Cancel if you want to return to editing your current story).
Share your story with others
If you want others to read your story:
Click on ‘Share’ (top left hand side of screen) Copy the link that appears (See below) and send it to others (eg via email) You can also publish it easily on www.textadventures.co.uk – a site focused on interactive fiction
and stories – by clicking on “Release”. This will open another page on the Text adventures site, where you will need to create another account before uploading your story.
The link you share with others will open up the story in the same way as it did when you clicked on “Read” - people will not be able to change your story.
For a small fee the company who created Inklewriter can also turn your story into an ebook. More details can be found at http://www.inklestudios.com/inklewriter/kindle-ebooks/
More advanced options in Inklewriter
As well as creating a simple branching story, more advanced options allow you to:
Add images. Images can’t be uploaded, but images with a url ending in jpg or png can be included in your story. Remember though that you shouldn’t include anything that is copyrighted.
Vary the text that appears. For example instead of always displaying the “The day was hot”, you could display “The heat was stifling” or “The sun was blistering” randomly instead.
Create complicated branching based on previous choices the reader has made in the story. Use logic in the story to change options the reader is presented with. Add web links to other web pages.
Details of how to do all of this can be found at http://www.inklestudios.com/inklewriter/getting-started/
Gary Green (Digital Services, Surrey Library Service)
Nov 2015