Embed Size (px)
Citation preview

100 Years’ War Battles
Conflict & Date: The Battle of Crécy was fought August 26, 1346, during the Hundred Years' War (1337-1453).
Armies & Commanders:
England
Edward III Edward, the Black Prince 12,000-16,000 men
France
Philip VI 20,000-80,000 men
Battle of Crécy Overview:
Seeking to invade France in 1346, King Edward III landed in Normandy that July. Quickly capturing Caen on July 26, Edward moved east towards the Seine. Alerted that King Philip VI was assembling a large army in Paris, Edward turned north and began moving along the coast. Pressing on, he crossed the Somme after winning the Battle of Blanchetaque on August 24. Tired from their endeavors, the English army encamped near the Forest of Crécy. Eager to defeat the English and angry that he had failed to trap them between the Seine and Somme, Philip raced towards Crécy with his men.Alerted to the approach of the French army, Edward deployed his men along a ridge between the villages of Crécy and Wadicourt. Dividing his army, Edward assigned command of the right division to his sixteen-year old son Edward, the Black Prince with assistance from the Earls of Oxford and Warwick, as well as Sir John Chandos. The left division was led by the Earl of Northampton, while Edward, commanding from a vantage point in a windmill, retained leadership of the reserve. These divisions were supported by large numbers of archers equipped with the English longbow.While waiting for the French to arrive, the English busied themselves by digging ditches and laying out caltrops in front of their position. Advancing north from Abbeyville, the lead elements of Philip's army arrived near the English lines around mid-day on August 26. Scouting the enemy position, they recommended to Philip that they encamp, rest, and wait for the entire army to arrive. While Philip agreed with this approach, he was overruled by his nobles who wished to attack the English without delay. Quickly forming for battle, the French did not wait for the bulk of their infantry or supply train to arrive.Advancing with Antonio Doria and Carlo Grimaldi's Genoese crossbowmen in the lead, the Frenchknights followed with lines led by the Duke D’Alencon, Duke of Lorraine, and Count of Blois, while Philip commanded the rearguard. Moving to the attack, the crossbowmen fired a series of volleys at the English. These proved ineffective as a brief thunderstorm before the battle had wet and slackened the crossbowstrings. The English archers on the other hand had simply untied their bowstrings during the storm.This coupled with the longbow's ability to fire every five seconds gave the English archers a dramatic advantage over the crossbowmen who could only get off one to two shots per minute. The Genoese position was worsened by the fact that in the rush to battle their pervises (shields to hide behind while

reloading) had not been brought forward. Coming under devastating fire from Edward's archers, the Genoese began withdrawing. Angered by the crossbowmen's retreat, the French knights fired insults at them and even cut several down.Charging forward, the French front lines fell into confusion as they collided with the retreating Genoese. As the two bodies of men tried to move past each other they came under fire from the English archers and five early cannon (some sources debate their presence). Continuing the attack, the French knights were forced to negotiate the slope of the ridge and the man-made obstacles. Cut down in large numbers by the archers, the felled knights and their horses blocked the advance of those to the rear. During this time, Edward received a message from his son requesting aid.Upon learning that the younger Edward was healthy, the king refused stating "“I am confident he will repel the enemy without my help," and "Let the boy win his spurs." As evening approached the English line held, repelling sixteen French charges. Each time, the English archers brought down the attacking knights. With darkness falling, a wounded Philip, recognizing he had been defeated, ordered a retreat and fell back to the castle at La Boyes.
Aftermath:
The Battle of Crécy was one of the greatest English victories of the Hundred Years' War and established the superiority of the longbow against mounted knights. In the fighting, Edward lost between 100-300 killed, while Philip suffered around 13,000-14,000 (some sources indicate it may have been as high as 30,000). Among the French losses were the heart of the nation's nobility including the Duke of Lorraine, Count of Blois, and the Count of Flanders, as well as John, King of Bohemia and the King of Majorca. In addition eight other counts and three archbishops were slain.
In the wake of the battle, the Black Prince paid tribute to the nearly blind King John of Bohemia, who had fought valiantly before being slain, by taking his shield and making it his own. Having "earned his spurs," the Black Prince became one of his father's best field commanders and won a stunning victory at Poitiers in 1356. Following the victory at Crécy, Edward continued north and laid siege to Calais. The city fell the next year and became a key English base for the remainder of the conflict.

Battle of Poitiers - Conflict: The Battle of Poitiers occurred during the Hundred Years' War (1137-1453).
Battle of Poitiers - Date: The Black Prince's victory took place on September 19, 1356.
Commanders & Armies:
England
Edward, Prince of Wales, a.k.a. The Black Prince Jean de Grailly, Captal de Buch approximately 6,000 men
France
King John II Duke de Orleans approximately 20,000 men
Battle of Poitiers - Background:
In August 1356, Edward, Prince of Wales, better known as the Black Prince, began a large scale raid into France from his base in Aquitaine. Moving north, he conducted a scorched earth campaign as he sought to ease pressure on English garrisons in northern and central France. Advancing to the Loire River at Tours, his raid was stopped by an inability to take to the city and its castle. Delaying, Edward soon had word that the French king, John II, had disengaged from operations against the Duke of Lancaster in Normandy and was marching south to destroy the English forces around Tours.
Battle of Poitiers - The Black Prince Makes a Stand:
Outnumbered, Edward began retreating back towards his base at Bordeaux. Marching hard, King John II's forces were able to overtake Edward on September 18 near Poitiers. Turning, Edward formed his army into three divisions, led by the Earl of Warwick, the Earl of Salisbury, and himself. Pushing Warwick and Salisbury forward, Edward placed his archers on the flanks and retained his division and an elite cavalry unit, under Jean de Grailly, as the reserve. To protect his position, Edward arrayed his men behind a low hedge, with marsh to left and his wagons (formed as a barricade) to the right.
Battle of Poitiers - The Longbow Prevails:
On September 19, King John II moved to attack Edward's forces. Forming his men into four "battles," led by Baron Clermont, Dauphin Charles, the Duke of Orleans, and himself, John ordered an advance. The first to move forward was Clermont's force of elite knights and mercenaries. Charging toward Edward's lines, Clermont's knights were cut down by a shower of English arrows. The next to attack were the Dauphin's men. Advancing forward, they were constantly harried by Edward's archers. As they neared, the English men-at-arms attacked, nearly encircling the French and forcing them to retreat.

As the Dauphin's broken forces retreated they collided with the Duke of Orleans' battle. In the resulting chaos, both divisions fell back on the king. Believing the fight to be over, Edward ordered his knights to mount to pursue the French and dispatched Jean de Grailly's force to attack the French right flank. As Edward's preparations were nearing completion, King John approached the English position with his battle. Moving out from behind the hedge, Edward attacked John's men. Firing into the French ranks, the archers expended their arrows and then picked up weapons to join the fight.Edward's assault was soon supported by de Grailly's force riding in from the right. This attack broke the French ranks, causing them to flee. As the French fell back, King John II was captured by English troops and turned over to Edward. With the battle won, Edward's men began tending to the wounded and pillaging the French camps.
Battle of Poitiers - Aftermath & Impact:
In his report to his father, King Edward III, Edward stated that his casualties were only 40 killed. While this number was probably higher, English casualties in the fighting were minimal. On the French side, King John II and his son Philip were captured as were 17 lords, 13 counts, and five viscounts. In addition, the French suffered approximately 2,500 dead and wounded, as well as 2,000 captured. As a result of the battle, England demanded an exorbitant ransom for the king, which France refused to pay. The battle also showed that superior English tactics could overcome greater French numbers.

Battle of Agincourt: Date & Conflict: The Battle of Agincourt was fought October 25, 1415, during theHundred Years' War (1337-1453).
Armies & Commanders
English
King Henry V approx. 6,000-8,500 men
French
Constable of France Charles d'Albret Marshal Boucicaut approx. 24,000-36,000 men
Battle of Agincourt: Background:
In 1414, King Henry V of England began discussions with his nobles regarding renewing the war with France to assert his claim on the French throne. He held this claim through his grandfather, Edward III who begun the Hundred Years' War in 1337. Initially reluctant, they encouraged the king to negotiate with the French. In doing so, Henry was willing to renounce his claim to the French throne in exchange for 1.6 million crowns (the outstanding ransom on French King John II - captured at Poitiers in 1356), as well as French recognition of English dominion over occupied lands in France.These included Touraine, Normandy, Anjou, Flanders, Brittany, and Aquitaine. To seal the deal, Henry was willing to marry the young daughter of the chronically insane King Charles VI, Princess Catherine, if he received a dowry of 2 million crowns. Negotiations quickly stalled on the latter issue as the French refused to offer such a large dowry. With talks deadlocked and feeling personally insulted by French actions, Henry successfully asked for war on April 19, 1415. Assembling an army, Henry crossed the Channel with around 10,500 men and landed near Harfleur on August 13/14.
Moving to Battle:
Quickly investing Harfleur, Henry hoped to take the city as a base before advancing east to Paris and then south to Bordeaux. Meeting a determined defense, the siege lasted longer than the English had initially hoped and Henry's army was beset by a variety of diseases such as dysentery. When the city finally fell on September 22, the majority of the campaigning season had passed. Assessing his situation, Henry elected to move northeast to his stronghold at Calais where the army could winter in safety. Leaving a garrison at Harfleur, his forces departed on October 8.Hoping to move quickly, the English army left their artillery and much of the baggage train as well as carried limited provisions. While the English were occupied at Harfleur, the French struggled to raise an army to oppose them. Gathering forces at Rouen, they were not ready by the time the city fell. Pursuing Henry, the French sought to blockade the English along the River Somme. These maneuvers proved somewhat successful as Henry was forced to turn southeast to seek an uncontested crossing. As a result, food became scarce in the English ranks.Finally crossing the river at Bellencourt and Voyenes on October 19, Henry pressed on towards Calais. The English advance was shadowed by the growing French army under the nominal command of

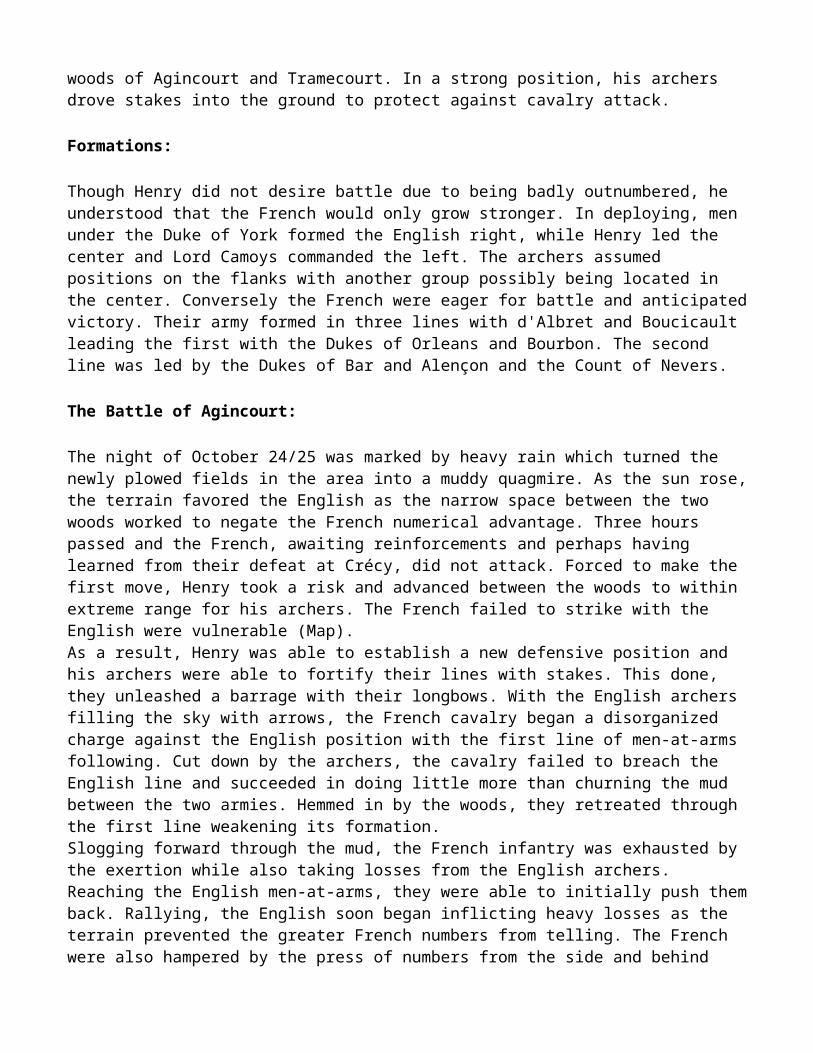
Constable Charles d'Albret and Marshal Boucicaut. On October 24, Henry's scouts reported that the French army had moved across their path and was blocking the road to Calais. Though his men were starving and suffering from disease, he halted and formed for battle along a ridge between the woods of Agincourt and Tramecourt. In a strong position, his archers drove stakes into the ground to protect against cavalry attack.
Formations:
Though Henry did not desire battle due to being badly outnumbered, he understood that the French would only grow stronger. In deploying, men under the Duke of York formed the English right, while Henry led the center and Lord Camoys commanded the left. The archers assumed positions on the flanks with another group possibly being located in the center. Conversely the French were eager for battle and anticipated victory. Their army formed in three lines with d'Albret and Boucicault leading the first with the Dukes of Orleans and Bourbon. The second line was led by the Dukes of Bar and Alençon and the Count of Nevers.
The Battle of Agincourt:
The night of October 24/25 was marked by heavy rain which turned the newly plowed fields in the area into a muddy quagmire. As the sun rose, the terrain favored the English as the narrow space between the two woods worked to negate the French numerical advantage. Three hours passed and the French, awaiting reinforcements and perhaps having learned from their defeat at Crécy, did not attack. Forced to make the first move, Henry took a risk and advanced between the woods to within extreme range for his archers. The French failed to strike with the English were vulnerable (Map).As a result, Henry was able to establish a new defensive position and his archers were able to fortify their lines with stakes. This done, they unleashed a barrage with their longbows. With the English archers filling the sky with arrows, the French cavalry began a disorganized charge against the English position with the first line of men-at-arms following. Cut down by the archers, the cavalry failed to breach the English line and succeeded in doing little more than churning the mud between the two armies. Hemmed in by the woods, they retreated through the first line weakening its formation.Slogging forward through the mud, the French infantry was exhausted by the exertion while also taking losses from the English archers. Reaching the English men-at-arms, they were able to initially push them back. Rallying, the English soon began inflicting heavy losses as the terrain prevented the greater French numbers from telling. The French were also hampered by the press of numbers from the side and behind which limited their ability to attack or defend effectively. As the English archers expended their arrows, they drew swords and other weapons and began attacking the French flanks. As a melee developed, the second French line joined the fray. As the battle raged, d'Albret was killed and sources indicate that Henry played an active role at the front.
Having defeated the first two French lines, Henry remained wary as the third line, led by the Counts of Dammartin and Fauconberg, remained a threat. The only French success during the fighting came when Ysembart d'Azincourt led a small force in a successful raid on the English baggage train. This, along with the menacing actions of the remaining French troops, led Henry to order the killing of the majority of his prisoners to prevent them from attacking should the battle resume. Though criticized by modern scholars, this action was accepted as necessary at the time. Assessing the massive losses already sustained, the remaining French troops departed the area.
Aftermath of Agincourt

Casualties for the Battle of Agincourt are not known with certainty, though many scholars estimate the French suffered 7,000-10,000 with another 1,500 nobles taken prisoner. English losses are generally accepted to be around 100 and perhaps as high as 500. Though he had won a stunning victory, Henry was unable to press home his advantage due to the weakened state of his army. Reaching Calais on October 29, Henry returned to England the following month where he was greeted as a hero. Though it would take several more years of campaigning to achieve his goals, the devastation wrought upon the French nobility at Agincourt made Henry's later efforts easier. In 1420, he was able to conclude the Treaty of Troyes which recognized him as the regent and heir to the French throne.
Siege of Orléans: Dates & Conflicts: The Siege of Orléans began October 12, 1428 and ended May 8, 1429, and took place during theHundred Years' War (1337-1453).
Armies & Commanders
English
Earl of Shrewsbury Earl of Salisbury Duke of Suffolk Sir John Fastolf approx. 5,000 men
French
Joan of Arc Jean de Dunois Gilles de Rais Jean de Brosse approx. 6,400-10,400 men
Siege of Orléans - Background:
In 1428, the English sought to assert Henry VI's claim to the French throne through the Treaty of Troyes. Already holding much of northern France with their Burgundian allies, 6,000 English soldiers landed at Calais under the leadership of the Earl of Salisbury. These were soon met by another 4,000 men drawn from Normandy by the Duke of Bedford. Advancing south, they succeeded in capturing Chartres and several other towns by late August. Occupying Janville, they next drove on the Loire Valley and took Meung on September 8. After moving downstream to take Beaugency, Salisbury dispatched troops to capture Jargeau.
Siege of Orleans - the Siege Begins:
Having isolated Orléans, Salisbury consolidated his forces, now numbering around 4,000 after leaving garrisons at his conquests, south of the city on October 12. While the city was located on the north side of the river, the English were initially confronted by defensive works on the south bank. These consisted of a barbican (fortified compound) and twin-towered gatehouse known as Les Tourelles. Directing their initial efforts against these two positions, they succeeded in driving out the French on October 23. Falling back across the nineteen-arch bridge, which they damaged, the French withdrew into the city.Occupying Les Tourelles and the nearby fortified convent of Les Augustins, the English began to dig in. The next day, Salisbury was mortally wounded when surveying French positions from Les Tourelles. He was replaced by the less aggressive Earl of Suffolk. With the weather changing, Suffolk pulled back from the city, leaving Sir William Glasdale and a small force to garrison Les Tourelles, and entered winter quarters. Concerned by this inactivity, Bedford dispatched the Earl of Shrewsbury and reinforcements to Orléans. Arriving in early December, Shrewsbury took command and moved troops back to the city.
Siege of Orleans - the Siege Tightens:

Shifting the bulk of his forces to the north bank, Shrewsbury built a large fortress around the Church of St. Laurent west of the city. Additional forts were built on the Ile de Charlemagne in the river and around the Church of St. Prive to the south. The English commander next constructed a series of three forts extending northeast and connected by a defensive ditch. Lacking sufficient men to fully surround the city, he established two forts east of Orléans, St. Loup and St. Jean le Blanc, with the goal of blocking supplies from entering the city. As the English line was porous, this was never fully achieved.
Siege of Orleans - Reinforcements for Orléans & the Burgundian Withdrawal:
When the siege began, Orléans possessed only a small garrison, but this was augmented by militia companies that were formed to man the city's thirty-four towers. As the English lines never fully cut off the city, reinforcements began to trickle in and Jean de Dunois assumed control of the defense. Though Shrewsbury's army was augmented by the arrival of 1,500 Burgundians during the winter, the English were soon outnumbered as the garrison swelled to around 7,000. In January, the French king, Charles VII assembled a relief force downstream at Blois.Led by the Count of Clermont, this army elected to attack an English supply train on February 12, 1429 and was routed at the Battle of the Herrings. Though the English siege was not tight, the situation in the city was becoming desperate as supplies were low. French fortunes began to change in February when Orléans applied to be put under the protection of the Duke of Burgundy. This caused a rift in the Anglo-Burgundian alliance, as Bedford, who was ruling as Henry's regent, refused this arrangement. Angered by Bedford's decision, the Burgundians withdrew from the siege further weakening the thin English lines.
Siege of Orleans - Joan Arrives:
As the intrigues with the Burgundians came to a head, Charles first met with the young Joan of Arc (Jeanne d'Arc) at his court in Chinon. Believing that she was following divine guidance, she asked Charles to allow her to lead relief forces to Orléans. Meeting with Joan on March 8, he sent her to Poitiers to be examined by clerics and Parliament. With their approval, she returned to Chinon in April where Charles agreed to let her lead a supply force to Orléans. Riding with the Duke of Alencon, her force moved along the south bank and crossed over at Chécy where she met with Dunois.While Dunois mounted a divisionary attack, the supplies were barged into the city. After spending the night in Chécy, Joan entered the city on April 29. Over the next few days, Joan assessed the situation while Dunois departed to Blois to bring up the main French army. This force arrived on May 4 and French units moved against the fort at St. Loup. Though intended as a diversion, the attack became a larger engagement and Joan rode out to join the fighting. Shrewsbury sought to relieve his beleaguered troops, but was blocked by Dunois and St. Loup was overrun.
Siege of Orleans - Orléans Relieved:
The next day, Shrewsbury began consolidating his position south of the Loire around the Les Tourelles complex and St. Jean le Blanc. On May 6, Jean sortied with a large force and crossed to the Ile-Aux-Toiles. Spotting this, the garrison at St. Jean le Blanc withdrew to Les Augustins. Pursuing the English, the French launched several assaults against the convent through the afternoon before finally taking it late in the day. Dunois succeeded in preventing Shrewsbury from sending aid by conducting raids against St. Laurent. His situation weakening, the English commander withdrew all of his forces from the south bank except for the garrison at Les Tourelles.

On the morning of May 7, Joan and the other French commanders, such as La Hire, Alencon, Dunois, and Ponton de Xaintrailles gathered east of Les Tourelles. Moving forward, they began assaulting the barbican around 8:00 AM. Fighting raged through the day with the French unable to penetrate the English defenses. In the course of the action, Joan was wounded in the shoulder and forced to leave the battle. With casualties mounting, Dunois debated calling off the attack, but was convinced by Joan to press on. After praying privately, Joan rejoined the fighting. The appearance of her banner advancing spurred on the French troops who finally broke into the barbican.
This action coincided with a fire barge burning the drawbridge between the barbican and Les Tourelles. English resistance in the barbican began to collapse and French militia from the city crossed the bridge and assaulted Les Tourelles from the north. By nightfall, the entire complex had been taken and Joan crossed the bridge to re-enter the city. Defeated on the south bank, the English formed their men for battle the next morning and emerged from their works northwest of the city. Assuming a formation similar to Crécy, they invited the French to attack. Though the French marched out, Joan counseled against an attack.
Aftermath
When it became apparent that the French would not attack, Shrewsbury began an orderly withdrawal toward Meung ending the siege. A key turning point in the Hundred Years' War, the Siege of Orléans brought Joan of Arc to prominence. Seeking to maintain their momentum, the French embarked on the successful Loire Campaign which saw Joan's forces drive the English from the region in a series of battles which culminated at Patay.

Conflict & Date: The Battle of Castillon was fought on July 17, 1453, during the Hundred Years' War.
Armies & Commanders:
English
John Talbot, Earl of Shrewsbury 6,000 men
French
Jean Bureau 7,000-10,000 men
Battle of Castillon Overview:
In 1451, with the tide of the Hundred Years' War favoring the French, King Charles VII marched south and succeeded in capturing Bordeaux. Long an English possession, the residents resented their new French overlords and soon were secretly dispatching agents to London asking for an army to liberate their territory. While the government in London was in turmoil as King Henry VI dealt with bouts of insanity and the Duke of York and Earl of Somerset vied for power, efforts were made to raise an army under the leadership of veteran commander John Talbot, Earl of Shrewsbury.On October 17, 1452, Shrewsbury landed near Bordeaux with 3,000 men. As promised, the city's populace expelled the French garrison and welcomed Shrewsbury's men. As the English liberated much of the area around the Bordeaux, Charles spent the winter raising a large army to invade the region. Though reinforced by his son, Lord Lisle, and a number of local troops, Shrewsbury possessed only around 6,000 men and was badly outnumbered by the approaching French. Advancing along three different routes, Charles' men soon spread out to attack numerous towns and villages in the area.At Castillon on the Dordogne River, around 7,000-10,000 men, under the artillery master Jean Bureau, constructed a fortified camp in preparation for besieging the town. Seeking to relieve Castillon and win a victory over this detached French force, Shrewsbury marched out of Bordeaux in early July. Arriving early on July 17, Shrewsbury succeeded in driving back a detachment of French archers. Alerted to the English approach, Bureau shifted 300 guns of various types from firing positions near the town to defend the camp. With his men stationed behind strong entrenchment, he awaited Shrewsbury's attack.As his army arrived on the field, a scout informed Shrewsbury that the French were fleeing the area and that a large cloud of dust could be seen in the direction Castillon. In actuality, this was caused by the departure of the French camp followers which had been instructed to leave by Bureau. Seeking to strike a decisive blow, Shrewsbury immediately ordered his men to form for battle and sent them forward without scouting the French position. Surging towards the French camp, the English were stunned to find the enemy's lines manned.Undeterred, Shrewsbury sent his men forward into a hail storm of arrows and artillery fire. Unable to personally take part in the fighting as he had been previously captured by the French and paroled, Shrewsbury charged across the battlefield pushing his men forward. Unable to break through Bureau's fortifications, the English were slaughtered en masse. With the assault faltering, French troops appeared on Shrewsbury's flank and began attacking. With the situation rapidly deteriorating, Shrewsbury's horse was hit by a cannonball. Falling, it broke the English commander's leg, pinning him to the ground.

Sallying out from their works a number of French soldiers overwhelmed Shrewsbury's guards and killed him. Elsewhere on the field, Lord Lisle also had been struck down. With both of their commanders dead, the English began falling back. Attempting to make a stand along the banks of the Dordogne, they were soon routed and forced to flee back to Bordeaux.
Aftermath:
The last major battle of the Hundred Years' War, Castillon cost the English around 4,000 killed, wounded, and captured as well as one of their most notable field commanders. For the French, losses were only around 100. Advancing to Bordeaux, Charles captured the city on October 19 after a three-month siege. With Henry's failing mental health and the resulting War of the Roses, England was no longer in a position to effectively pursue its claim to the French throne.

Middle Ages Warfare
Fortifications
Breakdowns in centralized states led to the rise of a number of groups that turned to large-scale pillage as a source of income. Most notably the Vikings, Arabs, Mongols and Magyars raided significantly. As these groups were generally small and needed to move quickly, building fortifications was a good way to provide refuge and protection for the people and the wealth in the region.
These fortifications evolved over the course of the Middle Ages, the most important form being the castle, a structure which has become synonymous with the Medieval era to many.
The castle served as a protected place for the local elites. Inside a castle they were protected from bands of raiders and could send mounted warriors to drive the raiders from the area, or to disrupt the efforts of larger armies to supply themselves in the region by gaining local superiority over foraging parties that would be impossible against the whole enemy host.
Fortifications provided safety to the lord, his family, his servants and his local vassals. They provided refuge from armies too large to face in open battle. Heavy cavalry which dominate an open battle was useless against fortifications.
Building siege engines was a time-consuming process, and could seldom be effectively done without preparations before the campaign. Sieges could take months, or even years, to weaken or demoralize the defenders sufficiently.

Medieval Siege Warfare
In the Medieval period besieging armies used a wide variety of siege engines including: scaling ladders; battering rams; siege towers and various types of catapults such as the mangonel, onager, ballista, and trebuchet. Siege techniques also included mining.
Advances in the prosecution of sieges encouraged the development of a variety of defensive counter-measures. In particular, medieval fortifications became progressively stronger — for example, the advent of the concentric castle from the period of the Crusades — and more dangerous to attackers as witnessed by the increasing use of machicolations and murder-holes, as well the preparation of hot or incendiary substances. Arrow slits, concealed doors for sallies, and deep water wells were also integral to resisting siege.
Designers of castles paid particular attention to defending entrances, protecting gates with drawbridges, portcullises and barbicans. Wet skins of freshly slaughtered animals were draped over gates, hourdes and other wooden structures to retard fire. Moats and other water defences, whether natural or augmented, were also vital to defenders.
In the European Middle Ages, virtually all large cities had city walls. Carcassonne and Dubrovnik in Dalmatia are well-preserved examples. The more important cities had citadels, forts or castles inside them, often built against the city walls. Great effort was expended to ensure a good water supply inside the city in case of siege. In some cases, long tunnels were constructed to carry water into the city. Complex systems of underground tunnels were used for storage and communications in medieval cities like Tábor in Bohemia.
Attackers would try to get over the walls using scaling ladders, siege towers called belfries, and grapples. Alternatively they could try to get through the doors using a battering ram, or through the walls using heavy artillery. They might try tunnelling under the walls to gain access, but more often they would try to undermine the walls to bring them down.
In a siege one army typically attacks an enemy within a stronghold. either a castle or a fortified town. Medieval towns were generally surrounded by defensive walls, just like castles. Indeed the distinction between castles and fortified towns is often blurred. Castles were often located within fortified towns - in fact many towns grew up around existing castles - so that the castle became a sort of citadel within the fortified town.
Attackers therefore often had two sets of obstacles - first the city walls, then the castle walls. This could lead to interesting complications as at Beaucaire in 1216. For months Simon de Montfort besieged Raymondet in the town, while Raymondet besieged a garrison loyal to de Montfort in the castle within the town.
Sometimes there were three sets of obstacles, because fauxburgs with their own defensive walls were often built on to the exterior of city walls, as at Carcassonneand Termes.
Besiegers had a number of techniques for gaining control of their objective - either by forcing a way in, or by forcing the besieged garrison out. Specific techniques - established since prehistoric times - include:
breaching the walls or doorways. Attackers would use weapons to get through walls. Examples are stone throwing machines petriers such as trebuchets and mangonels); machines to knock holes in walls such as battering rams; and engines to extract individual dressed stones one by one (cats, weasels and simple picks).

tunelling under the walls. Attackers would build mines, either to gain access to the interior or to undermine and collapse the defensive walls.
getting over the walls. Attackers would use scaling ladders and siege engines such as large mobile wooden towers known as belfries.
sitting and waiting. If communications between the besieged and the outside world could be cut then the defenders could be denied food supplies and sometimes water (as at Beaucaire, Carcassonne, Minerve, and Termes). This was not always possible (as for Raymondet at Beaucaire and at Montsegur). The word siege means "to sit", an indication that this was a standard technique.
A Fifth Column. Inducing someone on the inside to assist the attackers, either by bribery or exploiting divided loyalties. They could for example open a postern gate at night. Occasionally attackers could be smuggled in to the besieged fortification to fulfil this role, as for example in ancient times in the famous Trojan horse.
Diplomacy, threats, terror and psychological techniques. To help weaken the will of the defenders, attackers could make threats or promises, or terrorise the defenders - for example by mutilating or executing hostages, or by using throwing machines to lob fire, or human heads or other body parts, into the the fortification.
Biological Warfare. Medieval besiegers were known to project diseased animals into fortifications with the deliberate intention of spreading disease and so weakening the garisson. I some cases it was possible to poison water supplies, though most fortifications had their own wells or water cisterns.
Until the invention of gunpowder-based weapons (and the resulting higher-velocity projectiles), the balance of power and logistics definitely favoured the defender. With the invention of gunpowder, the traditional methods of defence became less and less effective against a determined siege, giving rise to a new form of defensive structure, the star-fort.
Working trebuchet at Château des Baux
The Siege of a Castle, Hartlet, Dorothy and Elliot, Margaret M.: “Life and Work of the People of
England: The Fourteenth Century” (1929)

Medieval Military Technology
Perhaps the most important technological advancement for medieval warfare in Europe was the invention of the stirrup, which had been unknown to the Romans. It most likely came to Europe with the Avars in the 600's AD, although it was not fully adopted by Europeans until the 900's AD.
In the Medieval period, the mounted cavalry long held sway on the battlefield. Heavily armoured, mounted knights represented a formidable foe for peasant draftees and lightly-armoured freemen. To defeat mounted cavalry, infantry used swarms of missiles or a tightly packed phalanx of men, techniques developed in Antiquity by the Greeks. Ancient generals of Asia used regiments of archers to fend off mounted threats. Alexander the Great combined both methods in his clashes with swarming Asiatic horseman, screening the central infantry core with slingers, archers and javelin men, before unleashing his cavalry to see off attackers.
The use of long pikes and densely-packed foot troops was not uncommon in Medieval times. Flemish footmen at the Battle of the Golden Spurs met and overcame French knights in 1302, and the Scots held their own against heavily-armoured English invaders.
During the St. Louis' crusade, dismounted French knights formed a tight lance-and-shield phalanx to repel Egyptian cavalry. The Swiss used pike tactics in the late medieval period. While pikemen usually grouped together and awaited a mounted attack, the Swiss developed flexible formations and aggressive manoeuvring, forcing their opponents to respond. The Swiss won at Morgarten, Laupen, Sempach, Grandson and Murten, and between 1450 and 1550 every leading prince in Europe hired Swiss pikemen, or emulated their tactics and weapons.
Welsh & English longbowman used a single-piece longbow to deliver arrows that could penetrate contemporary plate armour and mail. The longbow was a difficult weapon to master, requiring years of use and constant practice. A skilled longbowman could shoot about 12 shots per minute. This rate of fire was far superior to competing weapons like the crossbow or early gunpowder weapons. The nearest competitor to the longbow was the much more expensive crossbow, used often by urban militias and mercenary forces. The crossbow had greater range and penetrating power, and did not require the extended years of training.
At Crécy and Agincourt bowmen unleashed clouds of arrows into the ranks of knights. At Crécy, even 15,000 Genoese' crossbowmen could not dislodge them from their hill. At Agincourt, thousands of French knights were brought down by armour-piercing bodkin point arrows and horse-maiming broadheads. The Welsh longbowmen decimated an entire generation of the French nobility.
Since the longbow was difficult to deploy in a thrusting mobile offensive, it was best used in a defensive configuration. Bowmen were extended in thin lines and protected and screened by pits (as at the Battle of Bannockburn), staves or trenches. The terrain was usually chosen to put the archers at an advantage forcing their opponents into a bottleneck (Agincourt) or a hard climb under fire (Crécy). Sometimes bowmen were deployed in a shallow "W", enabling them to trap and enfilade their foes.
The pike and the longbow put an end to the dominance of cavalry in European warfare, making the use of foot soldiers more important than they had been in recent years. Knights began themselves to rather fight dismounted, using two-handed swords, poleaxes and other polearms, as the improved knightly plate armour made them fairly immune to arrows.
Gunpowder eventually was to provoke even more significant changes. However, a mounted reserve was often kept, and the heavy cavalry continued to be an important battlefield arm of European armies until the nineteenth century, when new and more accurate weapons made the mounted soldier too easy a target.

In the armies of Europe, mounted and unmounted crossbowmen, often mixed with javeliners and archers, occupied a central position in battle formations. Usually they engaged the enemy in offensive skirmishes before an assault of mounted knights. Crossbowmen were also valuable in counterattacks to protect their infantry. The rank of commanding officer of the crossbowmen corps was one of the highest positions in any army of this time. Along with polearm weapons made from farming equipment, the crossbow was also a weapon of choice for insurgent peasants such as the Taborites.
Mounted knights armed with lances proved ineffective against formations of pikemen combined with crossbowmen whose weapons could penetrate most knights' armor. The invention of pushlever and ratchet drawing mechanisms enabled the use of crossbows on horseback, leading to the development of new cavalry tactics. Knights and mercenaries deployed in triangular formations, with the most heavily armoured knights at the front. Some of these riders would carry small, powerful all-metal crossbows of their own. Crossbows were eventually replaced in warfare by more powerful gunpowder weapons, although early guns had slower rates of fire and much worse accuracy than contemporary crossbows. Later, similar competing tactics would feature arquebusiers or musketeers in formation with pikemen, pitted against cavalry firing pistols or carbines.
Cannons were introduced to the battlefield in the later medieval period. However, their very poor rate of fire (which often meant that only one shot was fired in the course of an entire battle) and their inaccuracy made them more of a psychological force multiplier than an effective anti-personnel weapon.
Later on in medieval warfare, one handed cannons were introduced, the rate of fire improved only slightly, but the cannons became far easier to aim, largely because they were smaller and much closer to their wielder. Users could be easily protected, because the cannons were lighter and could be moved far more quickly. Real field artillery did not become truly effective or commonly employed until well into the early modern period. The introduction of the arquebus is reflected in contemporary castle architecture - traditional arrow slits were replaced by (or adapted into gun ports).
Longbow Men