Embed Size (px)
Citation preview

Manual Apoio Ao
Extencionista
Lesson Plans
Table of Contents
Lesson 1- Intro to MIGC..............................................................................................6Lesson 2- Importance of Soil and Water Conservation.............................................14Lesson 3: Maize........................................................................................................23Lesson 4: Arroz.........................................................................................................41Lesson 5: Sesame.....................................................................................................55Lesson 6: Groundnuts...............................................................................................65Lesson 7: Legumes...................................................................................................75Lesson 8: Cashew Trees...........................................................................................86Lesson 9: Moringa Trees...........................................................................................96Lesson 10: Neem Trees..........................................................................................107
Lessons, stories and activities in the Manual Apoio Ao Extenciosta Lesson Plan complement the information provided in Manual Apoio Ao Extenciosta Farmer Leader Flipchart.
Understanding the Lesson PlanEach lesson begins with objectives. These are the behavior, knowledge and belief objectives that are covered in the lesson. Make sure that each of these objectives is reinforced during the lesson. Each objective is described below.
Our main goal is for farmers to practice new agriculture practices that promote healthy nutrition for their families. For this reason, most objectives are behavioral objectives written as action statements. These are the practices that we expect the farmers to follow based on the key messages in the flipchart.
A few objectives are knowledge objectives. We want farmers to know the value of soil and water conservation, as well as the benefits of these crops for themselves and their families. These are things that the farmer leaders must memorize during the lesson, using the pictures as a reminder. Farmer beneficiaries should be able to learn and apply knowledge objectives.
Each lesson contains one belief objective. We know that beliefs and attitudes affect our practices. Many times it is a person’s inaccurate belief or worldview that hinders them from making a behavior change. In this module we are reinforcing the belief that we have a responsibility to be good stewards of the earth. We have been given a unique responsibility and the necessary gifts to exercise dominion and stewardship over creation.
Under the objectives, all of the materials needed for the lesson are listed. The facilitator should make sure to bring all of these materials to the lesson.
2

The first section is the attendance and troubleshooting section. All farmer leaders will take attendance. The troubleshooting questions only apply to facilitators training others (farmer leaders). The facilitator follows up with any difficulties that the farmer leaders had teaching the previous lessons.
Each lesson begins by asking the participant about their current practices related to the teaching content. These questions help the facilitator to find out the farmers current practices, beliefs and attitudes about the new agricultural practices. This section is marked by the A (ask) in the ASPIRE method. This section is meant for discussion, not for teaching. Be sure to let everyone voice their opinions.
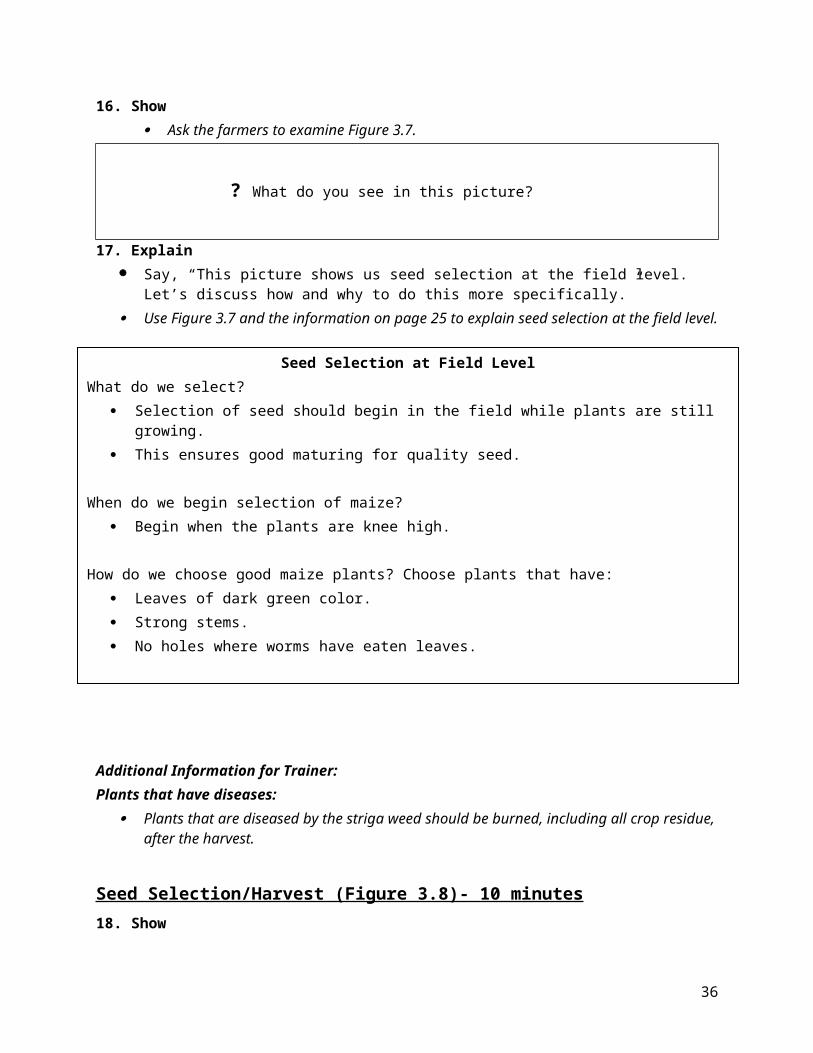
All picture pages are labeled with the S (Show) - in ASPIRE. After pictures are shown to the participants, the facilitator asks “What do you see in this picture?” Let the participants respond and describe what they think the flipchart pictures are telling them.
Next, explain the key messages written on the back of the flipchart. Be sure to explain each picture using the additional bullets printed on the back of the flipchart (or in the lesson plan). The lesson plan also contains additional information for the trainer. The additional information does not need to be discussed during the lesson unless it directly relates to questions by the participants.
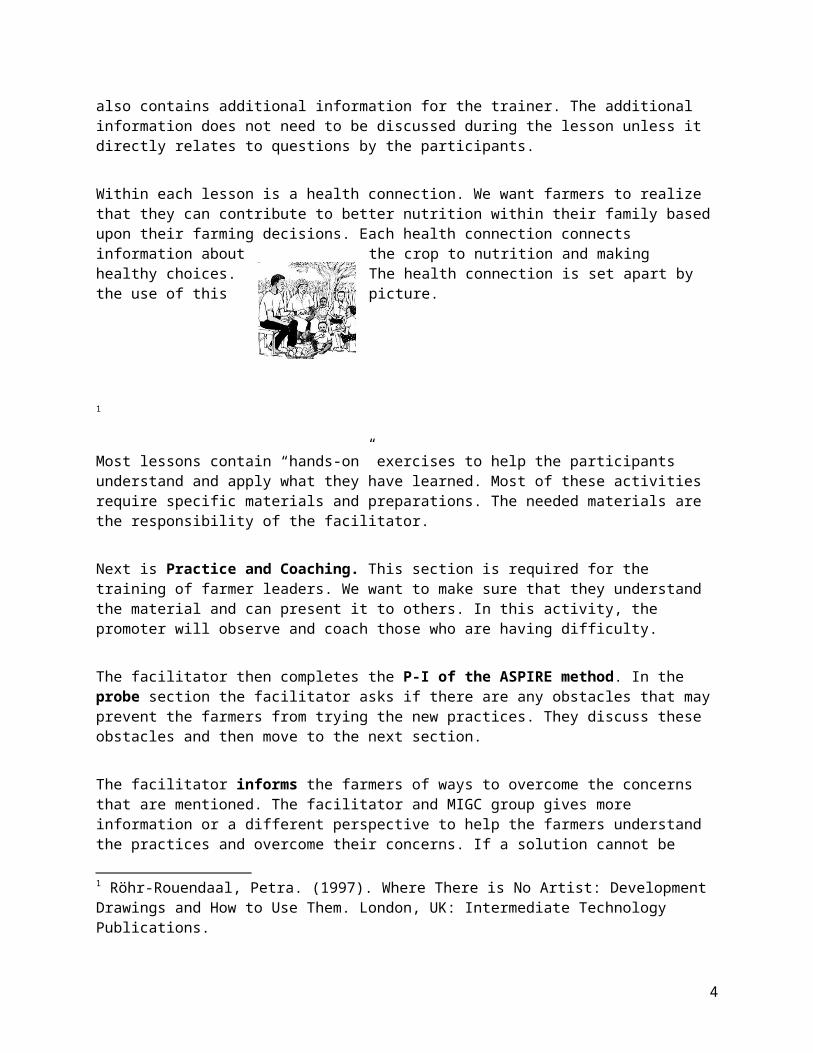
Within each lesson is a health connection. We want farmers to realize that they can contribute to better nutrition within their family based upon their farming decisions. Each health connection connects information about the crop to nutrition and making healthy choices. The health connection is set apart by the use of this picture.
1
Most lessons contain “hands-on” exercises to help the participants understand and apply what they have learned. Most of these activities require specific materials and preparations. The needed materials are the responsibility of the facilitator.
Next is Practice and Coaching. This section is required for the training of farmer leaders. We want to make sure that they understand the material and can present it to others. In this activity, the promoter will observe and coach those who are having difficulty.
1 Röhr-Rouendaal, Petra. (1997). Where There is No Artist: Development Drawings and How to Use Them. London, UK: Intermediate Technology Publications.
3
The facilitator then completes the P-I of the ASPIRE method. In the probe section the facilitator asks if there are any obstacles that may prevent the farmers from trying the new practices. They discuss these obstacles and then move to the next section.
The facilitator informs the farmers of ways to overcome the concerns that are mentioned. The facilitator and MIGC group gives more information or a different perspective to help the farmers understand the practices and overcome their concerns. If a solution cannot be reached, the facilitator must inform the group that they will use other resources (the PSO or supervisors) to find out further information.
Finally, the facilitator completes the R and E of the ASPIRE method.
R stands for Request. E stands for Examine. In this module, these two sections are under the title, “Discussing Commitments in Small Groups.” Small groups of five farmers form an accountability group. At the end of each lesson, the facilitator requests that each farmer makes a commitment to begin practicing one of the new agricultural practices discussed in the lesson. Each farmer makes his own commitment, based on his own experience and desires. Each farmer will make his or her verbal commitment to the others in their accountability group. The farmers are not forced to make a commitment. If a farmer is not convinced by the teaching, he may choose not to make a commitment.
After each farmer makes a commitment, the accountability group will examine the former commitments made by each farmer. Each farmer reports on his or her commitment from the previous lesson. Were they able to keep their commitment? Have they been practicing behaviors they learned in the last lesson? The accountability group offers support and encouragement to help each farmer maintain their commitments.
All lessons follow the pattern described above. Lessons can be adapted as needed to fit the needs of your care group. Lessons are approximately two hours in length. However, some lessons may take longer than others.
Lesson 1- Intro to MIGC
Objectives:1. The farmers will identify the benefits and reasons for a MIGC- learn
from each other, share ideas, increase crop productivity, and provide better nutrition for their family.
4
2. The farmers will be able to share their personal expectations for MIGC.
3. The farmers will be able to commit to the expectations the farmer leader has for the MIGC.
a. The farmer will attend all sessions for the entire 2 hours.b. The farmers will contribute to discussions and make sure all ideas
are understood. If an idea or concept is not understood, farmers will ask questions to clarify understanding.
Approximate Length of Session: 105 minutes
Materials: Attendance Registers Flipchart Two pieces of rope- one complete, one divided into strands
Lesson 1 Summary: Attendance Show pictures and share key messages on flipchart pages 3-6:
o Intro to MIGCo Overview of Topicso Activity- Expectations
Practice and Coaching in small groups Probe about possible barriers Inform about possible solutions to barriers Request a commitment
1. Attendance – 5 minutes1. Fill out the attendance form for all those who are present.2. Thank each farmer leader for their work and encourage them to continue.
The MIGCs- (Figure 1.1) - 15 minutes
2. ASK Read the questions on page 3 of the flipchart.
? What would you like to learn from this group?
? Why is it important to learn from each other?
? What are some things that we can learn from each other?
5
Ask the first question to find out about the expectations of the farmers in your group.
Ask the second question to find out about the attitudes of the community towards group learning.
Encourage discussion. Don’t correct ‘wrong answers.’ Let everyone give an opinion.
After the participants answer the last question, move to the information about MIGCs on the flipchart page by saying, “Let’s review some of the key aspects of the MIGCs.”
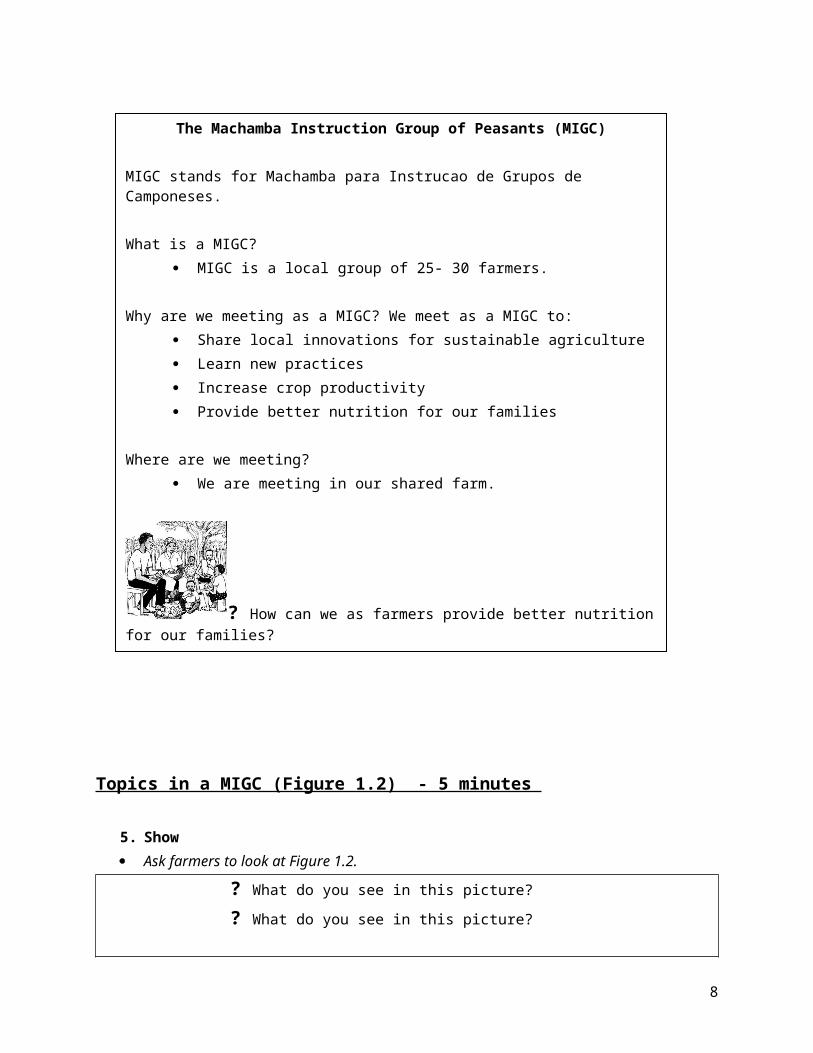
3. Show Ask the farmers to describe what they see on page 4, Figure 1.1
? What do you see in this picture?
4. Explain Share the key messages using flipchart page 3.
6

Topics in a MIGC (Figure 1.2) - 5 minutes
5. Show Ask farmers to look at Figure 1.2.
? What do you see in this picture?? What do you see in this picture?
? What are some of the crops we have grown in previous years?
? What crops should we study as a group?
6. Explain
The Machamba Instruction Group of Peasants (MIGC)
MIGC stands for Machamba para Instrucao de Grupos de Camponeses.
What is a MIGC? MIGC is a local group of 25- 30 farmers.
Why are we meeting as a MIGC? We meet as a MIGC to: Share local innovations for sustainable agriculture Learn new practices Increase crop productivity Provide better nutrition for our families
Where are we meeting? We are meeting in our shared farm.
? How can we as farmers provide better nutrition for our families? Farmers choose which foods to grow each season. Farmers choose which foods to sell and which foods to bring home. A farmer can improve their family’s health by growing a variety of foods
and bringing produce home to feed their families.
7
Share the information on page 5.
7. Activity- Expectations- 25 minutes2. Text in normal font tells you what to say. Text in italics tells you what to
do.1. Say, “Each of us came today with certain expectations. Let’s discuss these expectations.”2. Discuss the term expectations.
? Who can give us an explanation of the term expectation?
Make sure everyone in the group understands. Expectation is an idea of something that is going to happen.
? What are the expectations you have for being a part of this MIGC?
3. Have farmers get with a partner and take 5 minutes to share with each other about their expectations for the MIGC.
For example, “I expect to better understand the importance of soil and water conservation and how it will improve my crop production.”
“I expect to understand the nutritional importance of inter-cropping.”
“I expect to better understand when to weed my garden and what to do with the weeds.”
“I expect to be challenged to practice better measurement techniques when planting my seed.”
Topics in a MIGC
These are some of the crops that we have planted before and we are going to study this year:
Maize, Arroz, Sesame, Peanuts, Legumes, Cashews, Moringa, Neem.
Each lesson will discuss:Land Preparation, Seeds, Planting, Weeding, Caring for the Garden, Harvesting,
Soil and Water Conservation.
At the end of our growing season we will discuss:Crop Storage and Soil and Water Conservation Techniques.
8
4. After 5 minutes, bring the group back together. Ask for some contributions of ideas they discussed. At the end of the discussion, ask the group if these are reasonable expectations, can these expectations be met? How? Discuss.5. Say, “Now that we have discussed your expectations with the group, I also have expectations for you and for me. I would like to share these expectations with you.”6. Explain expectations of the group members and the leader
How often we will meet- We will meet as a MIGC two times a month during the preparation months, October through December, and once a month, January through May.
Attendance- We will take attendance each session. Please be present.
Length of the lesson- Each lesson will last about 2 hours. What will be done during meetings- Each meeting will include
a discussion and study of the flipchart with an activity usually done in the farm plot that emphasises the material that has been taught.
Preparation- I, as the leader, will be prepared and knowledgeable with the information being presented. That is my commitment to you.
? Are there any questions about my expectations for the MIGC?
7. Show the group the two pieces of rope- one has been broken apart into different strands (show one strand) and the other is complete.
? What are the similarities and differences between these pieces of rope? Discuss.
? Which rope is stronger? Why? Say, “Let’s test your theory.”
8. Ask for two volunteers to come up and hold the rope that is only one strand between them. Ask them to pull on the rope. It may or may not snap, but ask the volunteers how strong they felt the rope to be.
9. Now, using the same volunteers, give them the regular rope. Have the volunteers hold the rope between them. Ask them to pull on the rope. This rope should not break.
? Which rope was stronger? Why?
9
10.Say, “A rope is made up of many different strands and because of this, it is strong. One strand by itself can easily break. Our group is like this rope. We are coming together to work and learn and improve our farming practices. All of us will come away stronger because of this group. A farmer by himself/herself can be slower to adapt better farming techniques that would allow for greater crop productivity because they do not have the help of other farmers. Let’s be like a rope by working together and committing to learning and working as a team during this farming season.”
? Are there any questions?
Practice and Coaching – 30 minutes
For training of farmer leaders only:1. Ask participants to get in groups of 3. Each participant will use one page of
the flipchart to teach to the other people in their group. The participants should repeat the lesson exactly as they heard it presented earlier.
2. The people listening should ask questions as if they heard the material for the first time.
3. After the participant finishes presenting a page, the listeners should give feedback to the presenter- What did the presenter do well? What could they improve on in presenting the material? Have each listener give feedback to the presenter.
4. Switch roles until each participant has presented at least one page and had feedback given to them.
5. During this time the facilitator should visit all of the groups. He or she should listen to each group and correct or help those who have forgotten the message on that page.
6. When everyone is finished, answer any questions that the participants had on the material.
Probe-5 minutes
? What do you think about these ideas for a MIGC? Do you have questions or concerns about working with this group and being involved in the MIGC?
Ask the farmers to talk with the person sitting next to them for five minutes total. They should share any questions about the guidelines for the MIGC that they have and share any concerns about working as a team. After five minutes, ask the farmers to share their concerns and questions with the group.
10
Inform- 15 minutes
See if other people in the group can address or answer these points of concern or questions. If not, offer some advise or admit that you are not sure and will look into an answer. Make sure to bring these points up with a PSO or Supervisor.
Discussing Commitments in Small Groups- 5 minutes
Split the participants into groups of 5. It might be best to put farmers who live near each other in groups together- or ask farmers to form their own groups. These groups will serve as accountability groups for the farmers. Explain:
In order for us to try new practices, we need to encourage one another. At the end of each meeting, you will meet with this small group and do two things:
1. Make a verbal commitment of something new you will do in the next two weeks based on this lesson. Each farmer makes his own verbal commitment in front of the others. He can choose the practice that is most relevant to him or her.
For examples, a farmer may say, “ I will commit to learn new practices to improve my family’s nutrition.”
Another farmer may say, “I will commit to coming to each session on our group farm.”
2. This is the conclusion of the meeting. Usually, after each farmer in the small group makes a commitment, each farmer will then give a report on his commitment from the last meeting. This will be done in the following lessons.
Ask a volunteer to repeat what each group should do. When everyone understands, let the groups work together for the remaining time.
The facilitator will walk around and visit each group, helping farmers to make commitments and helping the group to follow-up on previous commitments made by the facilitator.
11

12
Lesson 2- Importance of Soil and Water Conservation
Objectives:1. The farmers will be able to identify the needs of a plant- water, air, light, space and soil.2. The farmers will describe soil and water conservation as using techniques
that improve crop production while at the same time protecting and developing the land resources on which the crops rely.
3. The farmers will understand and believe in the importance of soil and water conservation.
4. The farmers will implement at least one of the following water and soil conservation methods in the next six months: inter-cropping, water basins, hedgerows, or mulching.
Approximate length of lesson- 130 minutes
Materials: Attendance Registers Flipchart Activity materials
o Hoes (at least one per two people)
Lesson 2 Summary: Attendance and Troubleshooting Show pictures and share key messages on flipchart pages 7-12:
o Needs of a Planto What is Soil and Water Conservationo Why is Soil and Water Conservation Importanto Activity- Preparing a farm plot
Practice and Coaching in small groups Probe about possible barriers Inform about possible solutions to barriers Request a commitment Examine practices related to the last lesson
1. Attendance and Troubleshooting– 5 minutes1. Fill out the attendance form for all those who are present.

Troubleshooting: Only for the PSOs meeting with other farmer leaders:2. Collect attendance information from the farmer leaders for the previous lessons.
3. Ask farmer leaders about problems that they had at their last meeting.4. Help farmer leaders find solutions to the problems that they mention.5. Thank each farmer leader for their work and encourage them to continue.
Plant Needs (Figure 2.1)- 15 minutes
2. ASK
? What do you see in this picture?? Has your land changed at all over the years?
? Has the weather changed?
? Has the soil changed?
? What has remained the same and what is different?
Allow for discussion. This will be helpful in gaining insight into the farmers understanding of erosion and environmental change. It will also help in finding out a communities specific needs concerning soil and water conservation.
The leader should listen for current practices that are good (practices that protect soil and water), as well as harmful practices (practices that harm the land).
Encourage discussion. Do not correct ‘harmful practices’ mentioned by the farmers. This is a time for listening and letting farmers discuss, not for teaching. Incorrect practices will be corrected on the flipchart pages that follow.
3. SHOW Say, “At our last meeting we discussed the MIGC and our expectations
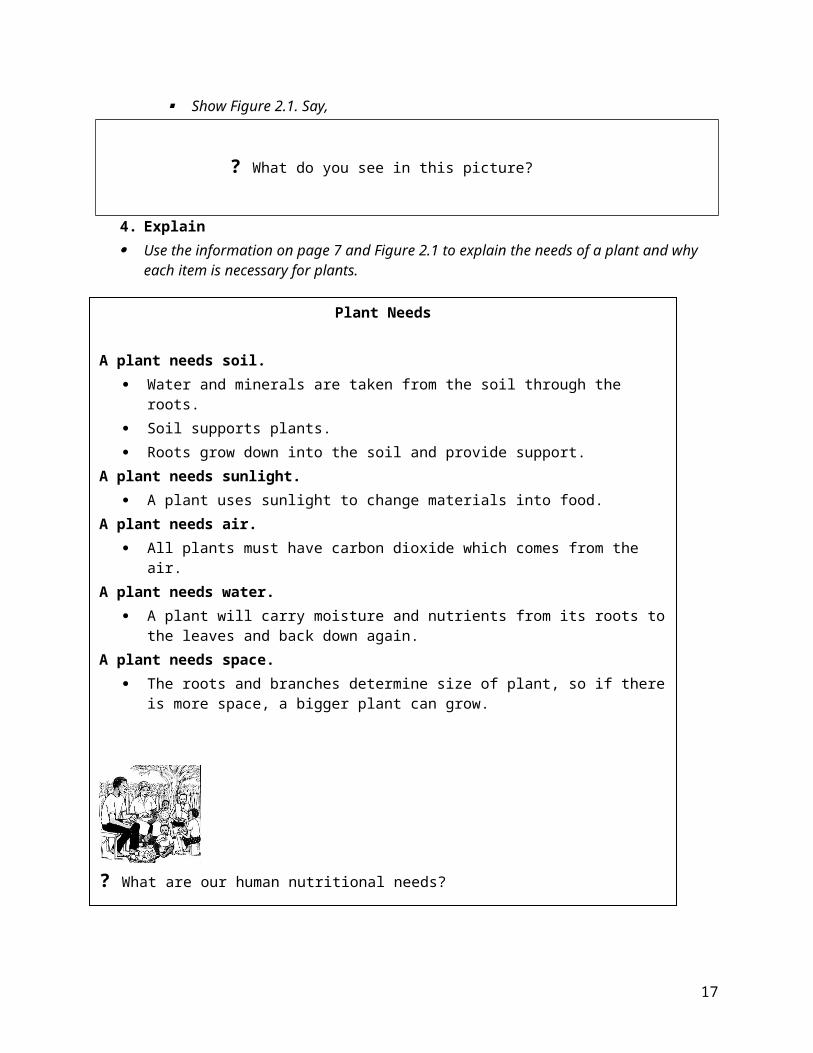
for the group. Today we are going to discuss soil and water.” Show Figure 2.1. Say,
? What do you see in this picture?
4. Explain Use the information on page 7 and Figure 2.1 to explain the needs of a plant
and why each item is necessary for plants.
14
Additional Information for Trainer:Carbon Dioxide: Carbon Dioxide is a gas found in the air that a plant uses to create sugar or
food.Minerals: Minerals are needed in soil and in our bodies. Minerals for the soil produce healthy plants. These minerals are calcium,
magnesium, potassium, and sodium. Minerals help a person’s body grow strong and healthy.
Plant Needs
A plant needs soil. Water and minerals are taken from the soil through the roots. Soil supports plants. Roots grow down into the soil and provide support.
A plant needs sunlight. A plant uses sunlight to change materials into food.
A plant needs air. All plants must have carbon dioxide which comes from the air.
A plant needs water. A plant will carry moisture and nutrients from its roots to the leaves and back
down again.A plant needs space.
The roots and branches determine size of plant, so if there is more space, a bigger plant can grow.
? What are our human nutritional needs? Plants have needs and so do we. Humans need water and a variety of minerals and nutrients, just like plants. Eating a diet that includes a variety of foods (greens and protein) provides us
with the nutrients we need to grow strong and healthy.
15
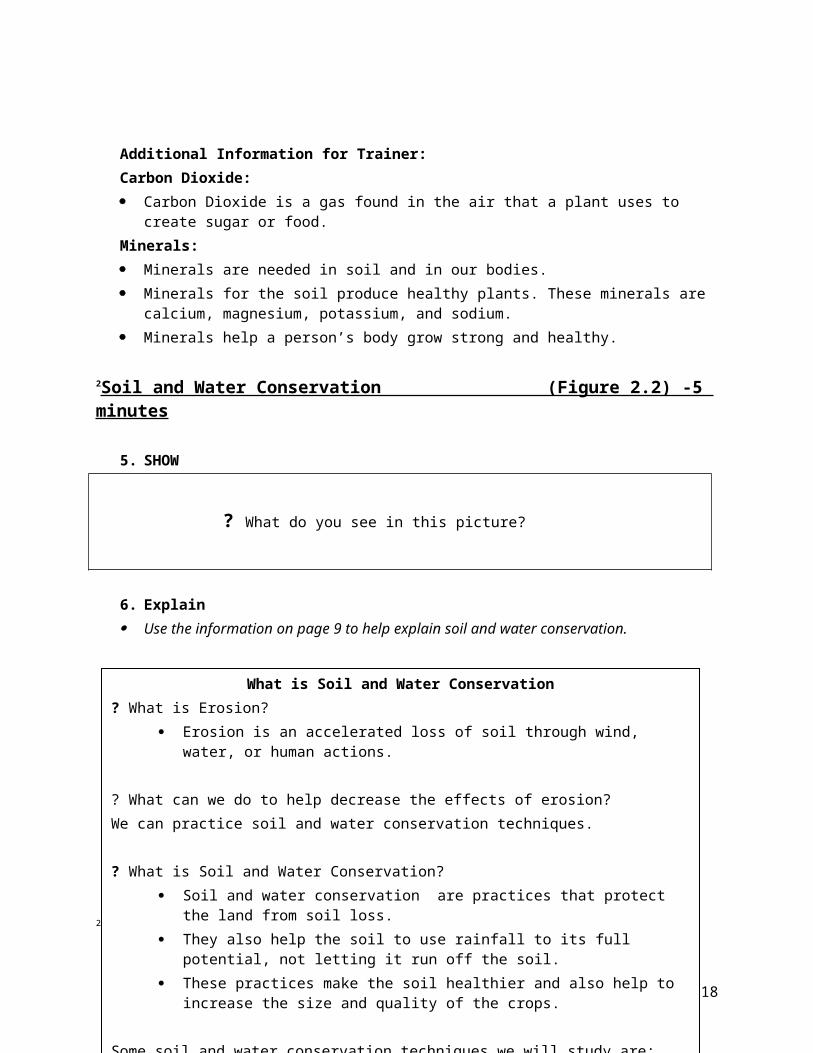
2Soil and Water Conservation (Figure 2.2) -5 minutes
5. SHOW
? What do you see in this picture?
6. Explain Use the information on page 9 to help explain soil and water conservation.
Additional Information for Trainer: 3
Erosion- Soil is able to reproduce and create more of itself. There is a natural loss of soil, and without erosion, it replaces itself over time.
2 http://www.dnr.state.md.us/forests/education/needs.html
3 Dumanski, J., R. Peiretti, J. Benetis, D. McGarry, and C. Pieri. 2006. The paradigm of conservation tillage. Proc. World Assoc. Soil and Water Conserv., P1: 58-64.
What is Soil and Water Conservation? What is Erosion?
Erosion is an accelerated loss of soil through wind, water, or human actions.
? What can we do to help decrease the effects of erosion?We can practice soil and water conservation techniques.
? What is Soil and Water Conservation? Soil and water conservation are practices that protect the land from soil loss. They also help the soil to use rainfall to its full potential, not letting it run off the
soil. These practices make the soil healthier and also help to increase the size and
quality of the crops.
Some soil and water conservation techniques we will study are: The use of creeping legumes or mulch to cover soil so it doesn’t wash away. Adding back nutrients to the soil by using compost or mulch, or plowing plant
residues under the earth.
? What other practices save water and soil loss?
16
Erosion does not allow for soil to reproduce the amount that was loss. The top 20 cm of soil is the most active soil, but also the most vulnerable
towards erosion. This layer of soil needs to be protected and replenished.
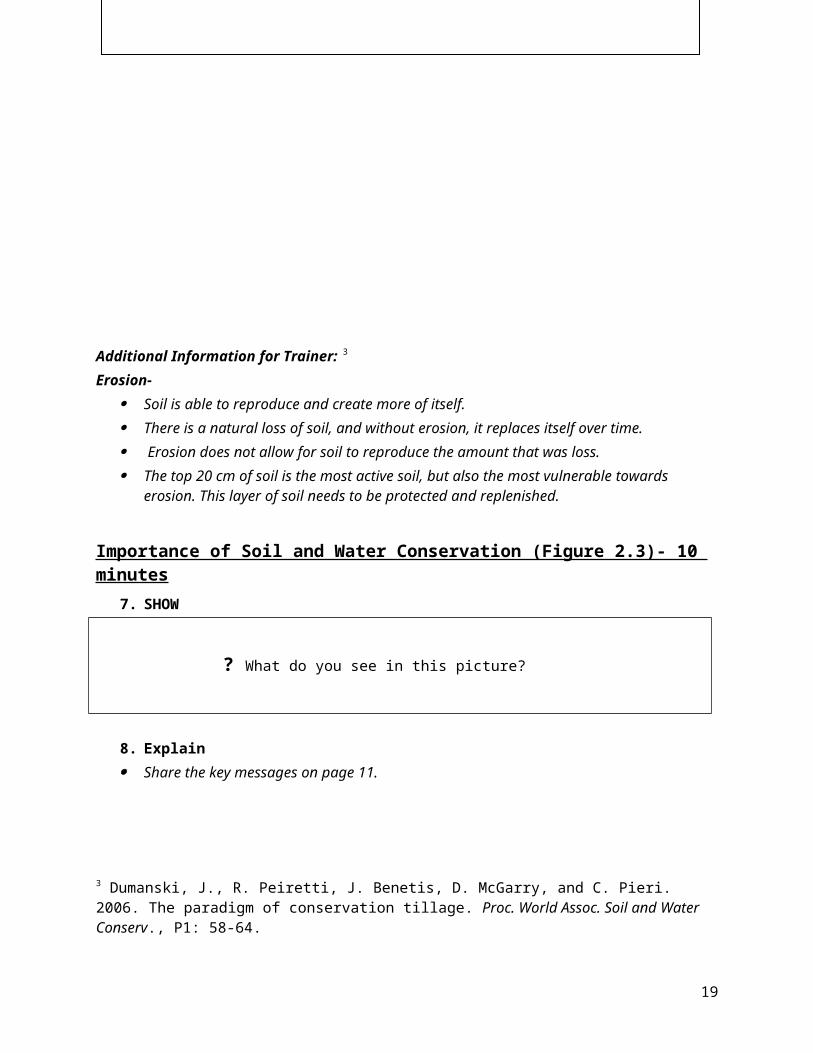
Importance of Soil and Water Conservation (Figure 2.3)- 10 minutes
7. SHOW
? What do you see in this picture?
8. Explain Share the key messages on page 11.
4
Additional Information for Trainer:4 Duveskog, D. Soil and Water Conservation with a Focus on Water Harvesting and Soil Moisture Retention. 2003.
Importance of Soil and Water Conservation
Why do we need soil and water conservation techniques? Earth is changing Resources (land and water) are valuable Need to protect and develop the resources we have Make better use of limited resources (like rainfall) Crop production can increase Cheap and simple options for increasing soil productivity
? How does practicing soil and water conservation techniques show that we are caring for the earth?
We care for the earth by not wasting the resources it has given us. We use the rain that has fallen in the best possible way for our gardens and our
homes. We work to increase soil productivity so that it is healthy and our crops are
healthy.
? What do you think about the importance of soil and water conservation?
? Do you think erosion is an issue in your community?
? Will your farm plots improve by practicing soil and water conservation techniques?
17
Drought- Drought is a natural disaster which affects those farms that are reliant on rain
as their main source of water. The majority of farmers in Sub-Sahara Africa rely on the rain, which can lead
to food shortages if the rains are not sufficient. By using the limited rainfall in direct and concentrated efforts, the soil water
content can be increased and therefore a successful crop season can be possible.
Soil and Water Conservation- Specific soil and water conservation techniques will be studied in each crop
lesson.
Activity- Preparing a farm plot – 30 minutes
1. Say, “Now we know about our group and the importance of caring for the soil and water, we need to prepare our farm plot as at our next lesson, we will begin to study the different crops.”
2. Move to the den farm plot with the group.3. As it is the beginning of the season, review the demarcations of the farm plot
and determine if it is sufficient or needs to be made larger.
? What do you think needs to be done to prepare the farm?
4. Make sure there is a discussion of caring for the resources we have- protecting the soil and water.
5. Say, “One of the techniques we will study this season is called mulching. It requires the collection of grass and plants. As we clear the field, let’s begin collecting these things in this area.” Choose a designated area.
6. Divide the field into sections for partners to work at clearing and preparing the field. Each partner should have a hoe and the other person can clear with their hands (stones or small weeds).
7. Clear the field.8. Specific land preparation will be studied for each crop and applied to the farm
plot as needed.9. Make sure the farmers are grateful for the resources they have been given!
Practice and Coaching – 30 minutes
For training of farmer leaders only:
18
1. Ask participants to get in groups of 3. Each participant will use one page of the flipchart to teach the others in their group. The participants should repeat the lesson exactly as they heard it presented earlier.
2. The people listening should ask questions as if they heard the material for the first time.
3. After the participant finishes presenting a page, the listeners should give feedback to the presenter- What did the presenter do well? What could they improve on in presenting the material? Have each listener give feedback to the presenter.
4. Switch roles until each participant has presented at least one page and had feedback given to them.
5. During this time the facilitator should visit all of the groups. He or she should listen to each group and correct or help those who have forgotten the message on that page.
6. When everyone is finished, answer any questions that the participants had on the material.
Probe-5 minutes
? What are your questions and concerns about soil and water conservation?
Ask the farmers to talk with the person sitting next to them for five minutes total. They should share any questions about erosion and soil and water conservation. After five minutes, ask the farmers to share their concerns and questions with the group.
Inform- 15 minutes
See if other people in the group can address or answer these points of concern or questions. Together, try to find a solution to their concerns and questions. If possible, offer some advise or admit that you are not sure and will look into an answer. Make sure to bring these points up with a PSO or Supervisor.
Discussing Commitments in Small Groups- 15 minutes
Divide into farmer accountability groups. Have farmers make a verbal commitment of something new that they will try
in the next two weeks based on the lesson.o For example, “I will commit to implement one of the soil and water
conservation techniques like inter-cropping, water basins, hedgerows, or mulching.”
o Or, “I will commit to using the resources I have been given to the best of my ability.”
Have each farmer give a report on his/her previous commitment from the last meeting.
19
Farmers should encourage those who are struggling to keep their commitment and suggest they try again.
Facilitator should move through the groups during this time encouraging and commenting on commitments.
20
Lesson 3: Maize
Objectives:1. The farmers will be able to identify the components of good soil for the maize crop: well prepared soil, fertile, well drained soil, full of nutrients.2. The farmers will plant maize with the correct spacing.
a. Farmers will plant maize with 2 foot lengths between each plant and 3 foot lengths between each row.
3. The farmers will weed their new maize crop two weeks after they have planted and will leave the weeds on the soil to provide ground cover.
4. The farmers will control pests in a variety of ways:a. Farmers will use local organic pesticide, like neem.b. Farmers will burn crops if diseased and chance of disease spreading
throughout crop.c. Farmers will keep animals out of their gardens by building a fence
around the animals, or a fence around the land to keep the animals out.
d. Farmers will use scarecrows and tins to keep birds away from maize.e. Farmers will work together to control rats and use local materials to
trap them.5. The farmers will intersperse their maize crop with another legume crop when
the maize is knee high or has 5 to 7 leaves on it.6. The farmers will flag strong maize that has dark green leaves, strong stems,
and no trace of worms in leaves.a. The farmers will first harvest the flagged maize from their fields.b. The farmers will select whole grains of the same color and size, preferably from the middle of the cob. These seeds will be treated with Sinza and stored.
7. The farmers will believe that they are good stewards of the earth by preparing the soil well, spacing their maize crop correctly, intercropping with legumes, and caring for their crop in weeding, pests, and harvesting.
Approximate Length of Session: 165 minutes
Materials: Attendance Registers Flipchart Activity materials (for group of 20)
o 5 hoeso Maize seed
Lesson 3 Summary: Attendance and Troubleshooting Show pictures and share key messages on flipchart pages 13-28:
o Soil Preparationo Sowing and Measuringo Activity- Field preparation and maize plantingo Control of Weedso Protection of Plantso Control of Ratso Inter-Croppingo Seed selection at Fieldo Seed selection/Harvest
Practice and Coaching in small groups Probe about possible barriers Inform about possible solutions to barriers Request a commitment Examine practices related to the last lesson
1. Attendance and Troubleshooting- 5 minutes1. Fill out the attendance form for all those who are present.
Troubleshooting: Only for the PSOs who teach other farmer leaders:2. Collect attendance information from the farmer leaders for the previous lessons.
3. Ask farmer leaders about problems that they had at their last meeting.4. Help farmer leaders find solutions to the problems that they mention.5. Thank each farmer leader for their work and encourage them to continue.
2. Ask- 10 minutes Say, “Today we are going to discuss maize plants and the process we take to
ensure good crop productivity.” Ask:
? How many of you have planted maize before?
? Did you have a good harvest?
? Why or Why not?
? What practices help maize to grow well?
? What practices prevent maize from growing well?
22
Allow time for discussion. This is an important time for the leader to listen to the current practices of the community regarding maize crops. It will also alert the leader to good practices, those of concern, and possible challenges.
The leader should listen for current practices that are good (practices that increase soil fertility and increase crop yield and quality) as well as harmful practices (practices that harm the land, crop yield and nutrition of families).
Encourage discussion. Do not correct ‘harmful practices’ mentioned by the farmers. This is a time for listening and letting farmers discuss, not for teaching. Incorrect practices will be corrected on the flipchart pages that follow.
After the discussion, move to the flipchart by saying, “Let’s compare your ideas with those found here in the flipchart. Let’s begin with soil preparation.”
Soil Preparation (Figure 3.1)- 5 minutes
3. Show: Ask the farmers to describe what they see in Figure 3.1.
? What do you see in this picture?
Allow time for many people to comment.
4. Explain: Share the key messages using flipchart page 13. Use the picture to help
remind you of the key points.
23
Additional Information for the Trainer:Soil Preparation:
Till the soil in the row where the seeds will be planted. This allows for rainwater to permeate the soil.
Well prepared soil includes applying mulch in the space where seeds are not planted.
Good Soil: Manure provides nutrients to soil. If it is available within a community, it can
be added to the soil and then tilled in order to mix it well with the local soil. Healthy soil has living bugs and insects which help to aid air and food back
into the soil. Healthy soil has decaying plant and animal materials (decayed roots and
plant parts, dead insects, and animal feces) that turn into food for plants. Healthy soil has pockets of air which allow rain to penetrate the soil and
provides room for roots to grow. Healthy soil contains water which feeds the plants and helps to increase
organic matter.
Preparation of the Soil
These are the soil requirements for maize crops. It must be: Well prepared soil that has been tilled and weeded. Well-drained soil. It must not be too wet. Full of nutrients. This can be identified by soil that is dark in color.
? How do you know the soil is good and meets these requirements?EXPLAIN USING PICTURE:You can identify good soil by looking for:
Soil that produces tall, dark green plants. Soil without too much sand or stones. Soil where living worms and insects are found. Dark soil with an equal mixture of sand and clay.
When do you prepare the soil for maize? Prepare the soil in October to December.
How do you prepare the soil? Use minimum tilling. Minimum tilling allows for good circulation of water and air
throughout the soil. Till the ground only in the rows where you will plant seeds. Till the soil ½ meter down so the water can easily enter the ground. Minimum tilling aids in seed germination.
24
Sowing
The timing of sowing maize crop: Sow maize during the early rain.
Perform a germination test for maize seeds: This test is done 20 days before sowing. Place moist sand in shallow basin. Plant 400 seeds in groups of 50 about 2 cm deep. Sprouting begins in 3 or 4 days after sowing. Count the seedlings with roots and shoots on day 4, 6 and 7.
How to sow maize seed in the field: Create small holes for the maize seeds. Make the holes in uniform rows. Place 1 or 2 maize seeds in each hole. Cover the seeds with soil.
Measuring
The rows in the field should be 3 foot lengths apart.The maize crops should be planted 2 foot lengths apart.
Fertile and productive soils are rarely found in nature. However, all soils can be improved. Many of the soil and water conservation techniques that are taught throughout the curriculum can be applied to improve the soil.
Minimum tilling: Minimum tilling is the practice of hand tilling the earth using manual labor. It is better for the earth as it keeps many of the local land resources
untouched. Tilling loosens the soil and helps get rid of weeds.
Sowing and Measuring (Figure 3.2 )- 10 minutes
5. Show: Ask the farmers what they see in the pictures, Figure 3.2.
? What do you see in this picture?? What do you see in these pictures?
? What practices are these farmers using in these pictures?
6. Explain Share the key messages using flipchart page 15. Use the picture to help
remind you of the key points.
25
Sowing
The timing of sowing maize crop: Sow maize during the early rain.
Perform a germination test for maize seeds: This test is done 20 days before sowing. Place moist sand in shallow basin. Plant 400 seeds in groups of 50 about 2 cm deep. Sprouting begins in 3 or 4 days after sowing. Count the seedlings with roots and shoots on day 4, 6 and 7.
How to sow maize seed in the field: Create small holes for the maize seeds. Make the holes in uniform rows. Place 1 or 2 maize seeds in each hole. Cover the seeds with soil.
Measuring
The rows in the field should be 3 foot lengths apart.The maize crops should be planted 2 foot lengths apart.
Additional Information for the Trainer:Germination Test:
The germination test allows for predictability of crop success. Collect seed sample near planting time. Collect samples of seed from different places in the stored maize. Examine seed for insects, holes, cracks, or other damage. Make sure that the sand in the basin does not dry out. After counting the seedlings, multiply the number that has sprouted by .25.
This will provide the percent germination. The rate of emergence in the field will not be as high as the germination rate
due to soil crusting and depth of planting. For more information on the germination test, see
http://maizedoctor.cimmyt.org/index.php?option=com_content&view=article&id=168%3Atesting-maize-seed-viability&catid=127&Itemid=53&lang=en
Sowing Maize Seed in the Field: Germination of maize seeds is between 6 and 10 days. If a farmer does not
see germination in a specific hole, a farmer can plant new seed. In this way, each plant is allowed its own space for proper growth and the roots do not compete.
The small holes for the maize seed should be two to three centimetres deep, or just enough to cover the seed.
Seed depth should be enough so that the seed takes up water and is protected from birds, but also able to access nutrients in the top soil.
Measuring- The exact distance for rows of maize crops is 80 cm between rows and 50
cm between plants.
7. Activity- Preparing and Planting Maize Seeds- 30 minutes
1. Move into the demonstration plot if not already there.2. Designate a portion of the field for maize. 3. Discuss the preparation of the soil.
26

? Is this good soil for maize?
? What were the requirements for the soil for planting maize?
The requirements are fertile, well-drained, well prepared, and rich in nutrients. Review page 11 if farmers do not remember.
? What is the first thing we need to do to prepare this soil for planting? Answer: Tilling soil.
? Why do we till the soil?Answer: to loosen soil, provide for good circulation of air and water.
4. Ask for 5 volunteers to till the area that was selected for the maize crop.5. Use the 5 hoes to till the area.6. While the rest are waiting, have them examine the seed to make sure that it is
good seed. Good seed should not be damaged. It is not cracked. It is dry and uniform in size.
7. Review measuring and sowing with the group. The holes should be 3 foot lengths by 2 foot lengths apart.
8. Divide the group into smaller groups of 3 or 4 people and divide the maize area into that many sections. If you have 20 people, make 5 groups of 4 people each and 5 areas of the farm plot. Assign every group a section of the land.
9. As a group, have them mark off the holes following the measuring guidelines. Use the hoes to dig appropriate holes for the seeds. Plant a maize seed (or 2) per hole. Cover the holes.
10. Discuss and review the steps that were done.
? How was this similar or different to what you have done in the past?
? Are there any questions about what we have done today?
11. Answer specific questions referring to flipchart as needed.12. Return to the teaching of the flipchart.
Control of Weeds (Figure 3.3)- 10 minutes
8. Show Ask the farmers to look at Figure 3.3.
27
? What do you see in this picture?? What is the farmer doing?
? How is she doing it?
? How is the picture of the mature crop different than the other picture?
? What do you notice about the weeds?
9. Explain Share the key messages found on flipchart page 17 with the farmers,
reinforcing their comments and adding additional information. Say, “These pictures show us maize at two different points in the season. This first picture shows us the crop in its early stages.”
28
Additional Information for Trainer:Weeds- Weeds, like other plants, flower and go to seed. It is therefore important that the
entire plant be removed by its roots. If roots are left behind, the weed can continue to grow.
Control of Weeds
? Why do we need to remove weeds? Weeds take food away from the maize. Weeds take water away from the maize.
When do you weed? Weed two weeks after sowing. Weed when weeds are still small.
How do you weed? You can weed by hand or with a hoe. You must remove the entire plant including the roots. Leave the weeds on the ground to protect soil against erosion and the sun.
Weeding after crop nears maturity
When plants have developed considerable foliage to create their own shade, the weeds do not have the opportunity to grow as strong.
Weeding does not have to take place as often.
Caring for our bodies is similar to weeding. There are good things happening in our bodies, but sometimes germs try to grow and take over, just like weeds do in our gardens.
? How do we get rid of germs on our body?1. Wash our hands after working in the soil.2. Keep drinking water clean and separate.3. Use a latrine at all times.
These steps will help us keep our bodies free of harmful germs.
29

If weeds go to seed, the seed can spread throughout the crop and be more difficult to remove.
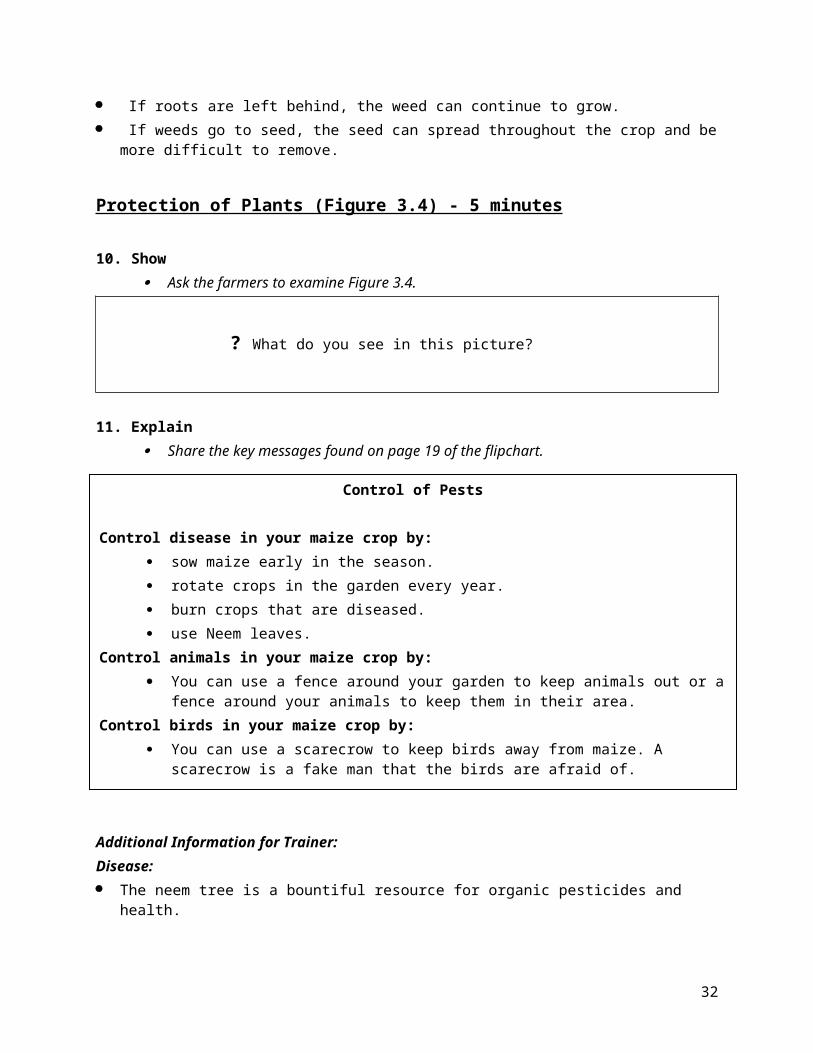
Protection of Plants (Figure 3.4) - 5 minutes
10. Show Ask the farmers to examine Figure 3.4.
? What do you see in this picture?
11. Explain Share the key messages found on page 19 of the flipchart.
Additional Information for Trainer:Disease: The neem tree is a bountiful resource for organic pesticides and health. Dry leaves in the shade and then crush to a powder in a mortar and pestle. Dust
crops with powder. The powder can also be mixed with water and then sprayed on crops.
Neem is discussed in further detail in Lesson 10. For more information, see http://echonet.org/content/article/699/Neem%20leaf
%20tea%20or%20neem%20seed%20oil%20to%20discourage%20insect%20feeding
Burning crops:
Control of Pests
Control disease in your maize crop by: sow maize early in the season. rotate crops in the garden every year. burn crops that are diseased. use Neem leaves.
Control animals in your maize crop by: You can use a fence around your garden to keep animals out or a fence around your
animals to keep them in their area.Control birds in your maize crop by:
You can use a scarecrow to keep birds away from maize. A scarecrow is a fake man that the birds are afraid of.
You can use tin cans on poles to create noise that will keep birds away.
30
The striga weed can be very dangerous to maize crops. Make sure that it is pulled up before it flowers to kill the weed.
Be careful not to break the stem of the striga weed as it will continue to grow. Do not leave the striga weed on the ground, but burn it outside of field. Striga weed contributes to a low production of maize.
Control of Rats (Figure 3.5) - 5 minutes12. Show
? What do you see in this picture?? Have any of you had problems with rats in your fields over other seasons?
? What did you do about them?
13. Explain Say, “Here is one method of rat traps that we could try as a community,
but it will take all of us working together to get rid of this problem. Let’s see how we could do it.”
Discuss Figure 3.5 and follow up with the specific details on page 21.
Additional Information for Trainers:Rat traps:
Local rat traps may be available in those communities closer to towns. Cats can be good mousers and drastically help reduce the number of rats. Snakes also eat rats and help keep the numbers down.
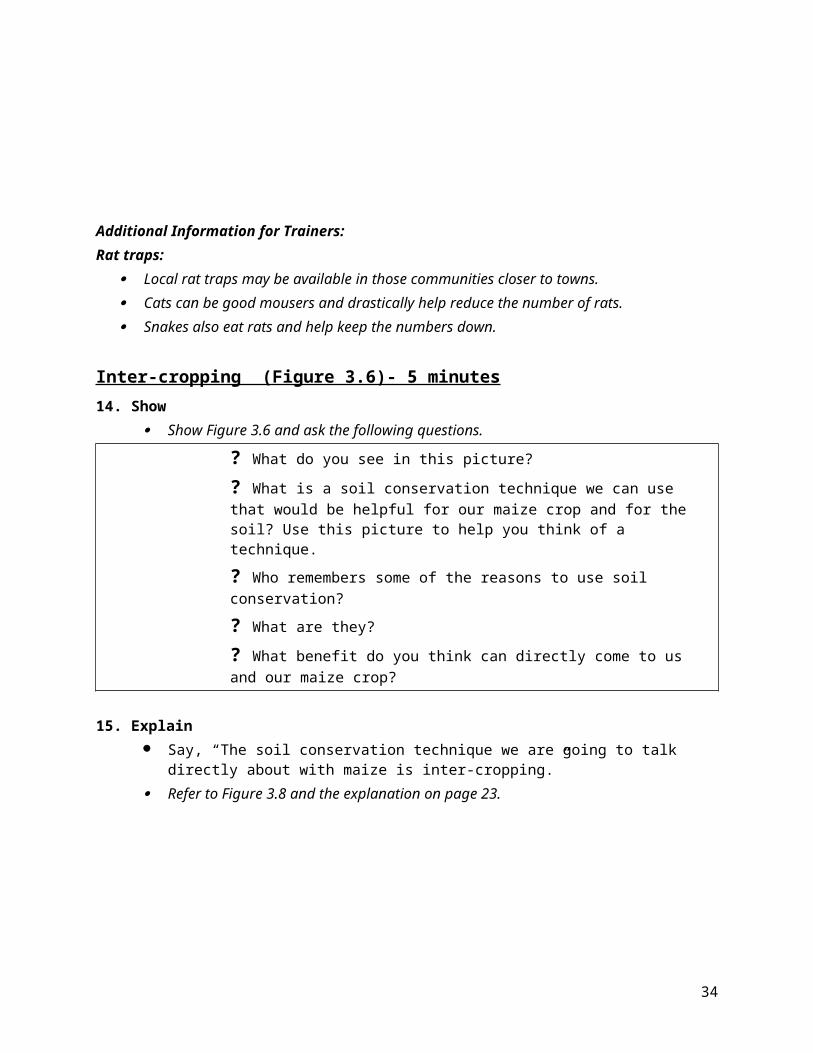
Inter-cropping (Figure 3.6)- 5 minutes14. Show
Show Figure 3.6 and ask the following questions.
Control of Rats Find the rat homes and the tunnels in the fields. Bury a clay pot near the rat hole.
o Fill the pot with some water. Place a corn cob on a wire. Put rubber on either end of the cob to keep it in the
middle of the wire. Put the wire into the ground, so it runs across the top of the pot. Secure the wire
into the ground. Rats try to eat the food, enter the pot and drown in the water. Empty the pots of the rats and water daily. Change the location of the pots every 14 days.
31
? What do you see in this picture?? What is a soil conservation technique we can use that would be helpful for our maize crop and for the soil? Use this picture to help you think of a technique.
? Who remembers some of the reasons to use soil conservation?
? What are they?
? What benefit do you think can directly come to us and our maize crop?
15. Explain Say, “The soil conservation technique we are going to talk directly about
with maize is inter-cropping.” Refer to Figure 3.8 and the explanation on page 23.
32
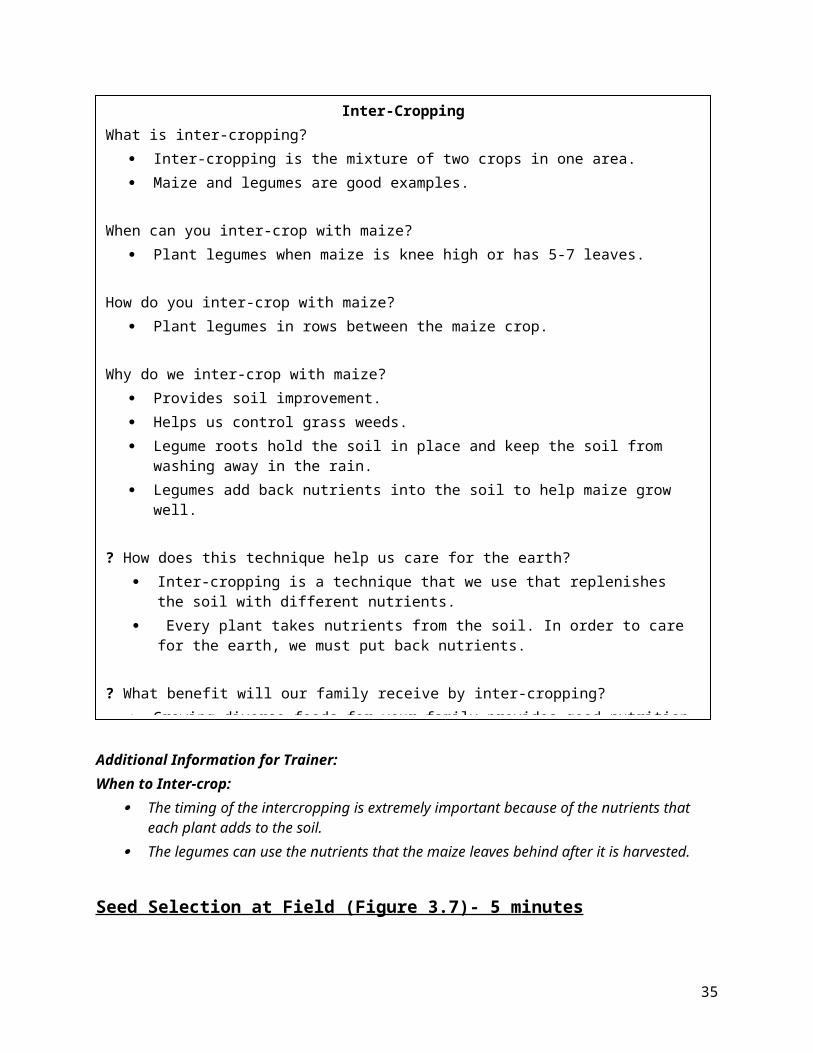
Additional Information for Trainer:When to Inter-crop:
The timing of the intercropping is extremely important because of the nutrients that each plant adds to the soil.
The legumes can use the nutrients that the maize leaves behind after it is harvested.
Seed Selection at Field (Figure 3.7)- 5 minutes
16. Show
Inter-CroppingWhat is inter-cropping?
Inter-cropping is the mixture of two crops in one area. Maize and legumes are good examples.
When can you inter-crop with maize? Plant legumes when maize is knee high or has 5-7 leaves.
How do you inter-crop with maize? Plant legumes in rows between the maize crop.
Why do we inter-crop with maize? Provides soil improvement. Helps us control grass weeds. Legume roots hold the soil in place and keep the soil from washing away in the rain. Legumes add back nutrients into the soil to help maize grow well.
? How does this technique help us care for the earth? Inter-cropping is a technique that we use that replenishes the soil with different
nutrients. Every plant takes nutrients from the soil. In order to care for the earth, we must put
back nutrients.
? What benefit will our family receive by inter-cropping? Growing diverse foods for your family provides good nutrition. Choosing to intercrop is not only good for the soil, it also enables you to provide
different foods for your family. Maize and legumes eaten in the same meal provides more protein for your body
than legumes eaten alone.
33
Ask the farmers to examine Figure 3.7.
? What do you see in this picture?
17. Explain Say, “This picture shows us seed selection at the field level. Let’s discuss how
and why to do this more specifically.” Use Figure 3.7 and the information on page 25 to explain seed selection at
the field level.
Additional Information for Trainer:Plants that have diseases:
Plants that are diseased by the striga weed should be burned, including all crop residue, after the harvest.
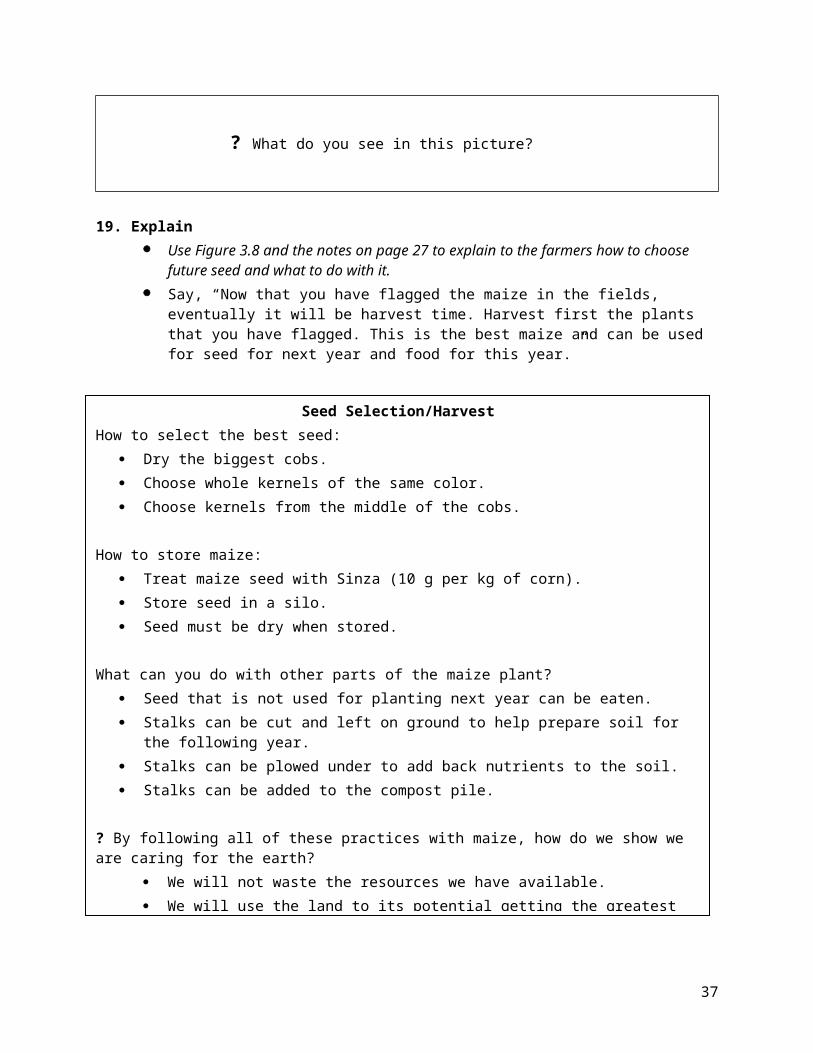
Seed Selection/Harvest (Figure 3.8)- 10 minutes18. Show
Seed Selection at Field LevelWhat do we select?
Selection of seed should begin in the field while plants are still growing. This ensures good maturing for quality seed.
When do we begin selection of maize? Begin when the plants are knee high.
How do we choose good maize plants? Choose plants that have: Leaves of dark green color. Strong stems. No holes where worms have eaten leaves.
Mark these strong, healthy plants with a flag.Leave or discard plants that have diseases.
34
? What do you see in this picture?
19. Explain Use Figure 3.8 and the notes on page 27 to explain to the farmers how to
choose future seed and what to do with it. Say, “Now that you have flagged the maize in the fields, eventually it will
be harvest time. Harvest first the plants that you have flagged. This is the best maize and can be used for seed for next year and food for this year.”
Additional Information for Trainer:Sinza: Sinza ash is generated in the home.
Seed Selection/HarvestHow to select the best seed:
Dry the biggest cobs. Choose whole kernels of the same color. Choose kernels from the middle of the cobs.
How to store maize: Treat maize seed with Sinza (10 g per kg of corn). Store seed in a silo. Seed must be dry when stored.
What can you do with other parts of the maize plant? Seed that is not used for planting next year can be eaten. Stalks can be cut and left on ground to help prepare soil for the following year. Stalks can be plowed under to add back nutrients to the soil. Stalks can be added to the compost pile.
? By following all of these practices with maize, how do we show we are caring for the earth? We will not waste the resources we have available. We will use the land to its potential getting the greatest possible yield. We will replenish nutrients in the soil. We will protect the crop that is growing and make sure that it is strong and
healthy.
35
Preference is given to ash from mango tree leaves and dry bean remains, but any ash will work.
Moisture and storage: The seed should not be stored with a moisture content exceeding 13%.
Practice and Coaching – 30 minutesFor training of farmer leaders only:
1. Ask participants to get in groups of 3. Each participant will use one page from the flipchart to teach the other people in their group. The participants should repeat the lesson exactly as they heard it presented earlier.
2. The people listening should ask questions as if they heard the material for the first time.
3. After the participant finishes presenting a page, the listeners should give feedback to the presenter- What did the presenter do well? What could they improve on in presenting the material? Have each listener give feedback to the presenter.
4. Switch roles until each participant has presented at least one page and had feedback given to them.
5. During this time the facilitator should visit all of the groups. He or she should listen to each group and correct or help those who have forgotten the message on that page.
6. When everyone is finished, answer any questions that the participants had on the material.
Probe-5 minutes
? What do you think about these guidelines for growing and harvesting maize? Are the steps we have discussed difficult to follow? Is there anything that was mentioned today that you would not be able to do in your own field?
Ask the farmers to talk with the person sitting next to them for five minutes total. They should share any questions about the guidelines for growing maize that they have as well as any concerns about these steps. After five minutes, ask the farmers to share their concerns and questions with the group.
Inform- 15 minutes
See if other people in the group can address or answer these points of concern or questions. Together, try to find a solution to their concerns and questions. If it is not possible to find a solution, offer some advise or admit that you are not sure and will look into an answer. Make sure to bring these points up with a PSO or Supervisor.
Possible Concerns and Solutions:
36
Seed:o Unavailability of certified seed making farmers rely on local seed that
deteriorates with time.o Currently, we need to help the farmers select the best seed from their
harvest and help them improve their seed preservation skills. In the future, we can help farmers purchase certified seed from Semoc and possibly even partner with Semoc to produce improved, certified seed.
Manureo Unavailability of animal manure that could have easily been a
substitute or complementary to inorganic fertilizers.o Keeping goats in an enclosed shelter with an aim of collecting manure
for planting small plots.
Discussing Commitments in Small Groups- 15 minutes
Divide into farmer accountability groups. Have farmers make a verbal commitment of something new that they will try
in the next two weeks based on the lesson.o For example, “I will commit to measuring my maize rows with 2 foot
lengths between each plant and 3 foot lengths between each row.”o Or, “I will commit to weeding my maize field every two weeks.”
Have farmers give a report on their previous commitment from the last meeting.
Farmers should encourage those who are struggling to keep their commitment and suggest they try again.
Facilitator should move through the groups during this time encouraging and commenting on commitments.
37
38
Lesson 4: Arroz
Objectives:1. The farmers will be able to create a proper dry or wet nursery depending
on their needs.2. The farmers will germinate rice seed by soaking it in water for 24 hours
and then covering it for 2 days before planting it in the nursery.3. The farmers will prepare basins that are 5 m x 5 m x 5 or 10 m, depending
on the size of their field, with earth mounds built up around the basins.4. The farmers will flood the fields for 2 weeks to kill weeds.5. The farmers will ensure a level basin free of humps and hollows to allow
for an even level of water that will benefit all plants.6. The farmers will plant the rice seedlings in flooded basins or fields and in
straight rows with 30 cm between each hole.7. The farmers will practise good stewardship of water through proper
management of flood irrigation.8. The farmers will weed their rice field 2 weeks after transplanting the
seedlings and then again in another 2 weeks.9. The farmers will implement a method to keep birds away from the rice.
The method could include, but are not limited to, scarecrows, noise, slingshot.
10.The farmers will harvest the rice when the heads are hard and yellow or brown.
11.The farmers will dry the heads of rice in a standing position for 3 to 4 days before threshing.
12.The farmers will believe that in adopting flood irrigation systems, proper spacing, and good soil management they will be caring for the earth and increasing crop productivity.
Approximate Length of Session- 150 minutes
Materials: Attendance Registers Flipchart Pre-cut 1 meter stick made out of local materials Activity materials (for group of 20)
o 10 hoes
Lesson 4 Summary: Attendance and Troubleshooting Show pictures and share key messages on flipchart pages 29-40:
Creating a nursery

Preparing the land Activity- Examining a rice paddy and preparing a rice nursery Transplanting Water Conservation Technique- Earth Basins Caring for the Rice Field Harvesting
Practice and Coaching in small groups Probe about possible barriers Inform about possible solutions to barriers Request a commitment Examine practices related to the last lesson
1. Attendance and Troubleshooting- 5 minutes1. Fill out the attendance form for all those who are present.
Troubleshooting: Only for the PSOs who teach other farmer leaders:2. Collect attendance information from the farmer leaders for the previous lessons.
3. Ask farmer leaders about problems or concerns that they had at their last meeting.4. Help farmer leaders find solutions to the problems that they mention.5. Thank each farmer leader for their work and encourage them to continue.
2. Ask-10 minutes
Allow time for discussion. This is an important time for the leader to listen to the current practices of the community regarding arroz crops. It will also alert the leader to good practices, those of concern, and possible challenges.
? How many of you have planted arroz before?
? Did you have a good harvest?
? Why or Why not?
? What practices help arroz to grow well?
? What practices prevent arroz from growing well?
40
The leader should listen for current practices that are good (practices that increase soil fertility and increase crop yield and quality) as well as harmful practices (practices that harm the land, crop yield and nutrition of families).
Encourage discussion. Do not correct ‘harmful practices’ mentioned by the farmers. This is a time for listening and letting farmers discuss, not for teaching. Incorrect practices will be corrected on the flipchart pages that follow.
After the discussion, move to the flipchart by saying, “Let’s compare your ideas with those found here in the flipchart. Let’s begin with arroz nurseries.”
Creating a Nursery (Figure 4.1) - 5 minutes3. Show:
Ask the farmers to describe what they see in Figure 4.1.
? What do you see in this picture?
4. Explain: Share the key messages using flipchart page 29.
41
Additional Information for Trainer:Dry and Wet Rice Nurseries: Deciding on a dry or wet rice nursery depends upon the availability of water
during the preparation period. Wet nurseries have an advantage in helping to suppress weeds.Preparing Seed:
When rice seeds germinate, you will see a tiny white spot on the grains.
Rice Nurseries
There are 2 types of rice nurseries: There is a dry rice nursery. The soil is moist but not soggy. There is a wet rice nursery. The soil is soggy.
Where do you develop a rice nursery? Develop a nursery near a main field. Develop a nursery where there is fertile soil with good drainage. Develop a nursery where it can be exposed to the sun.
When do you prepare the soil for the nursery? Prepare the nursery soil 2 months before you want to transplant the rice.
How do you prepare the nursery soil? First, till the soil. Then, remove all the weeds. Break up any clods in the earth. Rest the soil for 2 weeks. Divide the nursery into strips that are 1 to 1.5 m wide, 10 m long, and 4-6 cm high.
When do you prepare the seed for the nursery? Prepare rice seed 2 weeks before you plant it in the nursery.
How to Prepare the Rice Seed: Put rice seeds into a bucket and fill the bucket with water for 1 day. Remove any seeds that float in the water. Put all of the remaining rice seed into a basket or sack. Cover with palms and leave for 2 days After germination, spread over nursery evenly Cover with fine earth
42
Animals and birds can attack a young rice nursery. It is easier to care for the nurseries if farmers group them together so one person can watch and keep away animals.
Straw can help protect the rice seedlings from the sun and birds.Make sure the beds are free from weeds. 5
Preparing a Rice Paddy (Figure 4.2) - 5 minutes5. Show
? What do you see in this picture?
6. Examine Share the key messages on the flipchart page 31.
Additional Information for Trainer:Preparing a rice paddy: If the field is not prepared after the harvest, the field can be prepared when the
land is dry. This should be done before the beginning of the rains. Measuring basins: It is easiest to ensure basin size by using a pre-cut 1 meter stick. Bring one as an
example and then make sure that a farmer is in charge of making one for their community.
5 Better Farming Series 21- Wet Paddy or Swamp Rice (FAO - INADES, 1977).
Preparing a Rice Paddy
When do you prepare a rice paddy? Prepare a rice paddy immediately after harvest.
How do you prepare a rice paddy? Expose roots to the sun. Flood field for 2 weeks before the planting date to kill weeds. Remove water. Make basins of 5 m x 5m x 5 m. Create dikes, or earth piles around basins. Make sure soil is level- no humps or hollows- so seed can grow evenly, water is same
depth. Soil should be very wet.
43
If the farmer has more space, a basin can be made that measures 10 m x 10 m x 10 m.
Levelling soil-: An easy way to check to see if the soil is level is by putting water into the field. If
a small mound of soil appears above the water level, that area must be levelled. By walking through the field, you can check if there are hollows or deeper areas because the water level changes as you walk.
Use the extra soil from the humps to fill in the hollows.
7. Activity- Creating a rice nursery, preparing a rice paddy- 30 minutes1. Say, “Let’s put into practise what we have just learned. Today we are going to prepare a rice nursery bed and examine a current rice paddy and see if any changes or maintenance needs to be done on it.”2. Move the group to the rice paddy.
? Now that we are at the rice paddy, what do you see?
? Are the basins 5 m x 5m x 5m?
? Are the dikes in place? Is the soil level?
? Are there weeds present?
? What can we do to improve this rice field?
3. Each field will be different, but have farmers examine specific areas. 4. Demonstrate how to put a small amount of water in a basin to find if the area is level or has humps or hollows. Then have the group level the area.5. Examine the size of the basins and demonstrate how to measure them. Use the 1m stick that was brought to the session.6. Discuss water in the basins- how to get water there, how much water to keep in them, how to drain.7. Next, decide on a location near the rice field to create a rice nursery.8. Create a rice nursery by tilling soil, removing weeds, breaking up clods, and creating strips that are 1 to 1.5 m wide, 10 m long, 4-6 cm deep. Divide tasks to farmers. Discuss process as it is happening.9. Discuss and review the specifics of the rice paddy and the rice nursery.
? How was this similar or different to what you have done in the past?
? Are there any questions about what we have done today?
44

10. Answer specific questions referring back to the flipchart as needed.11. Return to the teaching of the flipchart.
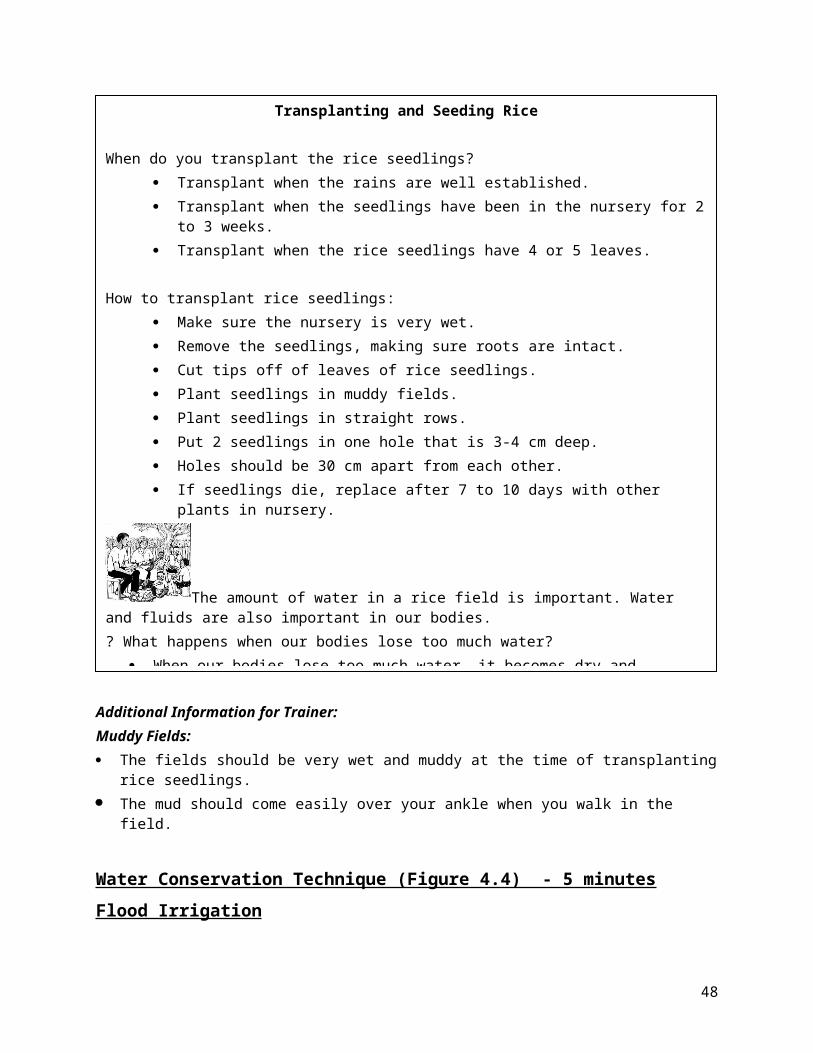
Transplanting and Seeding (Figure 4.3)- 10 minutes
8. Show Ask the farmers what they see in Figure 4.3.
? What do you see in this picture?
9. Explain Share the key messages using flipchart page 33 .Use the picture to help
remind you of the key points.
45
Additional Information for Trainer:Muddy Fields: The fields should be very wet and muddy at the time of transplanting rice
seedlings. The mud should come easily over your ankle when you walk in the field.
Water Conservation Technique (Figure 4.4) - 5 minutesFlood Irrigation
10. Show Ask the farmers what they see in the picture.
Transplanting and Seeding Rice
When do you transplant the rice seedlings? Transplant when the rains are well established. Transplant when the seedlings have been in the nursery for 2 to 3 weeks. Transplant when the rice seedlings have 4 or 5 leaves.
How to transplant rice seedlings: Make sure the nursery is very wet. Remove the seedlings, making sure roots are intact. Cut tips off of leaves of rice seedlings. Plant seedlings in muddy fields. Plant seedlings in straight rows. Put 2 seedlings in one hole that is 3-4 cm deep. Holes should be 30 cm apart from each other. If seedlings die, replace after 7 to 10 days with other plants in nursery.
The amount of water in a rice field is important. Water and fluids are also important in our bodies.? What happens when our bodies lose too much water?
When our bodies lose too much water, it becomes dry and shrivelled like an old corn stalk.
Whenever we are sick with vomiting or diarrhea, we must replace the liquids that are lost so our bodies will stay strong.
46

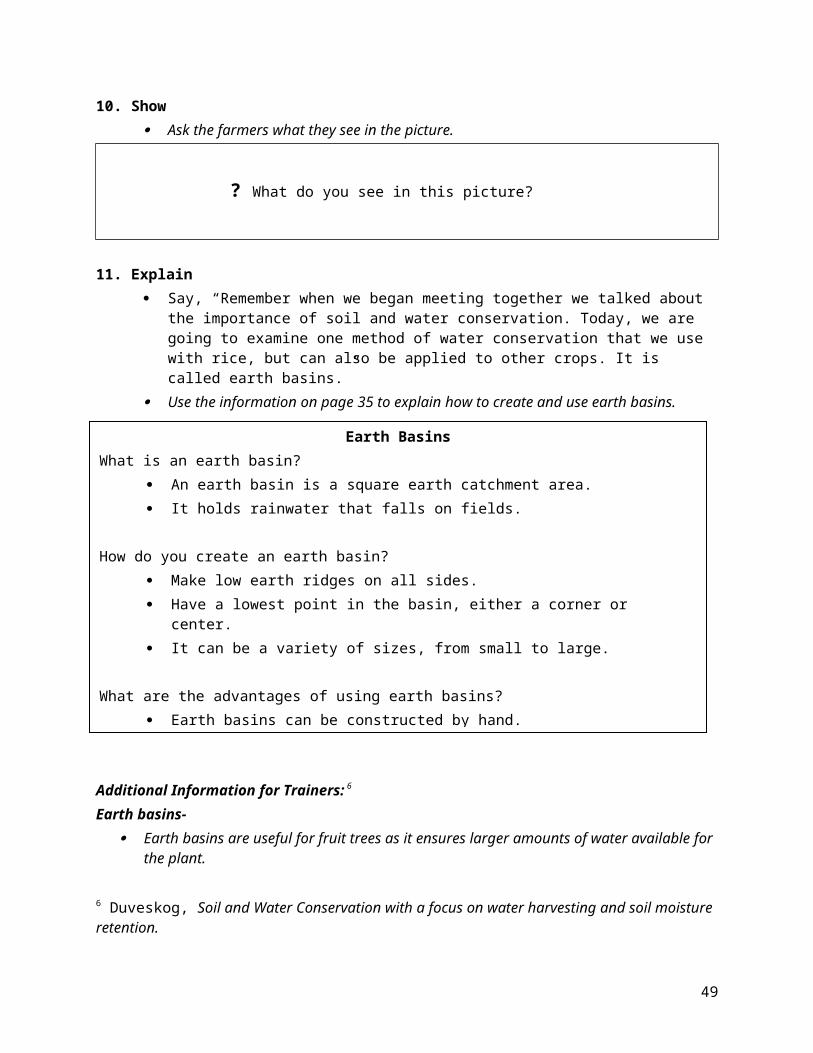
? What do you see in this picture?
11. Explain Say, “Remember when we began meeting together we talked about the
importance of soil and water conservation. Today, we are going to examine one method of water conservation that we use with rice, but can also be applied to other crops. It is called earth basins.”
Use the information on page 35 to explain how to create and use earth basins.
Additional Information for Trainers: 6
Earth basins- Earth basins are useful for fruit trees as it ensures larger amounts of water
available for the plant.
Caring for the Rice Field (Figure 4.5) - 5 minutes
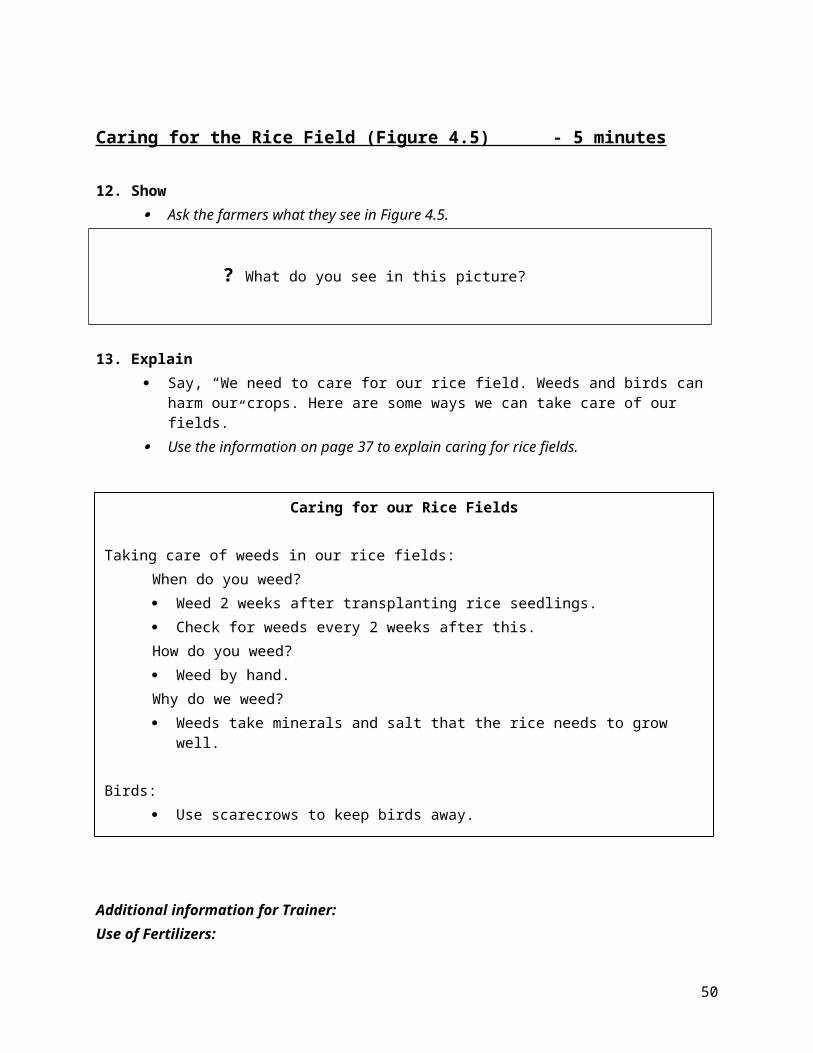
12. Show Ask the farmers what they see in Figure 4.5.
6 Duveskog, Soil and Water Conservation with a focus on water harvesting and soil moisture retention.
Earth BasinsWhat is an earth basin?
An earth basin is a square earth catchment area. It holds rainwater that falls on fields.
How do you create an earth basin? Make low earth ridges on all sides. Have a lowest point in the basin, either a corner or center. It can be a variety of sizes, from small to large.
What are the advantages of using earth basins? Earth basins can be constructed by hand. Erosion is reduced. There is an improved availability of water.
47
? What do you see in this picture?
13. Explain Say, “We need to care for our rice field. Weeds and birds can harm our
crops. Here are some ways we can take care of our fields.” Use the information on page 37 to explain caring for rice fields.
Additional information for Trainer:Use of Fertilizers:
Fertilizers aid in the growth of the rice. Legumes are a natural fertilizer. Legumes take nitrogen out of the air and put
it into the soil, making the soil more fertile. If farmers can access fertilizers, ammonium sulfate can be added to the rice
fields. Use 100kg per hectare of rice field. Apply to a drained field. This fertilizer will add nitrogen to the soil. When the heads are forming, apply an additional 50 kg per hectare of ammonium sulfate. 7
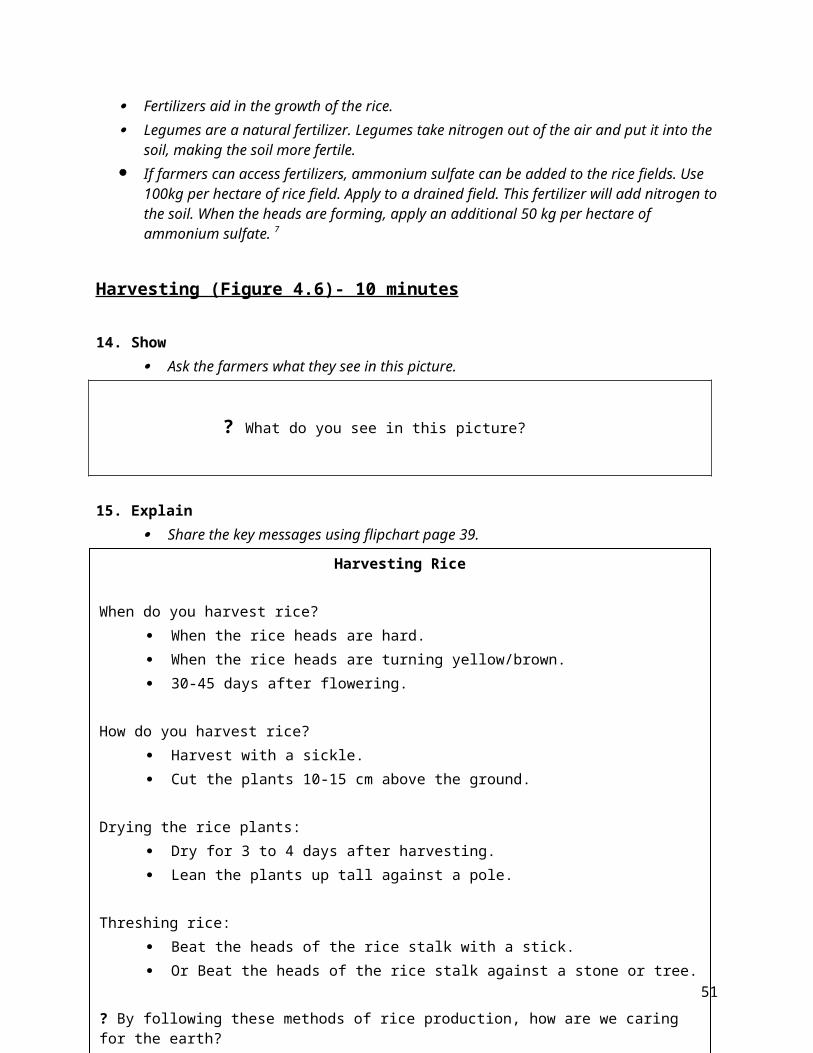
Harvesting (Figure 4.6)- 10 minutes
7 Better Farming Series 21- Wet Paddy or Swamp Rice (FAO - INADES, 1977).
Caring for our Rice Fields
Taking care of weeds in our rice fields:When do you weed? Weed 2 weeks after transplanting rice seedlings. Check for weeds every 2 weeks after this.How do you weed? Weed by hand.Why do we weed? Weeds take minerals and salt that the rice needs to grow well.
Birds: Use scarecrows to keep birds away. Create noise in the rice field. Use a watchman. Use a slingshot.
48
14. Show Ask the farmers what they see in this picture.
? What do you see in this picture?
15. Explain Share the key messages using flipchart page 39.
Additional Information for Trainer:Expected Returns:
With good management of the rice paddies and use of improved high yield rice varieties, 5 to 6 tons per ha of rice can be expected.
Storing Rice: Rice needs to be stored in a dry area.
Practice and Coaching – 30 minutes
For training of farmer leaders only:
Harvesting Rice
When do you harvest rice? When the rice heads are hard. When the rice heads are turning yellow/brown. 30-45 days after flowering.
How do you harvest rice? Harvest with a sickle. Cut the plants 10-15 cm above the ground.
Drying the rice plants: Dry for 3 to 4 days after harvesting. Lean the plants up tall against a pole.
Threshing rice: Beat the heads of the rice stalk with a stick. Or Beat the heads of the rice stalk against a stone or tree.
? By following these methods of rice production, how are we caring for the earth? We are making the best use of the earth. We are not wasting resources. We are trapping rain water and using it. We are making sure the earth produces the best possible yield by taking care to
weed and protect the rice paddies from pest.
49
1. Ask participants to get in groups of 3. Each participant will use a page from the flipchart to teach the other people in their group. The participants should repeat the lesson exactly as they heard it presented earlier.
2. The people listening should ask questions as if they heard the material for the first time.
3. After the participant finishes presenting a page, the listeners should give feedback to the presenter- What did the presenter do well? What could they improve on in presenting the material? Have each listener give feedback to the presenter.
4. Switch roles until each participant has presented at least one page and had feedback given to them.
5. During this time the facilitator should visit all of the groups. He or she should listen to each group and correct or help those who have forgotten the message on that page.
6. When everyone is finished, answer any questions that the participants had on the material.
Probe-5 minutes
? What do you think about these guidelines for growing and harvesting arroz? Are the steps we have discussed difficult to follow? Is there anything that was mentioned today that you would not be able to do in your own field?
Ask the farmers to talk with the person sitting next to them for five minutes total. They should share any questions about the guidelines for growing arroz that they have, as well as any concerns about these steps. After five minutes, ask the farmers to share their concerns and questions with the group.
Inform-15 minutes
See if other people in the group can address or answer these points of concern or questions. If no one can address the concern, offer some advise or admit that you are not sure and will look into an answer. Make sure to bring these points up with a PSO or Supervisor.
Possible Concerns and Solutions: Water
o A possible concern is the lack of adequate water through out the growing period.
o A possible solution is the use of earth basins to conserve water during the peak of the rainy period.
Levelling Fieldso A possible concern is the difficulties in levelling rice fields using manual
methods.
50
o A possible solution is that farmers with more experience can help those that are trying rice for the first time.
Seedo A possible concern is the unavailability of certified seed.o A possible solution is training farmers to choose quality seed from their
own farms.
Discussing Commitments in Small Groups- 15 minutes
Divide into farmer accountability groups. Have farmers make a verbal commitment of something new that they will try
in the next two weeks based on the lesson.o For example, “I will commit to creating a rice nursery before I plant my
rice in my paddy.”o Or, “I will commit to making my rice basins with the correct
measurement of 5 m x 5 m x 5m.” Have farmers give a report on their previous commitment from the last
meeting. Farmers should encourage those who are struggling to keep their
commitment and suggest they try again. Facilitator should move through the groups during this time encouraging and
commenting on commitments.
51

Lesson 5: Sesame
Objectives:1. The farmers will plant sesame with a 1 to 1 ratio of seed to sand and in a
straight line.2. The farmers will plant sesame with correct spacing between plants, 60 cm
between plants and 30 cm between rows for one plant and 70 cm between plants and 50 cm between rows for two plants.
3. The farmers will intercrop sesame with maize.4. The farmers will thin fields of stunted plants and leave only one or two
sesame plants per hole.5. The farmers will combat leaf beetle pest with a mixture of water and soap.6. The farmers will harvest only when the sesame plant is entirely dry with
brown caps and no leaves.7. The farmers will leave the sesame plants to dry for 2 to 3 weeks once the
plants have been cut.8. The farmers will separate the good quality sesame seeds from the poor
seed and store them separately.9. The farmers will believe that in using correct measuring techniques,
combating leaf beetle, and harvesting sesame when the plant is entirely dry they will be caring for the earth and increasing its productivity.
Approximate Length of Session: 140 minutes
Materials: Attendance Registers Flipchart Activity materials (for group of 20)
o Hoes (5 for group of 20)o Sesame Seed
Lesson 5 Summary: Attendance and Troubleshooting Show pictures and share key messages on flipchart pages 41- 50:
o Planting Sesameo Weeding in the Sesame Fieldo Thinning and Pest Controlo Harvesting and Dryingo Threshing and Cleaning
Activity- Preparing the field for Sesame Practice and Coaching in small groups
Probe about possible barriers Inform about possible solutions to barriers Request a commitment Examine practices related to the last lesson
1. Attendance and Troubleshooting- 5 minutes1. Fill out the attendance form for all those who are present.
Troubleshooting: Only for the PSOs who teach other farmer leaders:2. Collect attendance information from the farmer leaders for the previous lessons.
3. Ask farmer leaders about problems or concerns that they had at their last meeting.4. Help farmer leaders find solutions to the problems that they mention.5. Thank each farmer leader for their work and encourage them to continue.
2. Ask - 10 minutes Say, “Today we are going to discuss oil crops like sesame and the process
we take to ensure good crop productivity.” Ask:
Allow time for discussion. This is an important time for the leader to listen to the current practices of the community regarding oil crops. It will also alert the leader to good practices, those of concern, and possible challenges.
The leader should listen for current practices that are good (practices that increase soil fertility and increase crop yield and quality) as well as harmful practices (practices that harm the land, crop yield and nutrition of families).
Encourage discussion. Do not correct ‘harmful practices’ mentioned by the farmers. This is a time for listening and letting farmers discuss, not for teaching. Incorrect practices will be corrected on the flipchart pages that follow.
After the discussion, move to the flipchart by saying, “Let’s compare your ideas with those found here in the flipchart. Let’s begin with planting sesame.”
? How many of you have planted sesame before?
? Did you have a good harvest?
? Why or Why not?
? What practices help sesame to grow well?
? What practices prevent sesame from growing well?
53

Planting of Sesame (Figure 5.1) -5 minutes3. Show
Show Figure 5.1 and say
? What do you see in this picture?
4. Explain Use the key messages on page 41 to explain the facts about planting
sesame.
Additional Information for Trainer:Mixing seed with sand: There are a number of advantages to planting sesame when mixing the seed
with the sand. They are:o Allows for even distribution of seed by regulating the number of seed
dropped in each hole.o It reduces the time taken to thin sesame plants.
Planting Sesame
When do we plant sesame? Plant sesame in December to February. When the soil is moist or just after the beginning of the rains.
Land preparation for sesame should include: Tilled finely. This will aid in seed germination.
How to plant sesame: Plant in a straight line. Mix seed with sand at a 1:1 ratio just before planting. Space 1 plant: 60 cm between each plant, 30 cm between each row, thin and leave
1 plant per hole Space 2 plants 70 cm between each plant, 50 cm between each row, thin and leave
2 plants per hole Intercrop with maize- 80 cm between each plant. 50 cm betwen each row of maize
54
o Farmers will spend less time transplanting crops.o Each seed gets enough light and nutrients to grow very well.
Measuring: The average adult foot is 24 cm long. This can be used to space out the sesame
seeds.
Weeding in the Sesame Field (Figure 5.2) - 10 minutes5. Show
Show Figure 5.2 and say,
? What do you see in this picture?
6. Explain Say, “Weeding is a very important process for the sesame plant. Let’s
consider some key ideas about weeding.” Use the information on page 43 to share about weeding.
Weeding in the Sesame Field
When do you weed the sesame field? If you just have sesame in the field, weed at the beginning of the rains. If you have intercropped with maize, weed two weeks after planting the maize.
Children need to be protected and cared for in order to go strong and healthy, just like we care for our sesame plants.
Just as weeds need to be removed from around the growing sesame plants to enable them to grow well, so does human feces need to be removed from the environment where children are living and playing.
Dispose of feces away from the family living area by using a latrine. ? Why do you think disposing of feces is important?
55
Thinning and Pest Control in the Sesame Field (Figure 5.3) - 5 minutes
7. Show Show Figure 5.3 and say,
? What do you see in this picture?
8. Explain Use the information on page 45 to share about thinning and pest control.
Additional Information for Trainer:Thinning Sesame plants:
The plants that are chopped down should be left on the ground to help with keeping moisture in the soil and protect the soil from the sun.
The farmer chooses whether to leave one or two plants per hole.Control of common pests and organic pesticides:
The mixture of water and soap can be added to all plants to act as pest repellent even if the beetle is not present.
The farmer can sprinkle this mixture on the leaves using other leaf branches tied together or bundle of grass.
Any type of soap the farmer has available can be used for this mixture.
Harvesting and Drying (Figure 5.4) - 5 minutes
Thinning and Pest Control in the Sesame Field
How do you thin sesame plants? Remove stunted plants. Begin thinning when plant have 7 leaves. Leave 1 or 2 plants per hole.
How to control common pests- Leaf Beetle- Control by mixing 1 litre water with small bit of soap. Apply to plant with branches or grass.
56
9. Show Show Figure 5.4 and say,
? What do you see in this picture?
10. Explain Share the messages on page 47 and refer to Figure 5.4.
Additional Information for Trainer:Harvesting Sesame:
It is very important that the entire sesame plant dries before cutting. This should not be rushed as it will affect the seed.
If the plant is dried, it will enable the seed to get released easily during threshing.
It will also ensure that the seeds are fully mature.
Threshing and Cleaning (Figure 5.5) - 5 minutes11. Show
Show Figure 5.5.
Harvesting and Drying Sesame
When do you harvest sesame? Harvest sesame when the entire plant is dried. the pods are brown. the leaves start falling off the plant.
How do you harvest sesame? Cut the bottom of the plant off. Tie the plants in bundles in an A frame type structure. Leave to dry for 2 to 3 weeks.
57
? What do you see in this picture?
12. Explain Share the key messages found on page 49 and refer to Figure 5.5.
Additional Information for Trainer:Threshing Sesame: Threshing sesame is usually done using a winnowing tray if it is available. If it is
not available, farmers can manually sieve the grains.Seed: Bad seed can be identified by its color. It is usually dark in color because it has
been affected by fungi. Therefore good seed is light in color. Bad seed is usually very light in weight. It is easily blown away by the wind
during threshing.
13.Activity- Preparing Field for Sesame - 30 minutes1. Move into the demonstration plot if not already there.2. Designate a portion of the field for oil crops. 3. Discuss the preparation of the soil.
? Is this good soil for oil crops?
? What were the requirements for the soil for planting sesame?
Threshing and Cleaning Sesame
When do you thresh sesame? When sesame plants are well dried.
How do you thresh sesame? Thresh manually and leave in a sieve or mat for 1 to 2 days. Divide good and bad grains by manually sieving the grains.
? How are we good stewards of the earth when we plant sesame following all of these procedures?
58
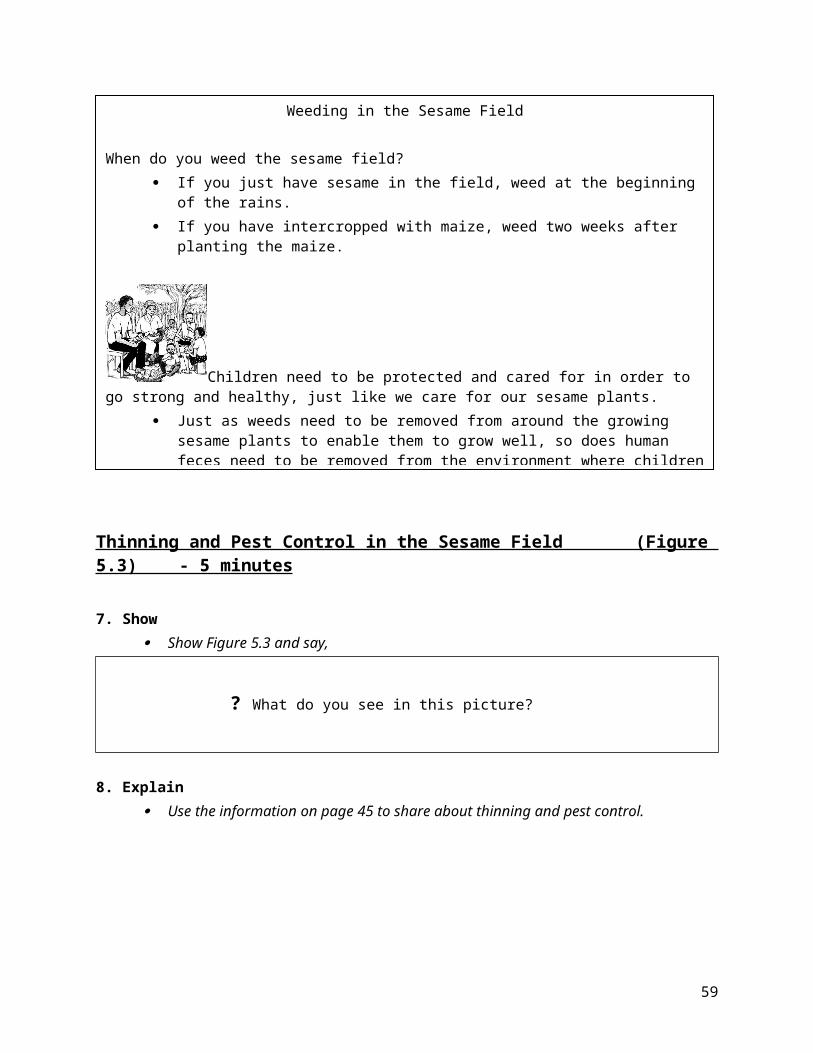
The requirements are moist and well tilled soil. Review page 47 if farmers do not remember.
? What crop can sesame be inter-cropped with?
Maize crop.
4. Ask for 5 volunteers to till the area that was selected for the oil crops between the rows of maize.
5. Use the 5 hoes to till the area.6. Have the group mix the sesame seed with sand in a 1 to 1 ratio.7. Have the group plant the sesame in between the maize crop. The
measurements for the sesame crops should be 80 cm between sesame plants and 50 cm between the rows of maize.
8. Discuss and review the steps that were done.
? How was this similar or different to what you have done in the past?
? Are there any questions about what we have done today?
9. Answer specific questions referring to flipchart as needed.
Practice and Coaching – 30 minutes
For training of farmer leaders only:1. Ask participants to get in groups of 3. Each participant will use a page from
the flipchart to teach the other people in their group. The participants should repeat the lesson exactly as they heard it presented earlier.
2. The people listening should ask questions as if they heard the material for the first time.
3. After the participant finishes presenting a page, the listeners should give feedback to the presenter- What did the presenter do well? What could they improve on in presenting the material? Have each listener give feedback to the presenter.4. Switch roles until each participant has presented at least one page and had feedback given to them.5. During this time the facilitator should visit all of the groups. He or she should
listen to each group and correct or help those who have forgotten the message on that page.
6. When everyone is finished, answer any questions that the participants had on the material.
59
Probe-5 minutes
? What do you think about these guidelines for growing and harvesting sesame? Are the steps we have discussed difficult to follow? Is there anything that was mentioned today that you would not be able to do in your own field?
Ask the farmers to talk with the person sitting next to them for five minutes total. They should share any questions about the guidelines for growing sesame that they have, as well as any concerns about these steps. After five minutes, ask the farmers to share their concerns and questions with the group.
Inform-15 minutes
See if other people in the group can address or answer these points of concern or questions. If not, offer some advise or admit that you are not sure and will look into an answer. Make sure to bring these points up with a PSO or Supervisor.
Discussing Commitments in Small Groups- 15 minutes
Divide into farmer accountability groups. Have farmers make a verbal commitment of something new that they will try
in the next two weeks based on the lesson.o For example, “I will commit to plant sesame with correct spacing
between plants, 60 cm between plants 30 cm between rows for one plant and 70 cm between plants and 50 cm between rows for two plants.”
o Or, “I will commit to harvesting sesame when the plants are dry and the leaves have begun to fall off.”
Have farmers give a report on their previous commitment from the last meeting.
Farmers should encourage those who are struggling to keep their commitment and suggest they try again.
Facilitator should move through the groups during this time encouraging and commenting on commitments.
60
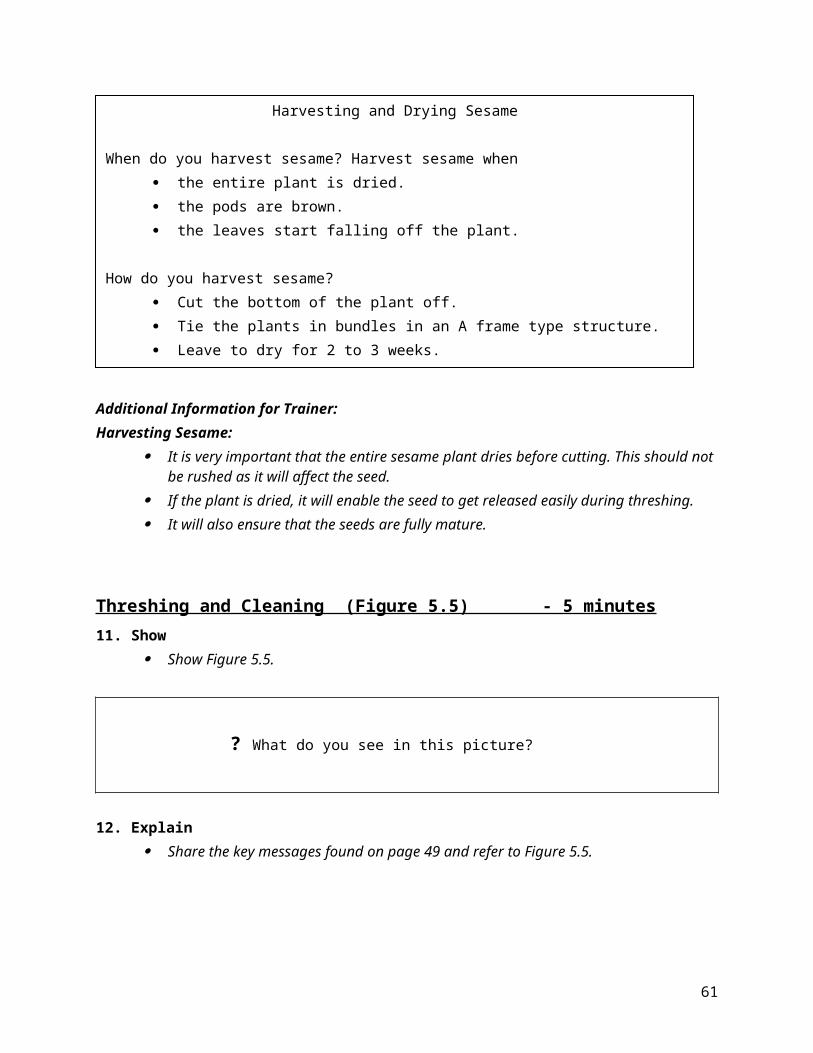
Lesson 6: Groundnuts
Objectives:1. The farmers will choose groundnut seeds that are disease free and have not been attacked by pests.2. The farmers will plant groundnut crops with correct spacing between the
plants. For the long cycle variety, the spacing will be 15 cm x 60 cm. For the short cycle variety, the spacing will be 15 cm x 80 cm.
3. The farmers will place soil mounds around the root formation of groundnuts in order to facilitate a stronger root formation and then a higher crop productivity.
4. The farmers will use hedgerows and grass strips to reduce soil erosion by rain, act as a windbreak, increase soil fertility, and help crops grow stronger.
5. The farmers will believe that in using correct measuring techniques, hedgerows, and soil mounds, they will be caring for the earth and increasing its productivity.
Approximate Length of Session: 140 minutes
Materials: Attendance Registers Flipchart Activity materials (for group of 20)
o Hoes (5 for group of 20)o Groundnut seed
Lesson 6 Summary: Attendance and Troubleshooting Show pictures and share key messages on flipchart pages 51- 60:
Choosing Groundnut Seeds Preparing the Soil Soil Conservation- Hedgerows Tending the Plants Harvesting and Storing Groundnuts
Activity- Preparing the field for Groundnuts Practice and Coaching in small groups Probe about possible barriers Inform about possible solutions to barriers Request a commitment Examine practices related to the last lesson
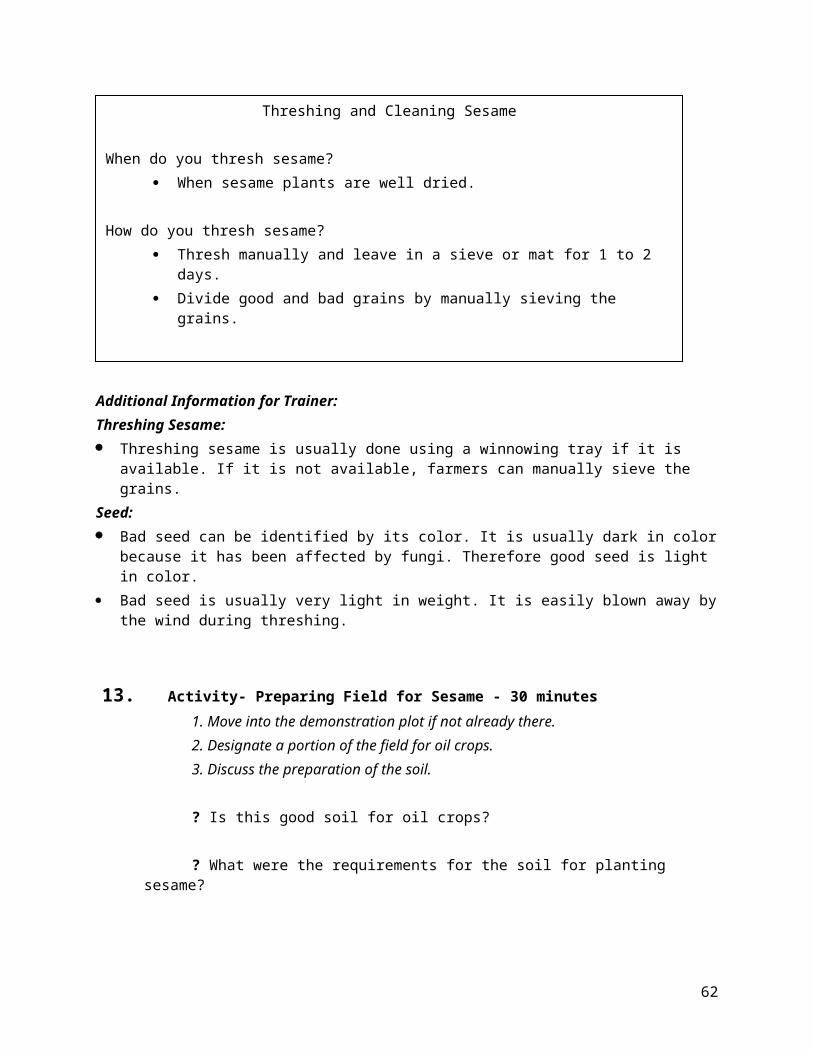
1. Attendance and Troubleshooting- 5 minutes1. Fill out the attendance form for all those who are present.
Troubleshooting: Only for the PSOs who teach other farmer leaders:2. Collect attendance information from the farmer leaders for the previous lessons.
3. Ask farmer leaders about problems or concerns that they had at their last meeting.4. Help farmer leaders find solutions to the problems that they mention.5. Thank each farmer leader for their work and encourage them to continue.
2. Ask - 10 minutes Say, “Today we are going to discuss oil crops like groundnuts and the
process we take to ensure good crop productivity.” Ask:
Allow time for discussion. This is an important time for the leader to listen to the current practices of the community regarding groundnuts. It will also alert the leader to good practices, those of concern, and possible challenges.
The leader should listen for current practices that are good (practices that increase soil fertility and increase crop yield and quality) as well as harmful practices (practices that harm the land, crop yield and nutrition of families).
Encourage discussion. Do not correct ‘harmful practices’ mentioned by the farmers. This is a time for listening and letting farmers discuss, not for teaching. Incorrect practices will be corrected on the flipchart pages that follow.
After the discussion, move to the flipchart by saying, “Let’s compare your ideas with those found here in the flipchart. Let’s begin with choosing groundnut seeds.”
Choosing Groundnut Seed (Figure 6.1) -5 minutes
? How many of you have planted groundnuts before?
? Did you have a good harvest?
? Why or Why not?
? What practices help groundnuts to grow well?
? What practices prevent groundnuts from growing well?
62
3. Show Show Figure 6.1 and say
? What do you see in this picture?
4. Explain Use the key messages on page 51 to explain the facts about groundnut
seeds.
Preparing the Soil (Figure 6.2) - 5minutes5. Show
Show Figure 6.2 and say,
? What do you see in this picture?
6. Explain Say, “Weeding is a very important process for the sesame plant. Let’s
consider some key ideas about weeding.” Use the information on page 53 to share about weeding.
Choosing Groundnut Seeds
How do you choose groundnut seed? Choose groundnut seeds15-30 days before sowing. Choose seeds that are healthy and well formed. Choose disease free seed. Choose seed that has not been attacked by pests.
Preparing the Soil
Preparation of Soil for groundnuts: Clear land in August. Begin ploughing and digging in September and October. The soil should be light and not too moist.
When do you sow groundnut seeds? Sow seeds in November and December. Sow 3 to 4 days before the rains.
63

Additional Information for Trainer:Long Cycle Varieties: The long cycle varieties are often local varieties. These are more prone to disease attack, especially the rosset virus.Short Cycle Varieties: The short cycle varieties are the improved varieties, specifically the Jl 24 and
Nemetil. The advantages of the improved variety is that it is able to escape drought, it is
more productive, and it is resistant to rosset attack.Spacing Groundnuts: Farmers can estimate that a half of their foot length is equal to 15 cm. Farmers can cut a stick or a string that is about 15 cm for use during the
planting.
Soil Conservation Technique (Figure 6.3) - 5 minutesUse of Hedgerows and dry grass strips
7. Show
? What do you see in this picture?
8. Explain Use the information on page 55 to discuss hedgerows and dry grass
strips. Refer to Figure 6.3.
Preparing the Soil
Preparation of Soil for groundnuts: Clear land in August. Begin ploughing and digging in September and October. The soil should be light and not too moist.
When do you sow groundnut seeds? Sow seeds in November and December. Sow 3 to 4 days before the rains.
64

Tending the Plants (Figure 6.4) - 10 minutes9. Show
Show Figure 6.4 and say,
? What do you see in this picture?
10. Explain Share the messages on page 57 and refer to Figure 6.4.
Soil Conservation TechniqueUse of Hedgerows and Dry Grass Strips
What are hedgerows and dry grass strips? Farmers use grass to curve between the lines of produce. Farmers use grass or trees to surround their farms and provide a wind block.
Why do we use hedgerows and dry grass strips? It reduces the amount of soil that is eroded by rain. It can be combined with stones and other materials. It can help improve the fertility of the soil. It helps crops develop well with strong stems and dark green leaves.
65
Harvesting and Storing (Figure 6.5) - 5 minutes
11. Show Show Figure 6.5.
? What do you see in this picture?
12. Explain Share the key messages found on page 59 and refer to Figure 6.5.
Tending the Groundnut Plants
When do you weed the groundnut farm? Weed when you see the weeds. Place soil mounds around the root zone to facilitate more root formation and then a
higher productivity of groundnuts.
Groundnuts are good snacks to eat between meals. Groundnuts help to build strong bones and muscles. They can be mashed into butter and mixed with infant porridge or given to adults as snacks between meals. ? Do you enjoy eating groundnuts?? In what dishes to eat them?? Do your children eat them?? Why is it important that our children build strong bones and muscles?
66
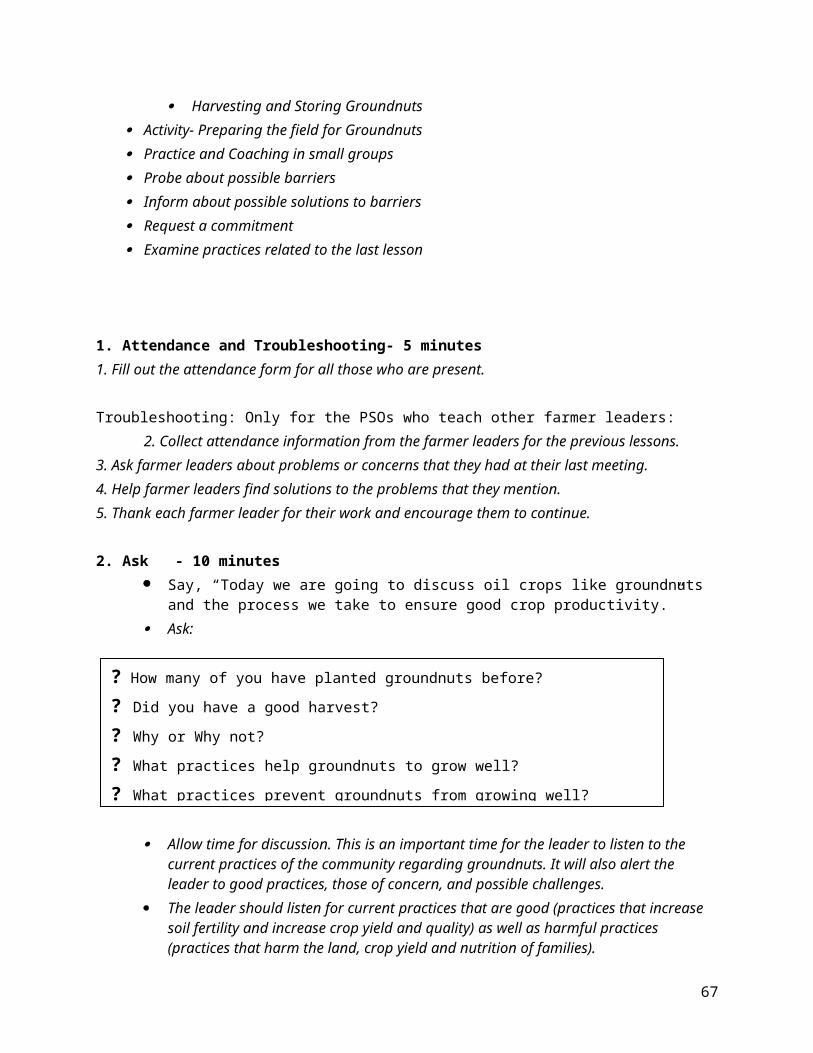
13. Activity- Preparing Field for Groundnuts- 30 minutes1. Move into the demonstration plot if not already there.2. Designate a portion of the field for groundnuts. 3. Discuss the preparation of the soil.
? Is this good soil for oil crops?
Harvesting and Storing Groundnuts
When do you harvest groundnuts? Choose 3 to 5 plants to examine.
o Pull up these plants.o Remove the pods.o Shell the seeds.o Examine pods
If shells have dark markings on the inside, that is good. If seeds are fat and the correct color, that is good. If the majority of shells and seeds are this way, then the plants are
ready for harvest.
How do you dry groundnut plants? Dry entire plants on an A-frame. Face the pods into the A-frame and away from the soil. Dry for 3 to 4 weeks. Pick the pods from the plants.
Storing groundnut guidelines: Store seeds in their shells. Make sure the shells are all dry. The shells should be healthy and disease free. Make sure there is space for the shells to get air.
? How are we good stewards of the earth when we plant groundnuts following all of these procedures?
We are making the best use of the soil. We are not wasting resources. By following the measuring and planting guide
lines, we will ensure high productivity. We are making sure the earth produces the best possible yield by taking care
to weed, harvest, and store the groundnuts at the correct times.
67
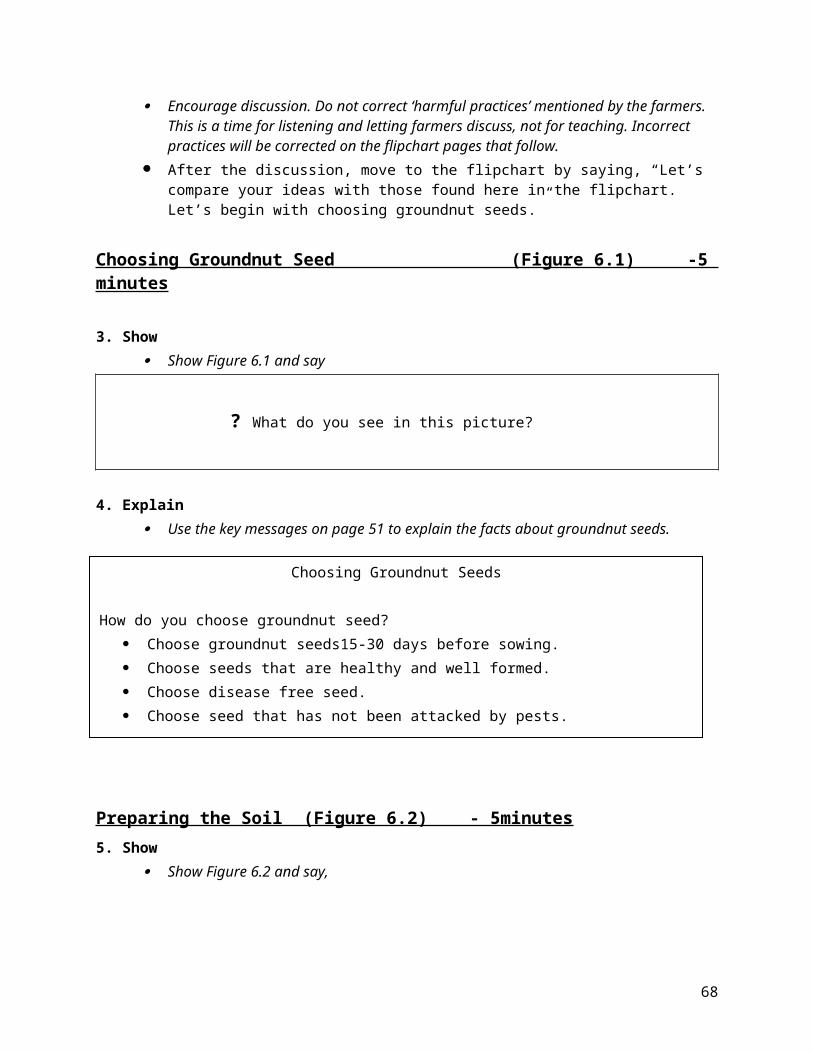
? What were the requirements for the soil for planting groundnuts?
The soil should be finely tilled.
4. Ask for 5 volunteers to till the area that was selected for groundnuts.5. Use the 5 hoes to till the area.6. While the rest are waiting, have them examine the groundnut seed
to make sure that it is good seed. Good seed should not be damaged. It is healthy, well formed and free of pests.
7. Plant the groundnut seeds. These should be planted 15 cm between plants and 60 cm between the rows for the long cycle variety or 15 cm between plants and 80 cm between the rows for the short cycle variety.
8. Discuss and review the steps that were done.
? How was this similar or different to what you have done in the past?
? Are there any questions about what we have done today?
9. Answer specific questions referring to flipchart as needed.
Practice and Coaching – 30 minutes
For training of farmer leaders only:1. Ask participants to get in groups of 3. Each participant will use a page from
the flipchart to teach the other people in their group. The participants should repeat the lesson exactly as they heard it presented earlier.
2. The people listening should ask questions as if they heard the material for the first time.
3. After the participant finishes presenting a page, the listeners should give feedback to the presenter- What did the presenter do well? What could they improve on in presenting the material? Have each listener give feedback to the presenter.4. Switch roles until each participant has presented at least one page and had feedback given to them.5. During this time the facilitator should visit all of the groups. He or she should listen to each group and correct or help those who have forgotten the message on that page.6. When everyone is finished, answer any questions that the participants had on
the material.
Probe-5 minutes
68
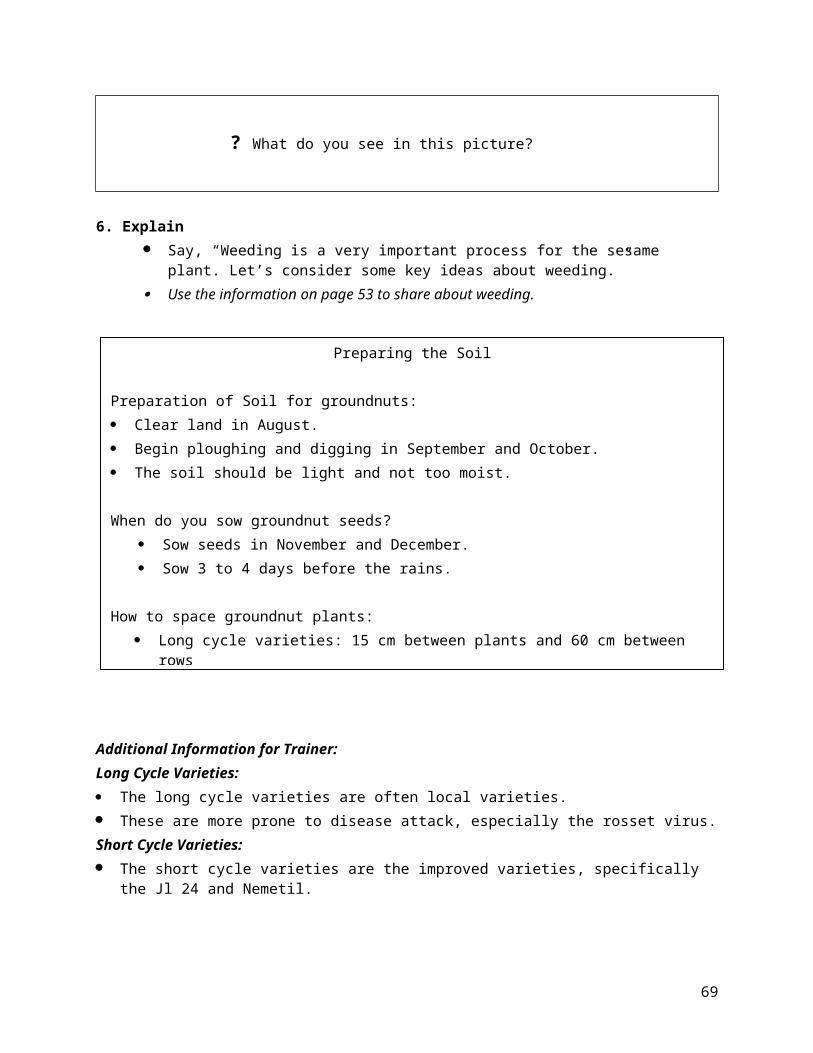
? What do you think about these guidelines for growing and harvesting groundnuts? Are the steps we have discussed difficult to follow? Is there anything that was mentioned today that you would not be able to do in your own field?
Ask the farmers to talk with the person sitting next to them for five minutes total. They should share any questions about the guidelines for growing groundnuts that they have, as well as any concerns about these steps. After five minutes, ask the farmers to share their concerns and questions with the group.
Inform-15 minutes
See if other people in the group can address or answer these points of concern or questions. If not, offer some advise or admit that you are not sure and will look into an answer. Make sure to bring these points up with a PSO or Supervisor.
Possible Concerns and Solutions: Processing
o A possible concern is that farmers who want to produce oil manually may not be a possibility in our areas because the crushing machine is not available in our area.
o A farmer could focus on peanut butter production by pounding the dry seeds manually.
Crop Destructiono A possible concern is that groundnuts can be destroyed by
squirrels. Squirrels are a common problem in this area.o Chasing the squirrels away on a routine basis is a possible solution.
This can be done using dogs or other means. Releasing the groundnut seed
o Farmers who have large harvests of groundnuts may find breaking the pods open individually very time consuming and difficult work.
o A possible solution is to hit the pods with a stick. Care needs to be taken not to break the seed during this practice.
o
Discussing Commitments in Small Groups- 15 minutes
Divide into farmer accountability groups. Have farmers make a verbal commitment of something new that they will try
in the next two weeks based on the lesson.o For example, “I will commit to choose ground nut seeds that are
disease free and have not been attacked by pests.”o Or, “I will commit to creating mounds around the roots of my
groundnut plants in order for better root formation to develop.”
69
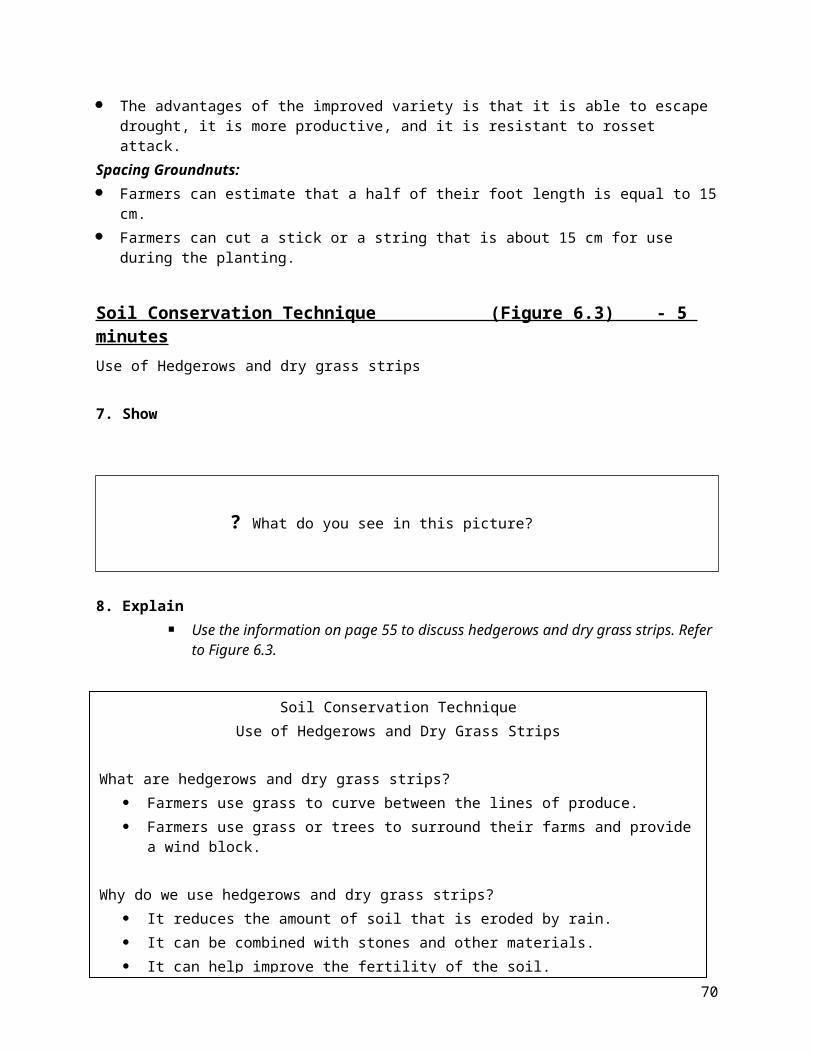
Have farmers give a report on their previous commitment from the last meeting.
Farmers should encourage those who are struggling to keep their commitment and suggest they try again.
Facilitator should move through the groups during this time encouraging and commenting on commitments.
70
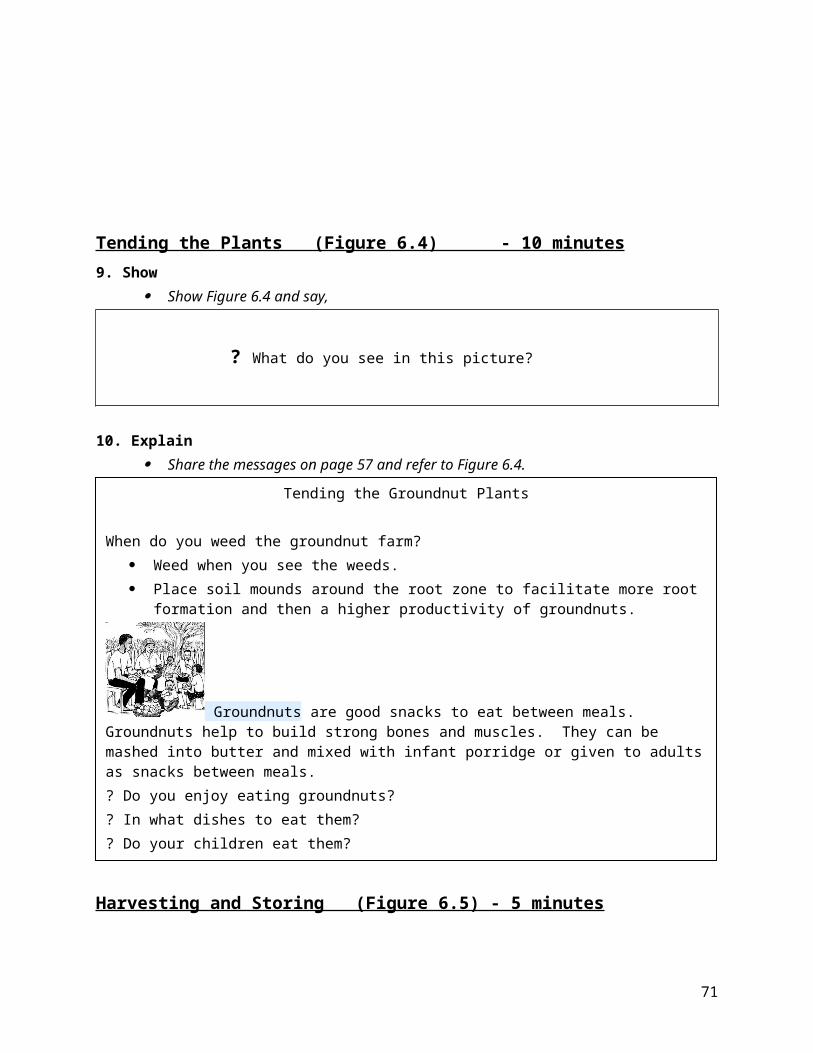
Lesson 7: Legumes
Objectives:1. The farmers will plant legumes at the beginning of the rains, in January or February.2. The farmers will incorporate organic material into the soil.
a. Some examples of organic material that could be used are manure and crop stubble.
3. The farmers will plant legumes with the correct distance and density.a. Legumes that grow upright should be spaced 50 cm between plants and 10 cm between rows.b. Legumes that grow along the ground should be spaced 60 cm between plants and 30 cm between rows.c. Climbing variety of legumes should be spaced 100 cm between plants and 50 cm between rows.
4. The farmers will weed legume fields each week so legumes will not compete with weeds for water, sun or nutrients.
5. The farmers will mulch with crop residue and grass and place it between the rows of legumes.
6. The farmers will control pests by using strong varieties of legumes, applying organic pesticides, and keeping the farms free of weeds.
7. The farmers will harvest legumes as soon as they start to dry. The farmers will harvest legumes in the early morning.
8. The farmers will dry the legumes in the sun for 3 to 4 days.9. The farmers will store the legumes in a dry area.10.The farmers will believe that they are being good stewards of the earth by
using the farm to the best of its potential- mulching in between rows of legumes and keeping the farm free of weeds.
Approximate Length of Session: 145 minutes
Materials: Attendance Registers Flipchart Activity materials (for group of 20)
o Hoes- 5o Legume seeds appropriate for that area
Lesson 7 Summary: Attendance and Troubleshooting Show pictures and share key messages on flipchart pages 61-72:
Land Preparation

Spacing/ Plant Density Crop Husbandry Mulching Activity- Preparing a legume field Control of Pests Harvesting and Storage
Practice and Coaching in small groups Probe about possible barriers Inform about possible solutions to barriers Request a commitment Examine practices related to the last lesson
1. Attendance and Troubleshooting- 5 minutes1. Fill out the attendance form for all those who are present.
Troubleshooting: Only for the PSOs who teach other farmer leaders:2. Collect attendance information from the farmer leaders for the previous lessons. 3. Ask farmer leaders about problems or concerns that they had at their last meeting.4. Help farmer leaders find solutions to the problems that they mention.5. Thank each farmer leader for their work and encourage them to continue.
2. Ask - 10 minutes Say, “Today we are going to discuss legumes and the process we take to
ensure good crop productivity.” Ask:
Allow time for discussion. This is an important time for the leader to listen to the current practices of the community regarding legumes. It will also alert the leader to good practices, those of concern, and possible challenges.
The leader should listen for current practices that are good (practices that increase soil fertility and increase crop yield and quality) as well as harmful practices (practices that harm the land, crop yield and nutrition of families).
? How many of you have planted legumes before?
? Did you have a good harvest?
? Why or Why not?
? What practices help legumes to grow well?
? What practices prevent legumes from growing well?
72
Encourage discussion. Do not correct ‘harmful practices’ mentioned by the farmers. This is a time for listening and letting farmers discuss, not for teaching. Incorrect practices will be corrected on the flipchart pages that follow.
After the discussion, move to the flipchart by saying, “Let’s compare your ideas with those found here in the flipchart. Let’s begin with land preparation and sowing.”
Land Preparation (Figure 7.1) -5 minutes3. Show
Show Figure 7.1 and say
? What do you see in this picture?
4. Explain Use the key messages on page 61 to explain the facts about land
preparation for legumes.
Additional Information for Trainer:Land Preparation:
Using crop stubble and residue is a soil conservation technique. It will be discussed in detail further on in this lesson.
Chickens and goats provide excellent manure.
Land Preparation
When do we plant legumes? Plant in January or February. Plant at the beginning of the rains.
Land preparation for legumes should include: Using organic material in the soil.
o Manure is an organic material.o Crop stubble and residue can also be added to the soil.o These items should be incorporated into the soil.
? Why do we add organic matter to the soil?? How is mulch incorporated into the soil?
73
Crop residue can be incorporated into the soil through mulching or simply spreading the residue on the land.
Spacing and Plant Density (Figure 7.2) - 5 minutes5. Show
Show Figure 7.2 and say,
? What do you see in this picture?
6. Explain Use the information on page 63 to share about measuring legume plants.
Additional Information for Trainer:Plant Density:
Plant density also affects the productivity of the legume crop. Plant density is different for each type of legume.
o Upright (Erect) varieties: 120,000 plants per hao Varieties that grow along the ground (indeterminate): 33,000 plants
per hao Climbing varieties: 12,000 plants per ha
Mixing Legume plants:
Spacing and Plant Density
? What are the benefits of proper spacing?
Correct spacing of the legumes allows for the most productive crop.
Space each type of legume differently. Upright varieties: 50 cm between plants and 10 cm between rows Varieties that grow along the ground: 60 cm between plants and 30 cm between rows Climbing varieties: 100 cm between plants and 50 cm between rows
When thinning legumes, leave only two plants per hole.Thin legumes while weeding the farm plot.
74
It is recommended that a farmer keep varieties of legumes pure by only planting one variety of legume in the farm plot to avoid cross pollination.
Crop Husbandry (Figure 7.3) - 5 minutes7. Show
Show Figure 7.3 and say,
? What do you see in this picture?
8. Explain Share the messages on page 65 and refer to Figure 7.3.
Additional Information for Trainer:Soil:
Soil that is acidic is not healthy for legumes. Soil that is acidic will cause poor growth of the legume crop. The crop will wilt
and dry up. Acidic soil can be balanced by applying lime, sulphur, or organic matter.
Soil Conservation Technique- Mulching (Figure 7.4) - 5 minutes9. Show
Show Figure 7.4 and say,
Crop HusbandryLegumes thrive well in many different soil types.
Manure and crop stubble will improve soil.
? How do manure and crop stubble help improve the soil?
Weeding legume crops is important. Weed the legume field within the first two weeks of planting. Weed as often as you notice signs of weeds growing in the farm plot.
75
? What do you see in this picture?
10. Explain Share the key messages found on page 67 and refer to Figure 7.4.
Additional Information for Trainer:Water:
Mulching conserves normal rain water, so it is not necessary to add water to the residue on the ground.
If additional water is added to the residue, it will aid in the breakdown of the residue and therefore will provide organic matter to the soil faster.
There must be a balance of water added as too much water will cause the residue to rot instead of breaking down.
Mulching: It can take 3 to 6 months for the mulch to break down and benefit the soil.
Therefore, the best time to prepare mulch is after the harvest.
11. Activity- Preparing a legume plot -30 minutes
1. Move into the demonstration plot if not already there.2. Designate a portion of the field for legumes. 3. Discuss the preparation of the soil.
Mulching
How do you mulch? Use any crop residue or dry grass. Place crop residue or grass between the rows of crops. When water is available, place water on the residue.
? What are the benefits of mulching? Keeps the soil cool during the dry period. Reduces soil erosion. Increases the filtration of water into the soil. Increases the soil’s organic matter, which will improve fertility. Increases the amount of water retained in the soil.
76

? What can we add to the soil to increase its nutrients?
Crop residue and grass can be incorporated into the soil.
4. Ask for 5 volunteers to till the area that was selected for legumes, making sure that crop residue and grass are incorporated into the soil.
5. Use the 5 hoes to till the area.6. Review the planting details for legumes.
i. Upright variety of legumes should be spaced 50 cm between plants and 10 cm between rows.
ii. Variety of legumes that grows along the ground should be spaced 60 cm between plants and 30 cm between rows.iii. Climbing variety of legumes should be spaced 100 cm
between plants and 50 cm between rows.7. Discuss the seed that you will be planting and in pairs, have farmers mark
places for the legume seeds and prepare the field.8. Plant the legumes with the correct spacing. 9. Discuss and review the steps that were done.
? How was this similar or different to what you have done in the past?
? Are there any questions about what we have done today?
10. Answer specific questions referring to flipchart as needed.
Control of Pests (Figure 7.5) - 5 minutes12. Show
Show Figure 7.5 and say,
? What do you see in this picture?
13. Explain Use the information on page 69 to share information about the control
of pests and refer to Figure 7.5.
Control of Pests
Pragas that can affect legumes: Mosca-do-feijoeiro Besouros-da-folha Termites Nem’atodos-de-galha Ferrugem Antracnose
77
Additional Information for Trainer:Resistant Varieties: FH is providing IT 18 and IT 16 to the farmers in Cabo del Gado. Botanical Pesticides: Apply neem and water mixture when farmers notice signs of pest attack. Apply mixture to leaves as this area is usually the area most affected.
Harvesting and Storage(Figure 7.6)- 10 minutes14. Show
? What do you see in this picture?
15. Explain Use the information on page 71 to discuss harvesting and storage of legumes.
Refer to Figure 7.6.
Control of Pests
Pragas that can affect legumes: Mosca-do-feijoeiro Besouros-da-folha Termites Nem’atodos-de-galha Ferrugem Antracnose
78
Additional Information for Trainer:Storage: Sinza is ash from cooking fires. The best ash is mango ash. More detailed storage directions will be introduced in Module 2.
Practice and Coaching – 30 minutes
For training of farmer leaders only:1. Ask participants to get in groups of 3. Each participant will teach a page from the
flipchart to the other people in their group. The participants should repeat the lesson exactly as they heard it presented earlier.
2. The people listening should ask questions as if they heard the material for the first time.3. After the participant finishes presenting a page, the listeners should give feedback to the presenter- What did the presenter do well? What could they
Harvesting and Storage of Legumes
When do you harvest legumes? Harvest immediately after legumes mature or when they start to dry in the field. Do not leave legumes in the field for a long time as the pods tend to pop and scatter
seeds on the ground. Harvest legumes in the early morning to avoid the pod opening and popping.
How to dry legumes: Dry legumes in the sun for three to four days.
How to store legumes: Make sure the legumes are very dry.
Test for dryness by biting a seed. If the seed breaks into powder, then it is not dry enough.
Treat the legumes with 10 grams of Sinza per kg of legumes.
? How are we good stewards of the earth when we plant legumes following all of these procedures we discussed?
We are making the best use of the soil. By following the measuring and planting guide lines, we will ensure high productivity. We are making sure the earth produces the best possible yield by taking care to
weed and harvest at the correct times. We are adding nutrients to the soil through mulching.
79
improve on in presenting the material? Have each listener give feedback to the presenter.4. Switch roles until each participant has presented at least one page and had
feedback given to them.5. During this time the facilitator should visit all of the groups. He or she should
listen to each group and correct or help those who have forgotten the message on that page.
6. When everyone is finished, answer any questions that the participants had on the material.
Probe-5 minutes
? What do you think about these guidelines for growing and harvesting legumes? Are the steps we have discussed difficult to follow? Is there anything that was mentioned today that you would not be able to do in your own field?
Ask the farmers to talk with the person sitting next to them for five minutes total. They should share any questions about the guidelines for growing legumes that they have, as well as any concerns about these steps. After five minutes, ask the farmers to share their concerns and questions with the group.
Inform-15 minutesSee if other people in the group can address or answer these points of concern or questions. If not, offer some advise or admit that you are not sure and will look into an answer. Make sure to bring these points up with a PSO or Supervisor.
Possible Concerns and Solutions: Harvesting Legumes
o Late harvesting can lead to significant loss of legume crop because of the splitting of the pods when they are dry.
o Harvest legume pods daily as the crop matures. Harvest as soon as the pods turn brown and just before they start popping open on their own.
Organic Pest Controlo Organic pest control can be problematic as the raw materials required
are not very common yet.o Encourage farmers to plant plants that can be used in organic pest
control like the neem tree, sisal, hot pepper plants, and tobacco.
Discussing Commitments in Small Groups- 15 minutesDivide into farmer accountability groups. Have farmers make a verbal commitment of something new that they willtry in the next two weeks based on the lesson.
80
o For example, “I will commit to incorporating organic materials like crop residue into my soil.” o Or, “I will commit to keeping my legume field free of weeds.”Have farmers give a report on their previous commitment from the last meeting.Farmers should encourage those who are struggling to keep their commitment and suggest they try again.Facilitator should move through the groups during this time encouraging and commenting on commitments.
81
Lesson 8: Cashew Trees
Objectives:1. The farmers will till the soil 2 to 3 times in preparation for planting the
cashew trees.2. The farmers will plan and plant cashew in rows along the contour with
correct spacing between plants.a. For reforestation, the cashew trees will be 3 m between trees and 3
m between rows.b. For commercial sale, the cashew trees will be 15 m between trees
and15 m between rows.3. The farmers will prepare holes for the seedlings before the rains with the
dimension of 20 cm deep and 20 cm wide.4. The farmers will directly sow 2 to 3 cashew seeds in one hole.
a. The seeds will be at a depth of 5 to 10 cm.b. The seeds will be pointing up and at an inclined position.c. The seeds will be in a triangular shape with 30 cm between each
seed.5. The farmers will thin the cashew plants after 1 to 2 months.6. The farmers will keep a 1 meter area clean of weeds and grass around
each tree.7. The farmers will intercrop cashew trees with annual plants and then cover
crops like legumes, beans soloco, and cowpeas.8. The farmers will prune the cashew tree regularly into a consistent shape.9. The farmers will remove sticks and infected branches from the cashew
tree.10.The farmers will believe that they are being good stewards of the earth by
tilling the soil often to allow for cashew trees to easily grow, following the guidelines for spacing between trees, keeping weeds away from the trees so they do not take minerals and water away from the trees, and protecting the trees from diseases and infections to ensure healthy trees and good crop productivity.
Approximate Length of Session: 145 minutes
Materials: Attendance Registers Flipchart Activity materials (for group of 20)
o 5 hoes
Lesson 8 Summary:
Attendance and Troubleshooting Show pictures and share key messages on flipchart pages 73-82:
o Land Preparation and Measuringo Sowing and Transplantingo Activity- Preparing a Cashew Orchardo Maintenanceo Intercroppingo Pruning
Practice and Coaching in small groups Probe about possible barriers Inform about possible solutions to barriers Request a commitment Examine practices related to the last lesson
1. Attendance and Troubleshooting- 5 minutes1. Fill out the attendance form for all those who are present.
Troubleshooting: Only for the PSOs who teach other farmer leaders:2. Collect attendance information from the farmer leaders for the previous lessons.
3. Ask farmer leaders about problems or concerns that they had at their last meeting.4. Help farmer leaders find solutions to the problems that they mention.5. Thank each farmer leader for their work and encourage them to continue.
2. Ask- 10 minutes Say, “Today we are going to discuss cashew trees and the process we
take to ensure good crop productivity.” Ask:
? What do you see in this picture?? How many of you have planted cashew trees before?
? Did you have success growing cashew trees?
? Why or Why not?
? What practices help cashew trees to grow well?
? What practices prevent cashew trees from growing well?
Allow time for discussion. This is an important time for the leader to listen to the current practices of the community regarding cashew trees. It will
83

also alert the leader to good practices, those of concern, and possible challenges.
The leader should listen for current practices that are good (practices that increase soil fertility and increase crop yield and quality) as well as harmful practices (practices that harm the land, crop yield and nutrition of families).
Encourage discussion. Do not correct ‘harmful practices’ mentioned by the farmers. This is a time for listening and letting farmers discuss, not for teaching. Incorrect practices will be corrected on the flipchart pages that follow.
After the discussion, move to the flipchart by saying, “Let’s compare your ideas with those found here in the flipchart. Let’s begin with land preparation and measuring.”
Land Preparation and Measuring (Figure 8.1) -5 minutes
3. Show Show Figure 8.1 and say
? What do you see in this picture?
4. Explain Use the key messages on page 73 to explain the facts about land
preparation for cashew trees.
Additional Information for Trainer:Commercial Planting:
Land Preparation for Cashew Trees
Land preparation for cashew trees should be carefully followed. Till the soil 2 to 3 times. Harrow the land until a depth of 5 to 6 cm before the rainy season. Place markers for potential cashew trees at the correct distance.
o If planting for reforestation, use 3 m between trees and 3 m between rows for spacing.
o If planting for commercial sale, use15 m between trees and 15 m between rows forspacing
Dig holes for saplings, one month before planting.o Holes should be 20 cm wide and 20 cm deep.
84

In a farm plot of commercial cashew trees, there should be no more than 76 trees per ha.
Measuring: An adult step is approximately 1 meter in length. This can help when
measuring the space between rows and between trees. An adult foot length is approximately 24 cm in length. Therefore farmers
can take 4 steps that are toe to toe to measure 1 meter.
Sowing and Transplanting (Figure 8.2) - 10 minutes5. Show
Show Figure 8.2 and say,
? What do you see in this picture?
6. Explain Use the information on page 75 to share about sowing and transplanting
cashew seedlings.
Additional Information for Trainer:Germination of Cashew Plants:
Soil for cashew plants must have sufficient moisture. That is why it is recommended that planting be done at the beginning of the rainy season.
Thinning Cashew Plants: Leave only the vigorous plants when thinning.
Eating Cashews: The shell of the cashew nut contains an irritating poison. People who
touch the shell can develop skin rashes and blisters. Roasting the cashew removes toxins.
7. Activity- Preparing a Cashew Orchard - 30 minutes
1. Move into the demonstration plot if not already there.2. Designate a portion of the field for the cashew orchard. 3. Discuss the preparation of the soil.
? What were the requirements to prepare the soil for planting cashew trees?
85
The requirements are to till the soil 2 to 3 times. Harrow the land until a depth of 5 to 6 cm. Place markers for potential cashew trees at the correct distance. If planting for reforestation, use a 3 m x 3 m spacing. If planting for commercial sale, use a 15 m x 15 m spacing Dig holes for saplings. Holes should be 20 cm deep and 20 cm wide.
4. Ask for 5 volunteers to till the area that was selected for the cashew trees.5. Use the 5 hoes to till the area. This should be done twice, so have another
group of 5 till the area again.6. Decide as a group if you are planting cashew trees for reforestation or
commercial sale. Discuss.7. Have half the group place markers for the cashew trees at the correct
distance either for reforestation or commercial sale. 8. Have the other half of the group dig holes for the saplings that are 20 cm
deep and 20 cm wide at the markers.9. Discuss and review the steps that were done.
? How was this similar or different to what you have done in the past?
? Are there any questions about what we have done today?
10. Answer specific questions referring to flipchart as needed.
Maintenance of Cashew Trees (Figure 8.3) - 5 minutes8. Show
Show Figure 8.3 and say,
? What do you see in this picture?
9. Explain Share the messages on page 77 and refer to Figure 8.3.
86
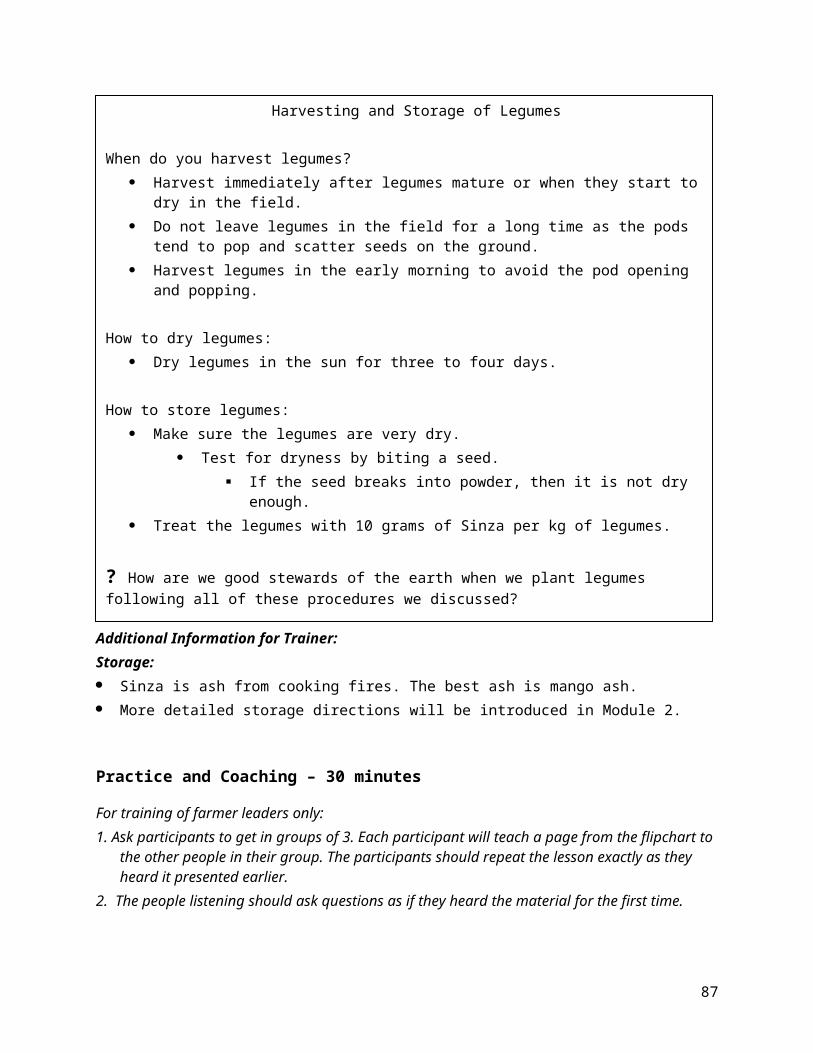
Soil Conservation Technique- Intercropping (Figure 8.4) - 5 minutes10. Show
Show Figure 8.4 and say,
? What do you see in this picture?
11. Explain Share the key messages found on page 79 and refer to Figure 8.4.
Maintenance of Cashew Trees
Remove weeds in an area of 1 meter around each tree.o Weeds steal water and nutrients from the growing trees.
Hoe the orchard each week.o Hoeing breaks the crust of the soil so water can enter the soil and feed the roots
of the cashew tree. Leave weeds and grass in the rows between the trees.
o Mulch holds water in the soil and adds nutrients back to the soil.
87

Additional Information for Trainer:Cover Crops:
Cover crops are recommended in the cashew orchard because they add nitrogen to the soil.
Even though alfalfa is not a human food crop, it can still be planted in a cashew orchard and used for feeding animals.
It is important that cover crops do not climb the cashew trees.Intercropping with Cashew Trees:
Intercropping is best used before the trees develop large branches. This happens in approximately 3 years. At 3 years, or when the trees are larger, the branches create too much shade for crops to grow well underneath the tree.
Pruning (Figure 8.5) - 10 minutes12. Show
a. Show Figure 8.5 and say,
Intercropping with Trees
What are the benefits of planting two or more crops in the same field? Different crops provide additional income while waiting for the other harvest. Different crops increase the variety of nutrition and health the family can enjoy. Soil is protected and holds more nutrients.
Why do you intercrop with Cashew Trees? The land is well prepared for plants to grow. Crops prevent weeds and grass from growing between the cashew trees. Different crops provide additional income while waiting for the cashews.
How do you intercrop with Cashews? Use annual crops.
o These include crops such as groundnuts and sesame. Keep them at a distance of at least 2 meters from the trees. Cover crops can be used later.
o These include crops such as legumes, beans soloco, and cowpeas.
88
? What do you see in this picture?
13. Explain Use the information on page 81 and Figure 8.5 to share information
about pruning cashew trees.
Additional Information for Trainer:Pruning Cashew Trees:
There are fungal disease that can cause damage to the cashew leaves, shoots and fruit. These diseases are called Anthracnose and Cercospora blotch.
Some pests that affect cashew trees are beetles, caterpillars, and termites. If possible, use botanical pesticide to combat pests.
Wounds on a cashew tree can be treated with tar. This will help with healing and the prevention of further infection.
Practice and Coaching – 30 minutes
Pruning Cashew Trees
Prune regularly to get a consistent shape of the cashew tree.o This will aid in caring for the cashew tree.
Remove the sick and infected branches.o Sick and infected branches might be branches that start drying up.o Branches might have aphids on the young shoots.o The leaves could have dark colors on them which indicates a fungal infection.
? How are we good stewards of the earth when we plant cashew trees following these procedures?
We are making the best use of the soil. By following the measuring and planting guide lines, we will ensure high productivity. We are producing the best possible yield by keeping weeds, grass, and crops away
from the trees. We are caring for the trees by pruning and treating wounds in order to protect the
trees and grow them to their potential.
89
For training of farmer leaders only:1. Ask participants to get in groups of 3. Each participant will teach a page from
the flipchart to the other people in their group. The participants should repeat the lesson exactly as they heard it presented earlier.
2. The people listening should ask questions as if they heard the material for the first time.
3. After the participant finishes presenting a page, the listeners should give feedback to the presenter- What did the presenter do well? What could they improve on in presenting the material? Have each listener give feedback to the presenter.
4. Switch roles until each participant has presented at least one page and had feedback given to them.
5. During this time the facilitator should visit all of the groups. He or she should listen to each group and correct or help those who have forgotten the message on that page.
6. When everyone is finished, answer any questions that the participants had on the material.
Probe-5 minutes
? What do you think about these guidelines for cashew trees? Are the steps we have discussed difficult to follow? Is there anything that was mentioned today that you would not be able to do in your own field?
Ask the farmers to talk with the person sitting next to them for five minutes total. They should share any questions about the guidelines for growing cashew trees that they have, as well as any concerns about these steps. After five minutes, ask the farmers to share their concerns and questions with the group.
Inform-15 minutes
See if other people in the group can address or answer these points of concern or questions. If not, offer some advise or admit that you are not sure and will look into an answer. Make sure to bring these points up with a PSO or Supervisor.
Possible Concerns and Solutions: Time taken until there are benefits
o Farmers may be concerned that it could take 2 to 3 years before proper production of the cashew tree can begin.
o Farmers are advised to use grafted trees. These grafted cashew trees will allow farmers to start harvesting small quantities in the first year.
Equipment for cashew trees
90
o Farmers may be concerned about the equipment needed to maintain mature cashew trees. Such equipment could include pruning saws and spraying pumps.
o Farmers are encouraged to use the money they earn during the first harvest and sale to buy correct pruning knives and saws.
Discussing Commitments in Small Groups- 15 minutes
1. Divide into farmer accountability groups.2. Have farmers make a verbal commitment of something new that they will try
in the next two weeks based on the lesson.3. For example, “I will commit to tilling the soil two to three times before I plant
cashew seedlings.” 4. Or, “I will commit to keeping a 1 meter area clean of weeds and grass around
each cashew tree.”5. Have farmers give a report on their previous commitment from the last
meeting.6. Farmers should encourage those who are struggling to keep their
commitment and suggest they try again.7. Facilitator should move through the groups during this time encouraging and
commenting on commitments.
91
Lesson 9: Moringa Trees
Objectives:1. The farmers will add moringa leaves to their family’s diet in order to improve nutrition.2. The farmers will cut moringa branches for planting after the tree stops producing fruit.3. The farmers will plant cut moringa branches with the correct measurements and soil mixture.
a. Branches should be planted in a hole 1 m wide, 1 m deep, and 1m across.
b. Soil should be a mixture of soil, sand and manure from either a lamb or chicken.
4. The farmers will plant moringa seeds in loose soil. The holes will be 30 cm wide 30 cm deep and 30 cm across.5. The farmers will thin the moringa shoots when they are 12 to 18 cm tall.6. The farmers will transplant moringa seedlings when they are 60 to 90 cm
tall.7. The farmers will believe that they are being good stewards of the earth by
using the moringa tree to the best of their potential- for pesticides, crop protection, soil and water conservation, and nutritional value.
Approximate Length of Session: 140 minutes
Materials: Attendance Registers Flipchart Activity materials (for group of 20)
o Hoes- 5o Moringa cuttings
Lesson 9 Summary: Attendance and Troubleshooting Show pictures and share key messages on flipchart pages 83- 92:
Moringa Treeo Planting from cuttingso Planting from seedso Transplanting Activity – Planting Moringa Trees
Practice and Coaching in small groups Probe about possible barriers
Inform about possible solutions to barriers Request a commitment Examine practices related to the last lesson
1. Attendance and Troubleshooting- 5 minutes
1. Fill out the attendance form for all those who are present.2. Troubleshooting: Only for the PSOs who teach other farmer leaders:3. Collect attendance information from the farmer leaders for the previous
lessons. 4. Ask farmer leaders about problems or concerns that they had at their last
meeting.5. Help farmer leaders find solutions to the problems that they mention.6. Thank each farmer leader for their work and encourage them to continue.
2. Ask - 10 minutes
Say, “Today we are going to discuss a tree that helps improve crop productivity.”
Ask:
? What do you see in this picture?? How many of you have used moringa trees before?
? What did you use them for?
? How did you use them?
? What do you know about planting, caring for, and using moringa trees?
Allow time for discussion. This is an important time for the leader to listen to the current practices of the community regarding moringa trees. It will also alert the leader to good practices, those of concern, and possible challenges.
The leader should listen for current practices that are good (practices that increase soil fertility and increase crop yield and quality) as well as harmful practices (practices that harm the land, crop yield and nutrition of families).
Encourage discussion. Do not correct ‘harmful practices’ mentioned by the farmers. This is a time for listening and letting farmers discuss, not for teaching. Incorrect practices will be corrected on the flipchart pages that follow.
93
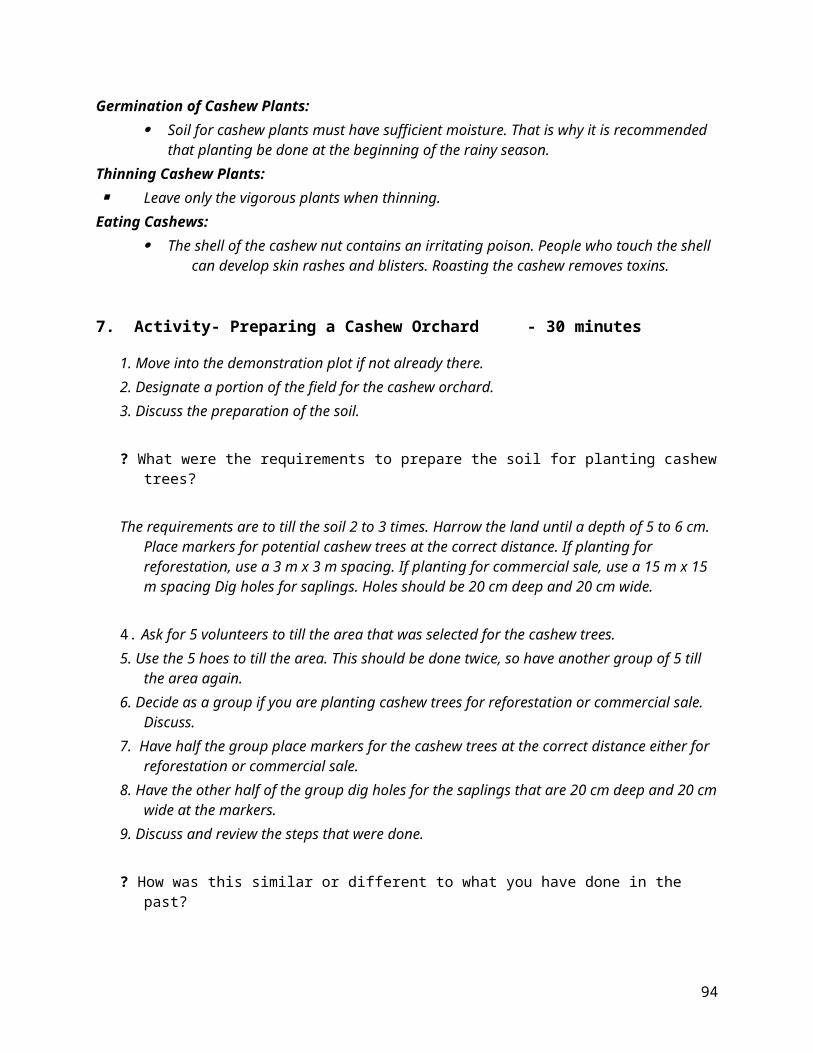
After the discussion, move to the flipchart by saying, “Let’s compare your ideas with those found here in the flipchart. Let’s begin with moringa trees.”
Moringa Trees (Figure 9.1) - 10 minutes
3. Show Show Figure 9.1 and say
? What do you see in this picture?
4. Explain Use the key messages on page 83 to explain the facts about moringa
trees.
Additional Information for Trainer:Moringa Trees:
Moringa trees are fast growing and are resistant to drought. This makes them a good tree for dry, sandy soils.
You can receive vitamins from other fruits and vegetables, but moringa leaves offer a higher amount of essential vitamins.
Moringa Trees
Why are Moringa Trees useful? Moringa leaves are full of vitamins.
o Vitamin A- helps with skin, heart problems, diarrheao Vitamin C- helps fight colds and fluo Calcium- develops stong bonés and teetho Potassium- helps with the functions of the brain and nerves
What part of the moringa tree can be used? All parts of the moringa tree can be used for food!
Add moringa leaves to the family meals. Add leaves to the cooking pot to provide additional protein. Use leaves that are fresh, or dry them and crush them.
94
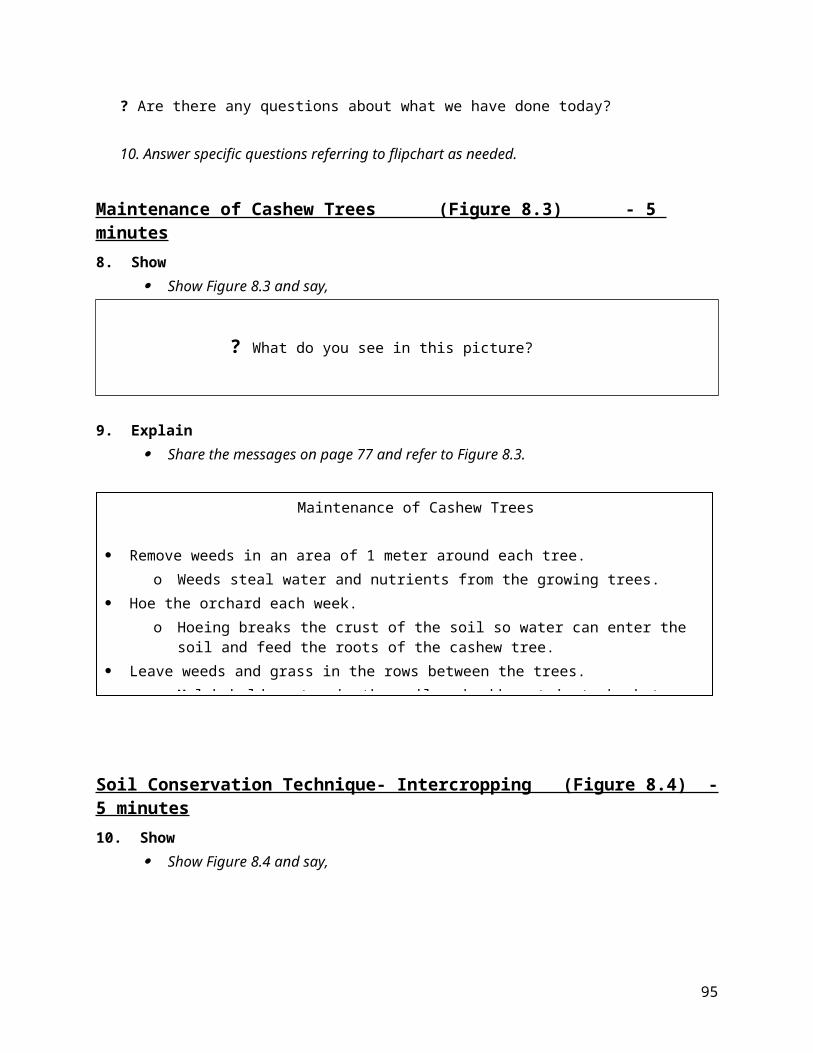
Planting from Cuttings (Figure 9.2) - 5 minutes5. Show
Show Figure 9.2 and say,
? What do you see in this picture?
6. Explain Use the information on page 85 to share about planting moringa trees
from cuttings.
Additional Information for Trainer:Spacing:
There is not a specific measuring recommendation for moringa trees. Most of the farmers in Cabo del Gado use these trees as hedges and gather the leaves and seeds.
More research can be done on issues surrounding the moringa tree/Soil:
If animal dung is not available, mix soil and sand together in a 1 to 1 ratio. When animal dung is available, add it to the soil at any point.
Planting from Cuttings
When to cut moringa trees: Prune after the tree stops producing fruit.
How to cut branches for planting: Cut a piece that is 30 cm in diameter and 1.8 m in length.
How to plant cut branches: Dig a hole 1 m wide, 1 m deep, and 1m across. Place cutting in hole. Fill hole with mixture of soil, sand and animal dung from a lamb or chicken. Compress soil firmly around the base of cutting. Form soil into a small ridge or rounded hill. Sprinkle with water, but do not flood.
95
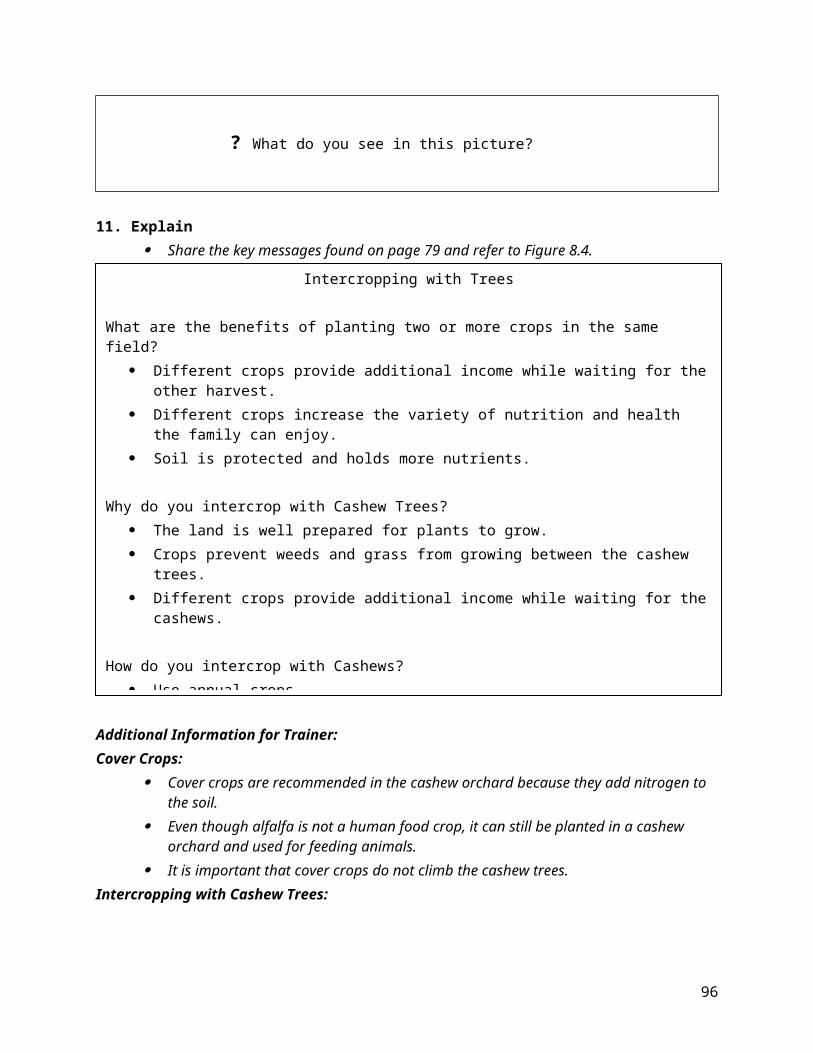
Planting from Seeds (Figure 9.3) - 5 minutes7. Show
Show Figure 9.3 and say,
? What do you see in this picture?
8. Explain Share the messages on page 87 and refer to Figure 9.3.
Additional Information for Trainer:Soil:
The soil should easily fall. The soil should not be stiff with mud or heavy with water.
If the soil is heavy, prepare a larger hole for the seeds. The hole should be 90 cm wide and 90 cm deep. o Refill the hole with 1 part sand and 2 parts original soil.o If manure is available, add manure to the hole.
Planting Seeds: The seeds should be placed at a depth no greater than 1.5 cm, about the
size of a thumbnail. The seeds should not be watered too much as the seed could drown.
Moringa Shoots: Watch small moringa shoots for termites and nematodes. Keep these
pests away from the small seedlings.
Planting from Seeds
How to plant Moringa Seeds: Choose area with loose soil and sand. Make holes 30 cm wide, 30 cm deep, and 30 cm across. Refill the holes loosely with soil and manure, if available. Place 3 to 5 seeds in each hole with 5 cm of space. Keep soil damp.
Thinning Moringa Shoots: Thin when shoot is 12 to 18 cm tall. Keep healthiest plant. Remove other shoots.
96
Transplanting (Figure 9.4) - 5 minutes9. Show
Show Figure 8.4 and say,
? What do you see in this picture?
10. Explain Share the key messages found on page 89 and refer to Figure 9.4.
97
Additional Information for Trainer:Soil in Plastic Bags:
The soil used in the plastic bags for planting moringa seeds should be a mix of loose soil. For example, use 3 parts soil to 1 part sand.
Keep soil damp, but not too wet.Thinning Seedlings:
Keep only one moringa shoot per bag. Remove any extra shoots.Seedlings:
Seedlings can be transplanted around 4 to 6 weeks. This is usually the time it takes to reach 60 to 90 cm.
Planting seedlings in the afternoon protects them from the scorching sun on the first day of transplantation.
11. Activity- Planting moringa trees -30 minutes
Transplanting Moringa Trees
When do you transplant moringa trees? If you cannot plant seeds directly into soil, plant seeds in plastic bags. Plant 2 or 3 seeds per bag. Germination occurs around two weeks. Transplant when seedlings are 60 to 90 cm tall.
How do you transplant moringa trees? Make a hole 30 cm wide, 30 cm deep, and 30 cm across. Water the holes where the seedlings will be planted the day before. Plant in late afternoon. Place plastic bag in hole and carefully cut away the bag. Keep soil intact around roots. Place soil around the base of the shoot. Water only slightly.
? How are we good stewards of the earth when we plant and use moringa trees following all of these guidelines?
We are adding nutrients to the soil. We are not wasting resources. By following the measuring and planting guide
lines, we will ensure high productivity. We are benefiting our families by adding vitamins and minerals to their diets.
98
1. Move into the demonstration plot if not already there.2. Designate a portion of the field for moringa trees. 3. Discuss the preparation of the soil.
? What mixture of soil do we need when we plant moringa cuttings?
We need soil, sand, and animal dung.
4. Ask for 5 volunteers to mix the soil, sand, and animal dung together using the hoes.
5. Examine the moringa cuttings and how they appear. They should be 30 cm in diameter and 1.8 m in length.
6. Ask for 5 more volunteers to dig holes respective to the number of cuttings that you have. The holes should be 1 m x 1 m x 1 m.
7. Have new volunteers plant the cuttings and fill the holes with the soil, sand, and animal dung mixture that was made above. This can be done in pairs.
8. Compress soil around base and make into a mound. 9. Lightly water the cuttings that have been planted.10. Bring the group together and examine the neem seed pods.11. Have a small group (3 or 4 people) prepare the seeds.
Slightly dampen the seed pods. Rub the pods on a rough surface. Remove pulp. Clean seeds until white.
12. After the seeds are cleaned, sprinkle a few into the ground about 1 cm deep.13. Discuss and review the steps that were done.
? How was this similar or different to what you have done in the past?
? Are there any questions about what we have done today?
14. Answer specific questions referring to flipchart as needed.
Soil and water conservation (Figure 9.5) - 5 minutes12. Show
? What do you see in this picture?
99

13. Explain Use the information on page 91 to discuss soil conservation.
8
Practice and Coaching – 30 minutes
For training of farmer leaders only:1. Ask participants to get in groups of 3. Each participant will teach a page from the
flipchart to the other people in their group. The participants should repeat the lesson exactly as they heard it presented earlier.
2. The people listening should ask questions as if they heard the material for the first time.3. After the participant finishes presenting a page, the listeners should give feedback to the presenter- What did the presenter do well? What could they improve on in presenting the material? Have each listener give feedback to the presenter.
8. Switch roles until each participant has presented at least one page and had feedback given to them.
9. During this time the facilitator should visit all of the groups. He or she should listen to each group and correct or help those who have forgotten the message on that page.
10.When everyone is finished, answer any questions that the participants had on the material.
Probe -5 minutes
8 Design Principles for Farm Forestry, Chapter 3. www.mtg.unimelb.edu.au/publications/des_ch3.pdf
Trees in Soil and Water Conservation
Planting tees helps conserve water and soil.Trees help in soil conservation by:
Decreasing the amount of erosion. Increasing the quality and amount of organic materials in the soil. And improving the structure of the soil.
Trees can help reduce the amount of erosion by: Holding the soil together. And slowing down wind and water.
Planting moringa trees will help conserve soil and water.
100
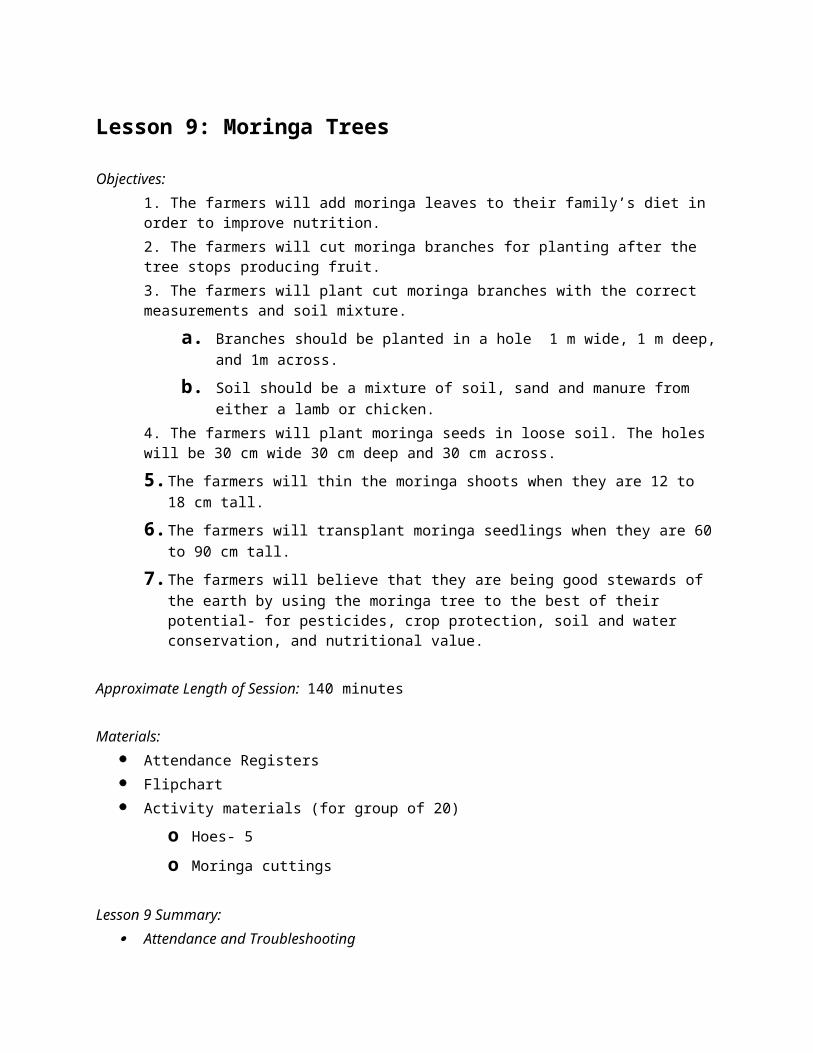
? What do you think about these guidelines for growing and using moringa trees? Are the steps we have discussed difficult to follow? Is there anything that was mentioned today that you would not be able to do in your own field?
Ask the farmers to talk with the person sitting next to them for five minutes total. They should share any questions about the guidelines for growing moringa trees that they have, as well as any concerns about these steps. After five minutes, ask the farmers to share their concerns and questions with the group.
Inform -15 minutes
See if other people in the group can address or answer these points of concern or questions. If not, offer some advice or admit that you are not sure and will look into an answer. Make sure to bring these points up with a PSO or Supervisor.
Possible Concerns and Solutions: Seeds
o Moringa seeds are not easily available for many of our farmers.o Farmers could travel to an area where moringa is commonly grown to
collect the seeds. Eating moringa
o Many farmers and families do not include moringa in their diets.o Demonstrations of how to incorporate moringa into a family’s diet can
be helpful. Also, exchange visits to communities where moringa is commonly eaten is another way of exposing farmers to new ideas.
Discussing Commitments in Small Groups- 15 minutes
1. Divide into farmer accountability groups.2. Have farmers make a verbal commitment of something new that they will try
in the next two weeks based on the lesson.3. For example, “I will commit to adding moringa leaves to my family’s meals in
order to increase the nutrients and vitamins we receive.”4. Or, “I will commit to planting moringa seeds in holes that are 30 cm wide, 30
cm deep, and 30 cm across.”5. Have farmers give a report on their previous commitment from the last
meeting.6. Farmers should encourage those who are struggling to keep their
commitment and suggest they try again.7. Facilitator should move through the groups during this time encouraging and
commenting on commitments.
101
102
Lesson 10: Neem Trees
Objectives:1. The farmers will use the neem tree as a pesticide.
a. The farmers will use the neem leaves to combat termites and other pests by soaking leaves in water.
b. The farmers will use the neem seed powder mixed with water to spray on plant and combat pests.
c. The farmers will use the neem oil mixed with stored crops to protect the crops from pests.
2. The farmers will sow only fresh neem seeds.3. The farmers will transplant neem seedlings after two pairs of leaves have
formed.4. The farmers will believe that they are being good stewards of the earth by
using the neem tree to the best of their potential- for pesticides, crop protection, soil and water conservation, and nutritional value.
Approximate Length of Session: 120 minutes
Materials: Attendance Registers Flipchart Activity materials (for group of 20)
o Hoes- 5o Neem seed pods
Lesson 10 Summary: Attendance and Troubleshooting Show pictures and share key messages on flipchart pages 93-100:
Neem Trees Use of Neem in Pest Control Sowing Neem Seeds Planting and Spacing Neem Trees Activity- Planting Neem Trees Soil Conservation
Practice and Coaching in small groups Probe about possible barriers Inform about possible solutions to barriers Request a commitment Examine practices related to the last lesson
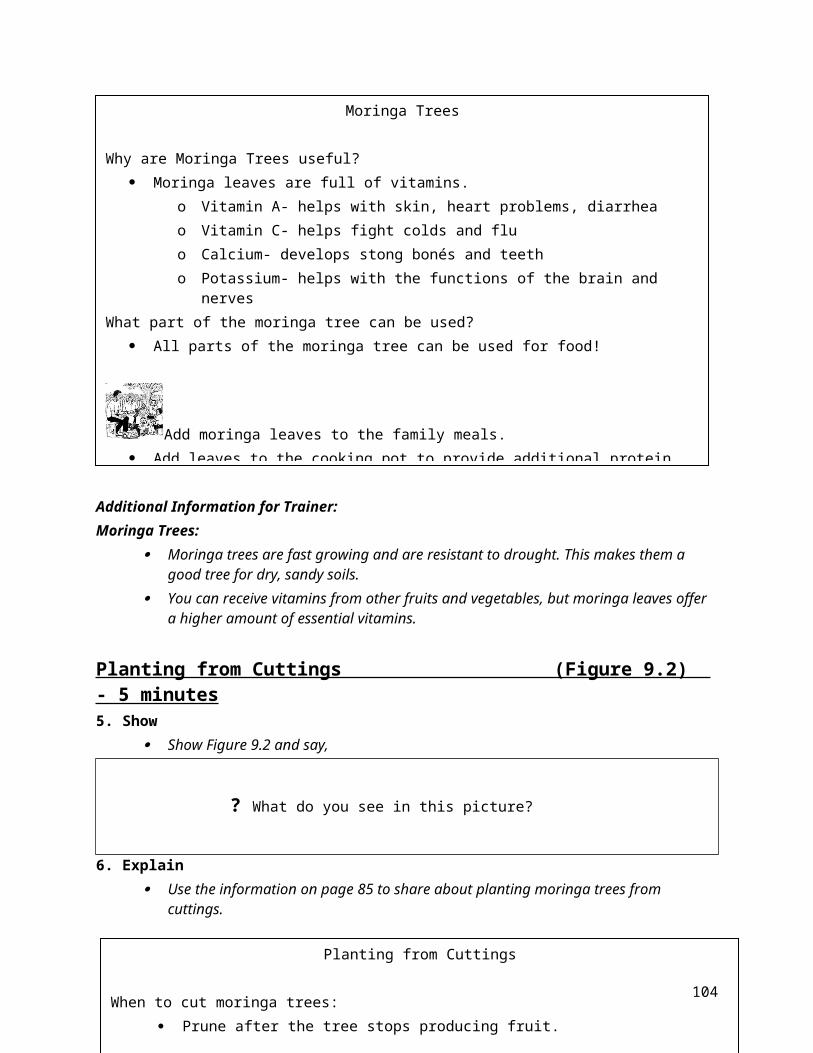
1. Attendance and Troubleshooting- 5 minutes1. Fill out the attendance form for all those who are present.
Troubleshooting: Only for the PSOs who teach other farmer leaders:2. Collect attendance information from the farmer leaders for the previous lessons. 3. Ask farmer leaders about problems or concerns that they had at their last meeting.4. Help farmer leaders find solutions to the problems that they mention.5. Thank each farmer leader for their work and encourage them to continue.
2. Ask - 10 minutes Say, “Today we are going to discuss trees that help improve crop
productivity.” Ask:
Allow time for discussion. This is an important time for the leader to listen to the current practices of the community regarding moringa and neem trees. It will also alert the leader to good practices, those of concern, and possible challenges.
The leader should listen for current practices that are good (practices that increase soil fertility and increase crop yield and quality) as well as harmful practices (practices that harm the land, crop yield and nutrition of families).
Encourage discussion. Do not correct ‘harmful practices’ mentioned by the farmers. This is a time for listening and letting farmers discuss, not for teaching. Incorrect practices will be corrected on the flipchart pages that follow.
After the discussion, move to the flipchart by saying, “Let’s compare your ideas with those found here in the flipchart. Let’s begin with neem trees.”
Neem Trees (Figure 10.1) - 5 minutes3. Show
a. Show Figure 10.1 and say,
? How many of you have used neem trees before?
? What did you use them for?
? How did you use them?
? What do you know about planting, caring for, and using neem trees?
104
? What do you see in this picture?
4. Explain Use the information on page 93 to share information about neem trees
and refer to firgura 10.1.
Use of Neem in Pest Control (Figure 10.2) - 5 minutes
5. Show
? What do you see in this picture?
6. Explain Use the information on page 95 to discuss the use of neem in pest control.
Refer to Figure 10.2.
Neem Trees
What is useful about a neem tree? The neem tree improves soil fertility. The neem tree improves water retention capacity. The neem tree needs little water, but plenty of sun. The neem tree can be used as an insecticide in food storage. The neem tree can improve soil. The neem tree can be used as a pesticide. The neem tree has health benefits, like the prevention of malaria.
Use of Neem in Pest Control
There are different parts of the neem tree that can be used as a pesticide. Here are some different possibilities:
Neem Leaves Place green leaves in large bucket. Soak leaves in water for 4 days.
105
Additional Information for Trainer:Neem Leaves:
The leaf and water mixture may be painted on plants or sprayed. Immediate results are hard to see. Neem is best used as a repellent.
Neem Seeds: The liquid can be sprayed on crops.
Neem Oil: Neem oil is collected from pounding the seeds and removing the shells.
Add a small amount of water to powder until it sticks together. Squeeze until oil collects on surface of ball.
Sowing Neem Seeds (Figure 10.3) - 5 minutes
7. Show
? What do you see in this picture?
8. Explain Use the information on page 97 To discuss sowing Neem seeds. Refer
to Figure 10.3.
Sowing Neem Seeds
How to sow Neem seeds: Use fresh seeds. Remove pulp from seeds.
o Dampen seed pods.o Rub pods on rough surface to remove pulp.o Wash with water until seed is clean and white.
When planting a small amount of seed: Throw seed directly into soil. Seeds should be about 1 cm deep. After sprouting, keep only the strongest plants.
When planting a large amount of seed: Grow plants in beds or trays and then transplant. Germination occurs within 1 to 3 weeks. Transplant shoots after 3 months.
Use of Neem in Pest Control
There are different parts of the neem tree that can be used as a pesticide. Here are some different possibilities:
Neem Leaves Place green leaves in large bucket. Soak leaves in water for 4 days.
106
Additional Information for Trainer:Seeds:
Seeds should not be older than 6 months.Transplanting:
If roots are not present, shoots can remain in trees for up to two years. This may occur if using a cutting of a neem tree.
Planting and Spacing (Figure 10.4) - 5 minutes
9. Show
? What do you see in this picture?
10. Explain
Use the information on page 99 to discuss planting and spacing neem trees. Refer to Figure 10.4.
Planting and Spacing Neem Trees
If planting neem trees in a nursery: Space seeds 15 to 25 cm between holes and 2.5 to 5 cm between the rows.
Seedlings can be transplanted when they have 2 pairs of leaves. Usually after 1 to 2 months.
Space the transplanted plants 15 cm between plants and 15 cm between the rows.
? How are we good stewards of the earth when we plant and use neem trees? We are adding nutrients to the soil. We are not wasting resources. By following the measuring and planting
guide lines, we will ensure high productivity. We are benefiting our families by adding vitamins and minerals to their diets. We are protecting our crop using organic and local pesticides.
107
11. Activity- Planting neem trees -20 minutes
1. Move into the demonstration plot if not already there.2. Designate a portion of the field for neem trees.3. Bring the group together and examine the neem seed pods.4. Have a small group (3 or 4 people) prepare the seeds.a. Slightly dampen the seed pods.b. Rub the pods on a rough surface.c. Remove pulp.d. Clean seeds until white.5. After the seeds are cleaned, sprinkle a few into the ground about 1 cm deep.6. Discuss and review the steps that were done.
? How was this similar or different to what you have done in the past? ? Are there any questions about what we have done today?
7. Answer specific questions referring to flipchart as needed.
Practice and Coaching – 30 minutes
For training of farmer leaders only:1. Ask participants to get in groups of 3. Each participant will teach a page from
the flipchart to the other people in their group. The participants should repeat the lesson exactly as they heard it presented earlier.
2. The people listening should ask questions as if they heard the material for the first time.
3. After the participant finishes presenting a page, the listeners should give feedback to the presenter- What did the presenter do well? What could they improve on in presenting the material? Have each listener give feedback to the presenter.
4. Switch roles until each participant has presented at least one page and had feedback given to them.
5. During this time the facilitator should visit all of the groups. He or she should listen to each group and correct or help those who have forgotten the message on that page.
6. When everyone is finished, answer any questions that the participants had on the material.
108
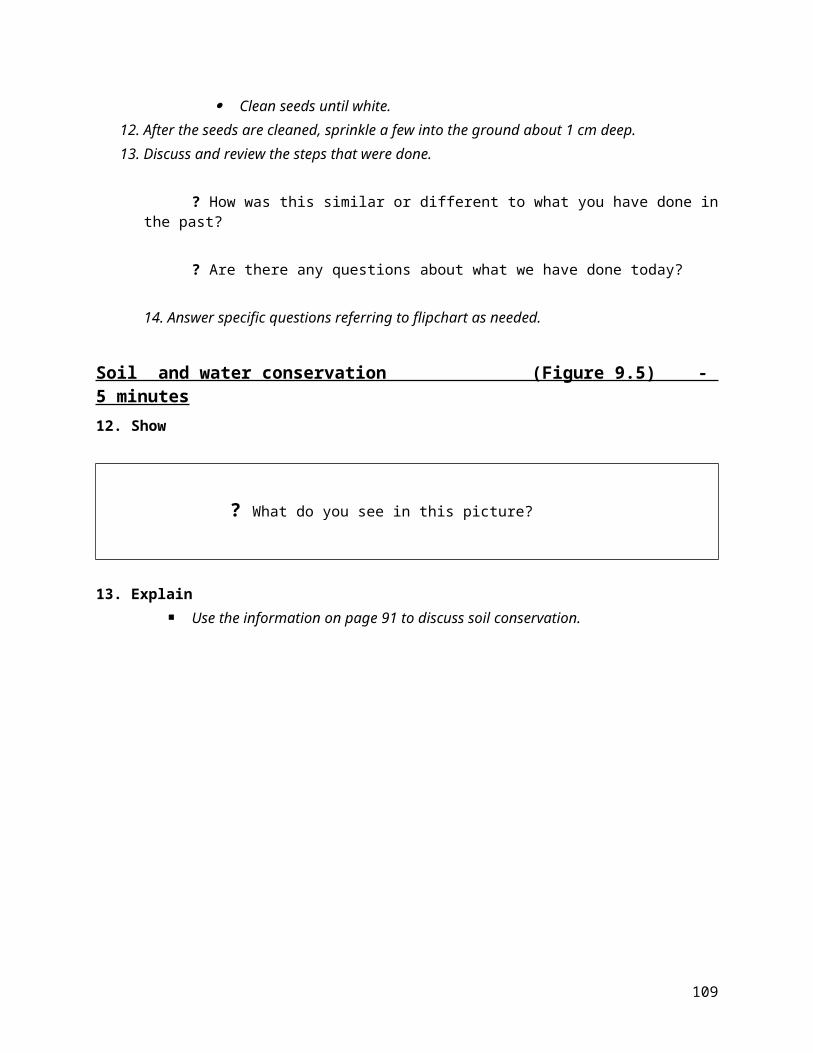
Probe-5 minutes
? What do you think about these guidelines for growing and using neem trees? Are the steps we have discussed difficult to follow? Is there anything that was mentioned today that you would not be able to do in your own field?
Ask the farmers to talk with the person sitting next to them for five minutes total. They should share any questions about the guidelines for growing neem trees that they have, as well as any concerns about these steps. After five minutes, ask the farmers to share their concerns and questions with the group.
Inform-15 minutes
See if other people in the group can address or answer these points of concern or questions. If not, offer some advise or admit that you are not sure and will look into an answer. Make sure to bring these points up with a PSO or Supervisor.
Discussing Commitments in Small Groups- 15 minutes
1. Divide into farmer accountability groups.2. Have farmers make a verbal commitment of something new that they will3. try in the next two weeks based on the lesson.4. For example, “I will commit to combating termites by soaking neem leaves in
water for 4 days and then using the liquid on the area that the termites are attacking.”
5. Or, “I will commit to sowing only fresh neem seeds.”6. Have farmers give a report on their previous commitment from the last meeting.7. Farmers should encourage those who are struggling to keep their commitment
and suggest they try again.8. Facilitator should move through the groups during this time encouraging and
commenting on commitments.
109


![wace1516.scsa.wa.edu.auwace1516.scsa.wa.edu.au/__data/assets/word_doc/000… · Web viewManual arts: Fusion welding. Perth: Education Department of Western Australia, p. 23] [From:](https://img.pdfslide.us/doc/110x75/5a78b1417f8b9a273b8d533d/web-viewmanual-arts-fusion-welding-perth-education-department-of-western-australia.jpg)