Embed Size (px)
Citation preview

Work with SD card(offline)
Step1. Connect lights, slave controller and
H801TC like the following image.
I connect H801RC to NET1 and NET2, you can also just
connect H801RC to NET1.
If you want to control for example WS2812B strip,
just connect GND, DI on strip to GND, DAT on slave
controller.
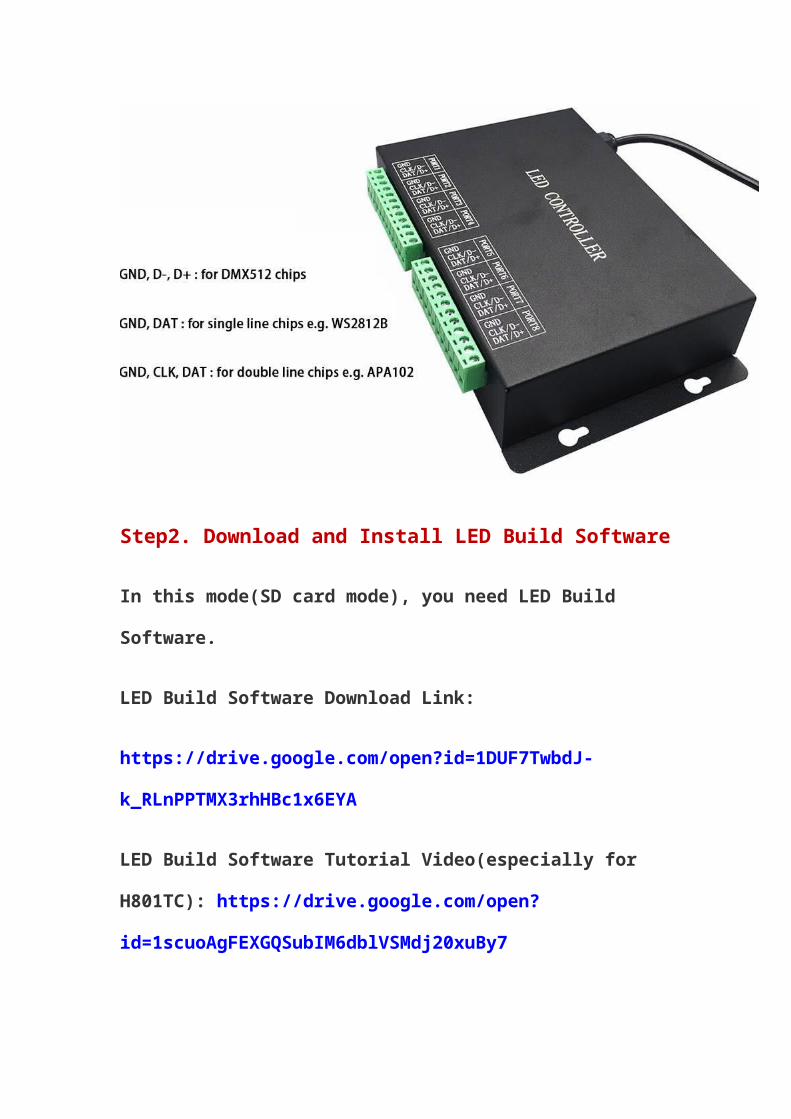
Step2. Download and Install LED Build Software
In this mode(SD card mode), you need LED Build
Software.
LED Build Software Download Link:
https://drive.google.com/open?id=1DUF7TwbdJ-
k_RLnPPTMX3rhHBc1x6EYA
LED Build Software Tutorial Video(especially for
H801TC): https://drive.google.com/open?
id=1scuoAgFEXGQSubIM6dblVSMdj20xuBy7
Step3. Program in LED Build Software
In the video, I show H801TC connects one
H801RC, if you connect more, same theory.
Basically, you can learn everything you need to
make H801TC work in the video. The following is
some text explanation.
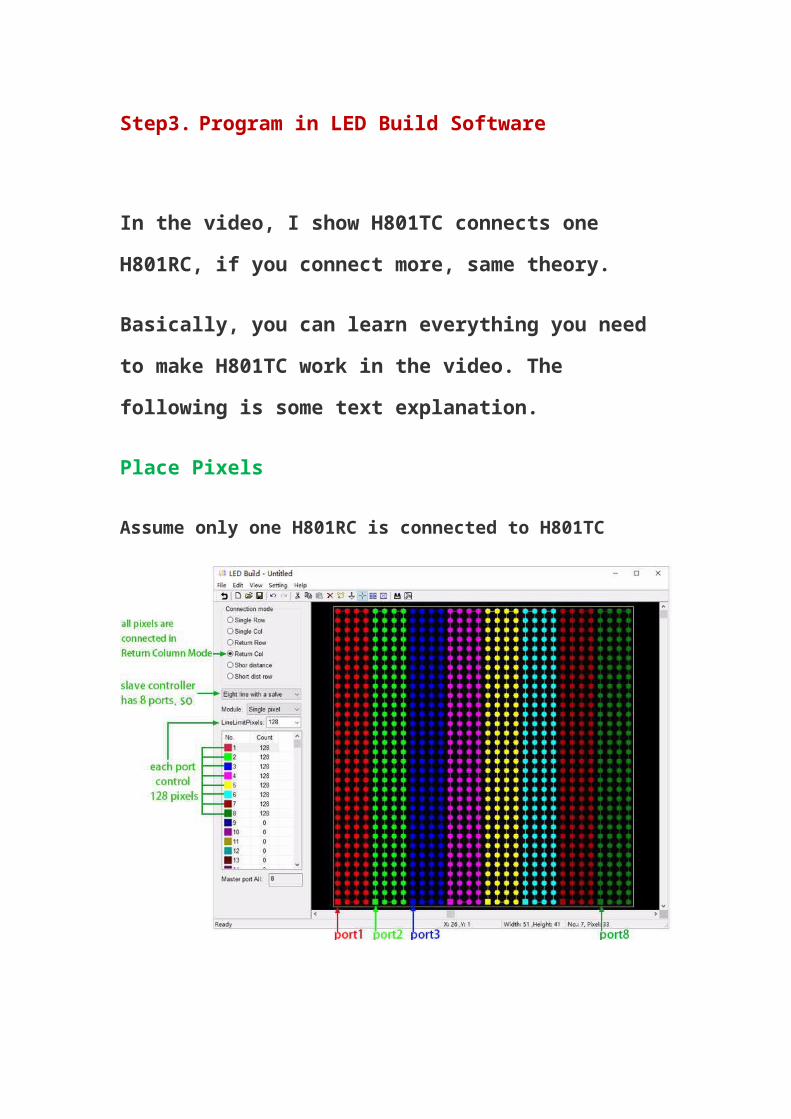
Place Pixels
Assume only one H801RC is connected to H801TC
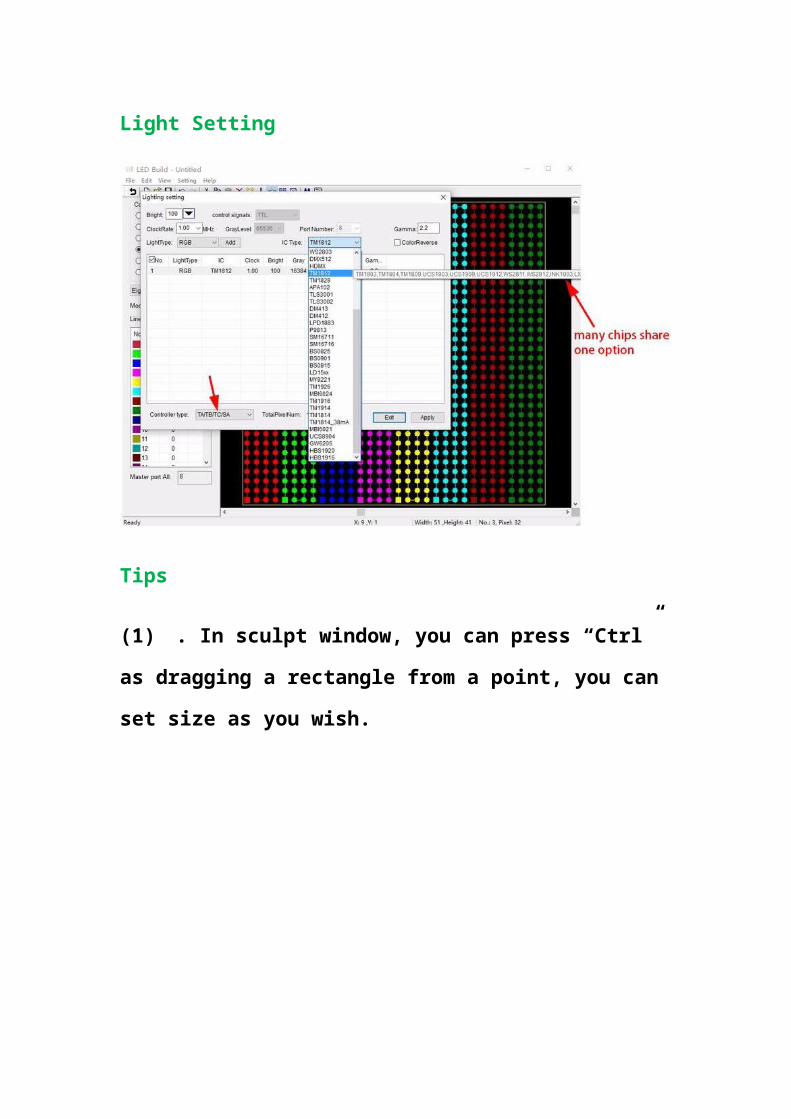
Light Setting
Tips
(1) . In sculpt window, you can press “Ctrl” as
dragging a rectangle from a point, you can set
size as you wish.

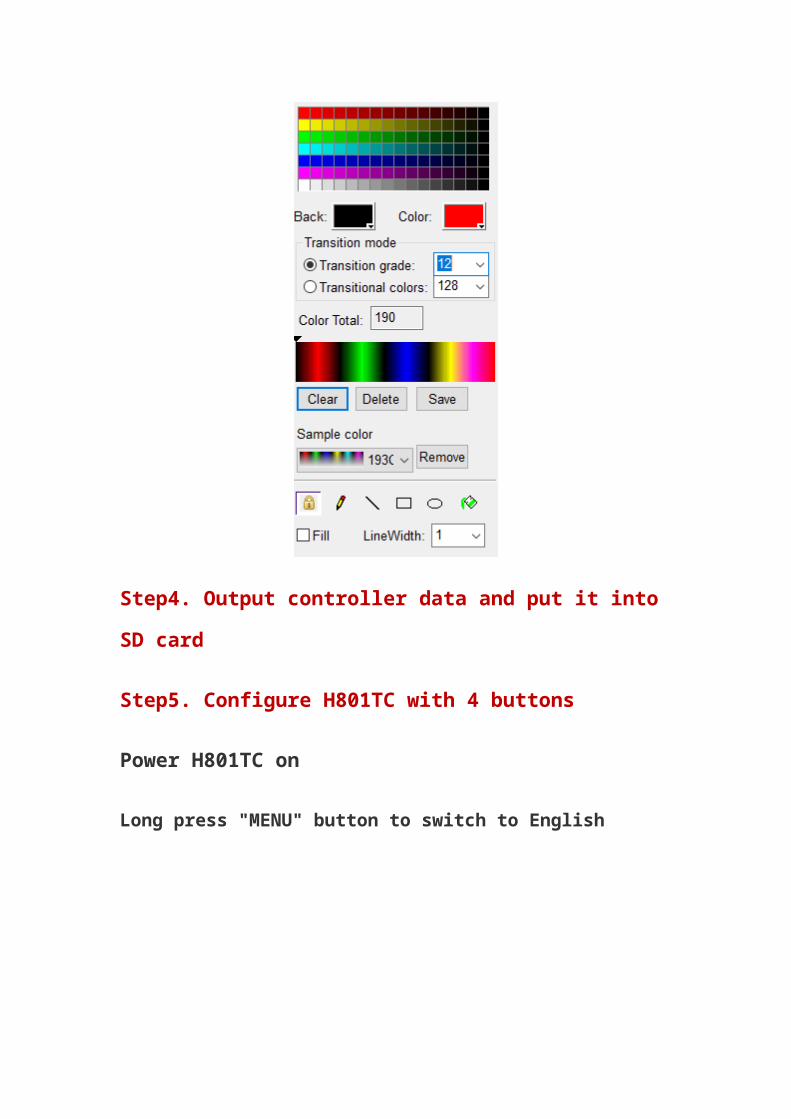
(2) . when you choose color in color plate, click
one color, press “Ctrl” as clicking another
color(or the same color), one color will gradually
change to another color.
Step4. Output controller data and put it into SD
card
Step5. Configure H801TC with 4 buttons
Power H801TC on
Long press "MENU" button to switch to English

Switch files
Set Playback Mode, press "OK" to save
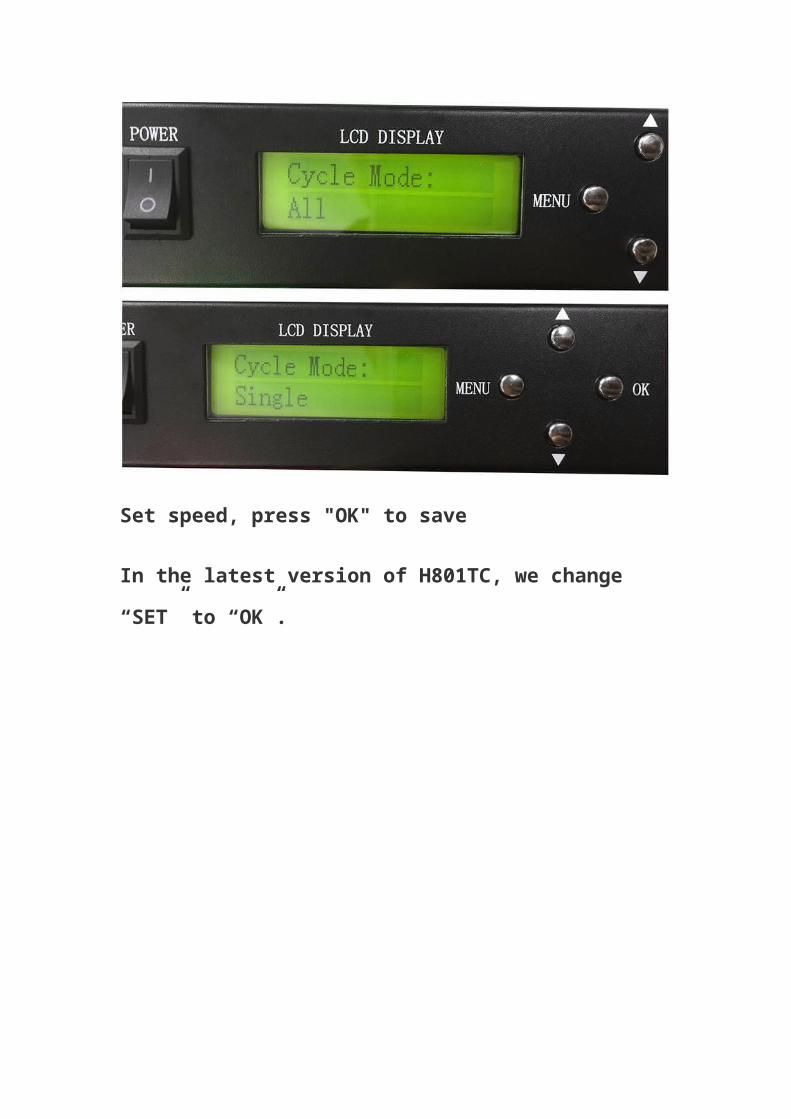
Set speed, press "OK" to save
In the latest version of H801TC, we change
“SET” to “OK”.

Set brightness
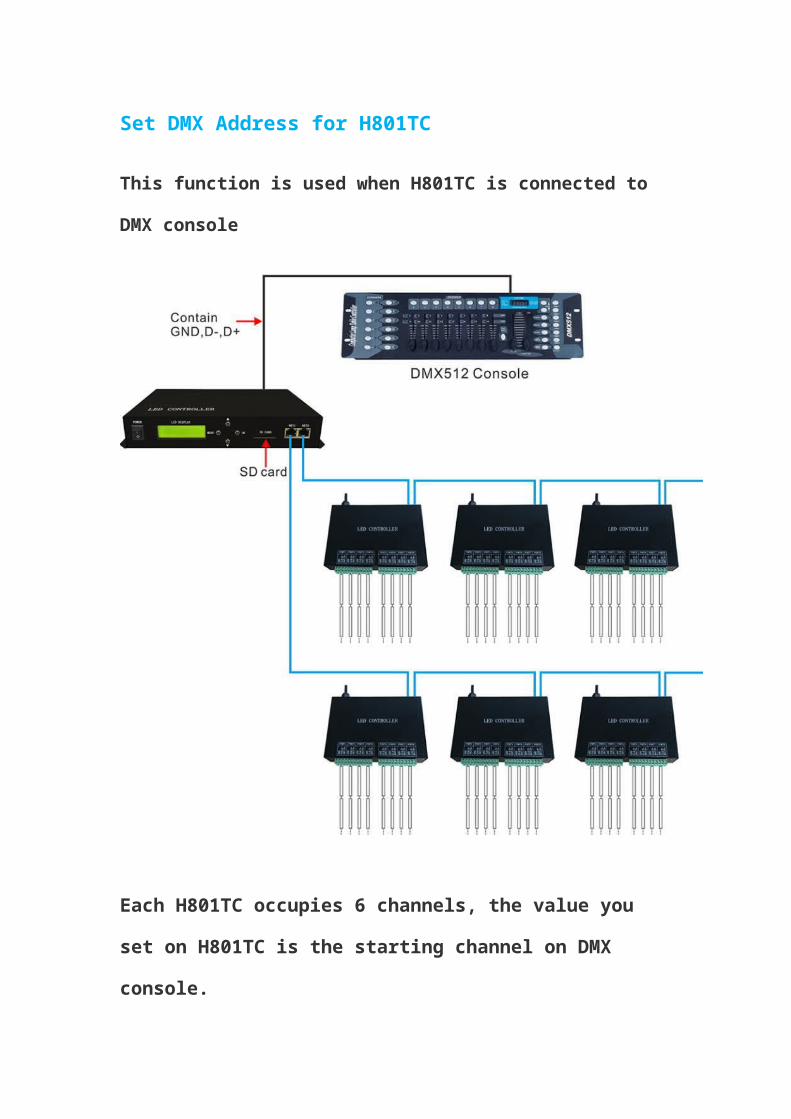
Set DMX Address for H801TC
This function is used when H801TC is connected to
DMX console
Each H801TC occupies 6 channels, the value you set
on H801TC is the starting channel on DMX console.

For example:
If DMX Address you set on H801TC is 1, then channel
1,2,3,4,5,6 on DMX Console are available.
If DMX Address is 3, then channel 3,4,5,6,7,8 on DMX
Console are available.
In a word, the DMX Address on H801TC is the starting
channel on DMX Console.
Let’s say you set DMX address to 1.
On DMX console:
Channel 1 is used to set brightness. H801TC itself
divides brightness into 16 grades.
So when you adjust channel 1, value 1~16 is grade 1,
17~31 is grade 2,...., 241~255 is grade 16.
Channel 2: adjust brightness of red
Channel 3: adjust brightness of green
Channel 4: adjust brightness of blue
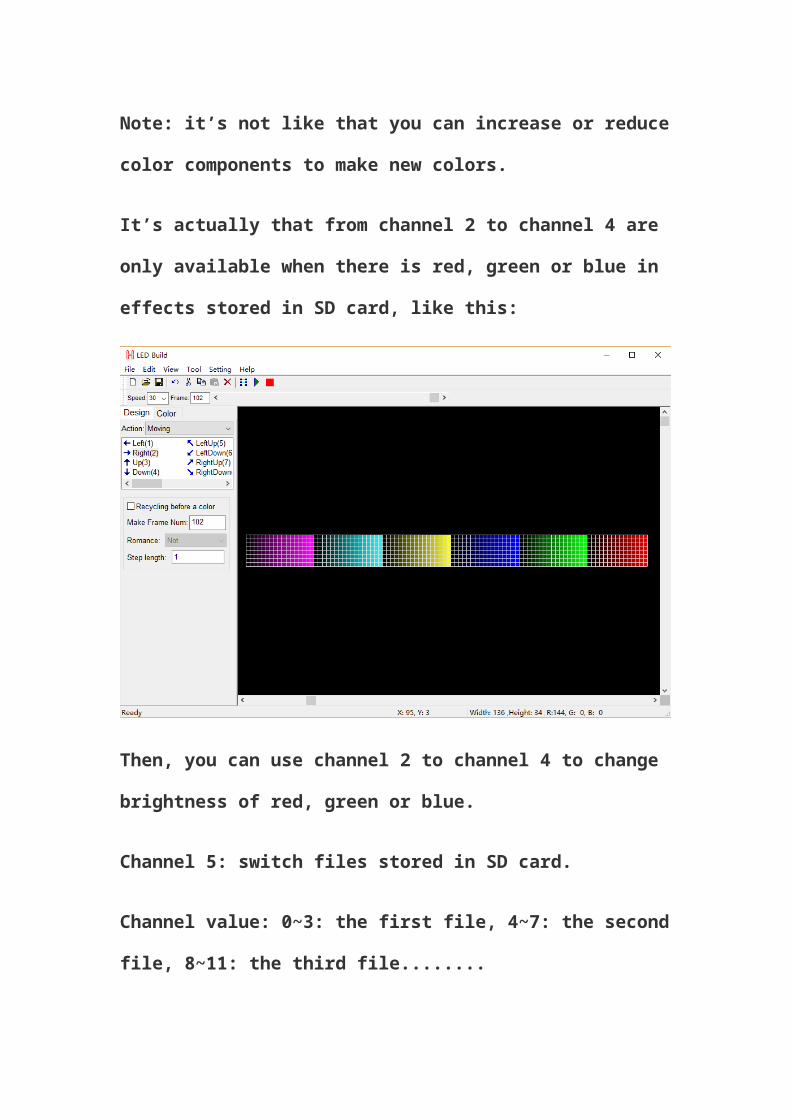
Note: it’s not like that you can increase or reduce
color components to make new colors.
It’s actually that from channel 2 to channel 4 are only
available when there is red, green or blue in effects
stored in SD card, like this:
Then, you can use channel 2 to channel 4 to change
brightness of red, green or blue.
Channel 5: switch files stored in SD card.
Channel value: 0~3: the first file, 4~7: the second file,
8~11: the third file........

Channel 6: adjust speed.
Formula:
actual speed = speed set on H801TC * channel value /
255
Press "OK" to start addressing.
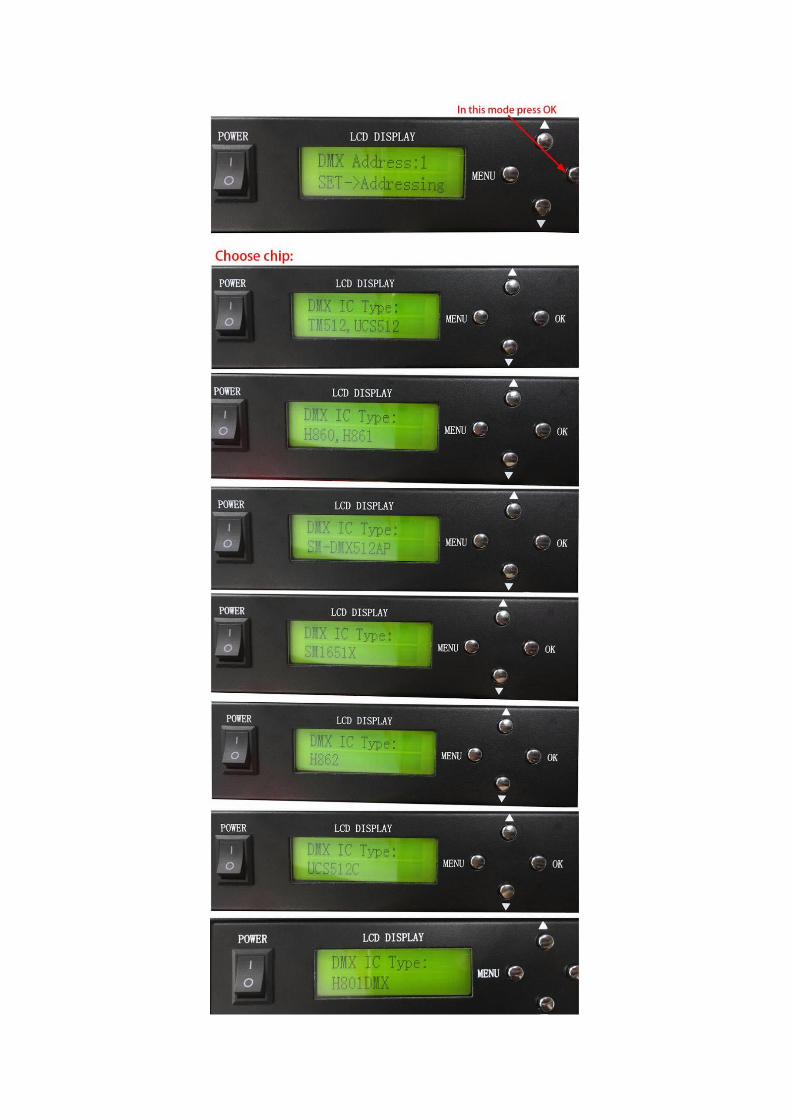
Control DMX512 chip lights
H801TC can control H801RC, H802RA and two kinds of
slave controllers(they all support DMX512 protocol),

but by using H801TC + H802RA, you can set DMX
address for DMX512 chips.
Take TM512 strip for example:
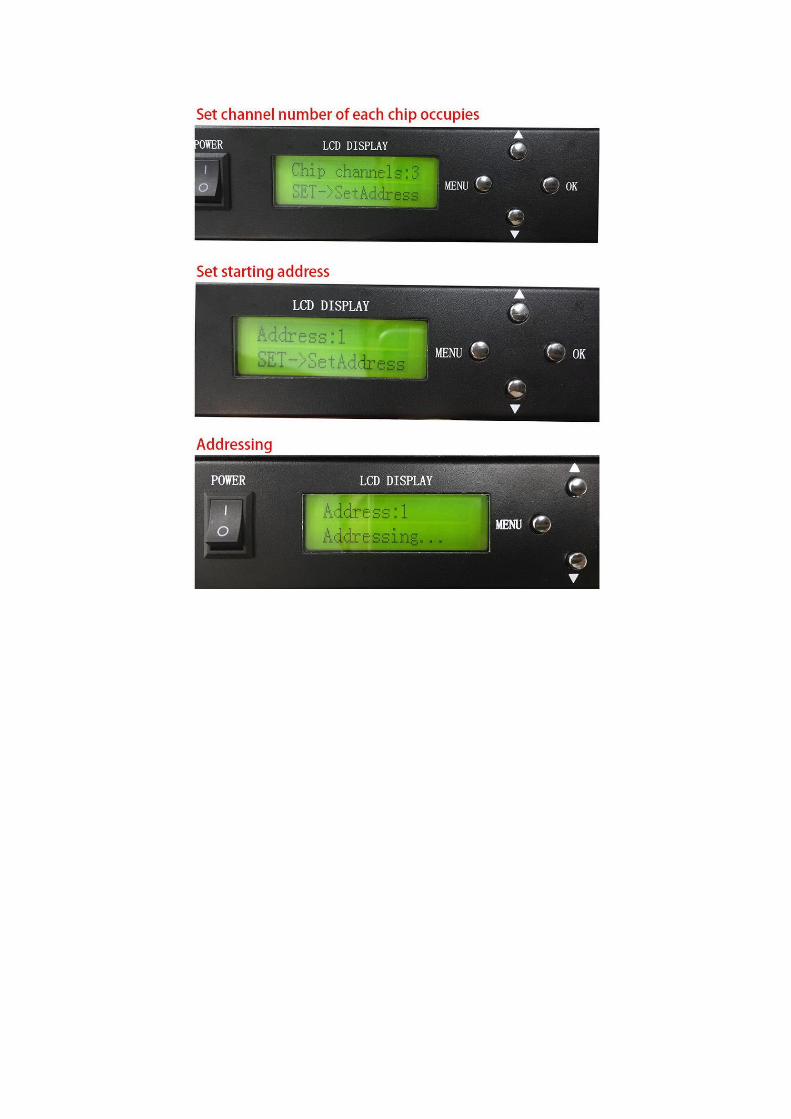
Step1. Set them up

Step2. Set address with four buttons