Embed Size (px)
Citation preview
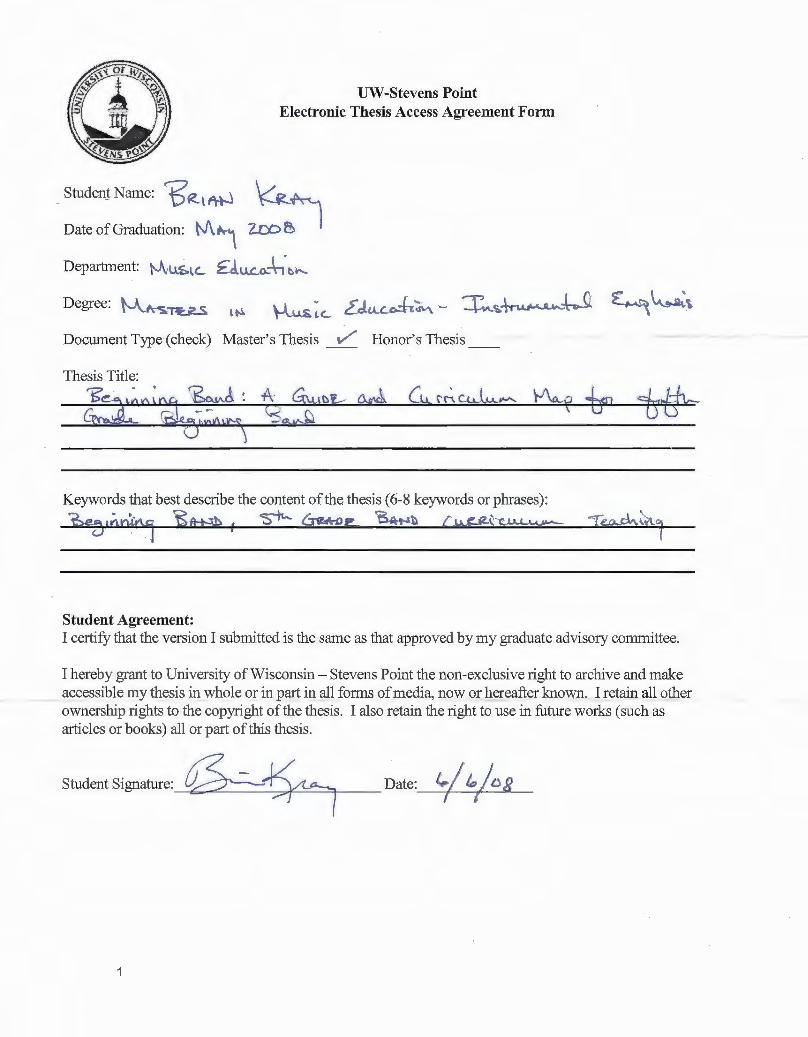
UW -Stevens Point Electronic Thesis Access Agreement Form
. Studen)Name: 'B'R.t~ ~
Date of Graduation: tv\~ 2..cl:::>~
Department: !JvU.'SlL £d.ULo...~· t.~
Degree: ~~~ ~ ~ \-lus~c... Ldu..c_o.:h.~ ~ ~~~W ~~~\
Document Type(check) Master's Thesis v' Honor's Thesis
Thesis Title:
~;~~'
Keywords that best describe the content of the thesis (6-8 keywords or phrases):
'?>ea ,.;n0., JS~ , ~ ~e.. ~\\ r~,~ :r~~,
Student Agreement: I certify that the version I submitted is the same as that approved by my graduate advisory committee.
I hereby grant to University of Wisconsin- Stevens Point the non-exclusive right to archive and make accessible my thesis in whole or in part in all forms of media, now or hereafter known. I retain all other ownership rights to the copyright of the thesis. I also retain the right to use in future works (such as articles or books) all or part of this thesis.
Student Signature: &~ Date: te/ lc )Dg - --+, - ,,,______....__
Beginning Band 1
Running head: BEGINNING BAND
Beginning Band:
A Guide and Curriculum Map for
Fifth Grade Beginning Band.
Brian J. Kray
University of Wisconsin – Stevens Point

Beginning Band 2
A Guide and Curriculum Map for Fifth Grade Beginning Band
The materials found within this paper are an outgrowth of a three-year journey
into teaching beginning band students. These materials can be used as a guide map to
beginning band. This paper is not intended to be the solution for every situation in
beginning band, but rather a self-help guide to first-time experiences in a beginning band
program and teaching the beginning band student.
Teaching beginning band for the first time can be a daunting experience. As a
college student, one is trained in the mechanics of each instrument, shown how to
conduct, and lectured in the fundamentals of a strong lesson plan. It is possible for a new
graduate never to have taught a beginning student on an instrument in the typical
beginning band setting. This paper addresses many of the problems a new teacher might
face when teaching a beginning band. This paper covers, through research and
experimentation, many of the aspects of teaching the beginning band student with initial
lesson plans (See Appendix B), a week-by-week curriculum map (See Appendix C), and
much more.
The beginning band program starts at various levels from district to district. With
the middle school concept (sixth through eighth grade students grouped together), starting
students in the fifth grade was the most viable option in the Marathon City School
District. Additionally, through developmental research obtained while compiling the
materials within this paper, the fifth grade student has many advantages over students at
other grade levels. The fifth grade program in Marathon, unlike programs in some school
districts, is limited to only a half-year program that begins with the start of the second
semester. However, the materials in this paper may be adapted for the use during the first
semester of a yearlong beginning band too.
Beginning Band 3
In the age of ever tightening budgets, accountability within a program is
increasingly important and through solid curriculum design and measurable outcomes the
legitimacy of the beginning instrumental music program can be demonstrated. This
project gives structure to the beginning level band program so that from year to year
specific concepts can be taught consistently to fifth grade students. These concepts
provide a solid foundation for students who continue in middle and high school level
bands.
Personally, the first three years of teaching beginning band moved through
various phases. The first year of the three-year process was filled with experimentation.
Even with the teacher’s edition of the chosen band method in hand; the first year was a
time of trial and error. Many questions were asked of fellow music educators and all
ideas were given a chance. The second year built upon the previous year’s successes and
progressed to a more organized means of instruction but still was not without challenges.
There were still new concepts to understand and materials to organize. Finally, the third
year yielded much improvement, leading to a more efficient and successful beginning
band experience for the students and the compilation of the information within this
document.
Materials in this paper are intended to help establish a working structure to
teaching beginning band students in the fifth grade for the first time beginning band
educator. The items contained in this resource include justification for having a fifth
grade program, recommendations to help with a beginning program, a curriculum
timeline, lesson objectives and guides, worksheets and other resources.
Beginning Band 4
Chapter 1:
Why Fifth Grade Band?
Debate Between Fourth, Fifth, and Sixth Grade Beginning Band Programs
There are many variations to the beginning band program. Not only are there
differences in teaching techniques and methods used but also in the age of the beginning
student and the time of year students start beginning band. Different programs have
students start band in fourth, fifth, or sixth grade. What is the advantage to having
students start in fifth grade?
Physically, fifth graders are better suited to begin instrumental study than their
fourth grade counterparts. Fourth grade students are simply physically smaller than fifth
grade students. This size difference makes it easier for fifth graders to be able to hold
their instruments. Suzuki programs are able to accommodate the younger ages by
adapting the size of the instruments, but the acoustical nature of wind instruments does
not allow similar accommodations.
There are exceptions of course, such as the tuba. Students at the fifth grade level
are simply not strong enough to hold a tuba and therefore are started on trumpet or
baritone horn. The seventh position on trombone is a reach for a fifth grader, but notes
played in this position are not often used or taught until much later in the student’s
development, so that reach is not an issue at this age. “Clarinetists who want to play bass
clarinet start on soprano clarinet for a year and then switch over to bass.” (Blaufuss,
2006)
A fifth grade student psychologically is better suited for the experiences of
beginning band than a fourth or sixth grade student. Piaget’s stage theory states that
Beginning Band 5
students in fifth grade find themselves transitioning between the concrete operational
thought stage and the final stage of formal operational thought. It is in the concrete
operational stage that “children first start to form musical concepts about volume, and
then in this order: timbre, tempo, duration, pitch, and harmony (Abeles, Hoffer, and
Klotman, 1995).” As they transition to formal operational thought students become less
focused on their imagination and start becoming more interested in facts such as the rules
of music notation (Abeles et al., 1995). This transitional period finds the student
prepared to master the physical requirements of starting an instrument but also be able to
handle the non-physical demands such as musical intent.
Sixth grade students are more concerned with their self-image and are less likely
to be willing to try new ideas. “Youngsters at twelve and thirteen years of age are
undergoing so many changes so rapidly, it is natural that they feel less than secure in
what they are doing. It is probably this sense of insecurity that more than anything else
encourages the high degree of conformity found among adolescents (Abeles et al.,
1995).” In music this conformity makes it difficult for students to try different
approaches towards the same end result.
The Strength of the Entire Program Begins with Fifth Grade Band
“The better your [beginning band] program, the better your high school music
department will become.” (How to Promote Your Band, N.D.) Although many districts
have to wait until sixth grade for a variety of reasons, fifth grade is still the choice for
beginning band programs. (Reul, 1994)
On a pure student enrollment basis, the high school band would not exist if there
were not a middle school feeder program; in turn this would not exist without a beginning
Beginning Band 6
band. Beginning band programs need to draw a significant number of students; otherwise
attrition will mean that the numbers at the high school will not be sufficient to fill an
ensemble. “The recruitment program should be approached with all the creativity,
enthusiasm, and energy that a director can muster. When trying to build a strong band
program, you first need a large enrollment.” (Fraedrich, 1997) This is especially
important in the small school setting where the pool from which students are drawn is
much smaller.
A strong foundation in the fundamentals prevents having to teach basic concepts
in high school band. For example if counting is covered adequately during the beginning
stages of instruction, work on basic rhythm at the high school is unnecessary. “There are
band programs that do not teach or require students to count rhythms – this is a mistake.”
(Clardy, 2005) Stressing the fundamentals of music in the early stages of instruction
allow for discussion of more complex aspects of music at the high school level.
Advantages of Fifth Grade Instruction
During the 1960s and 1970s school districts found it to be more cost efficient to
move sixth grade to a “middle school” than having to build additional elementary schools
to accommodate the baby boomer generation (Beane and Lipka, 2006). In districts where
the middle school is a sixth through eighth grade building, starting students in fifth grade
has many benefits. Small districts often have only enough students for one middle school
band so all students sixth through eighth grade are mixed together. Starting students in
the fifth grade gives the students an opportunity to begin separately before getting mixed
in with more advanced students.
Beginning Band 7
In the sixth grade, many activities become available that were not choices in the
fifth grade; for example, many middle schools have a large and varied array of after
school athletics. The demands in athletics sometimes are sufficiently high to deter
students from participating in other activities like band. Students also have the option to
become part of other student groups such as student council, DARE (Drug Abuse
Resistance Education), and SADD (Students Against Drunk Driving). Each activity
takes up time in a student’s day that leaves less time for that student to choose band. If
band has not been established as a worthwhile endeavor before sixth grade, students may
choose not to participate.
Being part of the beginning band program ultimately benefits the student. “Art
programs have a dramatic influence on elementary and high school students’
performance – not just in painting a still life or playing the trombone but also in
standardized test scores.” (Leroux, 2007) Music, band in particular, is no longer merely
an extracurricular activity. “With the passage of the Goals 2000: Educate America Act,
the national goals are written into law, naming the arts as a core academic subject – as
important to education as English, mathematics, history, civics and government,
geography, science, and foreign language.” (What Students Should Know, 2007)
Beginning Band 8
Chapter 2:
Establishing a New Fifth Grade Band Program
In the school setting there are several groups that need to support the idea of a
beginning band in the fifth grade. The administration, school board, and parents all need
to understand the importance of the program in order for it to be successful. Without all
three groups in agreement, the best-designed programs will fight an uphill battle.
Working with Administration
One of the first groups to approach is the administration. They will be able to
help with planning and implementing this new aspect to the program. They will also be
able to help present to the school board.
One can begin by explaining to administration how the new program addition will
fit into the present fifth grade curriculum. In the School District of Marathon, WI,
administration was presented with this model.
Marathon School District Plan a. Beginning band is completely a pull-out program (students are removed from
existing classes to participate) that is designed to work with the fifth grade teachers. The band schedule must work with the school schedule. (Fraedrich, 1997)
b. Students are pulled out of class by instrument once every six days. Marathon
Elementary runs on a six day rotating cycle for classes like gym and band to eliminate lost class time due to typical days off (Mondays and Fridays). Also students are grouped homogenously by like instruments for lessons, allowing time to be focused solely on one instrument. (Fraedrich, 1997)
c. Full band meetings are held following middle school band rehearsal at the end of
the fifth grade lunch recess time. The full beginning band meetings are held once a week beginning in April.
Beginning Band 9
Additionally, administration must decide whether the new program addition can
be handled with the staff presently available or if new teachers will need to be hired. In
the Marathon School District hiring a second band teacher was not an option with
declining enrollment and decreasing budgets. The addition of thirty students did not
justify hiring a second band instructor in the district. The decision had to be based
instead on whether there was sufficient time in the present band teacher’s schedule to fit
the additional lesson time and rehearsal time within the school day.
Adding a fifth grade beginning band will also impact the instrument inventory.
Will there need to be new instruments ordered or are there existing supplies sufficient for
the added students? Most of the instruments such as the flute, clarinet, trombone, and
trumpet are typically rented by the student, which does not impact the school’s inventory.
Students were also encouraged to rent their own alto saxophones. The low brass might
be a limiting factor but often times an instrument may be borrowed or even rented if
required.
Working with the School Board
All significant changes in program instruction need to be approved by the school
board. The presenter must inform the school board of the benefits of the addition of a
fifth grade beginning band to the overall instrumental music curriculum, and must present
a budget for adding the program. It may be important to be able to explain the
importance of the program quickly, since school boards often limit the length of
presentations.
Like the administration, the school board cares about the cost of adding the fifth
grade program, but if the school board is truly concerned about student education, they
Beginning Band 10
should be impressed by the benefits to both fifth grade students and the total band
program. By promoting the addition on the merits of the program, a convinced school
board is more likely to find the means to help support the new addition to the program.
School boards are accountable for program costs, so they must be provided with a
detailed and realistic budget for the added program. This will vary from district to
district and from teacher to teacher. This budget should include any necessary purchases
of instruments; however, the presenter may emphasize that most of the incremental costs
are borne by the student.
Working with Parents
Parental support is essential in all good music programs but nowhere more
necessary than the beginning band. Parents may need to be encouraged to purchase
instruments or they may need to be convinced that their child will progress beyond the
beginner stage. Parental support improves retention in the program. (Corenblum &
Marshall, 1998)
If the fifth grade program is a reinstatement of a former program it can be
promoted as a return to the way that the parents had been taught in band. Parents tend to
remember their own band experiences fondly. Research other school districts in the area
that begin band at the fifth grade level and convince the parents that the successes that
neighboring school sees in their band program can be attributed to the success of their
beginning program.
Once the implementation of a fifth grade band program has been approved,
students will need to be recruited and instruments selected all before the first note is even
sounded. (Refer to appendix A for recommendations when starting beginning band)
Beginning Band 11
“Always be enthusiastic, whether it has been a good day or a bad one; that one half hour
a week a student comes to you for a lesson is the only time he will see you, and it is
important to be as enthusiastic as if you just won the lottery for those students.”
(Blaufuss, 2006)
Beginning Band 12
Chapter 3:
Conclusion
Students who begin band in the fifth grade have both physical and psychological
advantages over fourth or sixth graders as beginning instrumentalists. Physical
development makes it easier for students to hold and manipulate their instruments.
Students are better able to process the material presented to them than either fourth or
sixth grade students. Fifth graders experience less need to conform making instruction
simpler than in sixth grade when self-image and awareness begin to materialize.
Beginning band plays an integral part to any instrumental program. The fifth
grade program can help ensure a healthy enrollment in the high school band by being
large enough to overcome attrition. Because many activities are added in the sixth grade,
the band program is enhanced if students’ interest is caught in the fifth grade, before the
competing activities become an issue.
Early instruction of the fundamentals opens opportunities for further development
of more complex aspects of music at the middle and high school levels. It is important to
establish instruction of the fundamentals even within the first several lessons for the
beginning band student (refer to Appendix B for lesson plans and notes for the major
beginning instruments). The early lessons lay the foundation for proper sound production
and control, and students learn proper assembly of their instruments as well as music
notation. Each successive lesson adds to these foundations as students develop on their
respective instruments.
Beginning Band 13
References
Benward, Bruce & White, Gary. (1997) Music in Theory and Practice (6th ed.). Madison,
WI: Brown & Benchmark.
Blaufuss, Dan. (2006). Starting Band with Steven Katzenmoyer. The Instrumentalist, 18.
Coreblum, Barry, & Marshall, Eric. (1998) The band played on: predicting students’
intentions to continue studying music. Journal of Research in Music Education,
46(1), 128-40.
Dvorak, T., Blocher, L., Emmons, S., Pearson, B., Ramsey, D. S., & Wilder, M. (2001).
Teaching music through performance in beginning band (R. Miles & T. Dvorak,
Eds.). Chicago: GIA Publications.
Fraedrich, Eileen. (1997). The Art of Elementary Band Directing. Galesville, MD:
Meredith Music Publications.
Leroux, C., & Grossman, R. (n.d.). Arts in the schools paint masterpiece: Higher scores.
Retrieved January 12, 2007, from
http://www.queuenews.com/NewslettersNov06/EduResrchReportNov2.html#art
Reul, David G. (1994) Getting Started with Middle Level Band. Reston, Virginia: Music
Educators National Conference.
Selmer Company. (n.d.) How to Promote Your Band. Elkart, Indiana.
What students should know and be able to do in the Arts: Summary statement. (n.d.).
Retrieved January 12, 2007, from Music Educators National Conference Web
site: http://www.menc.org/publication/books/summary.html
Wiggins, G. P., & McTighe, J. (1998). Understanding by design. Alexandria, Va:
Association for Supervision and Curriculum Development
Beginning Band 14
Appendix A: Recommendations When Starting Beginning Band
Recruiting Students
Because it is an elective class, students choose to participate in band. Promotion of the
band will help bring students into the program.
• Activities to promote student interest
o Performances by high school or middle school bands (invite the elementary
school to a dress rehearsal at the high school or take the older students on a
tour of the elementary schools)
These performances give students the opportunity to see where they
will be in the future
Gives the high school and middle school bands performance
opportunities
o Performances by visiting artists
Great tools to spur interest in beginners
Can also fuel excitement in your older ensembles
o Instrument demonstrations
Sparks thought about instrument selection
If high school students demonstrate, elementary students visualize
themselves playing the instruments
Be prepared for the day of demonstrations by having instruments ready
and specific demonstration music selected
o Create a bulletin board or fill a display case with band instruments and/or
information regarding beginning band.

Beginning Band 15
Place information in a public place like the cafeteria promoting band
and explaining upcoming selections for beginning band
“An eye-catching display of instruments, placed in a prominent location, can further
create interest.” (Fraedrich, 1997)
Instrument Selection
• Whenever possible allow students to have their first selections when choosing an
instrument
• “Let them physically hold the instrument to get a sense of the size of the instrument
and let them try to make a sound on the instrument (Blaufuss, 2006)
The Beginning Band Meeting
• Invite both parents and the students
• “Two important preparations are those of setting a date [for the beginning band
meeting] and obtaining building use.” (Fraedrich, 1997)
• Local music store should be there to facilitate rentals
• Have a room available. If the band room is big enough use it as a means of
introducing the parents and students to the room
• Send out a letter reminding the parents of the meeting and any other pertinent details
• Check with local music store if they want anything included in the reminder (See
Appendix D)
• Gather contact information from parents so you can communicate with them
throughout the beginning band experience
Beginning Band 16
“Make it a practice to keep parents informed by telephone and letter on the progress of
their children – not daily reports, but sufficiently regular to give parents a realistic idea of
how the child is developing.” (Selmer, N.D.)

Beginning Band 17
Compiled by Brian Kray, Marathon School District, Unit design template adapted from Understanding by Design, Grant and Wiggins
Appendix B: Sample Lesson Plans for Beginning Band (Utilizing the Essential Elements 2000 Method Book)
Initial Instruction for Beginning Band
(Music Notation Fundamentals), Grade Level 5
A foundation in music notation basics will assist students with recognition of note names when beginning on their instruments. Basic elements such as clef, bar lines, staff, grand staff, and note
names are introduced.
Stage 1: Desired Results What relevant goals (e.g., content standards, course or program objectives, learning outcomes) will this design address? ♦ Program of Studies/Core Content:
° E.8.1 read whole, half, quarter, eighth sixteenth, and dotted notes and rests in 2/4, 3/4, 4/4, 3/8, and alla breve meter signatures
° E.8.3 identify and define standard notation symbols for pitch, rhythm, dynamic, tempo, articulation, and expression
Understandings Essential Questions
Students will understand that: ♦ Music notation, like English, has a
specific set of parameters ♦ Music notation crosses language
barriers.
♦ What connections to English are there in music notation?
♦ How does music notation (a foreign language) equate into the sounds heard while playing?
Students will know: ♦ Basic elements including clef, staff,
ledger lines, bar lines, and note names. ♦ Reading of pitches in the clef
associated with students’ instrument
Students will be able to: ♦ Identify parts of music notation by
name ♦ Identify pitches in the clef associated
with students’ instrument by letter name
Stage 2: Assessment Evidence What evidence will be collected to determine whether or not the understandings have been developed, the knowledge and skill attained, and the state standards met?
Performance Tasks: Other Evidence, Summarized:
♦ Identify essential music notation symbols by name
♦ Identify pitches by letter name on the staff
♦ Draw treble and bass clefs
♦ Class discussion of music notation fundamentals
♦ Classroom discussion on note names ♦ Student worksheet examples and
problems accurately completed
Beginning Band 18
Compiled by Brian Kray, Marathon School District, Unit design template adapted from Understanding by Design, Grant and Wiggins
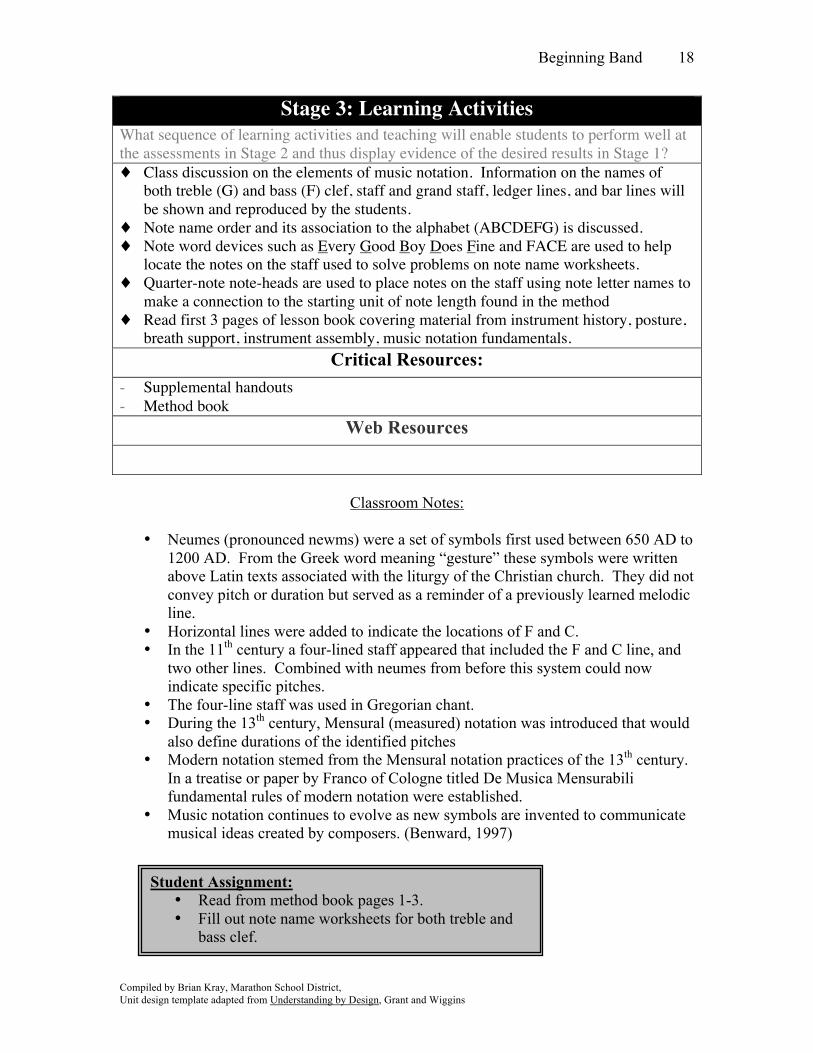
Stage 3: Learning Activities What sequence of learning activities and teaching will enable students to perform well at the assessments in Stage 2 and thus display evidence of the desired results in Stage 1? ♦ Class discussion on the elements of music notation. Information on the names of
both treble (G) and bass (F) clef, staff and grand staff, ledger lines, and bar lines will be shown and reproduced by the students.
♦ Note name order and its association to the alphabet (ABCDEFG) is discussed. ♦ Note word devices such as Every Good Boy Does Fine and FACE are used to help
locate the notes on the staff used to solve problems on note name worksheets. ♦ Quarter-note note-heads are used to place notes on the staff using note letter names to
make a connection to the starting unit of note length found in the method ♦ Read first 3 pages of lesson book covering material from instrument history, posture,
breath support, instrument assembly, music notation fundamentals. Critical Resources:
- Supplemental handouts - Method book
Web Resources
Classroom Notes:
• Neumes (pronounced newms) were a set of symbols first used between 650 AD to
1200 AD. From the Greek word meaning “gesture” these symbols were written above Latin texts associated with the liturgy of the Christian church. They did not convey pitch or duration but served as a reminder of a previously learned melodic line.
• Horizontal lines were added to indicate the locations of F and C. • In the 11th century a four-lined staff appeared that included the F and C line, and
two other lines. Combined with neumes from before this system could now indicate specific pitches.
• The four-line staff was used in Gregorian chant. • During the 13th century, Mensural (measured) notation was introduced that would
also define durations of the identified pitches • Modern notation stemed from the Mensural notation practices of the 13th century.
In a treatise or paper by Franco of Cologne titled De Musica Mensurabili fundamental rules of modern notation were established.
• Music notation continues to evolve as new symbols are invented to communicate musical ideas created by composers. (Benward, 1997)
Student Assignment: • Read from method book pages 1-3. • Fill out note name worksheets for both treble and
bass clef.
Beginning Band 19
Compiled by Brian Kray, Marathon School District, Unit design template adapted from Understanding by Design, Grant and Wiggins
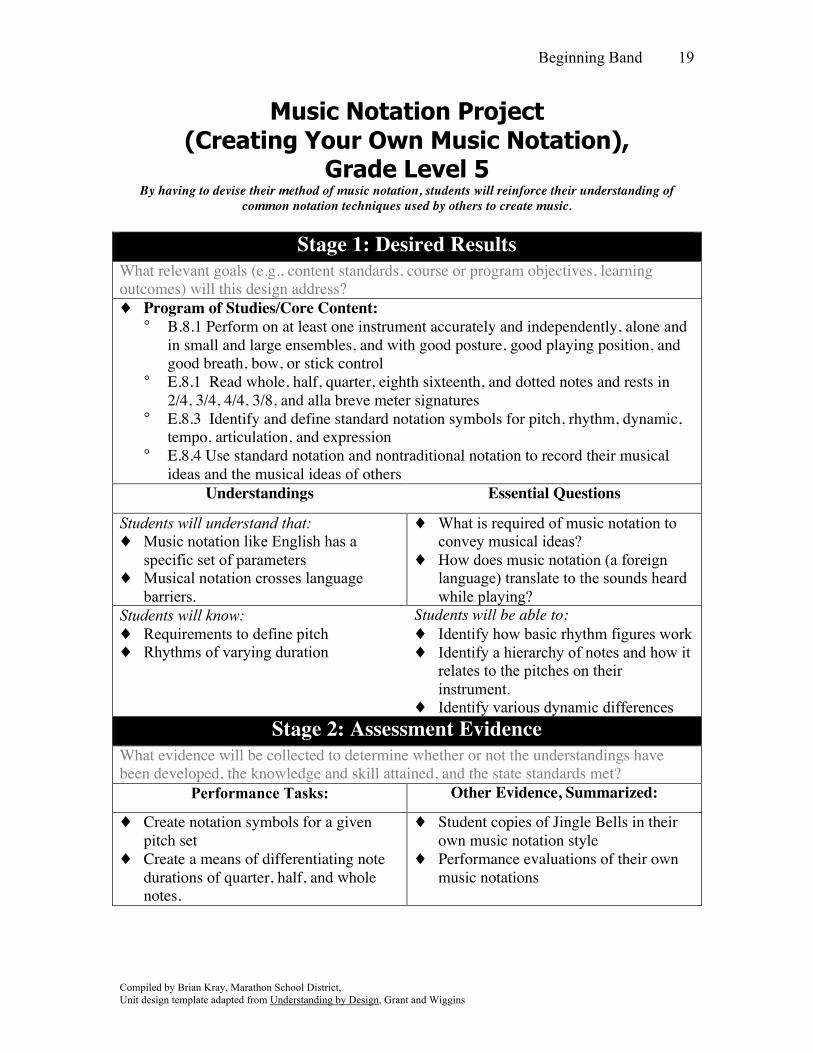
Music Notation Project (Creating Your Own Music Notation),
Grade Level 5 By having to devise their method of music notation, students will reinforce their understanding of
common notation techniques used by others to create music.
Stage 1: Desired Results What relevant goals (e.g., content standards, course or program objectives, learning outcomes) will this design address? ♦ Program of Studies/Core Content:
° B.8.1 Perform on at least one instrument accurately and independently, alone and in small and large ensembles, and with good posture, good playing position, and good breath, bow, or stick control
° E.8.1 Read whole, half, quarter, eighth sixteenth, and dotted notes and rests in 2/4, 3/4, 4/4, 3/8, and alla breve meter signatures
° E.8.3 Identify and define standard notation symbols for pitch, rhythm, dynamic, tempo, articulation, and expression
° E.8.4 Use standard notation and nontraditional notation to record their musical ideas and the musical ideas of others
Understandings Essential Questions
Students will understand that: ♦ Music notation like English has a
specific set of parameters ♦ Musical notation crosses language
barriers.
♦ What is required of music notation to convey musical ideas?
♦ How does music notation (a foreign language) translate to the sounds heard while playing?
Students will know: ♦ Requirements to define pitch ♦ Rhythms of varying duration
Students will be able to: ♦ Identify how basic rhythm figures work ♦ Identify a hierarchy of notes and how it
relates to the pitches on their instrument.
♦ Identify various dynamic differences Stage 2: Assessment Evidence
What evidence will be collected to determine whether or not the understandings have been developed, the knowledge and skill attained, and the state standards met?
Performance Tasks: Other Evidence, Summarized:
♦ Create notation symbols for a given pitch set
♦ Create a means of differentiating note durations of quarter, half, and whole notes.
♦ Student copies of Jingle Bells in their own music notation style
♦ Performance evaluations of their own music notations
Beginning Band 20
Compiled by Brian Kray, Marathon School District, Unit design template adapted from Understanding by Design, Grant and Wiggins
Stage 3: Learning Activities What sequence of learning activities and teaching will enable students to perform well at the assessments in Stage 2 and thus display evidence of the desired results in Stage 1? ♦ Class discussion on the elements of music notation used in Jingle Bells. What
elements need to be reproduced in their projects? (pitch, duration, dynamics) ♦ Discussion of teacher example (see pg. 21) ♦ Student projects of their own creation based on example provided ♦ Evaluation of performances and class sharing of student created music notation
Critical Resources: - Student Guide/Rubric - Method book - Instrument (for student performances of their projects)
Web Resources
Classroom Notes:
Student Assignment: • Create your own method of music notation for #38 Jingle
Bells from method book using Student Guide/Rubric provided.
Beginning Band 21
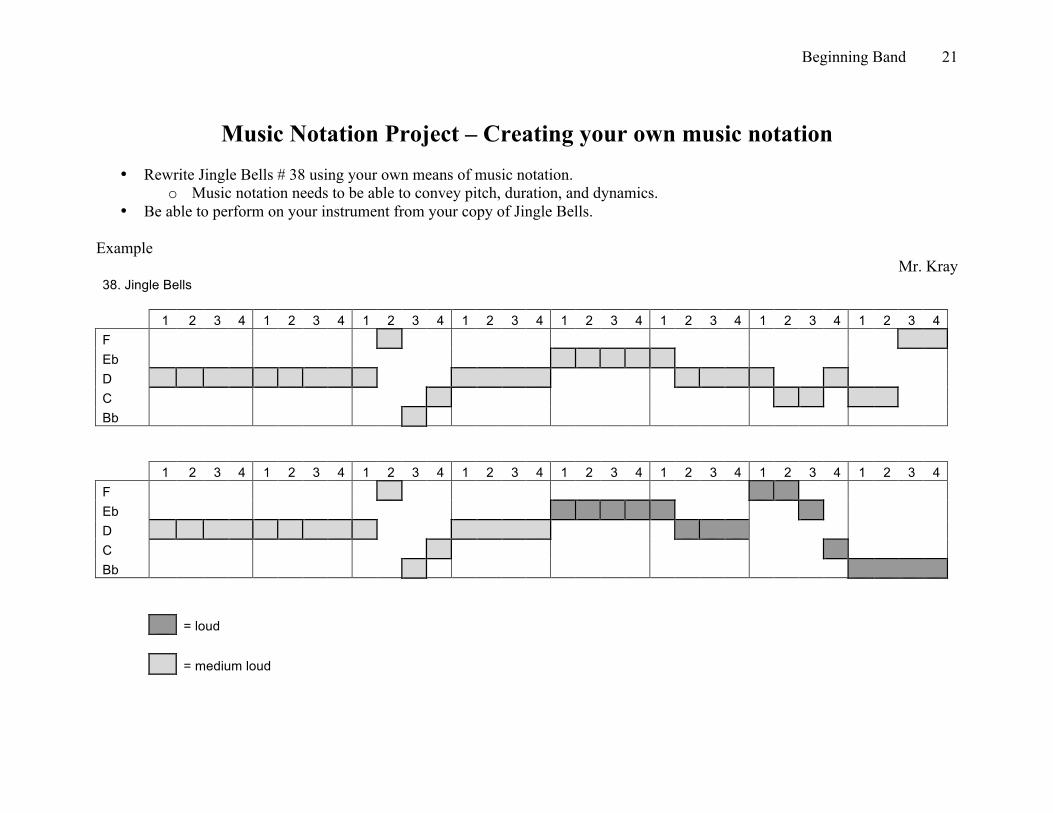
Music Notation Project – Creating your own music notation
• Rewrite Jingle Bells # 38 using your own means of music notation. o Music notation needs to be able to convey pitch, duration, and dynamics.
• Be able to perform on your instrument from your copy of Jingle Bells. Example
Mr. Kray 38. Jingle Bells 1 2 3 4 1 2 3 4 1 2 3 4 1 2 3 4 1 2 3 4 1 2 3 4 1 2 3 4 1 2 3 4 F Eb D C Bb 1 2 3 4 1 2 3 4 1 2 3 4 1 2 3 4 1 2 3 4 1 2 3 4 1 2 3 4 1 2 3 4 F Eb D C Bb = loud = medium loud

Beginning Band 22
Music Notation Project – Creating your own music notation (Student Rubric) Directions: Be able to check yes for each of the following items listed below. Description Yes Is your name clearly labeled on your project? Does your project create a means by which you are able to identify the different pitches used in Jingle Bells?
Does your project create a means by which you are able to identify the different rhythms used in Jingle Bells?
Does your project create a means by which you are able to identify the different dynamics used in Jingle Bells?
Are you able to perform Jingle Bells using your own project? If you are able to answer “yes” for all the above questions your project is completed. Great job!!!
Beginning Band
Compiled by Brian Kray, Marathon School District, Unit design template adapted from Understanding by Design, Wiggins (1998).
23
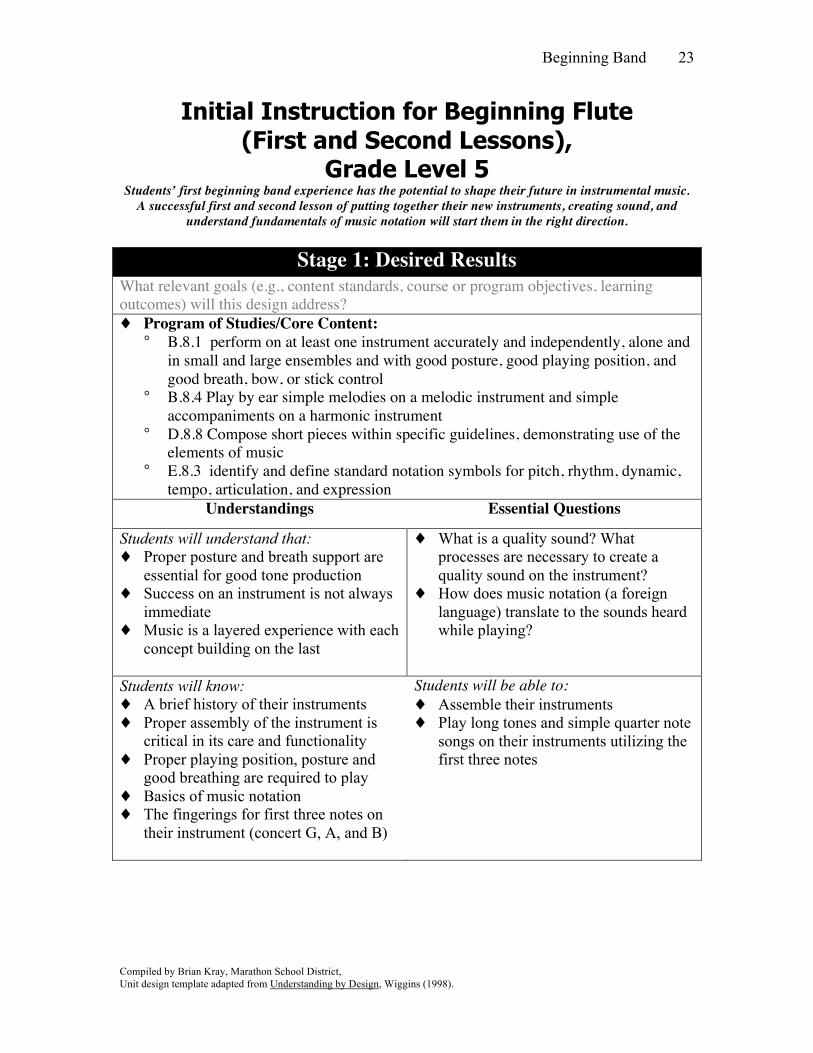
Initial Instruction for Beginning Flute (First and Second Lessons),
Grade Level 5 Students’ first beginning band experience has the potential to shape their future in instrumental music.
A successful first and second lesson of putting together their new instruments, creating sound, and understand fundamentals of music notation will start them in the right direction.
Stage 1: Desired Results
What relevant goals (e.g., content standards, course or program objectives, learning outcomes) will this design address? ♦ Program of Studies/Core Content:
° B.8.1 perform on at least one instrument accurately and independently, alone and in small and large ensembles and with good posture, good playing position, and good breath, bow, or stick control
° B.8.4 Play by ear simple melodies on a melodic instrument and simple accompaniments on a harmonic instrument
° D.8.8 Compose short pieces within specific guidelines, demonstrating use of the elements of music
° E.8.3 identify and define standard notation symbols for pitch, rhythm, dynamic, tempo, articulation, and expression
Understandings Essential Questions
Students will understand that: ♦ Proper posture and breath support are
essential for good tone production ♦ Success on an instrument is not always
immediate ♦ Music is a layered experience with each
concept building on the last
♦ What is a quality sound? What processes are necessary to create a quality sound on the instrument?
♦ How does music notation (a foreign language) translate to the sounds heard while playing?
Students will know: ♦ A brief history of their instruments ♦ Proper assembly of the instrument is
critical in its care and functionality ♦ Proper playing position, posture and
good breathing are required to play ♦ Basics of music notation ♦ The fingerings for first three notes on
their instrument (concert G, A, and B)
Students will be able to: ♦ Assemble their instruments ♦ Play long tones and simple quarter note
songs on their instruments utilizing the first three notes
Beginning Band
Compiled by Brian Kray, Marathon School District, Unit design template adapted from Understanding by Design, Wiggins (1998).
24
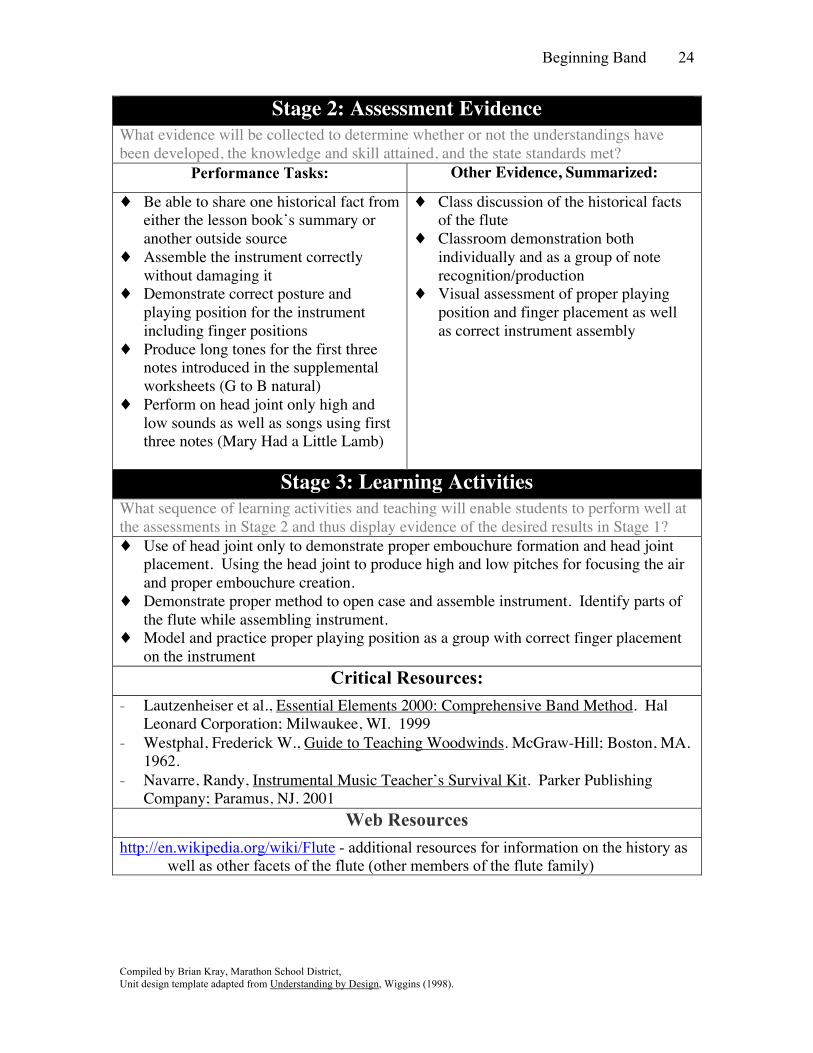
Stage 2: Assessment Evidence What evidence will be collected to determine whether or not the understandings have been developed, the knowledge and skill attained, and the state standards met?
Performance Tasks: Other Evidence, Summarized:
♦ Be able to share one historical fact from either the lesson book’s summary or another outside source
♦ Assemble the instrument correctly without damaging it
♦ Demonstrate correct posture and playing position for the instrument including finger positions
♦ Produce long tones for the first three notes introduced in the supplemental worksheets (G to B natural)
♦ Perform on head joint only high and low sounds as well as songs using first three notes (Mary Had a Little Lamb)
♦ Class discussion of the historical facts of the flute
♦ Classroom demonstration both individually and as a group of note recognition/production
♦ Visual assessment of proper playing position and finger placement as well as correct instrument assembly
Stage 3: Learning Activities What sequence of learning activities and teaching will enable students to perform well at the assessments in Stage 2 and thus display evidence of the desired results in Stage 1? ♦ Use of head joint only to demonstrate proper embouchure formation and head joint
placement. Using the head joint to produce high and low pitches for focusing the air and proper embouchure creation.
♦ Demonstrate proper method to open case and assemble instrument. Identify parts of the flute while assembling instrument.
♦ Model and practice proper playing position as a group with correct finger placement on the instrument
Critical Resources: - Lautzenheiser et al., Essential Elements 2000: Comprehensive Band Method. Hal
Leonard Corporation; Milwaukee, WI. 1999 - Westphal, Frederick W., Guide to Teaching Woodwinds. McGraw-Hill; Boston, MA.
1962. - Navarre, Randy, Instrumental Music Teacher’s Survival Kit. Parker Publishing
Company; Paramus, NJ. 2001 Web Resources
http://en.wikipedia.org/wiki/Flute - additional resources for information on the history as well as other facets of the flute (other members of the flute family)
Beginning Band
Compiled by Brian Kray, Marathon School District, Unit design template adapted from Understanding by Design, Wiggins (1998).
25
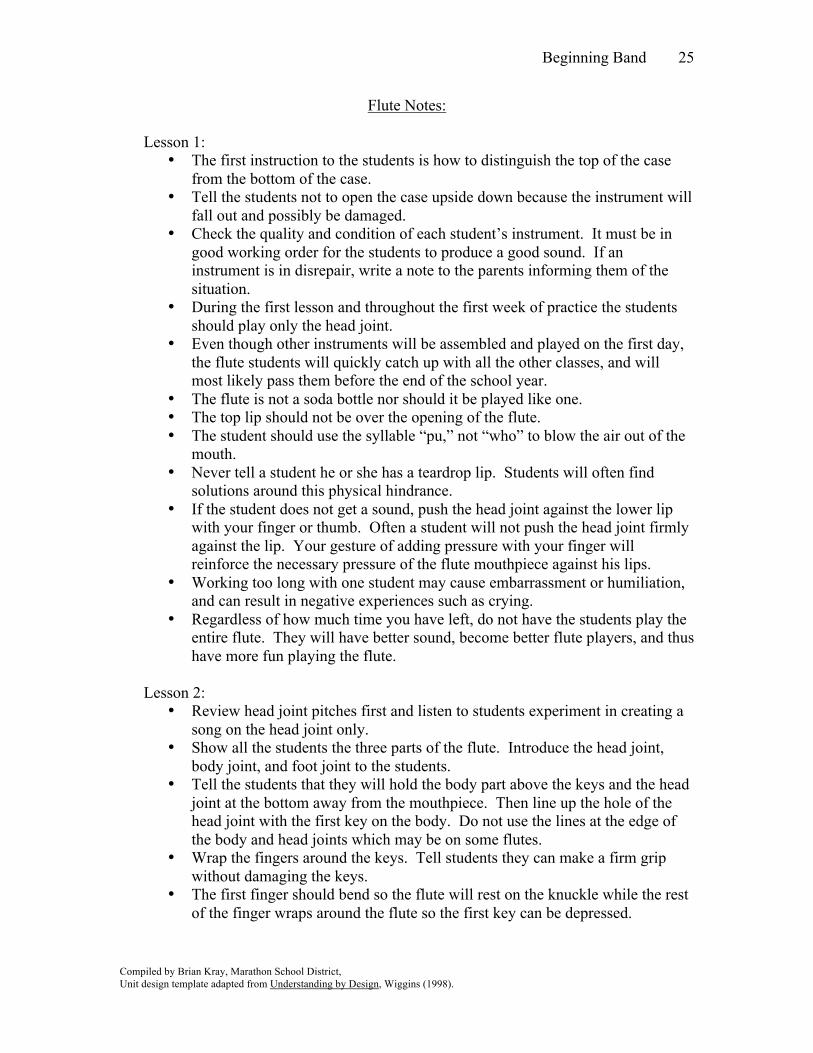
Flute Notes:
Lesson 1: • The first instruction to the students is how to distinguish the top of the case
from the bottom of the case. • Tell the students not to open the case upside down because the instrument will
fall out and possibly be damaged. • Check the quality and condition of each student’s instrument. It must be in
good working order for the students to produce a good sound. If an instrument is in disrepair, write a note to the parents informing them of the situation.
• During the first lesson and throughout the first week of practice the students should play only the head joint.
• Even though other instruments will be assembled and played on the first day, the flute students will quickly catch up with all the other classes, and will most likely pass them before the end of the school year.
• The flute is not a soda bottle nor should it be played like one. • The top lip should not be over the opening of the flute. • The student should use the syllable “pu,” not “who” to blow the air out of the
mouth. • Never tell a student he or she has a teardrop lip. Students will often find
solutions around this physical hindrance. • If the student does not get a sound, push the head joint against the lower lip
with your finger or thumb. Often a student will not push the head joint firmly against the lip. Your gesture of adding pressure with your finger will reinforce the necessary pressure of the flute mouthpiece against his lips.
• Working too long with one student may cause embarrassment or humiliation, and can result in negative experiences such as crying.
• Regardless of how much time you have left, do not have the students play the entire flute. They will have better sound, become better flute players, and thus have more fun playing the flute.
Lesson 2:
• Review head joint pitches first and listen to students experiment in creating a song on the head joint only.
• Show all the students the three parts of the flute. Introduce the head joint, body joint, and foot joint to the students.
• Tell the students that they will hold the body part above the keys and the head joint at the bottom away from the mouthpiece. Then line up the hole of the head joint with the first key on the body. Do not use the lines at the edge of the body and head joints which may be on some flutes.
• Wrap the fingers around the keys. Tell students they can make a firm grip without damaging the keys.
• The first finger should bend so the flute will rest on the knuckle while the rest of the finger wraps around the flute so the first key can be depressed.
Beginning Band
Compiled by Brian Kray, Marathon School District, Unit design template adapted from Understanding by Design, Wiggins (1998).
26
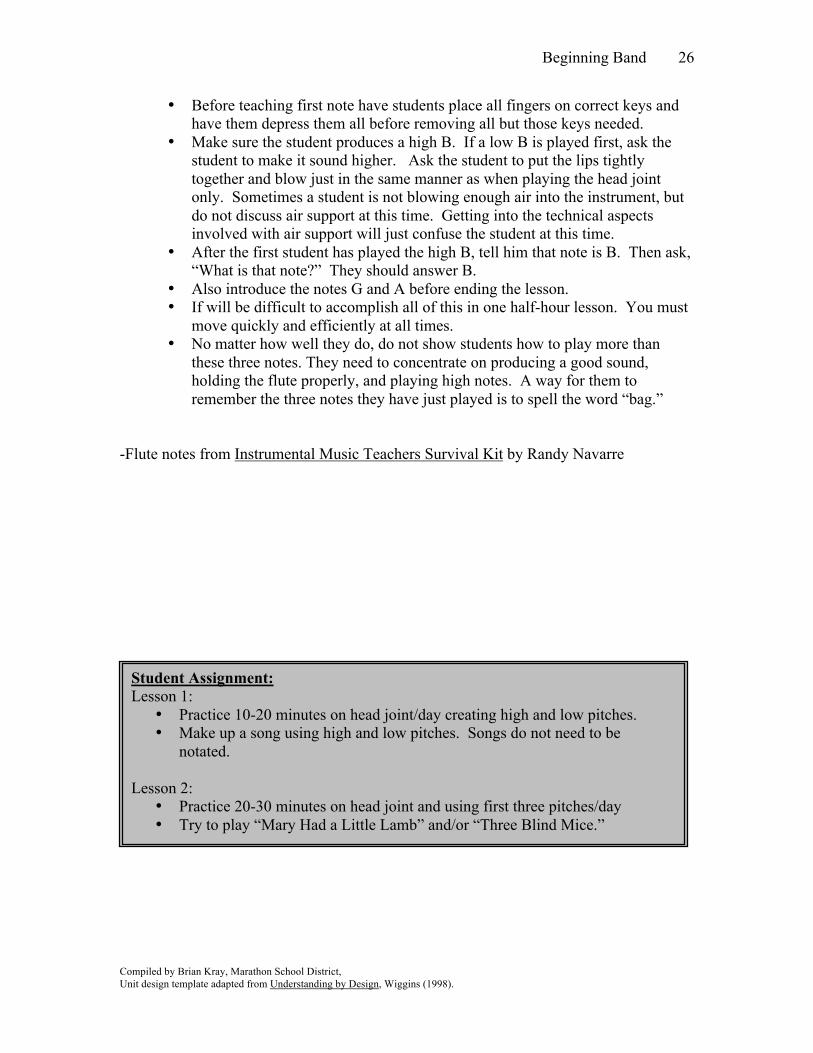
• Before teaching first note have students place all fingers on correct keys and have them depress them all before removing all but those keys needed.
• Make sure the student produces a high B. If a low B is played first, ask the student to make it sound higher. Ask the student to put the lips tightly together and blow just in the same manner as when playing the head joint only. Sometimes a student is not blowing enough air into the instrument, but do not discuss air support at this time. Getting into the technical aspects involved with air support will just confuse the student at this time.
• After the first student has played the high B, tell him that note is B. Then ask, “What is that note?” They should answer B.
• Also introduce the notes G and A before ending the lesson. • If will be difficult to accomplish all of this in one half-hour lesson. You must
move quickly and efficiently at all times. • No matter how well they do, do not show students how to play more than
these three notes. They need to concentrate on producing a good sound, holding the flute properly, and playing high notes. A way for them to remember the three notes they have just played is to spell the word “bag.”
-Flute notes from Instrumental Music Teachers Survival Kit by Randy Navarre
Student Assignment: Lesson 1:
• Practice 10-20 minutes on head joint/day creating high and low pitches. • Make up a song using high and low pitches. Songs do not need to be
notated.
Lesson 2: • Practice 20-30 minutes on head joint and using first three pitches/day • Try to play “Mary Had a Little Lamb” and/or “Three Blind Mice.”

Beginning Band
Compiled by Brian Kray, Marathon School District, Unit design template adapted from Understanding by Design, Wiggins (1998).
27
Initial Instruction for Beginning Flute (Third and Fourth Lessons),
Grade Level 5 As students continue in beginning band it is important to build upon initial successes, no matter how
small. Continuing to introduce the fundamentals at this stage is important but make sure not to do it all at once. It is important not to overwhelm the student.
Stage 1: Desired Results
What relevant goals (e.g., content standards, course or program objectives, learning outcomes) will this design address? ♦ Program of Studies/Core Content:
° B.8.1 perform on at least one instrument accurately and independently, alone and in small and large ensembles and with good posture, good playing position, and good breath, bow, or stick control
° E.8.1 read whole, half, quarter, eighth sixteenth, and dotted notes and rests in 2/4, 3/4, 4/4, 3/8, and alla breve meter signatures
° E.8.3 identify and define standard notation symbols for pitch, rhythm, dynamic, tempo, articulation, and expression
Understandings Essential Questions
Students will understand that: ♦ Proper posture and breath support are
essential for good tone production ♦ Success on an instrument is not always
immediate ♦ Music is a layered experience with each
concept building on the last
♦ What is a quality sound? What processes are necessary to create a quality sound on the instrument?
♦ How does music notation (a foreign language) translate to the sounds heard while playing?
Students will know: ♦ Proper playing position, posture and
good breathing are required to play ♦ Basics of music notation ♦ Notes 3rd line Bb, C, D, Eb, and F in
addition to initial B, A, and G.
Students will be able to: ♦ Assemble their instruments ♦ Begin sounds on their instruments and
separate notes with correct articulation ♦ Play long tones and simple quarter note
songs on their instruments utilizing the first five notes
♦ Read basic music notation
Beginning Band
Compiled by Brian Kray, Marathon School District, Unit design template adapted from Understanding by Design, Wiggins (1998).
28
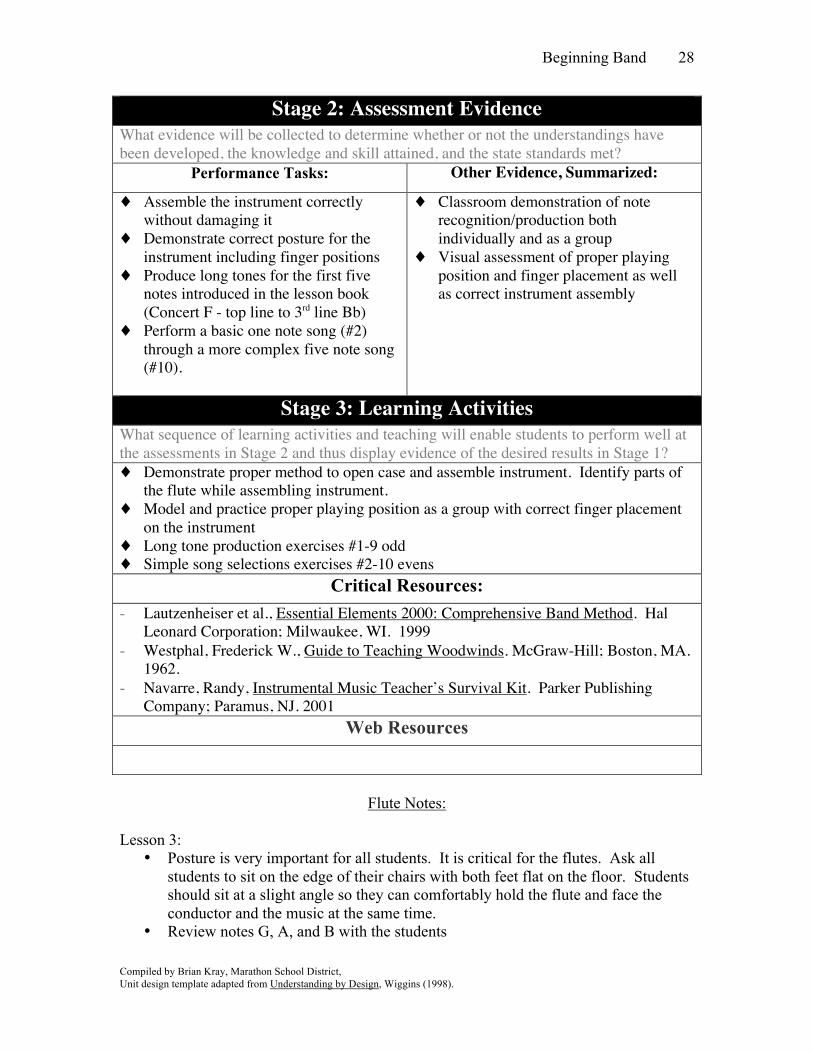
Stage 2: Assessment Evidence What evidence will be collected to determine whether or not the understandings have been developed, the knowledge and skill attained, and the state standards met?
Performance Tasks: Other Evidence, Summarized:
♦ Assemble the instrument correctly without damaging it
♦ Demonstrate correct posture for the instrument including finger positions
♦ Produce long tones for the first five notes introduced in the lesson book (Concert F - top line to 3rd line Bb)
♦ Perform a basic one note song (#2) through a more complex five note song (#10).
♦ Classroom demonstration of note recognition/production both individually and as a group
♦ Visual assessment of proper playing position and finger placement as well as correct instrument assembly
Stage 3: Learning Activities What sequence of learning activities and teaching will enable students to perform well at the assessments in Stage 2 and thus display evidence of the desired results in Stage 1? ♦ Demonstrate proper method to open case and assemble instrument. Identify parts of
the flute while assembling instrument. ♦ Model and practice proper playing position as a group with correct finger placement
on the instrument ♦ Long tone production exercises #1-9 odd ♦ Simple song selections exercises #2-10 evens
Critical Resources: - Lautzenheiser et al., Essential Elements 2000: Comprehensive Band Method. Hal
Leonard Corporation; Milwaukee, WI. 1999 - Westphal, Frederick W., Guide to Teaching Woodwinds. McGraw-Hill; Boston, MA.
1962. - Navarre, Randy, Instrumental Music Teacher’s Survival Kit. Parker Publishing
Company; Paramus, NJ. 2001 Web Resources
Flute Notes:
Lesson 3:
• Posture is very important for all students. It is critical for the flutes. Ask all students to sit on the edge of their chairs with both feet flat on the floor. Students should sit at a slight angle so they can comfortably hold the flute and face the conductor and the music at the same time.
• Review notes G, A, and B with the students
Beginning Band
Compiled by Brian Kray, Marathon School District, Unit design template adapted from Understanding by Design, Wiggins (1998).
29
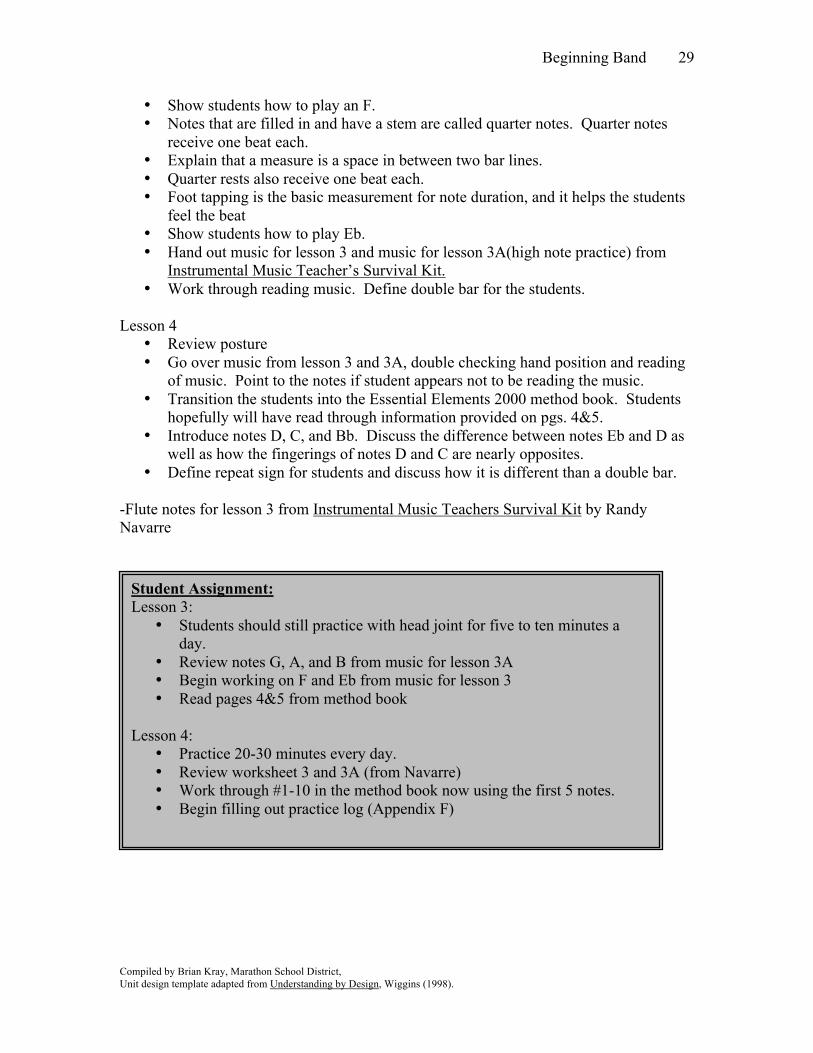
• Show students how to play an F. • Notes that are filled in and have a stem are called quarter notes. Quarter notes
receive one beat each. • Explain that a measure is a space in between two bar lines. • Quarter rests also receive one beat each. • Foot tapping is the basic measurement for note duration, and it helps the students
feel the beat • Show students how to play Eb. • Hand out music for lesson 3 and music for lesson 3A(high note practice) from
Instrumental Music Teacher’s Survival Kit. • Work through reading music. Define double bar for the students.
Lesson 4 • Review posture • Go over music from lesson 3 and 3A, double checking hand position and reading
of music. Point to the notes if student appears not to be reading the music. • Transition the students into the Essential Elements 2000 method book. Students
hopefully will have read through information provided on pgs. 4&5. • Introduce notes D, C, and Bb. Discuss the difference between notes Eb and D as
well as how the fingerings of notes D and C are nearly opposites. • Define repeat sign for students and discuss how it is different than a double bar.
-Flute notes for lesson 3 from Instrumental Music Teachers Survival Kit by Randy Navarre
Student Assignment: Lesson 3:
• Students should still practice with head joint for five to ten minutes a day.
• Review notes G, A, and B from music for lesson 3A • Begin working on F and Eb from music for lesson 3 • Read pages 4&5 from method book
Lesson 4: • Practice 20-30 minutes every day. • Review worksheet 3 and 3A (from Navarre) • Work through #1-10 in the method book now using the first 5 notes. • Begin filling out practice log (Appendix F)
Beginning Band
Compiled by Brian Kray, Marathon School District, Unit design template adapted from Understanding by Design, Wiggins (1998).
30
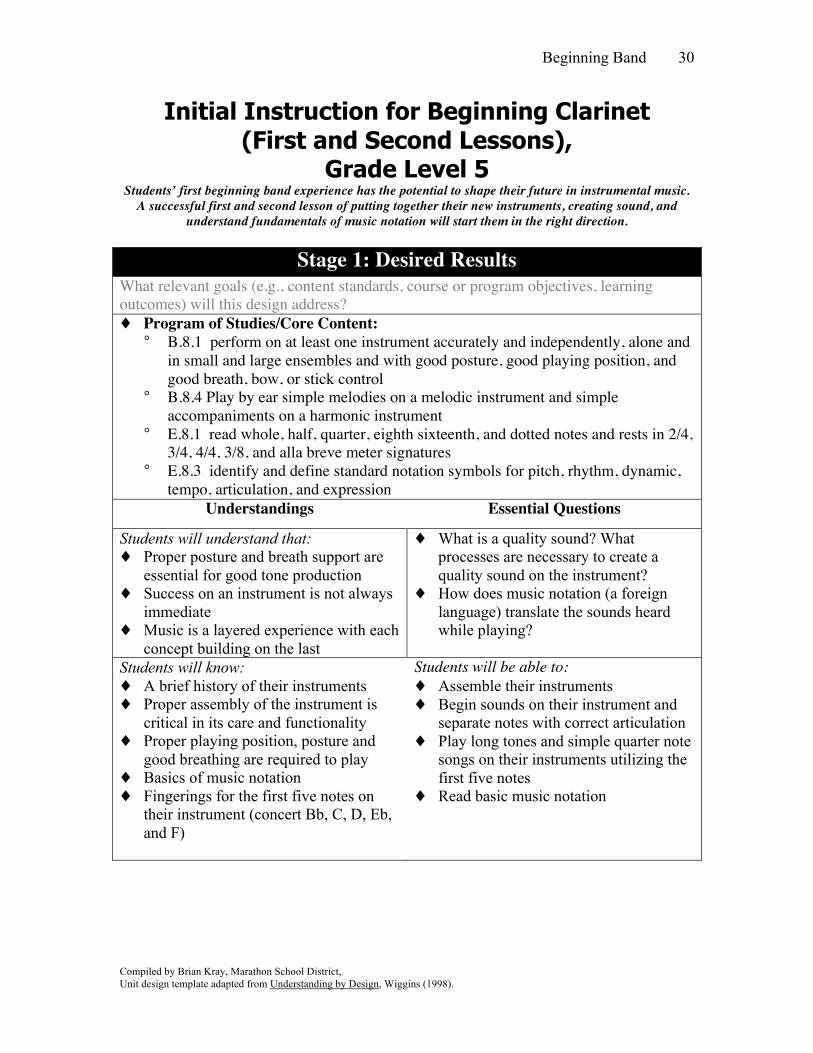
Initial Instruction for Beginning Clarinet (First and Second Lessons),
Grade Level 5 Students’ first beginning band experience has the potential to shape their future in instrumental music.
A successful first and second lesson of putting together their new instruments, creating sound, and understand fundamentals of music notation will start them in the right direction.
Stage 1: Desired Results
What relevant goals (e.g., content standards, course or program objectives, learning outcomes) will this design address? ♦ Program of Studies/Core Content:
° B.8.1 perform on at least one instrument accurately and independently, alone and in small and large ensembles and with good posture, good playing position, and good breath, bow, or stick control
° B.8.4 Play by ear simple melodies on a melodic instrument and simple accompaniments on a harmonic instrument
° E.8.1 read whole, half, quarter, eighth sixteenth, and dotted notes and rests in 2/4, 3/4, 4/4, 3/8, and alla breve meter signatures
° E.8.3 identify and define standard notation symbols for pitch, rhythm, dynamic, tempo, articulation, and expression
Understandings Essential Questions
Students will understand that: ♦ Proper posture and breath support are
essential for good tone production ♦ Success on an instrument is not always
immediate ♦ Music is a layered experience with each
concept building on the last
♦ What is a quality sound? What processes are necessary to create a quality sound on the instrument?
♦ How does music notation (a foreign language) translate the sounds heard while playing?
Students will know: ♦ A brief history of their instruments ♦ Proper assembly of the instrument is
critical in its care and functionality ♦ Proper playing position, posture and
good breathing are required to play ♦ Basics of music notation ♦ Fingerings for the first five notes on
their instrument (concert Bb, C, D, Eb, and F)
Students will be able to: ♦ Assemble their instruments ♦ Begin sounds on their instrument and
separate notes with correct articulation ♦ Play long tones and simple quarter note
songs on their instruments utilizing the first five notes
♦ Read basic music notation
Beginning Band
Compiled by Brian Kray, Marathon School District, Unit design template adapted from Understanding by Design, Wiggins (1998).
31
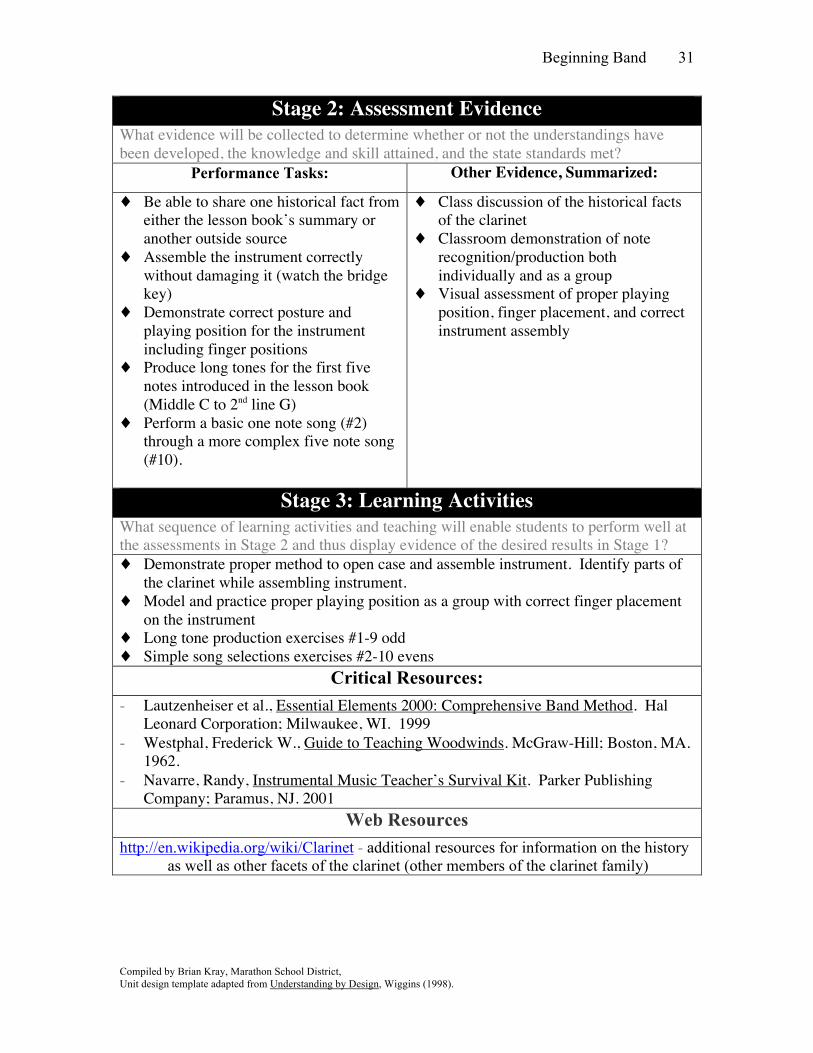
Stage 2: Assessment Evidence What evidence will be collected to determine whether or not the understandings have been developed, the knowledge and skill attained, and the state standards met?
Performance Tasks: Other Evidence, Summarized:
♦ Be able to share one historical fact from either the lesson book’s summary or another outside source
♦ Assemble the instrument correctly without damaging it (watch the bridge key)
♦ Demonstrate correct posture and playing position for the instrument including finger positions
♦ Produce long tones for the first five notes introduced in the lesson book (Middle C to 2nd line G)
♦ Perform a basic one note song (#2) through a more complex five note song (#10).
♦ Class discussion of the historical facts of the clarinet
♦ Classroom demonstration of note recognition/production both individually and as a group
♦ Visual assessment of proper playing position, finger placement, and correct instrument assembly
Stage 3: Learning Activities What sequence of learning activities and teaching will enable students to perform well at the assessments in Stage 2 and thus display evidence of the desired results in Stage 1? ♦ Demonstrate proper method to open case and assemble instrument. Identify parts of
the clarinet while assembling instrument. ♦ Model and practice proper playing position as a group with correct finger placement
on the instrument ♦ Long tone production exercises #1-9 odd ♦ Simple song selections exercises #2-10 evens
Critical Resources: - Lautzenheiser et al., Essential Elements 2000: Comprehensive Band Method. Hal
Leonard Corporation; Milwaukee, WI. 1999 - Westphal, Frederick W., Guide to Teaching Woodwinds. McGraw-Hill; Boston, MA.
1962. - Navarre, Randy, Instrumental Music Teacher’s Survival Kit. Parker Publishing
Company; Paramus, NJ. 2001 Web Resources
http://en.wikipedia.org/wiki/Clarinet - additional resources for information on the history as well as other facets of the clarinet (other members of the clarinet family)
Beginning Band
Compiled by Brian Kray, Marathon School District, Unit design template adapted from Understanding by Design, Wiggins (1998).
32
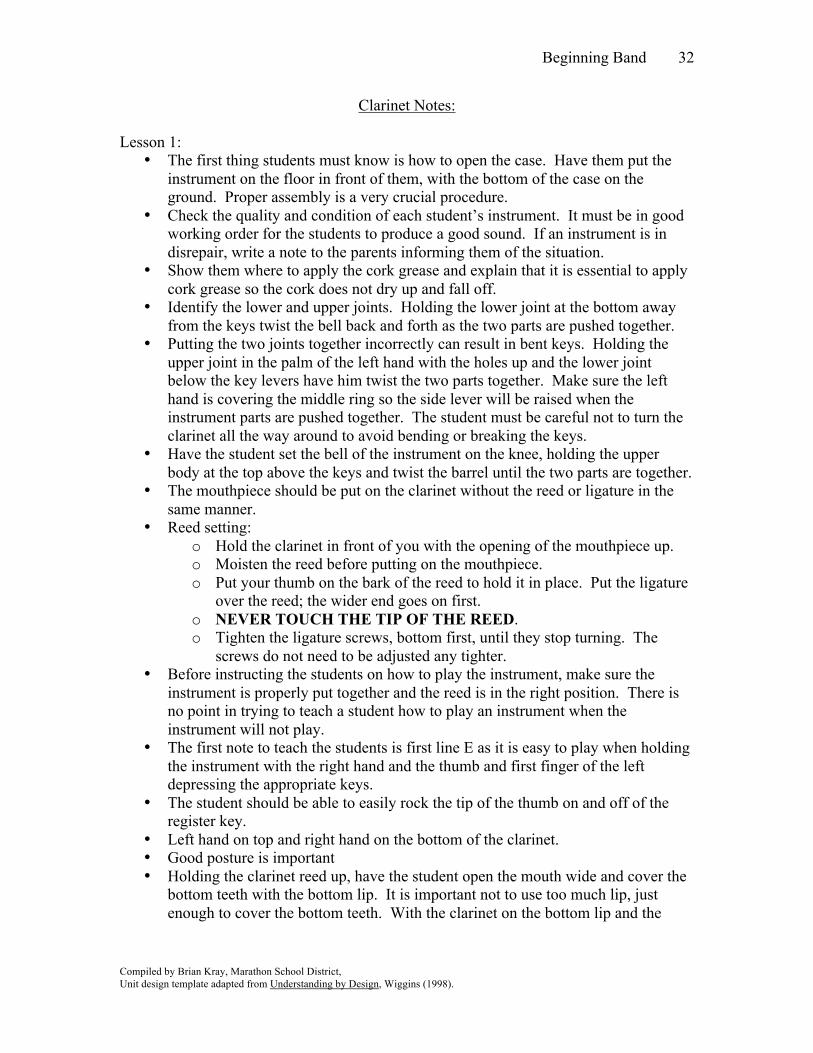
Clarinet Notes: Lesson 1:
• The first thing students must know is how to open the case. Have them put the instrument on the floor in front of them, with the bottom of the case on the ground. Proper assembly is a very crucial procedure.
• Check the quality and condition of each student’s instrument. It must be in good working order for the students to produce a good sound. If an instrument is in disrepair, write a note to the parents informing them of the situation.
• Show them where to apply the cork grease and explain that it is essential to apply cork grease so the cork does not dry up and fall off.
• Identify the lower and upper joints. Holding the lower joint at the bottom away from the keys twist the bell back and forth as the two parts are pushed together.
• Putting the two joints together incorrectly can result in bent keys. Holding the upper joint in the palm of the left hand with the holes up and the lower joint below the key levers have him twist the two parts together. Make sure the left hand is covering the middle ring so the side lever will be raised when the instrument parts are pushed together. The student must be careful not to turn the clarinet all the way around to avoid bending or breaking the keys.
• Have the student set the bell of the instrument on the knee, holding the upper body at the top above the keys and twist the barrel until the two parts are together.
• The mouthpiece should be put on the clarinet without the reed or ligature in the same manner.
• Reed setting: o Hold the clarinet in front of you with the opening of the mouthpiece up. o Moisten the reed before putting on the mouthpiece. o Put your thumb on the bark of the reed to hold it in place. Put the ligature
over the reed; the wider end goes on first. o NEVER TOUCH THE TIP OF THE REED. o Tighten the ligature screws, bottom first, until they stop turning. The
screws do not need to be adjusted any tighter. • Before instructing the students on how to play the instrument, make sure the
instrument is properly put together and the reed is in the right position. There is no point in trying to teach a student how to play an instrument when the instrument will not play.
• The first note to teach the students is first line E as it is easy to play when holding the instrument with the right hand and the thumb and first finger of the left depressing the appropriate keys.
• The student should be able to easily rock the tip of the thumb on and off of the register key.
• Left hand on top and right hand on the bottom of the clarinet. • Good posture is important • Holding the clarinet reed up, have the student open the mouth wide and cover the
bottom teeth with the bottom lip. It is important not to use too much lip, just enough to cover the bottom teeth. With the clarinet on the bottom lip and the
Beginning Band
Compiled by Brian Kray, Marathon School District, Unit design template adapted from Understanding by Design, Wiggins (1998).
33
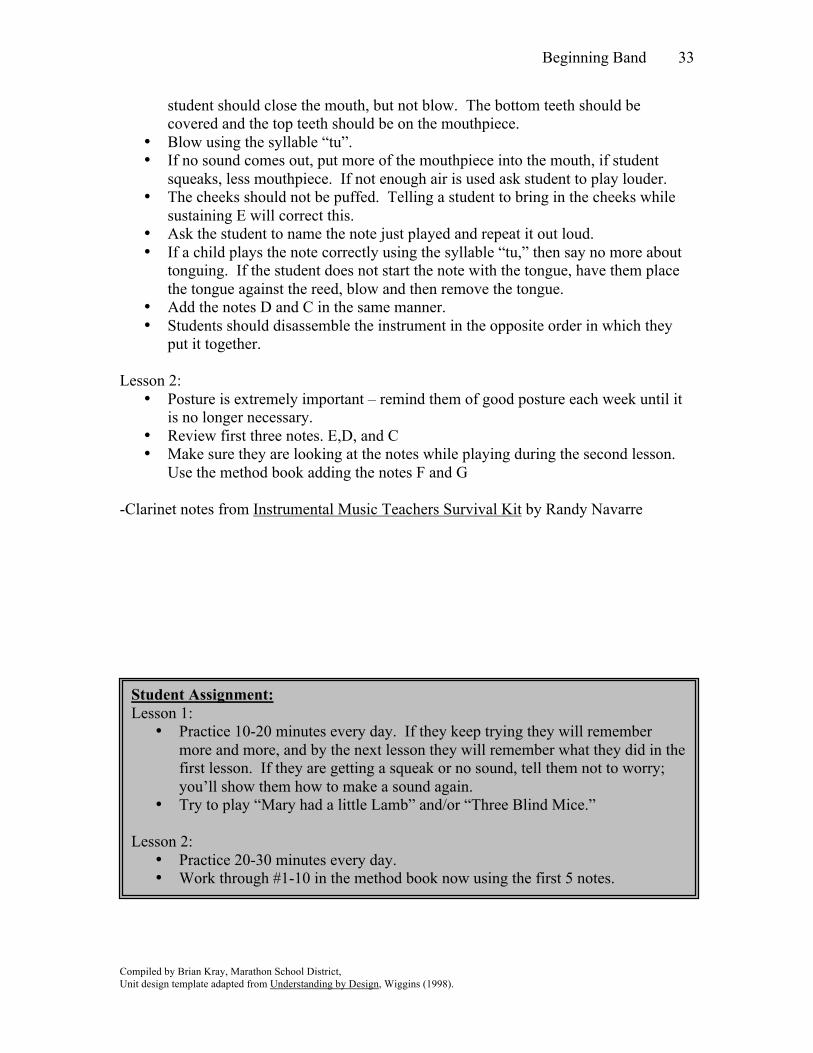
student should close the mouth, but not blow. The bottom teeth should be covered and the top teeth should be on the mouthpiece.
• Blow using the syllable “tu”. • If no sound comes out, put more of the mouthpiece into the mouth, if student
squeaks, less mouthpiece. If not enough air is used ask student to play louder. • The cheeks should not be puffed. Telling a student to bring in the cheeks while
sustaining E will correct this. • Ask the student to name the note just played and repeat it out loud. • If a child plays the note correctly using the syllable “tu,” then say no more about
tonguing. If the student does not start the note with the tongue, have them place the tongue against the reed, blow and then remove the tongue.
• Add the notes D and C in the same manner. • Students should disassemble the instrument in the opposite order in which they
put it together. Lesson 2:
• Posture is extremely important – remind them of good posture each week until it is no longer necessary.
• Review first three notes. E,D, and C • Make sure they are looking at the notes while playing during the second lesson.
Use the method book adding the notes F and G -Clarinet notes from Instrumental Music Teachers Survival Kit by Randy Navarre
Student Assignment: Lesson 1:
• Practice 10-20 minutes every day. If they keep trying they will remember more and more, and by the next lesson they will remember what they did in the first lesson. If they are getting a squeak or no sound, tell them not to worry; you’ll show them how to make a sound again.
• Try to play “Mary had a little Lamb” and/or “Three Blind Mice.”
Lesson 2: • Practice 20-30 minutes every day. • Work through #1-10 in the method book now using the first 5 notes.
Beginning Band
Compiled by Brian Kray, Marathon School District, Unit design template adapted from Understanding by Design, Wiggins (1998).
34
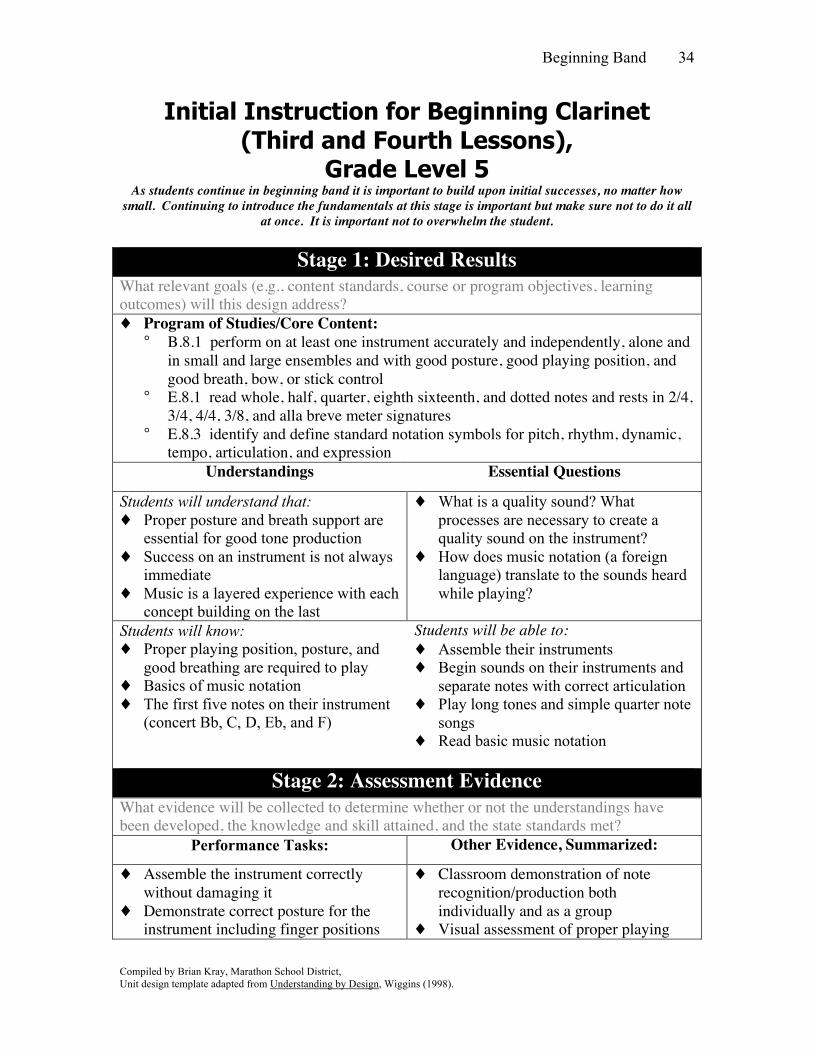
Initial Instruction for Beginning Clarinet (Third and Fourth Lessons),
Grade Level 5 As students continue in beginning band it is important to build upon initial successes, no matter how
small. Continuing to introduce the fundamentals at this stage is important but make sure not to do it all at once. It is important not to overwhelm the student.
Stage 1: Desired Results
What relevant goals (e.g., content standards, course or program objectives, learning outcomes) will this design address? ♦ Program of Studies/Core Content:
° B.8.1 perform on at least one instrument accurately and independently, alone and in small and large ensembles and with good posture, good playing position, and good breath, bow, or stick control
° E.8.1 read whole, half, quarter, eighth sixteenth, and dotted notes and rests in 2/4, 3/4, 4/4, 3/8, and alla breve meter signatures
° E.8.3 identify and define standard notation symbols for pitch, rhythm, dynamic, tempo, articulation, and expression
Understandings Essential Questions
Students will understand that: ♦ Proper posture and breath support are
essential for good tone production ♦ Success on an instrument is not always
immediate ♦ Music is a layered experience with each
concept building on the last
♦ What is a quality sound? What processes are necessary to create a quality sound on the instrument?
♦ How does music notation (a foreign language) translate to the sounds heard while playing?
Students will know: ♦ Proper playing position, posture, and
good breathing are required to play ♦ Basics of music notation ♦ The first five notes on their instrument
(concert Bb, C, D, Eb, and F)
Students will be able to: ♦ Assemble their instruments ♦ Begin sounds on their instruments and
separate notes with correct articulation ♦ Play long tones and simple quarter note
songs ♦ Read basic music notation
Stage 2: Assessment Evidence
What evidence will be collected to determine whether or not the understandings have been developed, the knowledge and skill attained, and the state standards met?
Performance Tasks: Other Evidence, Summarized:
♦ Assemble the instrument correctly without damaging it
♦ Demonstrate correct posture for the instrument including finger positions
♦ Classroom demonstration of note recognition/production both individually and as a group
♦ Visual assessment of proper playing
Beginning Band
Compiled by Brian Kray, Marathon School District, Unit design template adapted from Understanding by Design, Wiggins (1998).
35
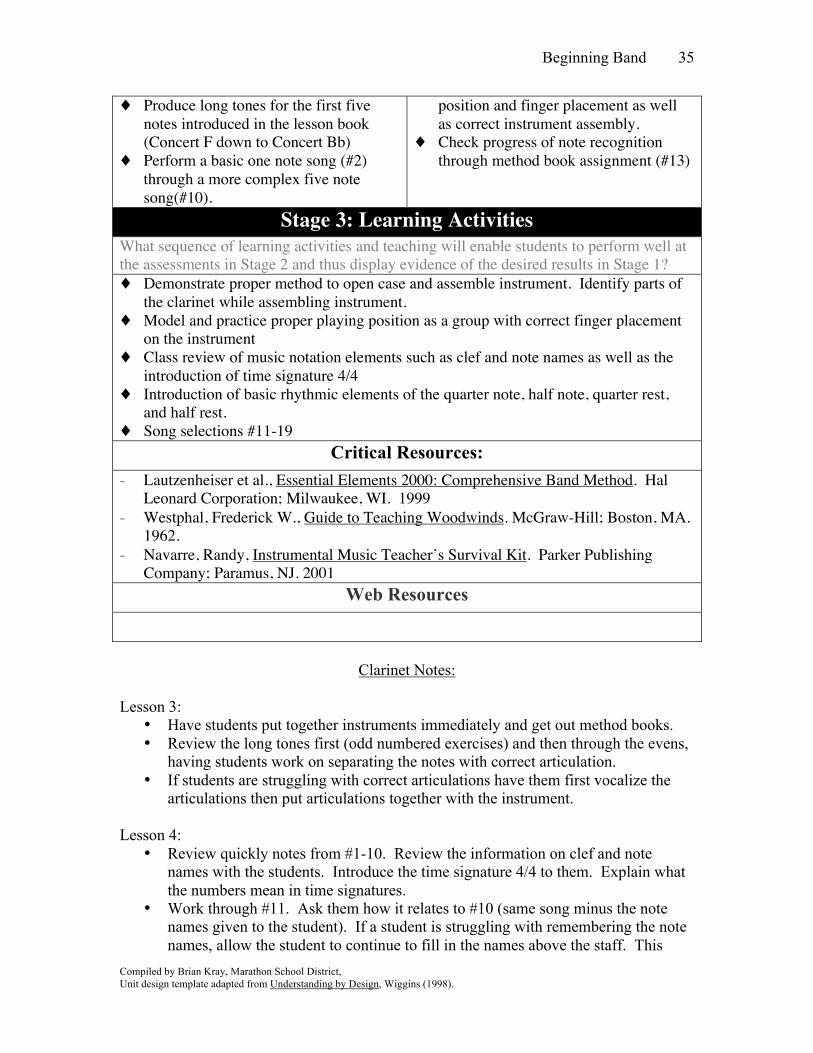
♦ Produce long tones for the first five notes introduced in the lesson book (Concert F down to Concert Bb)
♦ Perform a basic one note song (#2) through a more complex five note song(#10).
position and finger placement as well as correct instrument assembly.
♦ Check progress of note recognition through method book assignment (#13)
Stage 3: Learning Activities What sequence of learning activities and teaching will enable students to perform well at the assessments in Stage 2 and thus display evidence of the desired results in Stage 1? ♦ Demonstrate proper method to open case and assemble instrument. Identify parts of
the clarinet while assembling instrument. ♦ Model and practice proper playing position as a group with correct finger placement
on the instrument ♦ Class review of music notation elements such as clef and note names as well as the
introduction of time signature 4/4 ♦ Introduction of basic rhythmic elements of the quarter note, half note, quarter rest,
and half rest. ♦ Song selections #11-19
Critical Resources: - Lautzenheiser et al., Essential Elements 2000: Comprehensive Band Method. Hal
Leonard Corporation; Milwaukee, WI. 1999 - Westphal, Frederick W., Guide to Teaching Woodwinds. McGraw-Hill; Boston, MA.
1962. - Navarre, Randy, Instrumental Music Teacher’s Survival Kit. Parker Publishing
Company; Paramus, NJ. 2001 Web Resources
Clarinet Notes:
Lesson 3:
• Have students put together instruments immediately and get out method books. • Review the long tones first (odd numbered exercises) and then through the evens,
having students work on separating the notes with correct articulation. • If students are struggling with correct articulations have them first vocalize the
articulations then put articulations together with the instrument. Lesson 4:
• Review quickly notes from #1-10. Review the information on clef and note names with the students. Introduce the time signature 4/4 to them. Explain what the numbers mean in time signatures.
• Work through #11. Ask them how it relates to #10 (same song minus the note names given to the student). If a student is struggling with remembering the note names, allow the student to continue to fill in the names above the staff. This
Beginning Band
Compiled by Brian Kray, Marathon School District, Unit design template adapted from Understanding by Design, Wiggins (1998).
36
reinforcement will help them work on remembering the names for the notes in the future.
• Make sure students are: o Reading the music o Tapping their toes o Top teeth are touching the mouthpiece o Checks not puffed out o Good posture is being demonstrated.
• Continue with #12-14. Ask students what #14 sounds like; do they know it by a different name?
• Define a half note and half rest. Discuss how the half note is two beats of sound and half rest is two beats of silence.
• Explain the breath mark. This is a symbol used to tell performers when to breathe.
-Clarinet notes from Instrumental Music Teachers Survival Kit by Randy Navarre
Student Assignment: Lesson 3:
• Review #1-10 from method book. Use odd numbered exercises as a good warm-up to beginning to play.
• Assign #11-14. Have students review information about note names and clef as well as read about time signatures.
Lesson 4:
• Practice 20-30 minutes every day. • Review #11-14. • Assign #15-19. Make sure to fill in the note names for #19. • Begin filling out practice log (Appendix F)
Beginning Band
Compiled by Brian Kray, Marathon School District, Unit design template adapted from Understanding by Design, Wiggins (1998).
37
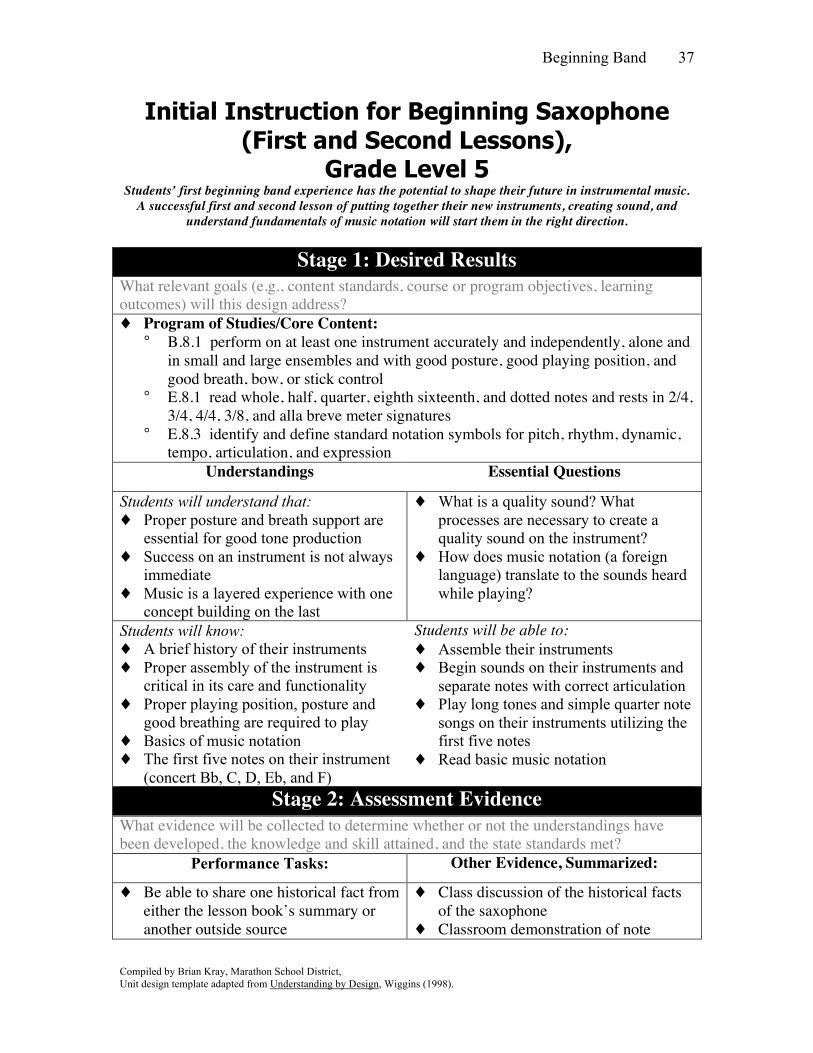
Initial Instruction for Beginning Saxophone (First and Second Lessons),
Grade Level 5 Students’ first beginning band experience has the potential to shape their future in instrumental music.
A successful first and second lesson of putting together their new instruments, creating sound, and understand fundamentals of music notation will start them in the right direction.
Stage 1: Desired Results
What relevant goals (e.g., content standards, course or program objectives, learning outcomes) will this design address? ♦ Program of Studies/Core Content:
° B.8.1 perform on at least one instrument accurately and independently, alone and in small and large ensembles and with good posture, good playing position, and good breath, bow, or stick control
° E.8.1 read whole, half, quarter, eighth sixteenth, and dotted notes and rests in 2/4, 3/4, 4/4, 3/8, and alla breve meter signatures
° E.8.3 identify and define standard notation symbols for pitch, rhythm, dynamic, tempo, articulation, and expression
Understandings Essential Questions
Students will understand that: ♦ Proper posture and breath support are
essential for good tone production ♦ Success on an instrument is not always
immediate ♦ Music is a layered experience with one
concept building on the last
♦ What is a quality sound? What processes are necessary to create a quality sound on the instrument?
♦ How does music notation (a foreign language) translate to the sounds heard while playing?
Students will know: ♦ A brief history of their instruments ♦ Proper assembly of the instrument is
critical in its care and functionality ♦ Proper playing position, posture and
good breathing are required to play ♦ Basics of music notation ♦ The first five notes on their instrument
(concert Bb, C, D, Eb, and F)
Students will be able to: ♦ Assemble their instruments ♦ Begin sounds on their instruments and
separate notes with correct articulation ♦ Play long tones and simple quarter note
songs on their instruments utilizing the first five notes
♦ Read basic music notation
Stage 2: Assessment Evidence What evidence will be collected to determine whether or not the understandings have been developed, the knowledge and skill attained, and the state standards met?
Performance Tasks: Other Evidence, Summarized:
♦ Be able to share one historical fact from either the lesson book’s summary or another outside source
♦ Class discussion of the historical facts of the saxophone
♦ Classroom demonstration of note
Beginning Band
Compiled by Brian Kray, Marathon School District, Unit design template adapted from Understanding by Design, Wiggins (1998).
38
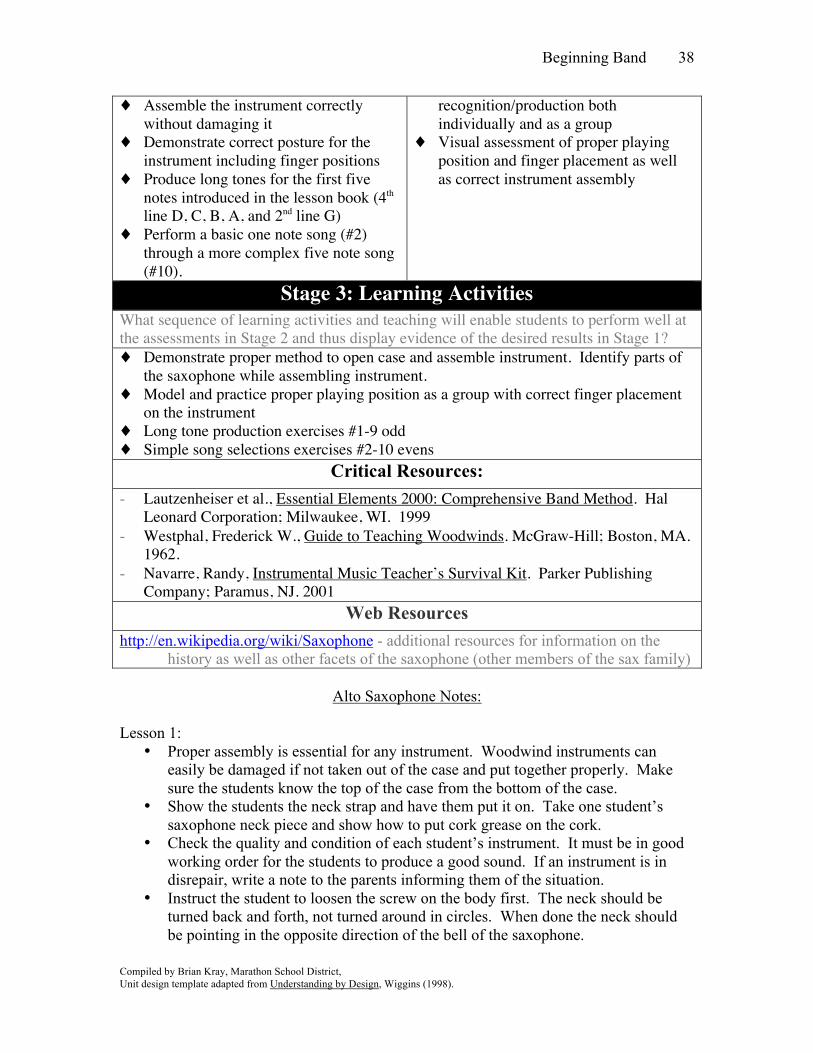
♦ Assemble the instrument correctly without damaging it
♦ Demonstrate correct posture for the instrument including finger positions
♦ Produce long tones for the first five notes introduced in the lesson book (4th line D, C, B, A, and 2nd line G)
♦ Perform a basic one note song (#2) through a more complex five note song (#10).
recognition/production both individually and as a group
♦ Visual assessment of proper playing position and finger placement as well as correct instrument assembly
Stage 3: Learning Activities What sequence of learning activities and teaching will enable students to perform well at the assessments in Stage 2 and thus display evidence of the desired results in Stage 1? ♦ Demonstrate proper method to open case and assemble instrument. Identify parts of
the saxophone while assembling instrument. ♦ Model and practice proper playing position as a group with correct finger placement
on the instrument ♦ Long tone production exercises #1-9 odd ♦ Simple song selections exercises #2-10 evens
Critical Resources: - Lautzenheiser et al., Essential Elements 2000: Comprehensive Band Method. Hal
Leonard Corporation; Milwaukee, WI. 1999 - Westphal, Frederick W., Guide to Teaching Woodwinds. McGraw-Hill; Boston, MA.
1962. - Navarre, Randy, Instrumental Music Teacher’s Survival Kit. Parker Publishing
Company; Paramus, NJ. 2001 Web Resources
http://en.wikipedia.org/wiki/Saxophone - additional resources for information on the history as well as other facets of the saxophone (other members of the sax family)
Alto Saxophone Notes:
Lesson 1:
• Proper assembly is essential for any instrument. Woodwind instruments can easily be damaged if not taken out of the case and put together properly. Make sure the students know the top of the case from the bottom of the case.
• Show the students the neck strap and have them put it on. Take one student’s saxophone neck piece and show how to put cork grease on the cork.
• Check the quality and condition of each student’s instrument. It must be in good working order for the students to produce a good sound. If an instrument is in disrepair, write a note to the parents informing them of the situation.
• Instruct the student to loosen the screw on the body first. The neck should be turned back and forth, not turned around in circles. When done the neck should be pointing in the opposite direction of the bell of the saxophone.
Beginning Band
Compiled by Brian Kray, Marathon School District, Unit design template adapted from Understanding by Design, Wiggins (1998).
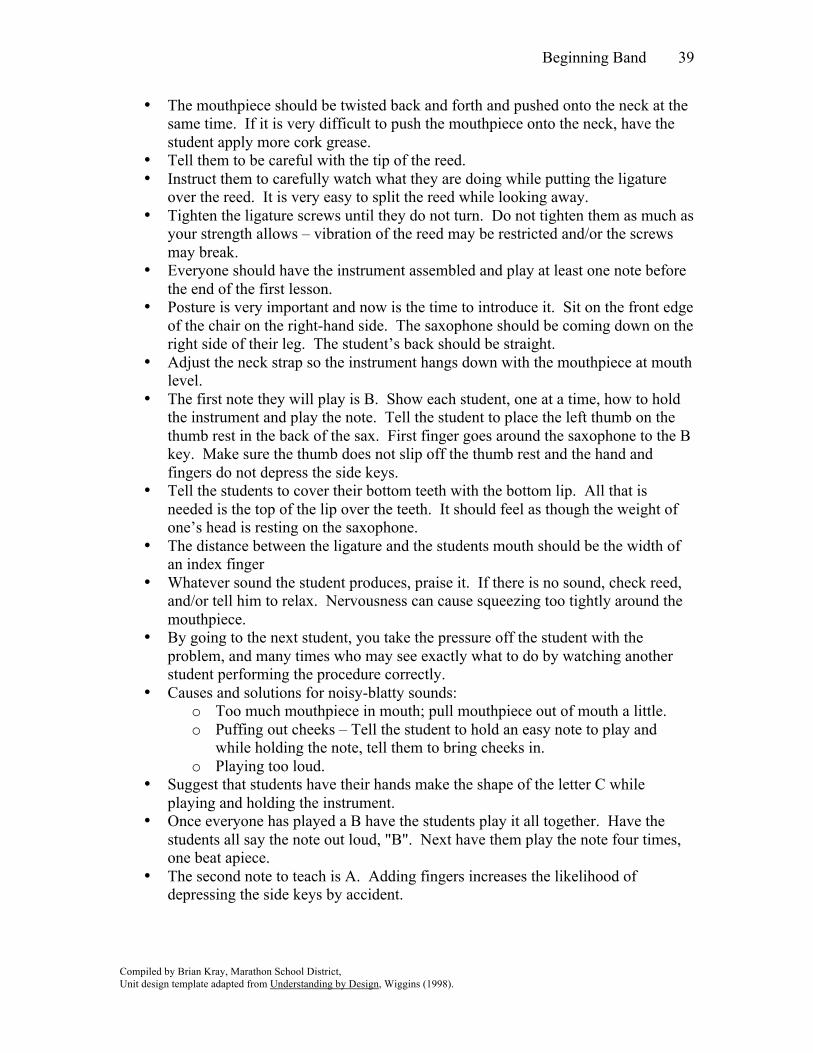
39
• The mouthpiece should be twisted back and forth and pushed onto the neck at the same time. If it is very difficult to push the mouthpiece onto the neck, have the student apply more cork grease.
• Tell them to be careful with the tip of the reed. • Instruct them to carefully watch what they are doing while putting the ligature
over the reed. It is very easy to split the reed while looking away. • Tighten the ligature screws until they do not turn. Do not tighten them as much as
your strength allows – vibration of the reed may be restricted and/or the screws may break.
• Everyone should have the instrument assembled and play at least one note before the end of the first lesson.
• Posture is very important and now is the time to introduce it. Sit on the front edge of the chair on the right-hand side. The saxophone should be coming down on the right side of their leg. The student’s back should be straight.
• Adjust the neck strap so the instrument hangs down with the mouthpiece at mouth level.
• The first note they will play is B. Show each student, one at a time, how to hold the instrument and play the note. Tell the student to place the left thumb on the thumb rest in the back of the sax. First finger goes around the saxophone to the B key. Make sure the thumb does not slip off the thumb rest and the hand and fingers do not depress the side keys.
• Tell the students to cover their bottom teeth with the bottom lip. All that is needed is the top of the lip over the teeth. It should feel as though the weight of one’s head is resting on the saxophone.
• The distance between the ligature and the students mouth should be the width of an index finger
• Whatever sound the student produces, praise it. If there is no sound, check reed, and/or tell him to relax. Nervousness can cause squeezing too tightly around the mouthpiece.
• By going to the next student, you take the pressure off the student with the problem, and many times who may see exactly what to do by watching another student performing the procedure correctly.
• Causes and solutions for noisy-blatty sounds: o Too much mouthpiece in mouth; pull mouthpiece out of mouth a little. o Puffing out cheeks – Tell the student to hold an easy note to play and
while holding the note, tell them to bring cheeks in. o Playing too loud.
• Suggest that students have their hands make the shape of the letter C while playing and holding the instrument.
• Once everyone has played a B have the students play it all together. Have the students all say the note out loud, "B". Next have them play the note four times, one beat apiece.
• The second note to teach is A. Adding fingers increases the likelihood of depressing the side keys by accident.
Beginning Band
Compiled by Brian Kray, Marathon School District, Unit design template adapted from Understanding by Design, Wiggins (1998).
40
• Have them play B, A, G slowly one note after another. The students have just played “Three Blind Mice.” Ask the students what B-A-G spells. This will help them to remember the notes learned.
• Disassemble the instrument in the opposite order it was assembled. • If no sound comes out when they practice at home, tell them to stay relaxed and
keep trying. Most of the time when a sound does not come out, it is because they are trying too hard and squeezing the reed against the mouthpiece.
Lesson 2:
• Instruct the students to assemble their instruments as they come in. • Have students play B all together, then A, and finally G, reviewing notes from the
first lesson. • Remind them to:
o Keep the bottom teeth covered with the bottom lip. o Top teeth should be firmly resting on the mouthpiece. o If no sound is coming out, relax and place more of the mouthpiece into the
mouth. o If a blatty sound is being made, put less of the mouthpiece into the mouth.
Do not puff out cheeks. • If someone is looking at other students’ fingers or around the room in confusion,
the student does not understand how to read the music. The easiest way to get a student to read music is to point to the notes with your baton as the group plays.
• Many beginning method books will include D on the first page. D is not an easy note for a beginning saxophonist. The problem with this note is that the fingers on both hands must depress the six major keys and octave key while not depressing the side keys. Have each student, one at a time, play the note. Before they play, make sure the fingers are on the correct keys and they are not touching the side keys.
• Make sure you reserve enough time to put their instruments back into their cases. -Alto saxophone notes from Instrumental Music Teachers Survival Kit by Randy Navarre
Student Assignment: Lesson 1:
• Practice 10-20 minutes every day. If they keep trying they will remember more and more, and by the next lesson they will remember what they did in the first lesson. If they are getting a squeak or no sound, tell them not to worry; you’ll show them how to make a sound again.
• Try to play “Mary Had a Little Lamb” and/or “Three Blind Mice.”
Lesson 2: • Practice 20-30 minutes every day. • Work through #1-10 in the method book now using the first 5 notes.
Beginning Band
Compiled by Brian Kray, Marathon School District, Unit design template adapted from Understanding by Design, Wiggins (1998).
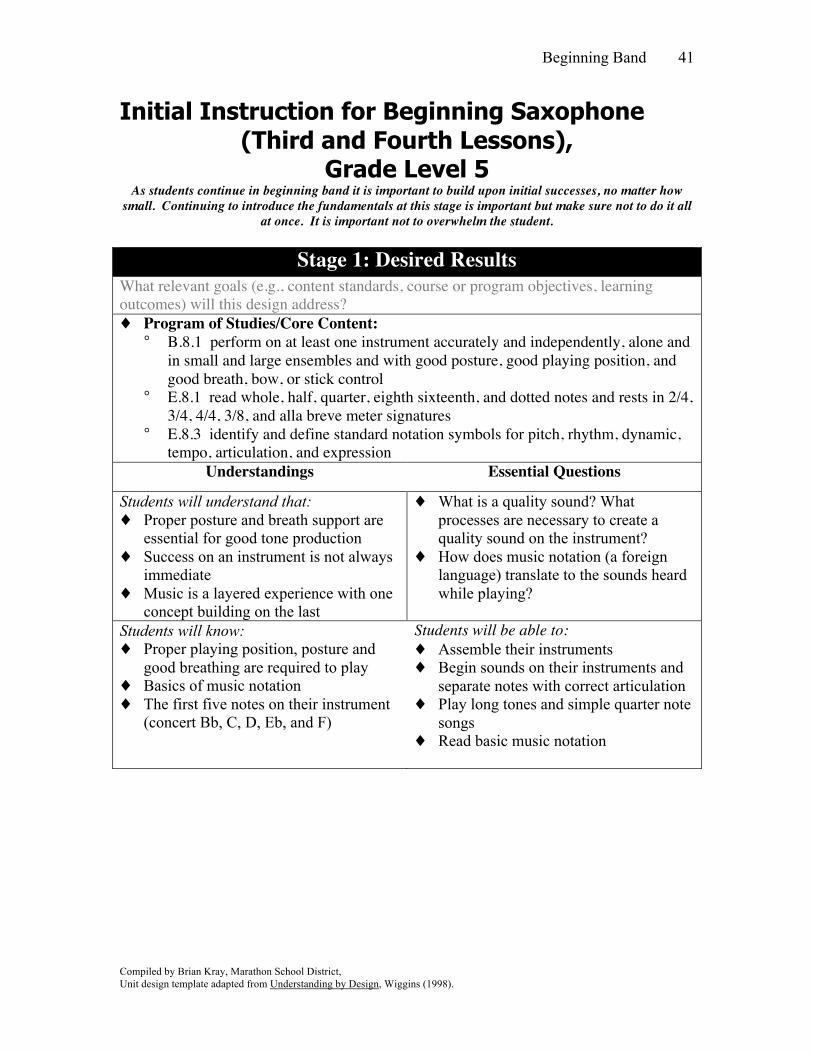
41
Initial Instruction for Beginning Saxophone (Third and Fourth Lessons),
Grade Level 5 As students continue in beginning band it is important to build upon initial successes, no matter how
small. Continuing to introduce the fundamentals at this stage is important but make sure not to do it all at once. It is important not to overwhelm the student.
Stage 1: Desired Results
What relevant goals (e.g., content standards, course or program objectives, learning outcomes) will this design address? ♦ Program of Studies/Core Content:
° B.8.1 perform on at least one instrument accurately and independently, alone and in small and large ensembles and with good posture, good playing position, and good breath, bow, or stick control
° E.8.1 read whole, half, quarter, eighth sixteenth, and dotted notes and rests in 2/4, 3/4, 4/4, 3/8, and alla breve meter signatures
° E.8.3 identify and define standard notation symbols for pitch, rhythm, dynamic, tempo, articulation, and expression
Understandings Essential Questions
Students will understand that: ♦ Proper posture and breath support are
essential for good tone production ♦ Success on an instrument is not always
immediate ♦ Music is a layered experience with one
concept building on the last
♦ What is a quality sound? What processes are necessary to create a quality sound on the instrument?
♦ How does music notation (a foreign language) translate to the sounds heard while playing?
Students will know: ♦ Proper playing position, posture and
good breathing are required to play ♦ Basics of music notation ♦ The first five notes on their instrument
(concert Bb, C, D, Eb, and F)
Students will be able to: ♦ Assemble their instruments ♦ Begin sounds on their instruments and
separate notes with correct articulation ♦ Play long tones and simple quarter note
songs ♦ Read basic music notation
Beginning Band
Compiled by Brian Kray, Marathon School District, Unit design template adapted from Understanding by Design, Wiggins (1998).
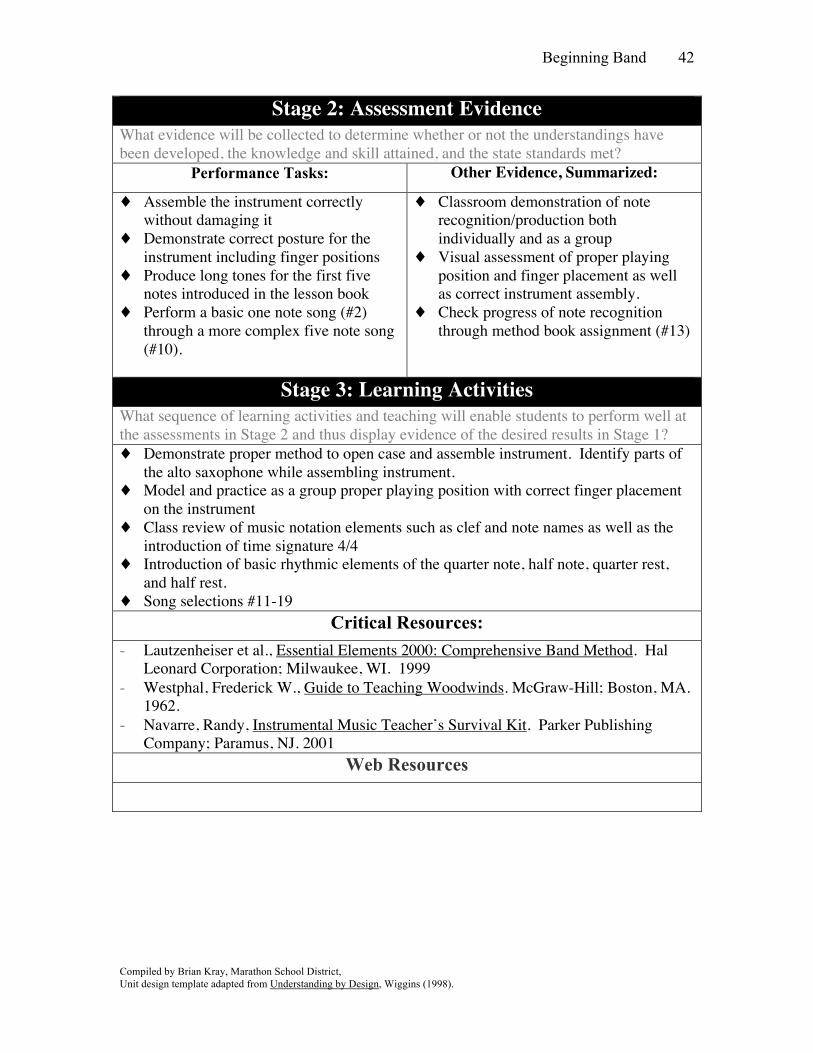
42
Stage 2: Assessment Evidence What evidence will be collected to determine whether or not the understandings have been developed, the knowledge and skill attained, and the state standards met?
Performance Tasks: Other Evidence, Summarized:
♦ Assemble the instrument correctly without damaging it
♦ Demonstrate correct posture for the instrument including finger positions
♦ Produce long tones for the first five notes introduced in the lesson book
♦ Perform a basic one note song (#2) through a more complex five note song (#10).
♦ Classroom demonstration of note recognition/production both individually and as a group
♦ Visual assessment of proper playing position and finger placement as well as correct instrument assembly.
♦ Check progress of note recognition through method book assignment (#13)
Stage 3: Learning Activities What sequence of learning activities and teaching will enable students to perform well at the assessments in Stage 2 and thus display evidence of the desired results in Stage 1? ♦ Demonstrate proper method to open case and assemble instrument. Identify parts of
the alto saxophone while assembling instrument. ♦ Model and practice as a group proper playing position with correct finger placement
on the instrument ♦ Class review of music notation elements such as clef and note names as well as the
introduction of time signature 4/4 ♦ Introduction of basic rhythmic elements of the quarter note, half note, quarter rest,
and half rest. ♦ Song selections #11-19
Critical Resources: - Lautzenheiser et al., Essential Elements 2000: Comprehensive Band Method. Hal
Leonard Corporation; Milwaukee, WI. 1999 - Westphal, Frederick W., Guide to Teaching Woodwinds. McGraw-Hill; Boston, MA.
1962. - Navarre, Randy, Instrumental Music Teacher’s Survival Kit. Parker Publishing
Company; Paramus, NJ. 2001 Web Resources
Beginning Band
Compiled by Brian Kray, Marathon School District, Unit design template adapted from Understanding by Design, Wiggins (1998).
43
Alto Saxophone Notes: Lesson 3:
• As students enter have them assemble their instruments and get out their method books. Check to make sure that the instrument is being assembled properly.
• Have students review the long tones from #1-10 for warm-up and to make sure notes are being fingered correctly.
• Remember to check for the following: o Puffing checks o Top Teeth on the mouthpiece o Breathing before every note. (Do not overdo this yet. Just mention to
them not to breathe before every note.) o Bottom lip covering the bottom teeth o Too much or too little mouthpiece in mouth. o Tapping toes. (This is extremely important. Students must count from the
very beginning. Tapping their toes is the only means by which they can keep count at this time.)
o Reading the notes. Watch their eyes. Use your baton to point to the notes if they appear to not be reading the music.
o Pressing the side keys accidentally. o Hand position o Posture
• Review the information on clef and note names with the students. Introduce the time signature 4/4 to them. Explain what the numbers mean.
Lesson 4:
• Have students put together instruments immediately and get out method books.
• Review through the long tones first (odd numbered exercises) and then through the evens having students work on separating the notes with correct articulation.
• Continue with #12-14. Ask students what #14 sounds like; do they know it by a different name? (Most students will recognize #14 as Mary Had a Little Lamb)
• Define a half note and half rest. Discuss how the half note is two beats of sound and half rest is two beats of silence.
• Explain the breath mark. This is a symbol used to tell performers when to breathe.
-Alto saxophone notes from Instrumental Music Teachers Survival Kit by Randy Navarre
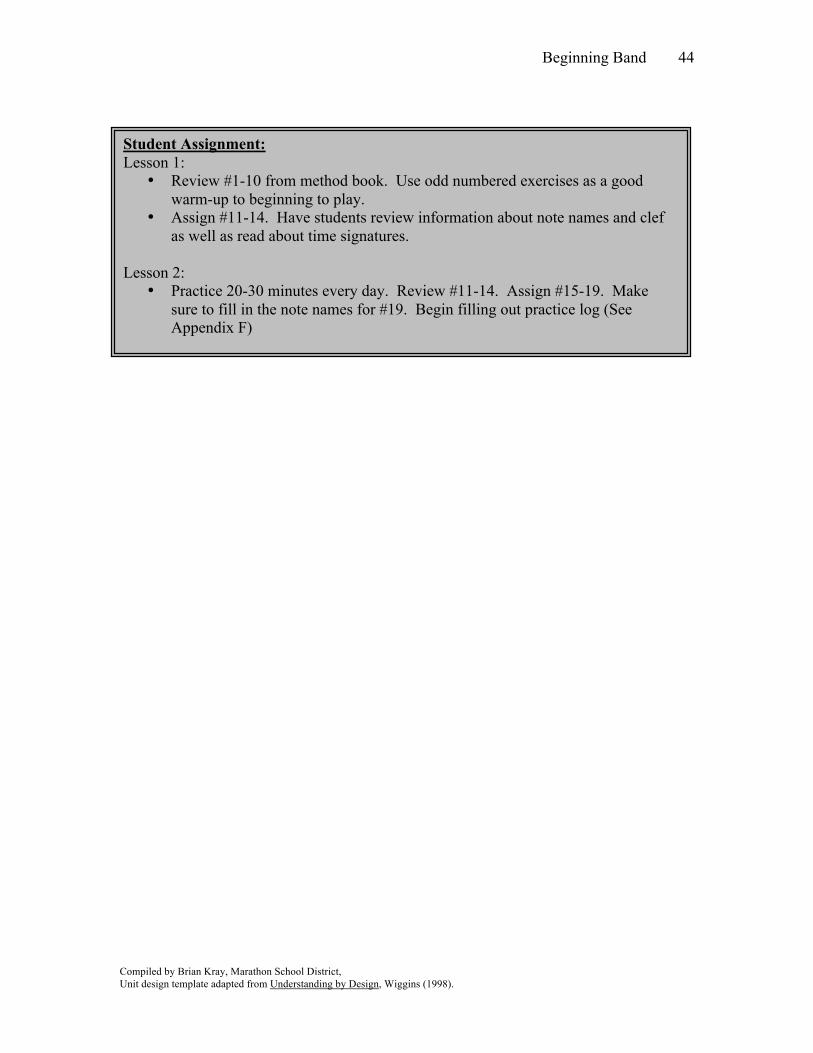
Beginning Band
Compiled by Brian Kray, Marathon School District, Unit design template adapted from Understanding by Design, Wiggins (1998).
44
Student Assignment: Lesson 1:
• Review #1-10 from method book. Use odd numbered exercises as a good warm-up to beginning to play.
• Assign #11-14. Have students review information about note names and clef as well as read about time signatures.
Lesson 2: • Practice 20-30 minutes every day. Review #11-14. Assign #15-19. Make
sure to fill in the note names for #19. Begin filling out practice log (See Appendix F)

Beginning Band
Compiled by Brian Kray, Marathon School District, Unit design template adapted from Understanding by Design, Wiggins (1998).
45
Initial Instruction for Beginning Trumpet (First and Second Lessons),
Grade Level 5 Students’ first beginning band experience has the potential to shape their future in instrumental music.
A successful first and second lesson of putting together their new instruments, creating sound, and understand fundamentals of music notation will start them in the right direction.
Stage 1: Desired Results
What relevant goals (e.g., content standards, course or program objectives, learning outcomes) will this design address? ♦ Program of Studies/Core Content:
° B.8.1 perform on at least one instrument accurately and independently, alone and in small and large ensembles and with good posture, good playing position, and good breath, bow, or stick control
° E.8.1 read whole, half, quarter, eighth sixteenth, and dotted notes and rests in 2/4, 3/4, 4/4, 3/8, and alla breve meter signatures
° E.8.3 identify and define standard notation symbols for pitch, rhythm, dynamic, tempo, articulation, and expression
Understandings Essential Questions
Students will understand that: ♦ Proper posture and breath support are
essential for good tone production ♦ Success on an instrument is not always
immediate ♦ Music is a layered experience with one
concept building on the last
♦ What is a quality sound? What processes are necessary to create a quality sound on the instrument?
♦ How does music notation (a foreign language) translate to the sounds heard while playing?
Students will know: ♦ A brief history of their instruments ♦ Proper assembly of the instrument is
critical in its care and functionality ♦ Proper playing position, posture and
good breathing are required to play ♦ Basics of music notation ♦ The first six notes on their instrument
(concert Bb, C, D, Eb, F, and G)
Students will be able to: ♦ Assemble their instruments ♦ Begin sounds on their instrument and
separate notes with correct articulation ♦ Play long tones and simple quarter note
songs on their instruments utilizing the first five notes
♦ Read basic music notation
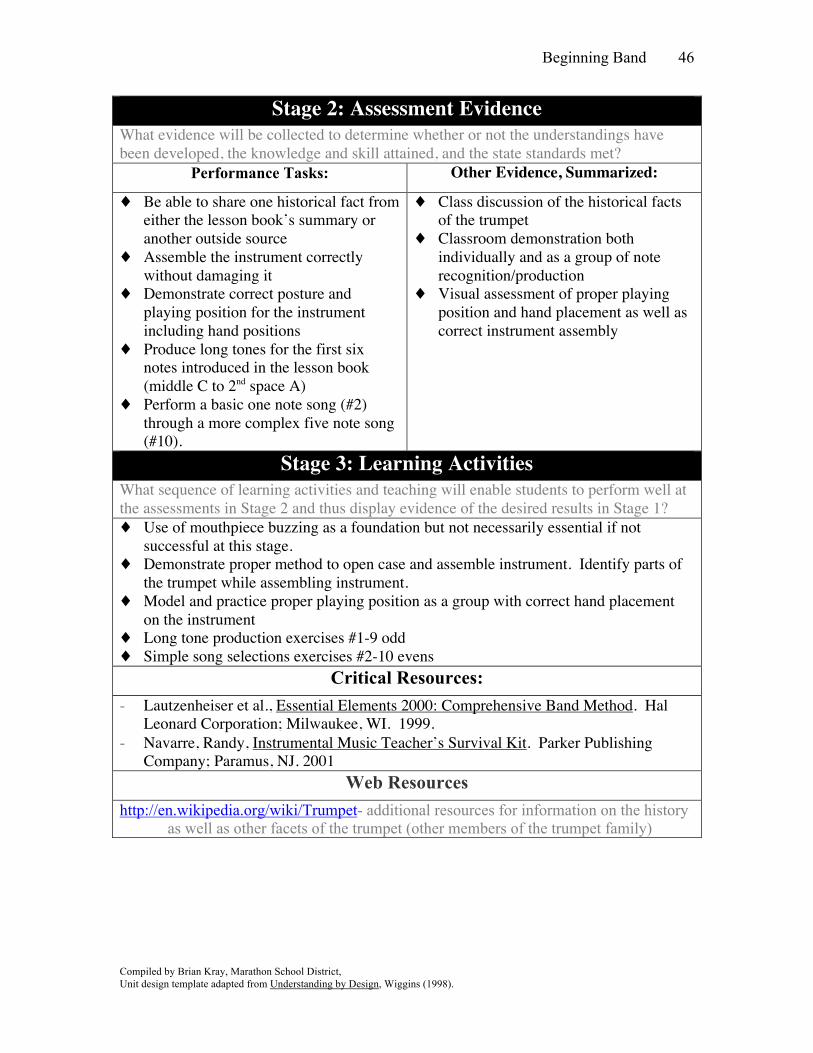
Beginning Band
Compiled by Brian Kray, Marathon School District, Unit design template adapted from Understanding by Design, Wiggins (1998).
46
Stage 2: Assessment Evidence What evidence will be collected to determine whether or not the understandings have been developed, the knowledge and skill attained, and the state standards met?
Performance Tasks: Other Evidence, Summarized:
♦ Be able to share one historical fact from either the lesson book’s summary or another outside source
♦ Assemble the instrument correctly without damaging it
♦ Demonstrate correct posture and playing position for the instrument including hand positions
♦ Produce long tones for the first six notes introduced in the lesson book (middle C to 2nd space A)
♦ Perform a basic one note song (#2) through a more complex five note song (#10).
♦ Class discussion of the historical facts of the trumpet
♦ Classroom demonstration both individually and as a group of note recognition/production
♦ Visual assessment of proper playing position and hand placement as well as correct instrument assembly
Stage 3: Learning Activities What sequence of learning activities and teaching will enable students to perform well at the assessments in Stage 2 and thus display evidence of the desired results in Stage 1? ♦ Use of mouthpiece buzzing as a foundation but not necessarily essential if not
successful at this stage. ♦ Demonstrate proper method to open case and assemble instrument. Identify parts of
the trumpet while assembling instrument. ♦ Model and practice proper playing position as a group with correct hand placement
on the instrument ♦ Long tone production exercises #1-9 odd ♦ Simple song selections exercises #2-10 evens
Critical Resources: - Lautzenheiser et al., Essential Elements 2000: Comprehensive Band Method. Hal
Leonard Corporation; Milwaukee, WI. 1999. - Navarre, Randy, Instrumental Music Teacher’s Survival Kit. Parker Publishing
Company; Paramus, NJ. 2001 Web Resources
http://en.wikipedia.org/wiki/Trumpet- additional resources for information on the history as well as other facets of the trumpet (other members of the trumpet family)
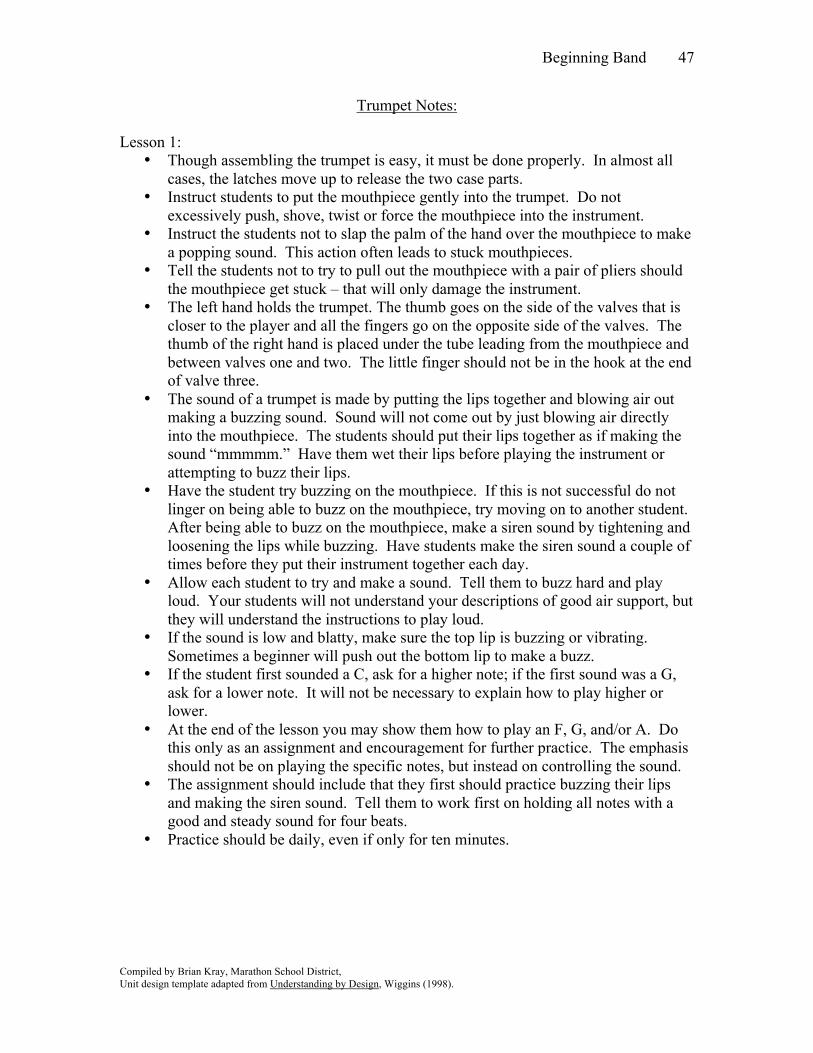
Beginning Band
Compiled by Brian Kray, Marathon School District, Unit design template adapted from Understanding by Design, Wiggins (1998).
47
Trumpet Notes:
Lesson 1: • Though assembling the trumpet is easy, it must be done properly. In almost all
cases, the latches move up to release the two case parts. • Instruct students to put the mouthpiece gently into the trumpet. Do not
excessively push, shove, twist or force the mouthpiece into the instrument. • Instruct the students not to slap the palm of the hand over the mouthpiece to make
a popping sound. This action often leads to stuck mouthpieces. • Tell the students not to try to pull out the mouthpiece with a pair of pliers should
the mouthpiece get stuck – that will only damage the instrument. • The left hand holds the trumpet. The thumb goes on the side of the valves that is
closer to the player and all the fingers go on the opposite side of the valves. The thumb of the right hand is placed under the tube leading from the mouthpiece and between valves one and two. The little finger should not be in the hook at the end of valve three.
• The sound of a trumpet is made by putting the lips together and blowing air out making a buzzing sound. Sound will not come out by just blowing air directly into the mouthpiece. The students should put their lips together as if making the sound “mmmmm.” Have them wet their lips before playing the instrument or attempting to buzz their lips.
• Have the student try buzzing on the mouthpiece. If this is not successful do not linger on being able to buzz on the mouthpiece, try moving on to another student. After being able to buzz on the mouthpiece, make a siren sound by tightening and loosening the lips while buzzing. Have students make the siren sound a couple of times before they put their instrument together each day.
• Allow each student to try and make a sound. Tell them to buzz hard and play loud. Your students will not understand your descriptions of good air support, but they will understand the instructions to play loud.
• If the sound is low and blatty, make sure the top lip is buzzing or vibrating. Sometimes a beginner will push out the bottom lip to make a buzz.
• If the student first sounded a C, ask for a higher note; if the first sound was a G, ask for a lower note. It will not be necessary to explain how to play higher or lower.
• At the end of the lesson you may show them how to play an F, G, and/or A. Do this only as an assignment and encouragement for further practice. The emphasis should not be on playing the specific notes, but instead on controlling the sound.
• The assignment should include that they first should practice buzzing their lips and making the siren sound. Tell them to work first on holding all notes with a good and steady sound for four beats.
• Practice should be daily, even if only for ten minutes.

Beginning Band
Compiled by Brian Kray, Marathon School District, Unit design template adapted from Understanding by Design, Wiggins (1998).
48
Lesson 2: • Have students assemble their instruments when they enter class. • Have them review G and C. • Have them play 4 quarter note Gs. Explain to them that the quarter note is played
for one beat because it is marked with a circle that is filled in with a stem on it. Sing the example first using the syllable “tah.” Singing the correct rhythm is the objective, not necessarily the right note. Have them play the first measure, and then explain to them the rhythm of rests.
• Make sure students are buzzing predominantly with their top lips, not their bottom lips.
-Trumpet notes from Instrumental Music Teachers Survival Kit by Randy Navarre
Student Assignment: Lesson 1:
• Practice 10-20 minutes every day. If they keep trying they will remember more and more, and by the next lesson they will remember what they did in the first lesson.
• Try to play “F, G, A” as well as working on “C and G” and mouthpiece sirens.
Lesson 2: • Practice 20-30 minutes every day. • Work through #1-10 in the method book now using the first 5 notes.
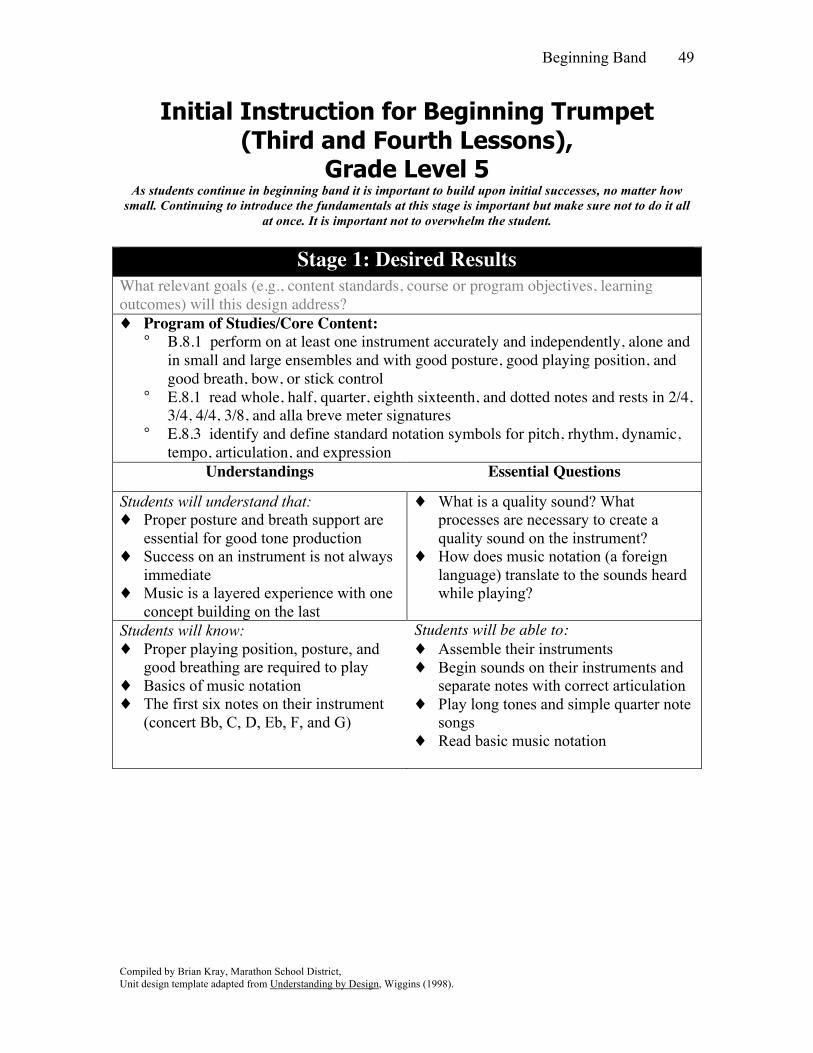
Beginning Band
Compiled by Brian Kray, Marathon School District, Unit design template adapted from Understanding by Design, Wiggins (1998).
49
Initial Instruction for Beginning Trumpet (Third and Fourth Lessons),
Grade Level 5 As students continue in beginning band it is important to build upon initial successes, no matter how
small. Continuing to introduce the fundamentals at this stage is important but make sure not to do it all at once. It is important not to overwhelm the student.
Stage 1: Desired Results
What relevant goals (e.g., content standards, course or program objectives, learning outcomes) will this design address? ♦ Program of Studies/Core Content:
° B.8.1 perform on at least one instrument accurately and independently, alone and in small and large ensembles and with good posture, good playing position, and good breath, bow, or stick control
° E.8.1 read whole, half, quarter, eighth sixteenth, and dotted notes and rests in 2/4, 3/4, 4/4, 3/8, and alla breve meter signatures
° E.8.3 identify and define standard notation symbols for pitch, rhythm, dynamic, tempo, articulation, and expression
Understandings Essential Questions
Students will understand that: ♦ Proper posture and breath support are
essential for good tone production ♦ Success on an instrument is not always
immediate ♦ Music is a layered experience with one
concept building on the last
♦ What is a quality sound? What processes are necessary to create a quality sound on the instrument?
♦ How does music notation (a foreign language) translate to the sounds heard while playing?
Students will know: ♦ Proper playing position, posture, and
good breathing are required to play ♦ Basics of music notation ♦ The first six notes on their instrument
(concert Bb, C, D, Eb, F, and G)
Students will be able to: ♦ Assemble their instruments ♦ Begin sounds on their instruments and
separate notes with correct articulation ♦ Play long tones and simple quarter note
songs ♦ Read basic music notation
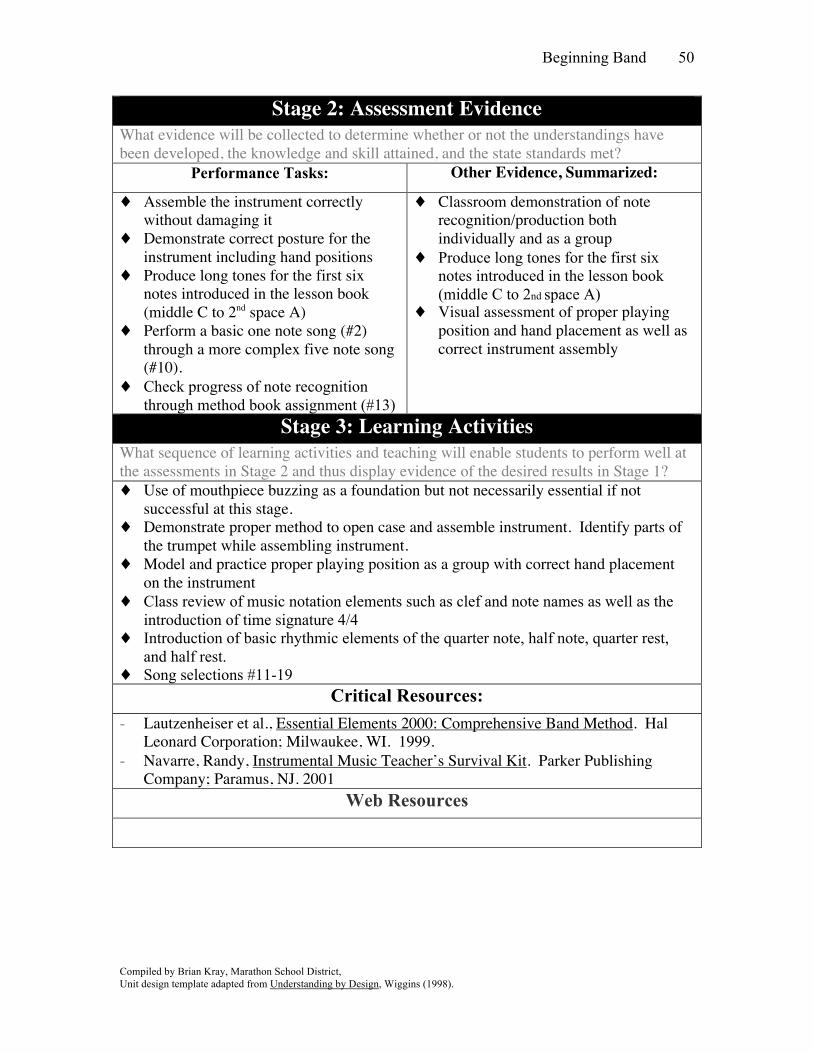
Beginning Band
Compiled by Brian Kray, Marathon School District, Unit design template adapted from Understanding by Design, Wiggins (1998).
50
Stage 2: Assessment Evidence What evidence will be collected to determine whether or not the understandings have been developed, the knowledge and skill attained, and the state standards met?
Performance Tasks: Other Evidence, Summarized:
♦ Assemble the instrument correctly without damaging it
♦ Demonstrate correct posture for the instrument including hand positions
♦ Produce long tones for the first six notes introduced in the lesson book (middle C to 2nd space A)
♦ Perform a basic one note song (#2) through a more complex five note song (#10).
♦ Check progress of note recognition through method book assignment (#13)
♦ Classroom demonstration of note recognition/production both individually and as a group
♦ Produce long tones for the first six notes introduced in the lesson book (middle C to 2nd space A)
♦ Visual assessment of proper playing position and hand placement as well as correct instrument assembly
Stage 3: Learning Activities What sequence of learning activities and teaching will enable students to perform well at the assessments in Stage 2 and thus display evidence of the desired results in Stage 1? ♦ Use of mouthpiece buzzing as a foundation but not necessarily essential if not
successful at this stage. ♦ Demonstrate proper method to open case and assemble instrument. Identify parts of
the trumpet while assembling instrument. ♦ Model and practice proper playing position as a group with correct hand placement
on the instrument ♦ Class review of music notation elements such as clef and note names as well as the
introduction of time signature 4/4 ♦ Introduction of basic rhythmic elements of the quarter note, half note, quarter rest,
and half rest. ♦ Song selections #11-19
Critical Resources: - Lautzenheiser et al., Essential Elements 2000: Comprehensive Band Method. Hal
Leonard Corporation; Milwaukee, WI. 1999. - Navarre, Randy, Instrumental Music Teacher’s Survival Kit. Parker Publishing
Company; Paramus, NJ. 2001 Web Resources
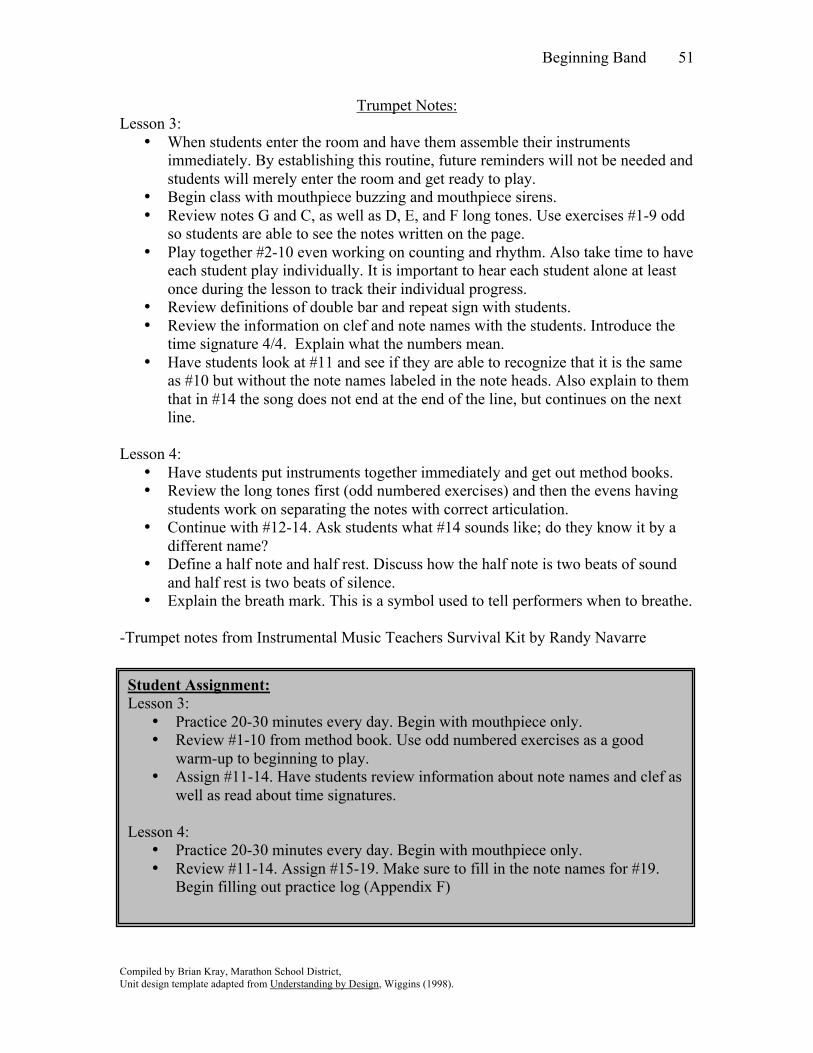
Beginning Band
Compiled by Brian Kray, Marathon School District, Unit design template adapted from Understanding by Design, Wiggins (1998).
51
Trumpet Notes: Lesson 3:
• When students enter the room and have them assemble their instruments immediately. By establishing this routine, future reminders will not be needed and students will merely enter the room and get ready to play.
• Begin class with mouthpiece buzzing and mouthpiece sirens. • Review notes G and C, as well as D, E, and F long tones. Use exercises #1-9 odd
so students are able to see the notes written on the page. • Play together #2-10 even working on counting and rhythm. Also take time to have
each student play individually. It is important to hear each student alone at least once during the lesson to track their individual progress.
• Review definitions of double bar and repeat sign with students. • Review the information on clef and note names with the students. Introduce the
time signature 4/4. Explain what the numbers mean. • Have students look at #11 and see if they are able to recognize that it is the same
as #10 but without the note names labeled in the note heads. Also explain to them that in #14 the song does not end at the end of the line, but continues on the next line.
Lesson 4: • Have students put instruments together immediately and get out method books. • Review the long tones first (odd numbered exercises) and then the evens having
students work on separating the notes with correct articulation. • Continue with #12-14. Ask students what #14 sounds like; do they know it by a
different name? • Define a half note and half rest. Discuss how the half note is two beats of sound
and half rest is two beats of silence. • Explain the breath mark. This is a symbol used to tell performers when to breathe.
-Trumpet notes from Instrumental Music Teachers Survival Kit by Randy Navarre
Student Assignment: Lesson 3:
• Practice 20-30 minutes every day. Begin with mouthpiece only. • Review #1-10 from method book. Use odd numbered exercises as a good
warm-up to beginning to play. • Assign #11-14. Have students review information about note names and clef as
well as read about time signatures. Lesson 4:
• Practice 20-30 minutes every day. Begin with mouthpiece only. • Review #11-14. Assign #15-19. Make sure to fill in the note names for #19.
Begin filling out practice log (Appendix F)
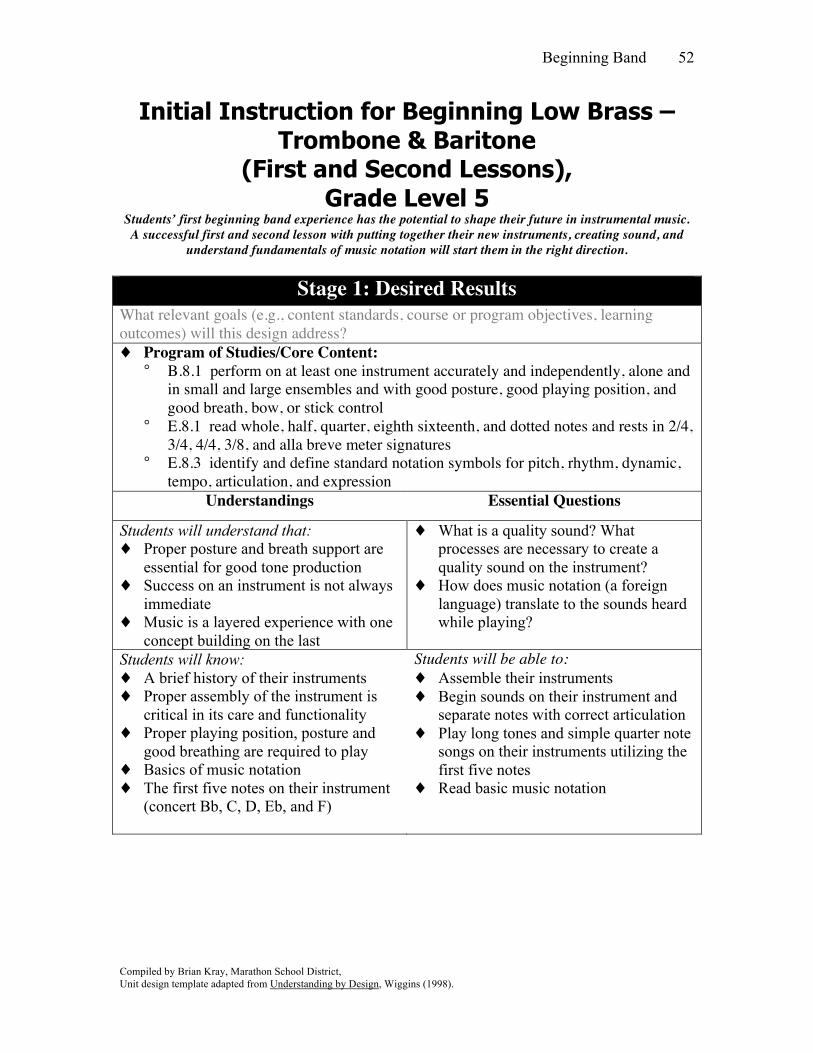
Beginning Band
Compiled by Brian Kray, Marathon School District, Unit design template adapted from Understanding by Design, Wiggins (1998).
52
Initial Instruction for Beginning Low Brass – Trombone & Baritone
(First and Second Lessons), Grade Level 5
Students’ first beginning band experience has the potential to shape their future in instrumental music. A successful first and second lesson with putting together their new instruments, creating sound, and
understand fundamentals of music notation will start them in the right direction.
Stage 1: Desired Results What relevant goals (e.g., content standards, course or program objectives, learning outcomes) will this design address? ♦ Program of Studies/Core Content:
° B.8.1 perform on at least one instrument accurately and independently, alone and in small and large ensembles and with good posture, good playing position, and good breath, bow, or stick control
° E.8.1 read whole, half, quarter, eighth sixteenth, and dotted notes and rests in 2/4, 3/4, 4/4, 3/8, and alla breve meter signatures
° E.8.3 identify and define standard notation symbols for pitch, rhythm, dynamic, tempo, articulation, and expression
Understandings Essential Questions
Students will understand that: ♦ Proper posture and breath support are
essential for good tone production ♦ Success on an instrument is not always
immediate ♦ Music is a layered experience with one
concept building on the last
♦ What is a quality sound? What processes are necessary to create a quality sound on the instrument?
♦ How does music notation (a foreign language) translate to the sounds heard while playing?
Students will know: ♦ A brief history of their instruments ♦ Proper assembly of the instrument is
critical in its care and functionality ♦ Proper playing position, posture and
good breathing are required to play ♦ Basics of music notation ♦ The first five notes on their instrument
(concert Bb, C, D, Eb, and F)
Students will be able to: ♦ Assemble their instruments ♦ Begin sounds on their instrument and
separate notes with correct articulation ♦ Play long tones and simple quarter note
songs on their instruments utilizing the first five notes
♦ Read basic music notation
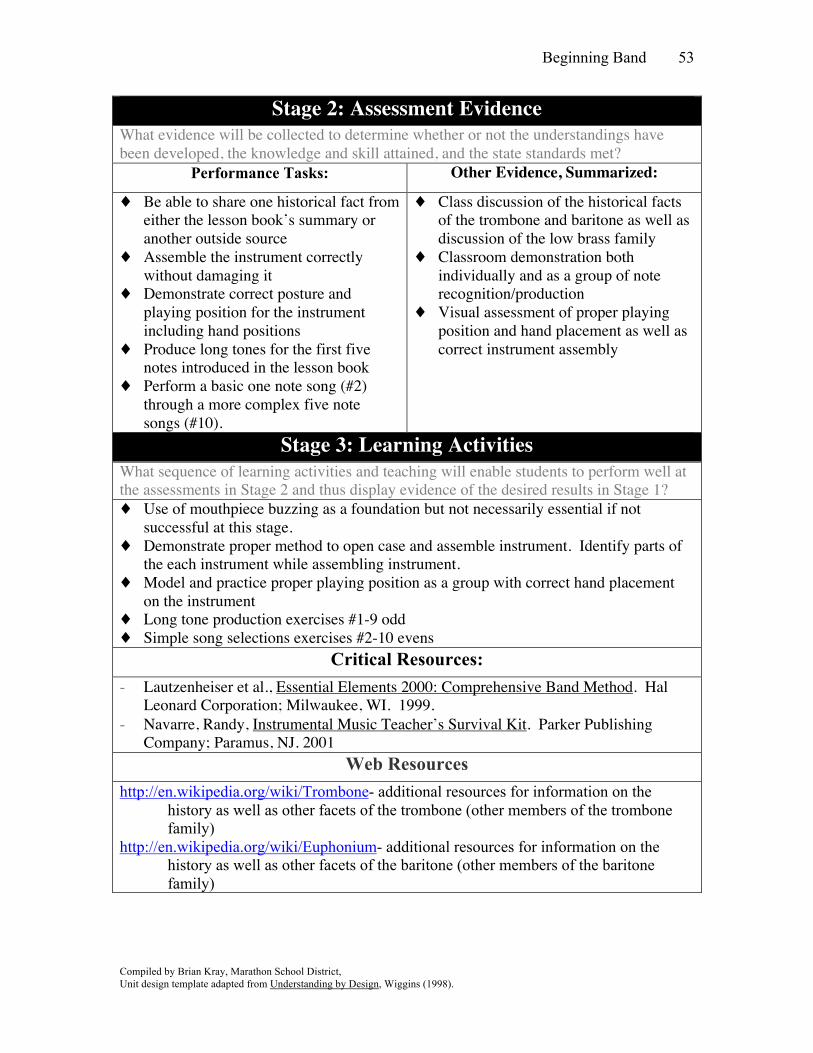
Beginning Band
Compiled by Brian Kray, Marathon School District, Unit design template adapted from Understanding by Design, Wiggins (1998).
53
Stage 2: Assessment Evidence What evidence will be collected to determine whether or not the understandings have been developed, the knowledge and skill attained, and the state standards met?
Performance Tasks: Other Evidence, Summarized:
♦ Be able to share one historical fact from either the lesson book’s summary or another outside source
♦ Assemble the instrument correctly without damaging it
♦ Demonstrate correct posture and playing position for the instrument including hand positions
♦ Produce long tones for the first five notes introduced in the lesson book
♦ Perform a basic one note song (#2) through a more complex five note songs (#10).
♦ Class discussion of the historical facts of the trombone and baritone as well as discussion of the low brass family
♦ Classroom demonstration both individually and as a group of note recognition/production
♦ Visual assessment of proper playing position and hand placement as well as correct instrument assembly
Stage 3: Learning Activities What sequence of learning activities and teaching will enable students to perform well at the assessments in Stage 2 and thus display evidence of the desired results in Stage 1? ♦ Use of mouthpiece buzzing as a foundation but not necessarily essential if not
successful at this stage. ♦ Demonstrate proper method to open case and assemble instrument. Identify parts of
the each instrument while assembling instrument. ♦ Model and practice proper playing position as a group with correct hand placement
on the instrument ♦ Long tone production exercises #1-9 odd ♦ Simple song selections exercises #2-10 evens
Critical Resources: - Lautzenheiser et al., Essential Elements 2000: Comprehensive Band Method. Hal
Leonard Corporation; Milwaukee, WI. 1999. - Navarre, Randy, Instrumental Music Teacher’s Survival Kit. Parker Publishing
Company; Paramus, NJ. 2001 Web Resources
http://en.wikipedia.org/wiki/Trombone- additional resources for information on the history as well as other facets of the trombone (other members of the trombone family)
http://en.wikipedia.org/wiki/Euphonium- additional resources for information on the history as well as other facets of the baritone (other members of the baritone family)
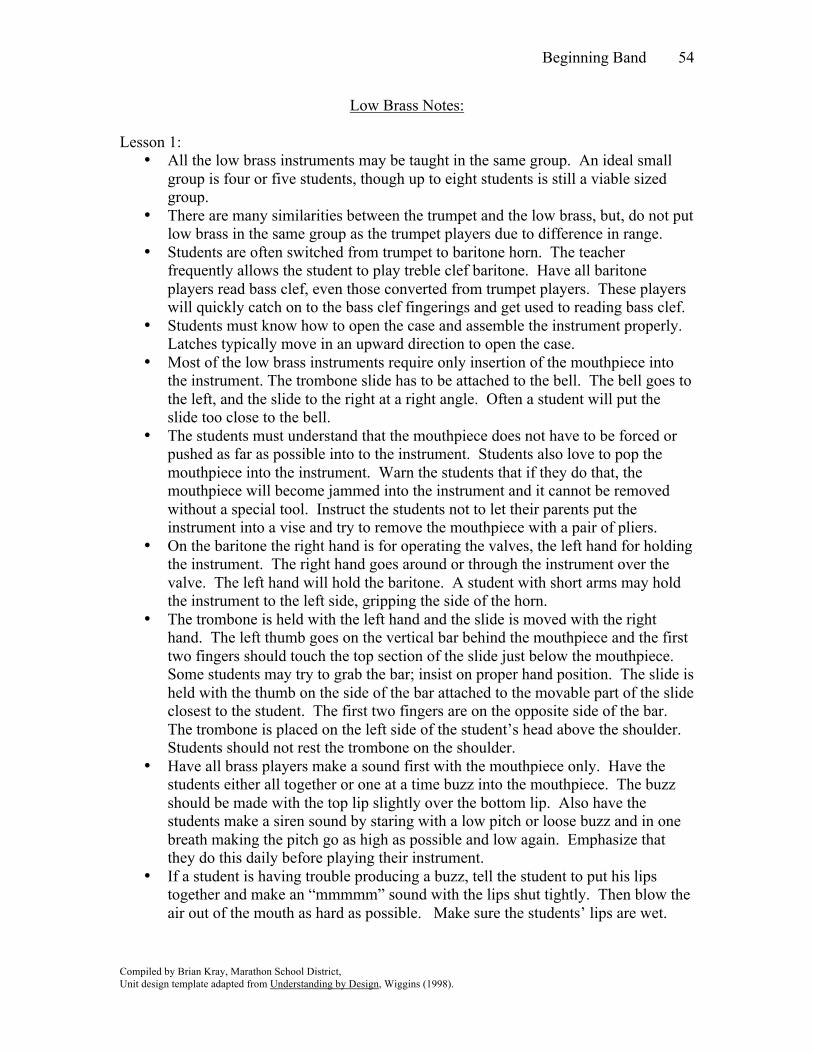
Beginning Band
Compiled by Brian Kray, Marathon School District, Unit design template adapted from Understanding by Design, Wiggins (1998).
54
Low Brass Notes: Lesson 1:
• All the low brass instruments may be taught in the same group. An ideal small group is four or five students, though up to eight students is still a viable sized group.
• There are many similarities between the trumpet and the low brass, but, do not put low brass in the same group as the trumpet players due to difference in range.
• Students are often switched from trumpet to baritone horn. The teacher frequently allows the student to play treble clef baritone. Have all baritone players read bass clef, even those converted from trumpet players. These players will quickly catch on to the bass clef fingerings and get used to reading bass clef.
• Students must know how to open the case and assemble the instrument properly. Latches typically move in an upward direction to open the case.
• Most of the low brass instruments require only insertion of the mouthpiece into the instrument. The trombone slide has to be attached to the bell. The bell goes to the left, and the slide to the right at a right angle. Often a student will put the slide too close to the bell.
• The students must understand that the mouthpiece does not have to be forced or pushed as far as possible into to the instrument. Students also love to pop the mouthpiece into the instrument. Warn the students that if they do that, the mouthpiece will become jammed into the instrument and it cannot be removed without a special tool. Instruct the students not to let their parents put the instrument into a vise and try to remove the mouthpiece with a pair of pliers.
• On the baritone the right hand is for operating the valves, the left hand for holding the instrument. The right hand goes around or through the instrument over the valve. The left hand will hold the baritone. A student with short arms may hold the instrument to the left side, gripping the side of the horn.
• The trombone is held with the left hand and the slide is moved with the right hand. The left thumb goes on the vertical bar behind the mouthpiece and the first two fingers should touch the top section of the slide just below the mouthpiece. Some students may try to grab the bar; insist on proper hand position. The slide is held with the thumb on the side of the bar attached to the movable part of the slide closest to the student. The first two fingers are on the opposite side of the bar. The trombone is placed on the left side of the student’s head above the shoulder. Students should not rest the trombone on the shoulder.
• Have all brass players make a sound first with the mouthpiece only. Have the students either all together or one at a time buzz into the mouthpiece. The buzz should be made with the top lip slightly over the bottom lip. Also have the students make a siren sound by staring with a low pitch or loose buzz and in one breath making the pitch go as high as possible and low again. Emphasize that they do this daily before playing their instrument.
• If a student is having trouble producing a buzz, tell the student to put his lips together and make an “mmmmm” sound with the lips shut tightly. Then blow the air out of the mouth as hard as possible. Make sure the students’ lips are wet.
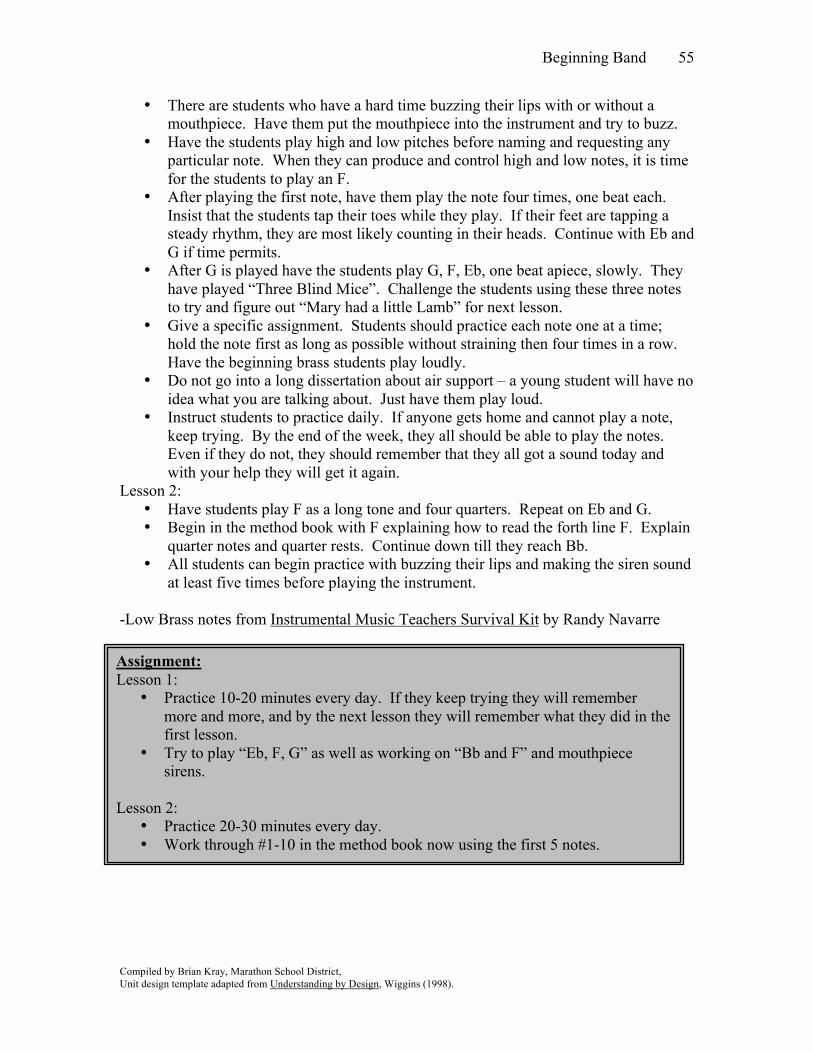
Beginning Band
Compiled by Brian Kray, Marathon School District, Unit design template adapted from Understanding by Design, Wiggins (1998).
55
• There are students who have a hard time buzzing their lips with or without a mouthpiece. Have them put the mouthpiece into the instrument and try to buzz.
• Have the students play high and low pitches before naming and requesting any particular note. When they can produce and control high and low notes, it is time for the students to play an F.
• After playing the first note, have them play the note four times, one beat each. Insist that the students tap their toes while they play. If their feet are tapping a steady rhythm, they are most likely counting in their heads. Continue with Eb and G if time permits.
• After G is played have the students play G, F, Eb, one beat apiece, slowly. They have played “Three Blind Mice”. Challenge the students using these three notes to try and figure out “Mary had a little Lamb” for next lesson.
• Give a specific assignment. Students should practice each note one at a time; hold the note first as long as possible without straining then four times in a row. Have the beginning brass students play loudly.
• Do not go into a long dissertation about air support – a young student will have no idea what you are talking about. Just have them play loud.
• Instruct students to practice daily. If anyone gets home and cannot play a note, keep trying. By the end of the week, they all should be able to play the notes. Even if they do not, they should remember that they all got a sound today and with your help they will get it again.
Lesson 2: • Have students play F as a long tone and four quarters. Repeat on Eb and G. • Begin in the method book with F explaining how to read the forth line F. Explain
quarter notes and quarter rests. Continue down till they reach Bb. • All students can begin practice with buzzing their lips and making the siren sound
at least five times before playing the instrument. -Low Brass notes from Instrumental Music Teachers Survival Kit by Randy Navarre
Assignment: Lesson 1:
• Practice 10-20 minutes every day. If they keep trying they will remember more and more, and by the next lesson they will remember what they did in the first lesson.
• Try to play “Eb, F, G” as well as working on “Bb and F” and mouthpiece sirens.
Lesson 2:
• Practice 20-30 minutes every day. • Work through #1-10 in the method book now using the first 5 notes.
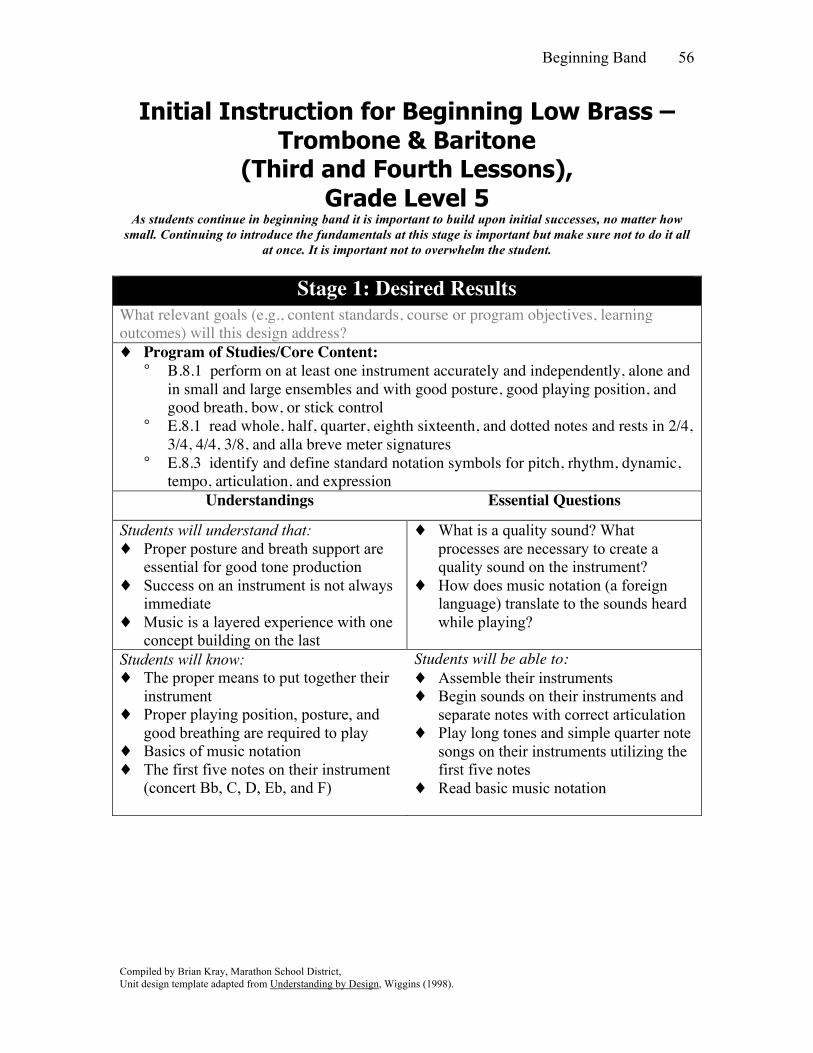
Beginning Band
Compiled by Brian Kray, Marathon School District, Unit design template adapted from Understanding by Design, Wiggins (1998).
56
Initial Instruction for Beginning Low Brass – Trombone & Baritone
(Third and Fourth Lessons), Grade Level 5
As students continue in beginning band it is important to build upon initial successes, no matter how small. Continuing to introduce the fundamentals at this stage is important but make sure not to do it all
at once. It is important not to overwhelm the student.
Stage 1: Desired Results What relevant goals (e.g., content standards, course or program objectives, learning outcomes) will this design address? ♦ Program of Studies/Core Content:
° B.8.1 perform on at least one instrument accurately and independently, alone and in small and large ensembles and with good posture, good playing position, and good breath, bow, or stick control
° E.8.1 read whole, half, quarter, eighth sixteenth, and dotted notes and rests in 2/4, 3/4, 4/4, 3/8, and alla breve meter signatures
° E.8.3 identify and define standard notation symbols for pitch, rhythm, dynamic, tempo, articulation, and expression
Understandings Essential Questions
Students will understand that: ♦ Proper posture and breath support are
essential for good tone production ♦ Success on an instrument is not always
immediate ♦ Music is a layered experience with one
concept building on the last
♦ What is a quality sound? What processes are necessary to create a quality sound on the instrument?
♦ How does music notation (a foreign language) translate to the sounds heard while playing?
Students will know: ♦ The proper means to put together their
instrument ♦ Proper playing position, posture, and
good breathing are required to play ♦ Basics of music notation ♦ The first five notes on their instrument
(concert Bb, C, D, Eb, and F)
Students will be able to: ♦ Assemble their instruments ♦ Begin sounds on their instruments and
separate notes with correct articulation ♦ Play long tones and simple quarter note
songs on their instruments utilizing the first five notes
♦ Read basic music notation

Beginning Band
Compiled by Brian Kray, Marathon School District, Unit design template adapted from Understanding by Design, Wiggins (1998).
57
Stage 2: Assessment Evidence What evidence will be collected to determine whether or not the understandings have been developed, the knowledge and skill attained, and the state standards met?
Performance Tasks: Other Evidence, Summarized:
♦ Assemble the instrument correctly without damaging it
♦ Demonstrate correct posture for the instrument including hand positions
♦ Produce long tones for the first five notes introduced in the lesson book
♦ Perform a basic one note song (#2) through a more complex five note song (#10).
♦ Classroom demonstration of note recognition/production both individually and as a group
♦ Visual assessment of proper playing position and hand placement as well as correct instrument assembly
♦ Check progress of note recognition through method book assignment (#13)
Stage 3: Learning Activities What sequence of learning activities and teaching will enable students to perform well at the assessments in Stage 2 and thus display evidence of the desired results in Stage 1? ♦ Use of mouthpiece buzzing as a foundation but not necessarily essential if not
successful at this stage. ♦ Demonstrate proper method to open case and assemble instrument. Identify parts of
the each instrument while assembling instrument. ♦ Model and practice proper playing position as a group with correct hand placement
on the instrument ♦ Class review of music notation elements such as clef and note names as well as the
introduction of time signature 4/4 ♦ Introduction of basic rhythmic elements of the quarter note, half note, quarter rest,
and half rest. ♦ Song selections #11-19
Critical Resources:
- Lautzenheiser et al., Essential Elements 2000: Comprehensive Band Method. Hal Leonard Corporation; Milwaukee, WI. 1999.
- Navarre, Randy, Instrumental Music Teacher’s Survival Kit. Parker Publishing Company; Paramus, NJ. 2001
Web Resources
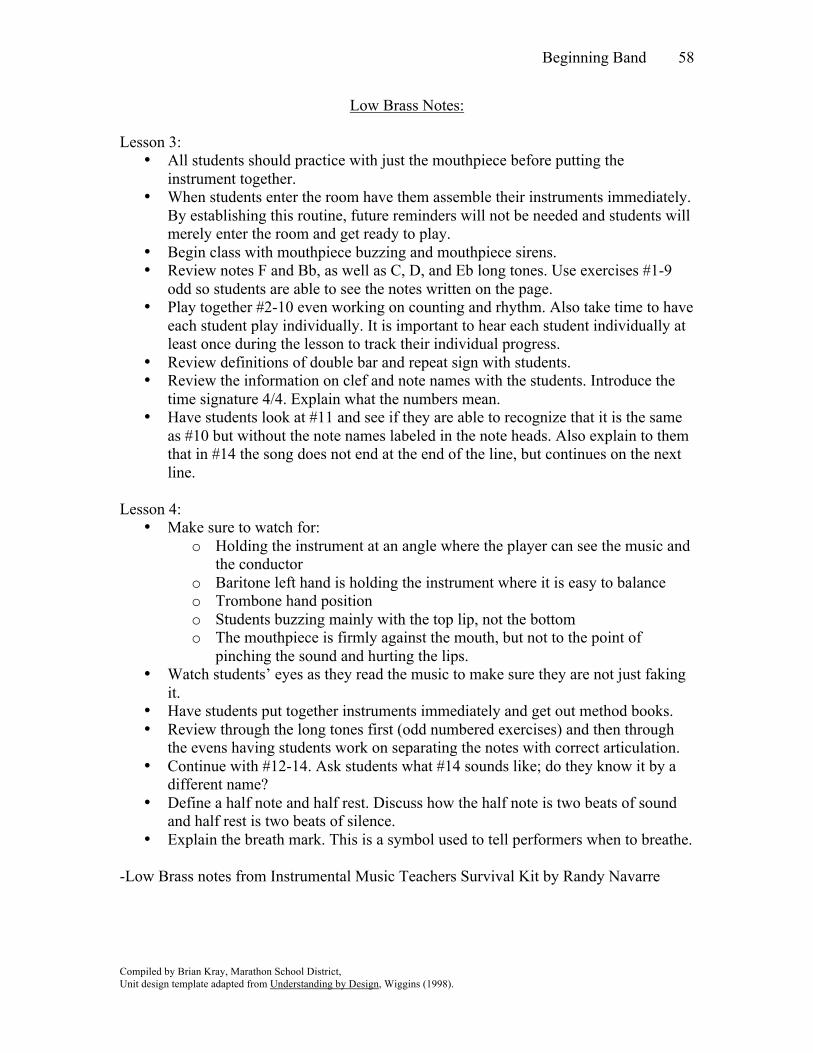
Beginning Band
Compiled by Brian Kray, Marathon School District, Unit design template adapted from Understanding by Design, Wiggins (1998).
58
Low Brass Notes: Lesson 3:
• All students should practice with just the mouthpiece before putting the instrument together.
• When students enter the room have them assemble their instruments immediately. By establishing this routine, future reminders will not be needed and students will merely enter the room and get ready to play.
• Begin class with mouthpiece buzzing and mouthpiece sirens. • Review notes F and Bb, as well as C, D, and Eb long tones. Use exercises #1-9
odd so students are able to see the notes written on the page. • Play together #2-10 even working on counting and rhythm. Also take time to have
each student play individually. It is important to hear each student individually at least once during the lesson to track their individual progress.
• Review definitions of double bar and repeat sign with students. • Review the information on clef and note names with the students. Introduce the
time signature 4/4. Explain what the numbers mean. • Have students look at #11 and see if they are able to recognize that it is the same
as #10 but without the note names labeled in the note heads. Also explain to them that in #14 the song does not end at the end of the line, but continues on the next line.
Lesson 4: • Make sure to watch for:
o Holding the instrument at an angle where the player can see the music and the conductor
o Baritone left hand is holding the instrument where it is easy to balance o Trombone hand position o Students buzzing mainly with the top lip, not the bottom o The mouthpiece is firmly against the mouth, but not to the point of
pinching the sound and hurting the lips. • Watch students’ eyes as they read the music to make sure they are not just faking
it. • Have students put together instruments immediately and get out method books. • Review through the long tones first (odd numbered exercises) and then through
the evens having students work on separating the notes with correct articulation. • Continue with #12-14. Ask students what #14 sounds like; do they know it by a
different name? • Define a half note and half rest. Discuss how the half note is two beats of sound
and half rest is two beats of silence. • Explain the breath mark. This is a symbol used to tell performers when to breathe.
-Low Brass notes from Instrumental Music Teachers Survival Kit by Randy Navarre
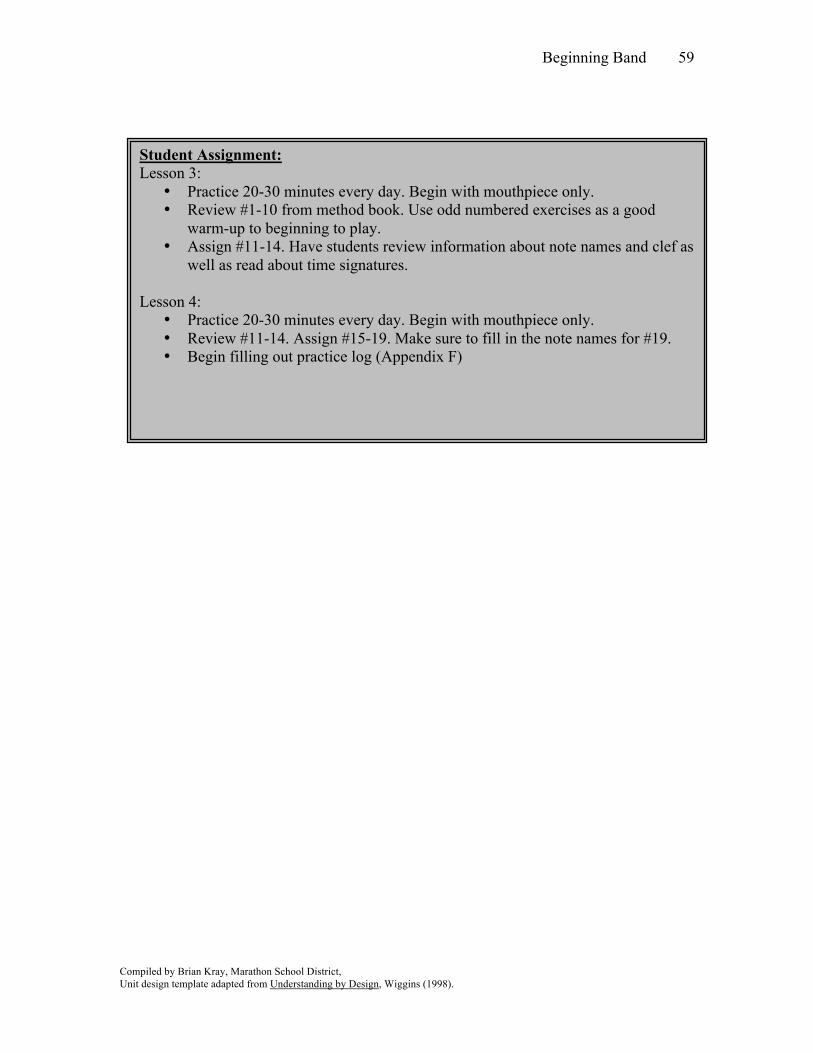
Beginning Band
Compiled by Brian Kray, Marathon School District, Unit design template adapted from Understanding by Design, Wiggins (1998).
59
Student Assignment: Lesson 3:
• Practice 20-30 minutes every day. Begin with mouthpiece only. • Review #1-10 from method book. Use odd numbered exercises as a good
warm-up to beginning to play. • Assign #11-14. Have students review information about note names and clef as
well as read about time signatures.
Lesson 4: • Practice 20-30 minutes every day. Begin with mouthpiece only. • Review #11-14. Assign #15-19. Make sure to fill in the note names for #19. • Begin filling out practice log (Appendix F)
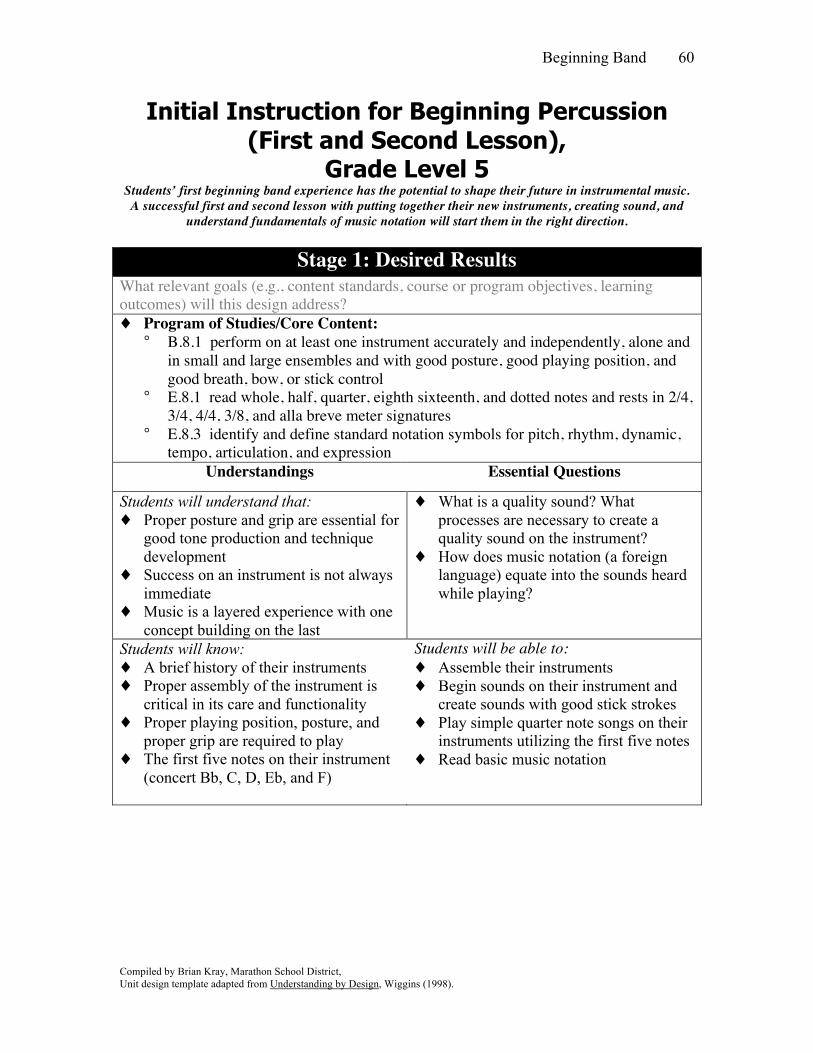
Beginning Band
Compiled by Brian Kray, Marathon School District, Unit design template adapted from Understanding by Design, Wiggins (1998).
60
Initial Instruction for Beginning Percussion (First and Second Lesson),
Grade Level 5 Students’ first beginning band experience has the potential to shape their future in instrumental music. A successful first and second lesson with putting together their new instruments, creating sound, and
understand fundamentals of music notation will start them in the right direction.
Stage 1: Desired Results What relevant goals (e.g., content standards, course or program objectives, learning outcomes) will this design address? ♦ Program of Studies/Core Content:
° B.8.1 perform on at least one instrument accurately and independently, alone and in small and large ensembles and with good posture, good playing position, and good breath, bow, or stick control
° E.8.1 read whole, half, quarter, eighth sixteenth, and dotted notes and rests in 2/4, 3/4, 4/4, 3/8, and alla breve meter signatures
° E.8.3 identify and define standard notation symbols for pitch, rhythm, dynamic, tempo, articulation, and expression
Understandings Essential Questions
Students will understand that: ♦ Proper posture and grip are essential for
good tone production and technique development
♦ Success on an instrument is not always immediate
♦ Music is a layered experience with one concept building on the last
♦ What is a quality sound? What processes are necessary to create a quality sound on the instrument?
♦ How does music notation (a foreign language) equate into the sounds heard while playing?
Students will know: ♦ A brief history of their instruments ♦ Proper assembly of the instrument is
critical in its care and functionality ♦ Proper playing position, posture, and
proper grip are required to play ♦ The first five notes on their instrument
(concert Bb, C, D, Eb, and F)
Students will be able to: ♦ Assemble their instruments ♦ Begin sounds on their instrument and
create sounds with good stick strokes ♦ Play simple quarter note songs on their
instruments utilizing the first five notes ♦ Read basic music notation
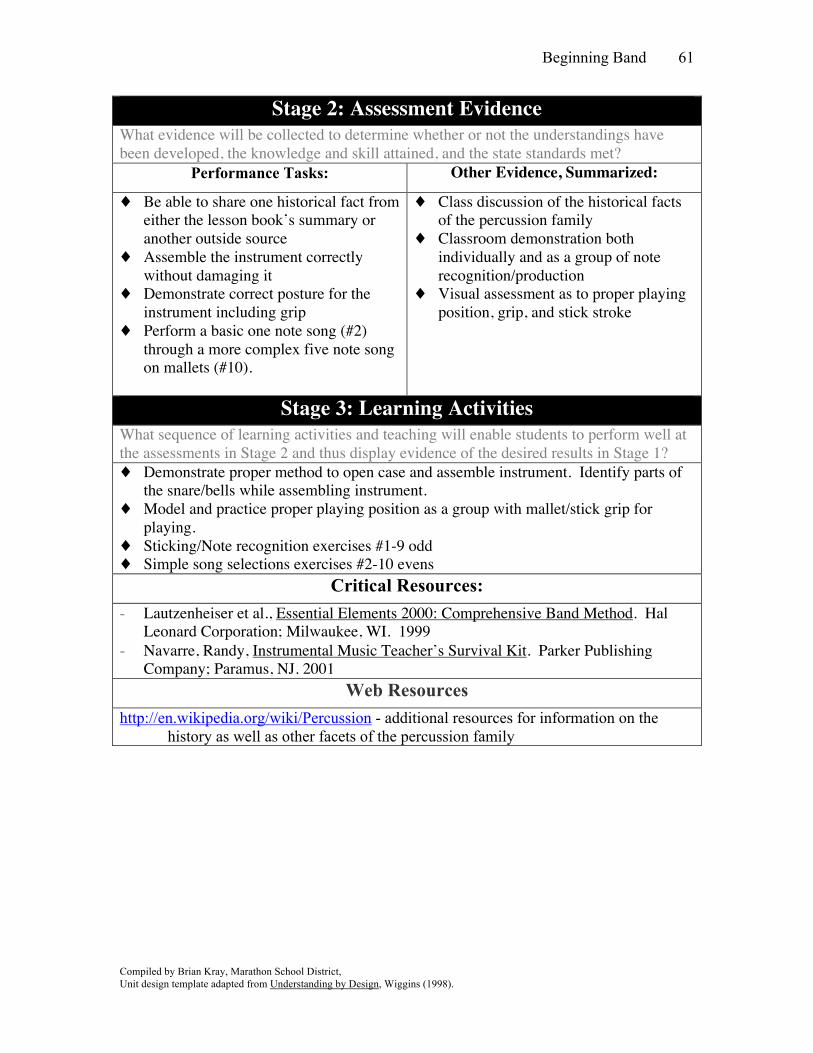
Beginning Band
Compiled by Brian Kray, Marathon School District, Unit design template adapted from Understanding by Design, Wiggins (1998).
61
Stage 2: Assessment Evidence What evidence will be collected to determine whether or not the understandings have been developed, the knowledge and skill attained, and the state standards met?
Performance Tasks: Other Evidence, Summarized:
♦ Be able to share one historical fact from either the lesson book’s summary or another outside source
♦ Assemble the instrument correctly without damaging it
♦ Demonstrate correct posture for the instrument including grip
♦ Perform a basic one note song (#2) through a more complex five note song on mallets (#10).
♦ Class discussion of the historical facts of the percussion family
♦ Classroom demonstration both individually and as a group of note recognition/production
♦ Visual assessment as to proper playing position, grip, and stick stroke
Stage 3: Learning Activities What sequence of learning activities and teaching will enable students to perform well at the assessments in Stage 2 and thus display evidence of the desired results in Stage 1? ♦ Demonstrate proper method to open case and assemble instrument. Identify parts of
the snare/bells while assembling instrument. ♦ Model and practice proper playing position as a group with mallet/stick grip for
playing. ♦ Sticking/Note recognition exercises #1-9 odd ♦ Simple song selections exercises #2-10 evens
Critical Resources: - Lautzenheiser et al., Essential Elements 2000: Comprehensive Band Method. Hal
Leonard Corporation; Milwaukee, WI. 1999 - Navarre, Randy, Instrumental Music Teacher’s Survival Kit. Parker Publishing
Company; Paramus, NJ. 2001 Web Resources
http://en.wikipedia.org/wiki/Percussion - additional resources for information on the history as well as other facets of the percussion family
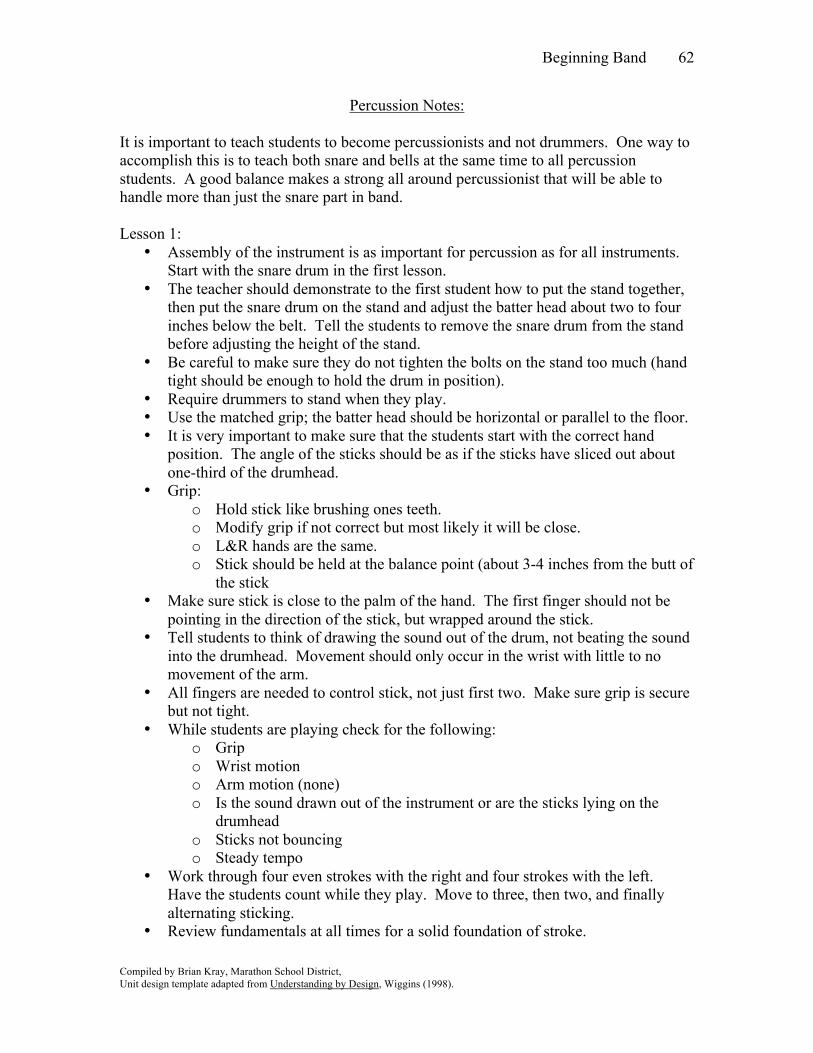
Beginning Band
Compiled by Brian Kray, Marathon School District, Unit design template adapted from Understanding by Design, Wiggins (1998).
62
Percussion Notes:
It is important to teach students to become percussionists and not drummers. One way to accomplish this is to teach both snare and bells at the same time to all percussion students. A good balance makes a strong all around percussionist that will be able to handle more than just the snare part in band. Lesson 1:
• Assembly of the instrument is as important for percussion as for all instruments. Start with the snare drum in the first lesson.
• The teacher should demonstrate to the first student how to put the stand together, then put the snare drum on the stand and adjust the batter head about two to four inches below the belt. Tell the students to remove the snare drum from the stand before adjusting the height of the stand.
• Be careful to make sure they do not tighten the bolts on the stand too much (hand tight should be enough to hold the drum in position).
• Require drummers to stand when they play. • Use the matched grip; the batter head should be horizontal or parallel to the floor. • It is very important to make sure that the students start with the correct hand
position. The angle of the sticks should be as if the sticks have sliced out about one-third of the drumhead.
• Grip: o Hold stick like brushing ones teeth. o Modify grip if not correct but most likely it will be close. o L&R hands are the same. o Stick should be held at the balance point (about 3-4 inches from the butt of
the stick • Make sure stick is close to the palm of the hand. The first finger should not be
pointing in the direction of the stick, but wrapped around the stick. • Tell students to think of drawing the sound out of the drum, not beating the sound
into the drumhead. Movement should only occur in the wrist with little to no movement of the arm.
• All fingers are needed to control stick, not just first two. Make sure grip is secure but not tight.
• While students are playing check for the following: o Grip o Wrist motion o Arm motion (none) o Is the sound drawn out of the instrument or are the sticks lying on the
drumhead o Sticks not bouncing o Steady tempo
• Work through four even strokes with the right and four strokes with the left. Have the students count while they play. Move to three, then two, and finally alternating sticking.
• Review fundamentals at all times for a solid foundation of stroke.
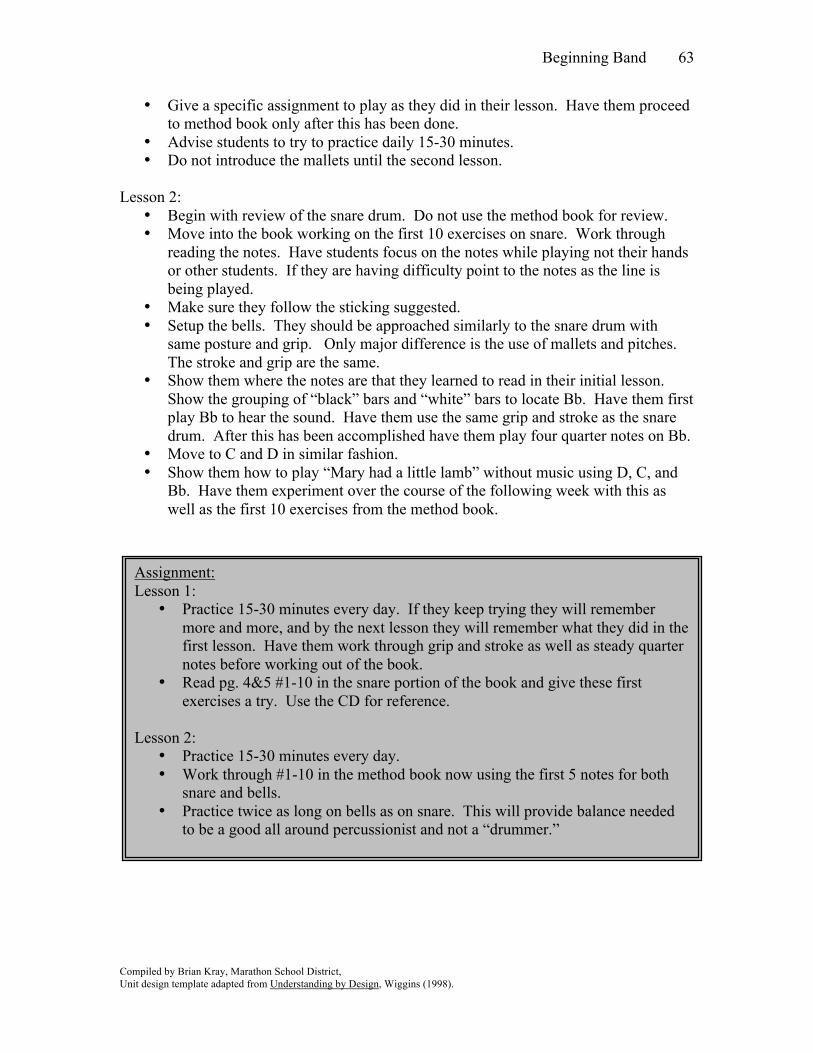
Beginning Band
Compiled by Brian Kray, Marathon School District, Unit design template adapted from Understanding by Design, Wiggins (1998).
63
• Give a specific assignment to play as they did in their lesson. Have them proceed to method book only after this has been done.
• Advise students to try to practice daily 15-30 minutes. • Do not introduce the mallets until the second lesson.
Lesson 2:
• Begin with review of the snare drum. Do not use the method book for review. • Move into the book working on the first 10 exercises on snare. Work through
reading the notes. Have students focus on the notes while playing not their hands or other students. If they are having difficulty point to the notes as the line is being played.
• Make sure they follow the sticking suggested. • Setup the bells. They should be approached similarly to the snare drum with
same posture and grip. Only major difference is the use of mallets and pitches. The stroke and grip are the same.
• Show them where the notes are that they learned to read in their initial lesson. Show the grouping of “black” bars and “white” bars to locate Bb. Have them first play Bb to hear the sound. Have them use the same grip and stroke as the snare drum. After this has been accomplished have them play four quarter notes on Bb.
• Move to C and D in similar fashion. • Show them how to play “Mary had a little lamb” without music using D, C, and
Bb. Have them experiment over the course of the following week with this as well as the first 10 exercises from the method book.
Assignment: Lesson 1:
• Practice 15-30 minutes every day. If they keep trying they will remember more and more, and by the next lesson they will remember what they did in the first lesson. Have them work through grip and stroke as well as steady quarter notes before working out of the book.
• Read pg. 4&5 #1-10 in the snare portion of the book and give these first exercises a try. Use the CD for reference.
Lesson 2:
• Practice 15-30 minutes every day. • Work through #1-10 in the method book now using the first 5 notes for both
snare and bells. • Practice twice as long on bells as on snare. This will provide balance needed
to be a good all around percussionist and not a “drummer.”
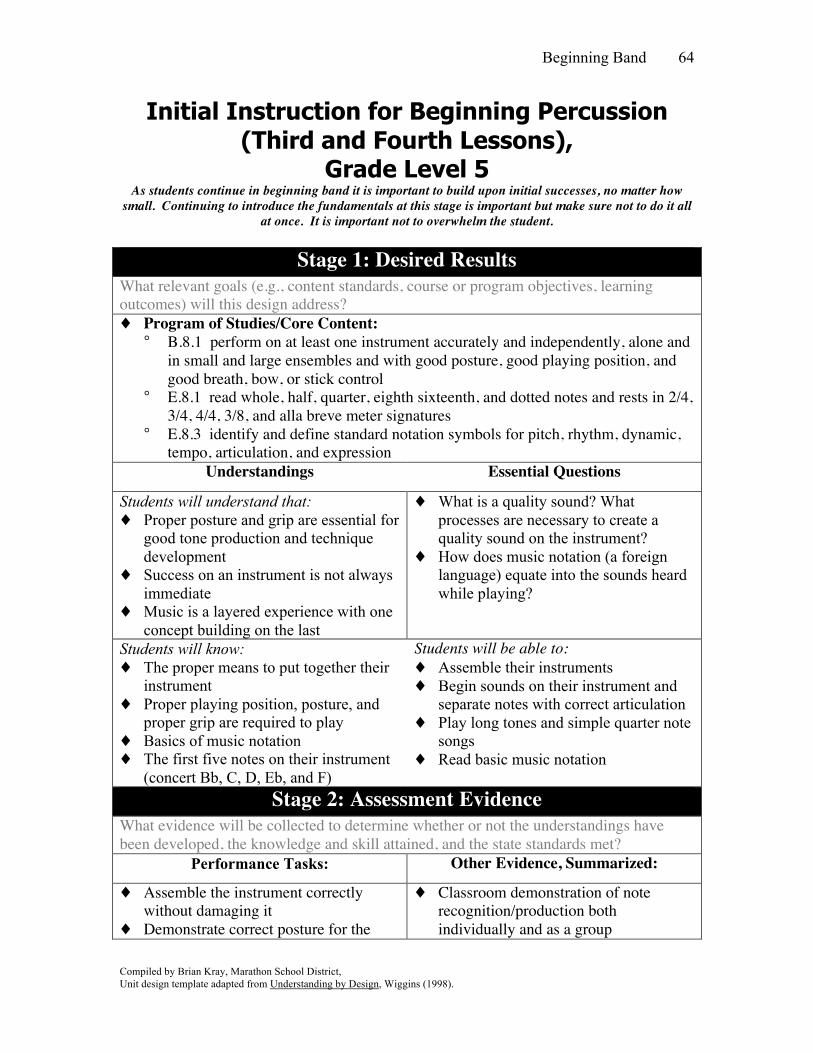
Beginning Band
Compiled by Brian Kray, Marathon School District, Unit design template adapted from Understanding by Design, Wiggins (1998).
64
Initial Instruction for Beginning Percussion (Third and Fourth Lessons),
Grade Level 5 As students continue in beginning band it is important to build upon initial successes, no matter how
small. Continuing to introduce the fundamentals at this stage is important but make sure not to do it all at once. It is important not to overwhelm the student.
Stage 1: Desired Results
What relevant goals (e.g., content standards, course or program objectives, learning outcomes) will this design address? ♦ Program of Studies/Core Content:
° B.8.1 perform on at least one instrument accurately and independently, alone and in small and large ensembles and with good posture, good playing position, and good breath, bow, or stick control
° E.8.1 read whole, half, quarter, eighth sixteenth, and dotted notes and rests in 2/4, 3/4, 4/4, 3/8, and alla breve meter signatures
° E.8.3 identify and define standard notation symbols for pitch, rhythm, dynamic, tempo, articulation, and expression
Understandings Essential Questions
Students will understand that: ♦ Proper posture and grip are essential for
good tone production and technique development
♦ Success on an instrument is not always immediate
♦ Music is a layered experience with one concept building on the last
♦ What is a quality sound? What processes are necessary to create a quality sound on the instrument?
♦ How does music notation (a foreign language) equate into the sounds heard while playing?
Students will know: ♦ The proper means to put together their
instrument ♦ Proper playing position, posture, and
proper grip are required to play ♦ Basics of music notation ♦ The first five notes on their instrument
(concert Bb, C, D, Eb, and F)
Students will be able to: ♦ Assemble their instruments ♦ Begin sounds on their instrument and
separate notes with correct articulation ♦ Play long tones and simple quarter note
songs ♦ Read basic music notation
Stage 2: Assessment Evidence
What evidence will be collected to determine whether or not the understandings have been developed, the knowledge and skill attained, and the state standards met?
Performance Tasks: Other Evidence, Summarized:
♦ Assemble the instrument correctly without damaging it
♦ Demonstrate correct posture for the
♦ Classroom demonstration of note recognition/production both individually and as a group
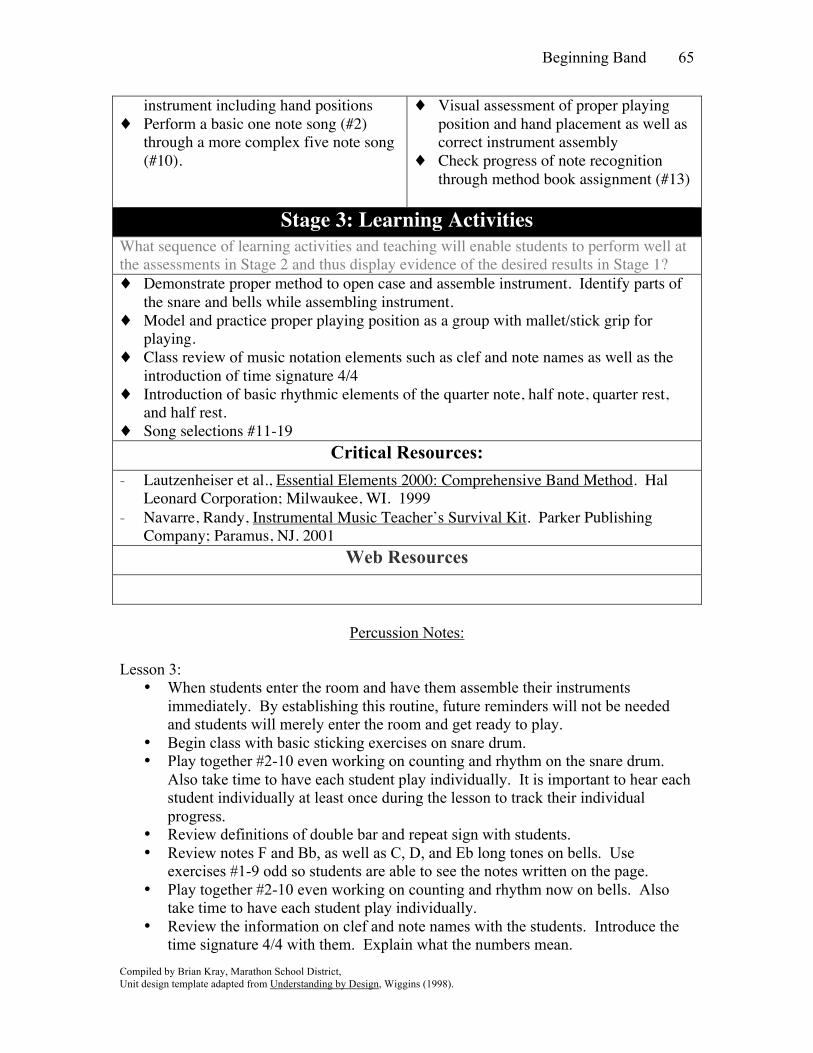
Beginning Band
Compiled by Brian Kray, Marathon School District, Unit design template adapted from Understanding by Design, Wiggins (1998).
65
instrument including hand positions ♦ Perform a basic one note song (#2)
through a more complex five note song (#10).
♦ Visual assessment of proper playing position and hand placement as well as correct instrument assembly
♦ Check progress of note recognition through method book assignment (#13)
Stage 3: Learning Activities
What sequence of learning activities and teaching will enable students to perform well at the assessments in Stage 2 and thus display evidence of the desired results in Stage 1? ♦ Demonstrate proper method to open case and assemble instrument. Identify parts of
the snare and bells while assembling instrument. ♦ Model and practice proper playing position as a group with mallet/stick grip for
playing. ♦ Class review of music notation elements such as clef and note names as well as the
introduction of time signature 4/4 ♦ Introduction of basic rhythmic elements of the quarter note, half note, quarter rest,
and half rest. ♦ Song selections #11-19
Critical Resources: - Lautzenheiser et al., Essential Elements 2000: Comprehensive Band Method. Hal
Leonard Corporation; Milwaukee, WI. 1999 - Navarre, Randy, Instrumental Music Teacher’s Survival Kit. Parker Publishing
Company; Paramus, NJ. 2001 Web Resources
Percussion Notes:
Lesson 3:
• When students enter the room and have them assemble their instruments immediately. By establishing this routine, future reminders will not be needed and students will merely enter the room and get ready to play.
• Begin class with basic sticking exercises on snare drum. • Play together #2-10 even working on counting and rhythm on the snare drum.
Also take time to have each student play individually. It is important to hear each student individually at least once during the lesson to track their individual progress.
• Review definitions of double bar and repeat sign with students. • Review notes F and Bb, as well as C, D, and Eb long tones on bells. Use
exercises #1-9 odd so students are able to see the notes written on the page. • Play together #2-10 even working on counting and rhythm now on bells. Also
take time to have each student play individually. • Review the information on clef and note names with the students. Introduce the
time signature 4/4 with them. Explain what the numbers mean.
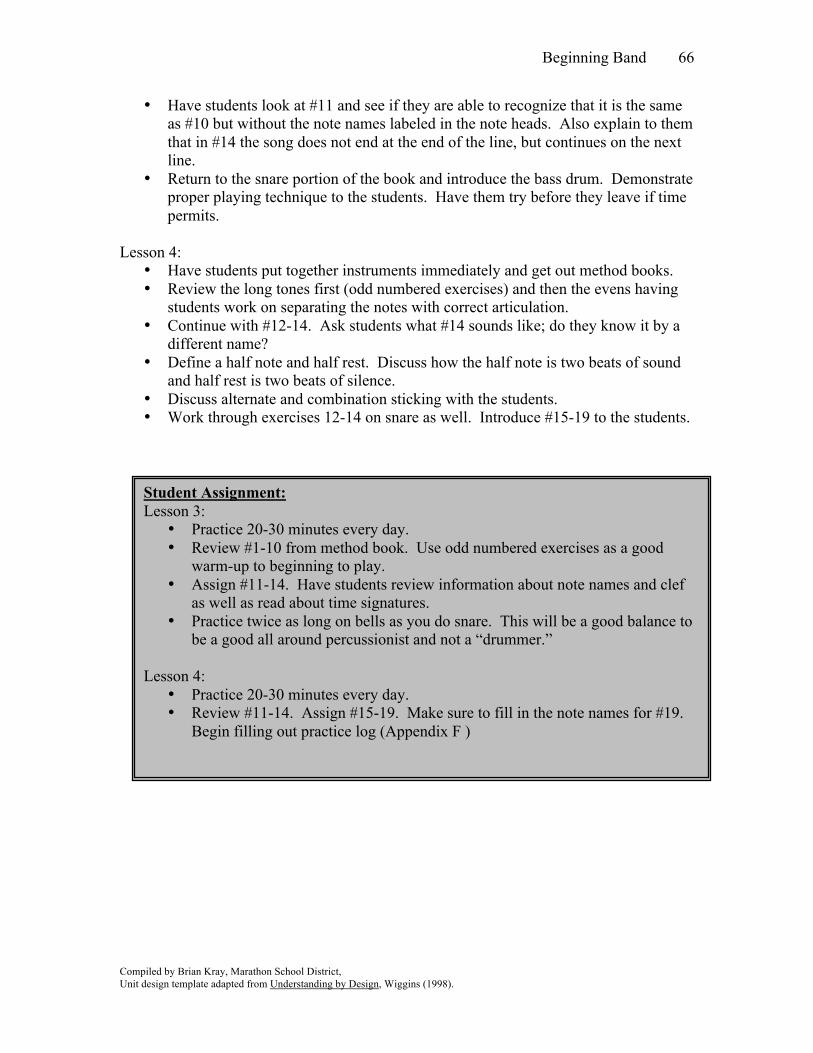
Beginning Band
Compiled by Brian Kray, Marathon School District, Unit design template adapted from Understanding by Design, Wiggins (1998).
66
• Have students look at #11 and see if they are able to recognize that it is the same as #10 but without the note names labeled in the note heads. Also explain to them that in #14 the song does not end at the end of the line, but continues on the next line.
• Return to the snare portion of the book and introduce the bass drum. Demonstrate proper playing technique to the students. Have them try before they leave if time permits.
Lesson 4:
• Have students put together instruments immediately and get out method books. • Review the long tones first (odd numbered exercises) and then the evens having
students work on separating the notes with correct articulation. • Continue with #12-14. Ask students what #14 sounds like; do they know it by a
different name? • Define a half note and half rest. Discuss how the half note is two beats of sound
and half rest is two beats of silence. • Discuss alternate and combination sticking with the students. • Work through exercises 12-14 on snare as well. Introduce #15-19 to the students.
Student Assignment: Lesson 3:
• Practice 20-30 minutes every day. • Review #1-10 from method book. Use odd numbered exercises as a good
warm-up to beginning to play. • Assign #11-14. Have students review information about note names and clef
as well as read about time signatures. • Practice twice as long on bells as you do snare. This will be a good balance to
be a good all around percussionist and not a “drummer.” Lesson 4:
• Practice 20-30 minutes every day. • Review #11-14. Assign #15-19. Make sure to fill in the note names for #19.
Begin filling out practice log (Appendix F )
Beginning Band
67
Appendix C: Sample Beginning Band Time Line
Marathon Instrumental Music Department
Beginning Band Time Line
Lesson by lesson guided plan to beginning band instruction
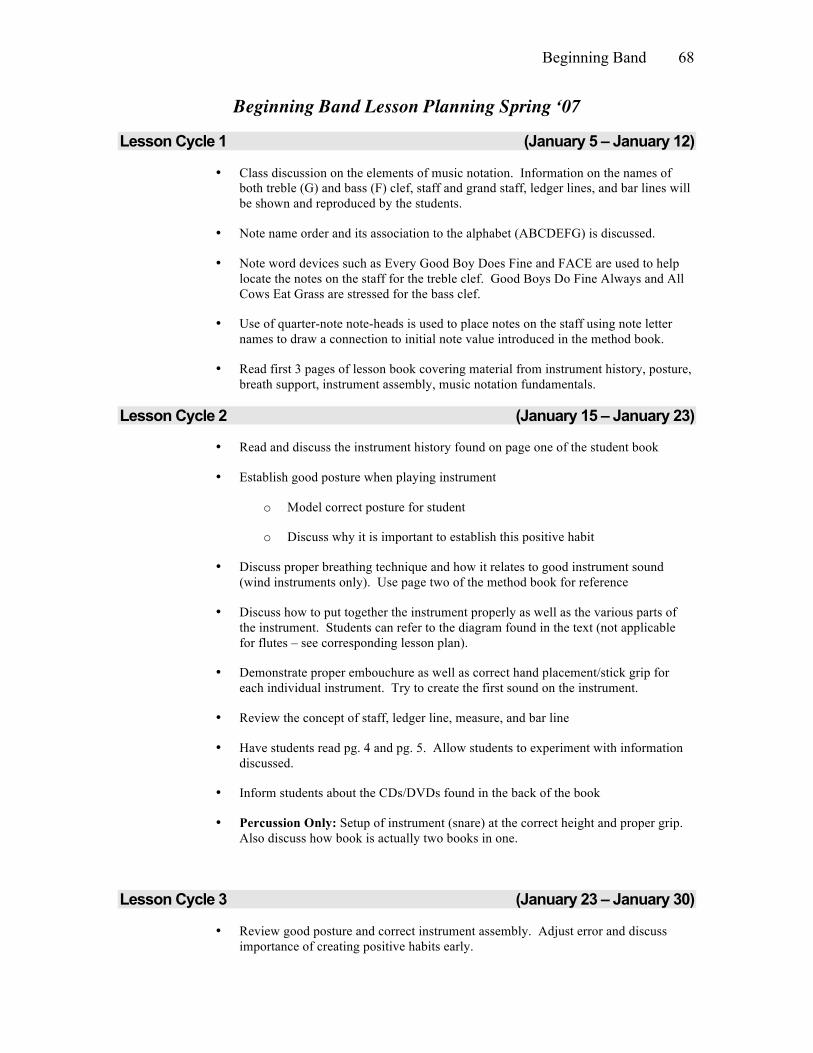
Beginning Band
68
Beginning Band Lesson Planning Spring ‘07
Lesson Cycle 1 (January 5 – January 12)
• Class discussion on the elements of music notation. Information on the names of both treble (G) and bass (F) clef, staff and grand staff, ledger lines, and bar lines will be shown and reproduced by the students.
• Note name order and its association to the alphabet (ABCDEFG) is discussed.
• Note word devices such as Every Good Boy Does Fine and FACE are used to help locate the notes on the staff for the treble clef. Good Boys Do Fine Always and All Cows Eat Grass are stressed for the bass clef.
• Use of quarter-note note-heads is used to place notes on the staff using note letter names to draw a connection to initial note value introduced in the method book.
• Read first 3 pages of lesson book covering material from instrument history, posture, breath support, instrument assembly, music notation fundamentals.
Lesson Cycle 2 (January 15 – January 23)
• Read and discuss the instrument history found on page one of the student book
• Establish good posture when playing instrument
o Model correct posture for student
o Discuss why it is important to establish this positive habit
• Discuss proper breathing technique and how it relates to good instrument sound (wind instruments only). Use page two of the method book for reference
• Discuss how to put together the instrument properly as well as the various parts of the instrument. Students can refer to the diagram found in the text (not applicable for flutes – see corresponding lesson plan).
• Demonstrate proper embouchure as well as correct hand placement/stick grip for each individual instrument. Try to create the first sound on the instrument.
• Review the concept of staff, ledger line, measure, and bar line
• Have students read pg. 4 and pg. 5. Allow students to experiment with information discussed.
• Inform students about the CDs/DVDs found in the back of the book
• Percussion Only: Setup of instrument (snare) at the correct height and proper grip. Also discuss how book is actually two books in one.
Lesson Cycle 3 (January 23 – January 30)
• Review good posture and correct instrument assembly. Adjust error and discuss importance of creating positive habits early.
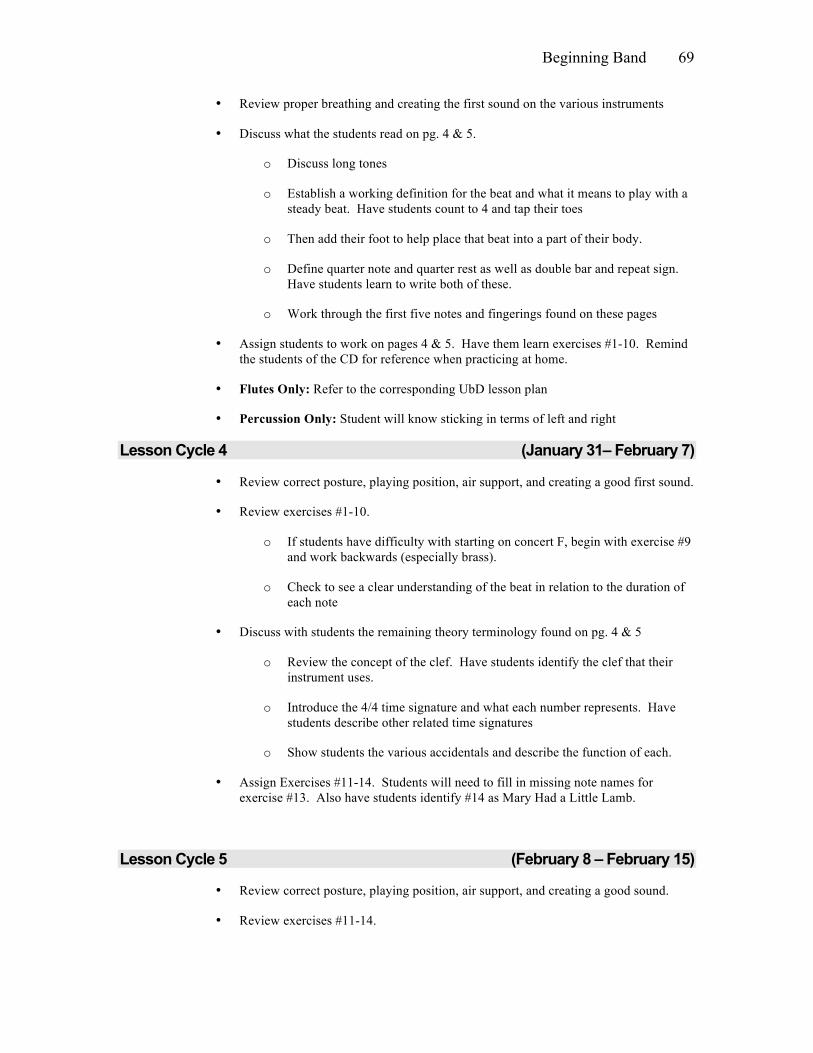
Beginning Band
69
• Review proper breathing and creating the first sound on the various instruments
• Discuss what the students read on pg. 4 & 5.
o Discuss long tones
o Establish a working definition for the beat and what it means to play with a steady beat. Have students count to 4 and tap their toes
o Then add their foot to help place that beat into a part of their body.
o Define quarter note and quarter rest as well as double bar and repeat sign. Have students learn to write both of these.
o Work through the first five notes and fingerings found on these pages
• Assign students to work on pages 4 & 5. Have them learn exercises #1-10. Remind the students of the CD for reference when practicing at home.
• Flutes Only: Refer to the corresponding UbD lesson plan
• Percussion Only: Student will know sticking in terms of left and right
Lesson Cycle 4 (January 31– February 7)
• Review correct posture, playing position, air support, and creating a good first sound.
• Review exercises #1-10.
o If students have difficulty with starting on concert F, begin with exercise #9 and work backwards (especially brass).
o Check to see a clear understanding of the beat in relation to the duration of each note
• Discuss with students the remaining theory terminology found on pg. 4 & 5
o Review the concept of the clef. Have students identify the clef that their instrument uses.
o Introduce the 4/4 time signature and what each number represents. Have students describe other related time signatures
o Show students the various accidentals and describe the function of each.
• Assign Exercises #11-14. Students will need to fill in missing note names for exercise #13. Also have students identify #14 as Mary Had a Little Lamb.
Lesson Cycle 5 (February 8 – February 15)
• Review correct posture, playing position, air support, and creating a good sound.
• Review exercises #11-14.
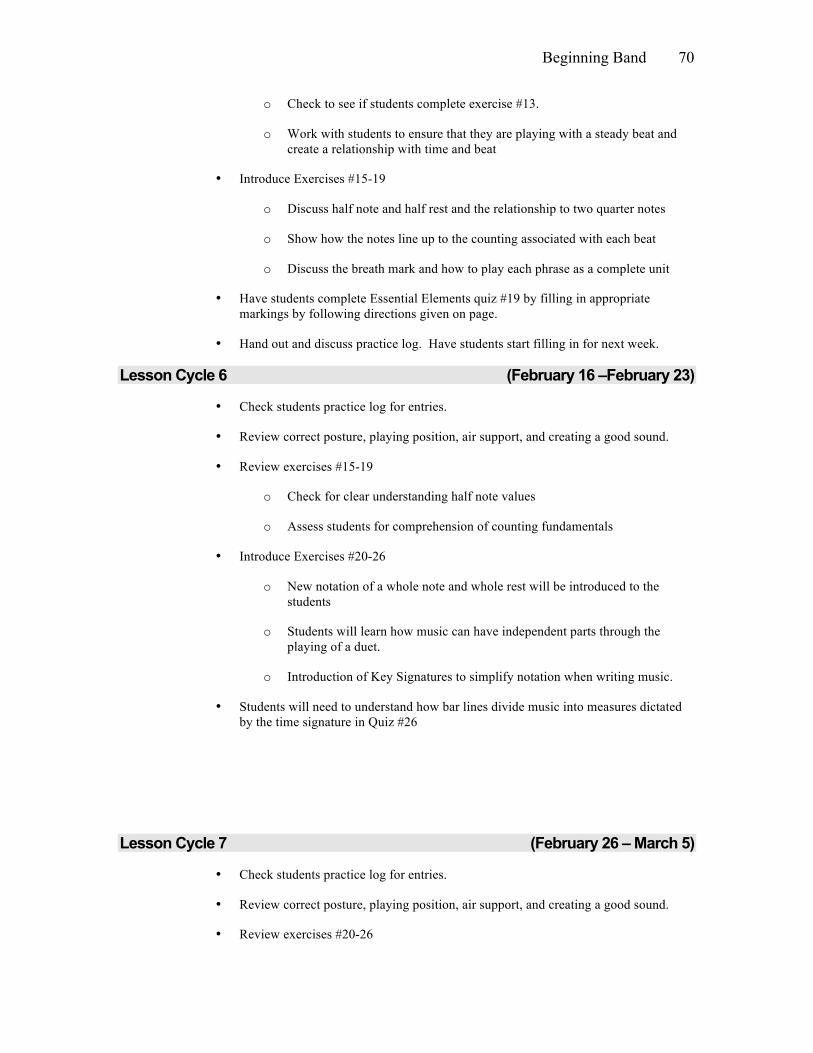
Beginning Band
70
o Check to see if students complete exercise #13.
o Work with students to ensure that they are playing with a steady beat and create a relationship with time and beat
• Introduce Exercises #15-19
o Discuss half note and half rest and the relationship to two quarter notes
o Show how the notes line up to the counting associated with each beat
o Discuss the breath mark and how to play each phrase as a complete unit
• Have students complete Essential Elements quiz #19 by filling in appropriate markings by following directions given on page.
• Hand out and discuss practice log. Have students start filling in for next week.
Lesson Cycle 6 (February 16 –February 23)
• Check students practice log for entries.
• Review correct posture, playing position, air support, and creating a good sound.
• Review exercises #15-19
o Check for clear understanding half note values
o Assess students for comprehension of counting fundamentals
• Introduce Exercises #20-26
o New notation of a whole note and whole rest will be introduced to the students
o Students will learn how music can have independent parts through the playing of a duet.
o Introduction of Key Signatures to simplify notation when writing music.
• Students will need to understand how bar lines divide music into measures dictated by the time signature in Quiz #26
Lesson Cycle 7 (February 26 – March 5)
• Check students practice log for entries.
• Review correct posture, playing position, air support, and creating a good sound.
• Review exercises #20-26
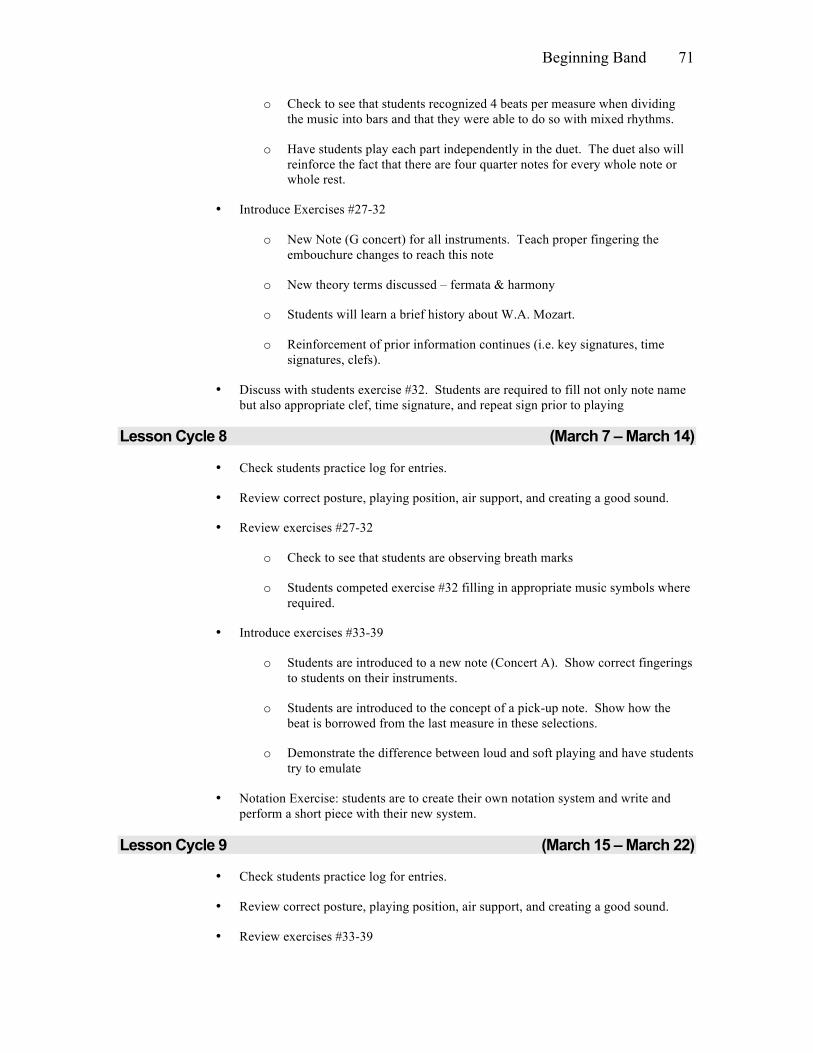
Beginning Band
71
o Check to see that students recognized 4 beats per measure when dividing the music into bars and that they were able to do so with mixed rhythms.
o Have students play each part independently in the duet. The duet also will reinforce the fact that there are four quarter notes for every whole note or whole rest.
• Introduce Exercises #27-32
o New Note (G concert) for all instruments. Teach proper fingering the embouchure changes to reach this note
o New theory terms discussed – fermata & harmony
o Students will learn a brief history about W.A. Mozart.
o Reinforcement of prior information continues (i.e. key signatures, time signatures, clefs).
• Discuss with students exercise #32. Students are required to fill not only note name but also appropriate clef, time signature, and repeat sign prior to playing
Lesson Cycle 8 (March 7 – March 14)
• Check students practice log for entries.
• Review correct posture, playing position, air support, and creating a good sound.
• Review exercises #27-32
o Check to see that students are observing breath marks
o Students competed exercise #32 filling in appropriate music symbols where required.
• Introduce exercises #33-39
o Students are introduced to a new note (Concert A). Show correct fingerings to students on their instruments.
o Students are introduced to the concept of a pick-up note. Show how the beat is borrowed from the last measure in these selections.
o Demonstrate the difference between loud and soft playing and have students try to emulate
• Notation Exercise: students are to create their own notation system and write and perform a short piece with their new system.
Lesson Cycle 9 (March 15 – March 22)
• Check students practice log for entries.
• Review correct posture, playing position, air support, and creating a good sound.
• Review exercises #33-39
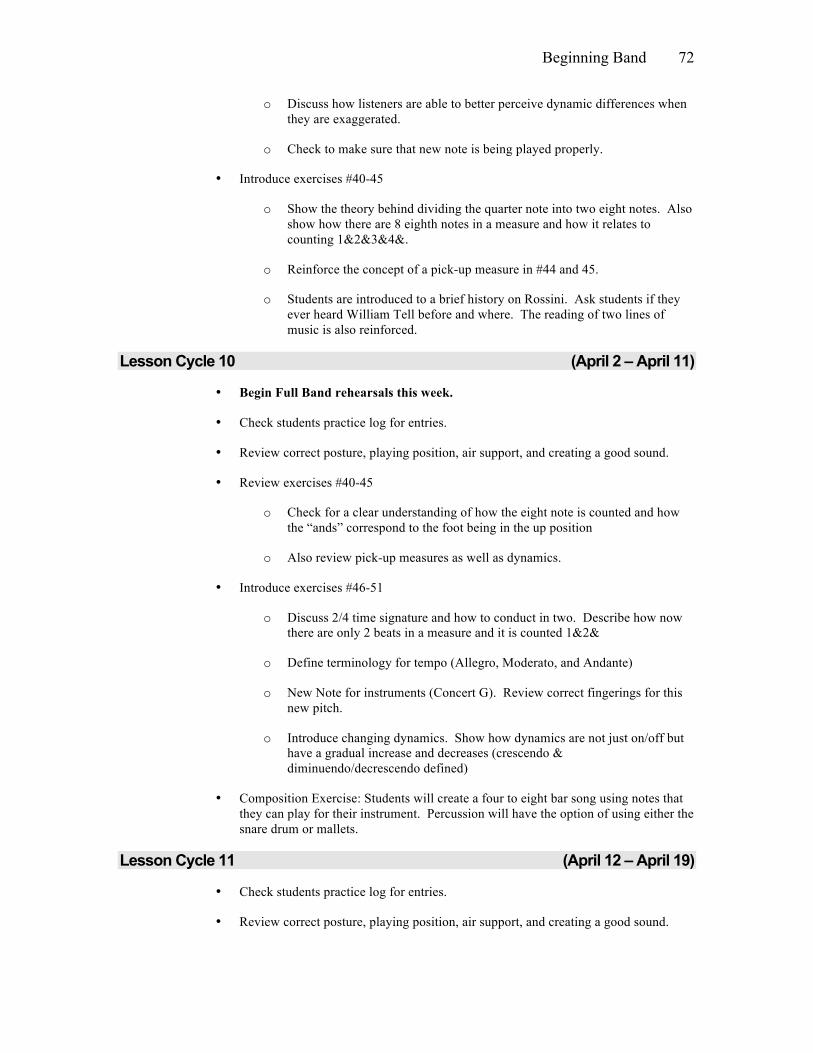
Beginning Band
72
o Discuss how listeners are able to better perceive dynamic differences when they are exaggerated.
o Check to make sure that new note is being played properly.
• Introduce exercises #40-45
o Show the theory behind dividing the quarter note into two eight notes. Also show how there are 8 eighth notes in a measure and how it relates to counting 1&2&3&4&.
o Reinforce the concept of a pick-up measure in #44 and 45.
o Students are introduced to a brief history on Rossini. Ask students if they ever heard William Tell before and where. The reading of two lines of music is also reinforced.
Lesson Cycle 10 (April 2 – April 11)
• Begin Full Band rehearsals this week.
• Check students practice log for entries.
• Review correct posture, playing position, air support, and creating a good sound.
• Review exercises #40-45
o Check for a clear understanding of how the eight note is counted and how the “ands” correspond to the foot being in the up position
o Also review pick-up measures as well as dynamics.
• Introduce exercises #46-51
o Discuss 2/4 time signature and how to conduct in two. Describe how now there are only 2 beats in a measure and it is counted 1&2&
o Define terminology for tempo (Allegro, Moderato, and Andante)
o New Note for instruments (Concert G). Review correct fingerings for this new pitch.
o Introduce changing dynamics. Show how dynamics are not just on/off but have a gradual increase and decreases (crescendo & diminuendo/decrescendo defined)
• Composition Exercise: Students will create a four to eight bar song using notes that they can play for their instrument. Percussion will have the option of using either the snare drum or mallets.
Lesson Cycle 11 (April 12 – April 19)
• Check students practice log for entries.
• Review correct posture, playing position, air support, and creating a good sound.
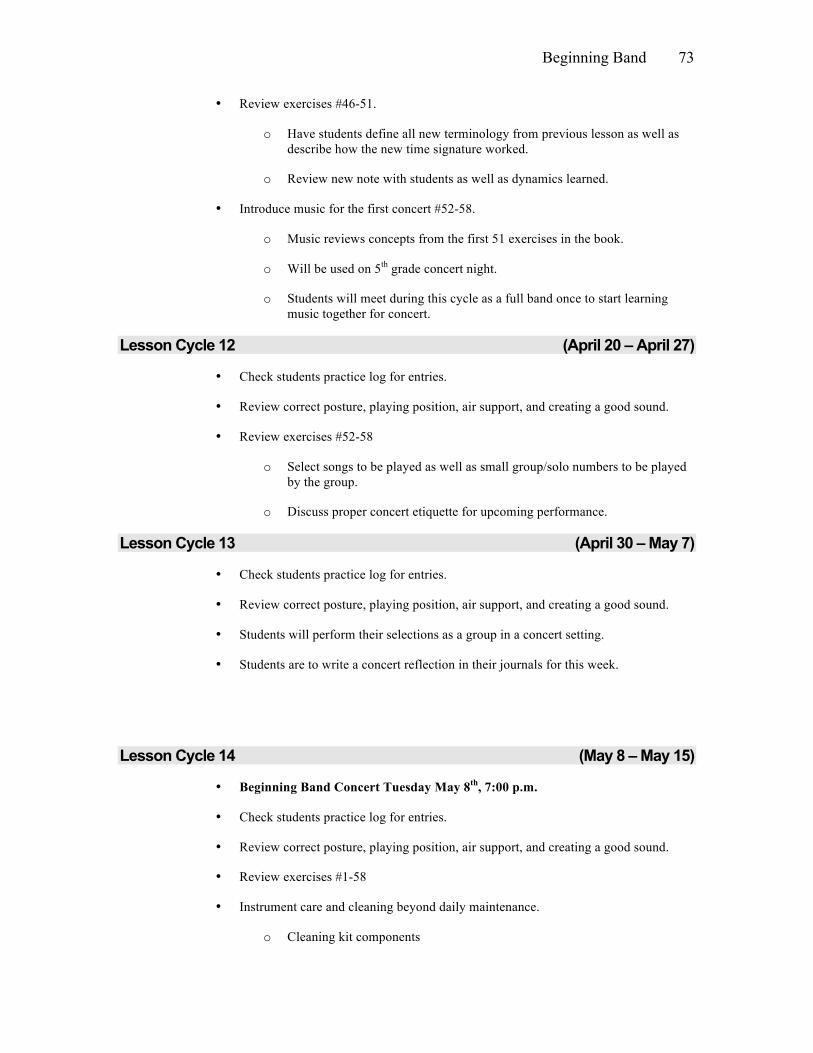
Beginning Band
73
• Review exercises #46-51.
o Have students define all new terminology from previous lesson as well as describe how the new time signature worked.
o Review new note with students as well as dynamics learned.
• Introduce music for the first concert #52-58.
o Music reviews concepts from the first 51 exercises in the book.
o Will be used on 5th grade concert night.
o Students will meet during this cycle as a full band once to start learning music together for concert.
Lesson Cycle 12 (April 20 – April 27)
• Check students practice log for entries.
• Review correct posture, playing position, air support, and creating a good sound.
• Review exercises #52-58
o Select songs to be played as well as small group/solo numbers to be played by the group.
o Discuss proper concert etiquette for upcoming performance.
Lesson Cycle 13 (April 30 – May 7)
• Check students practice log for entries.
• Review correct posture, playing position, air support, and creating a good sound.
• Students will perform their selections as a group in a concert setting.
• Students are to write a concert reflection in their journals for this week.
Lesson Cycle 14 (May 8 – May 15)
• Beginning Band Concert Tuesday May 8th, 7:00 p.m.
• Check students practice log for entries.
• Review correct posture, playing position, air support, and creating a good sound.
• Review exercises #1-58
• Instrument care and cleaning beyond daily maintenance.
o Cleaning kit components
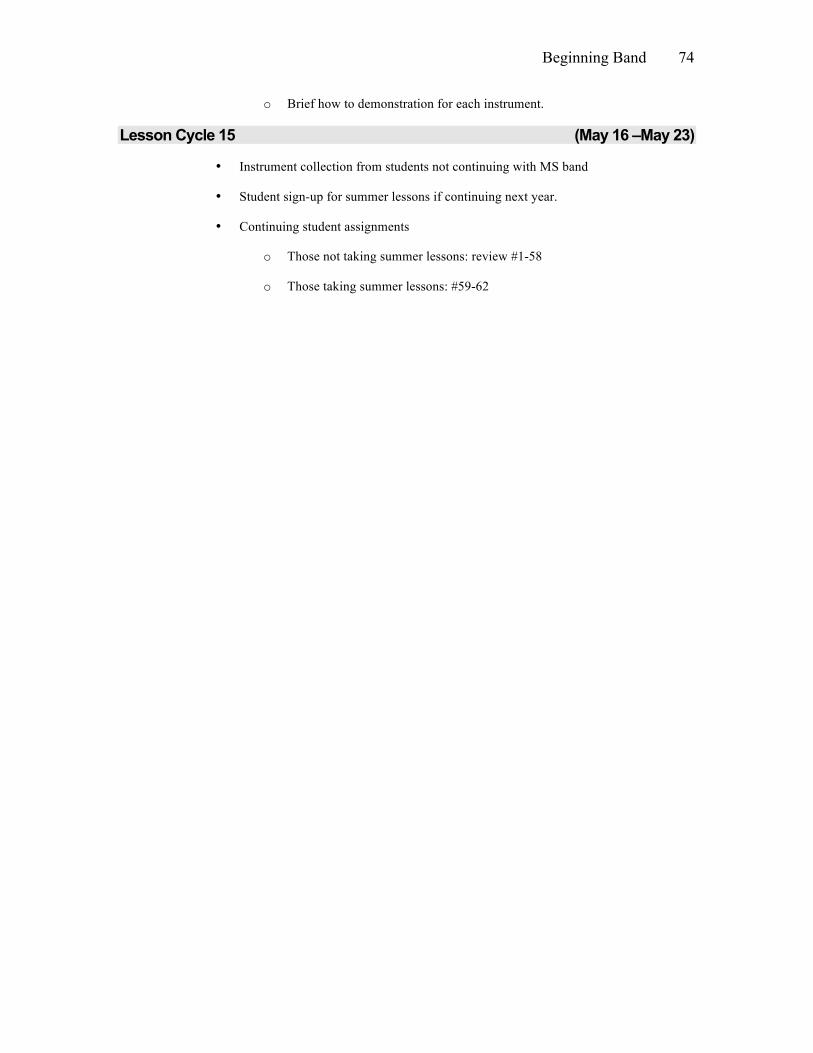
Beginning Band
74
o Brief how to demonstration for each instrument.
Lesson Cycle 15 (May 16 –May 23)
• Instrument collection from students not continuing with MS band
• Student sign-up for summer lessons if continuing next year.
• Continuing student assignments
o Those not taking summer lessons: review #1-58
o Those taking summer lessons: #59-62
Beginning Band
75
Appendix D: Parents Night Informational Letter
Marathon Instrumental Music Department 204 East St. (715) 443-2226 x164 Marathon, WI 54448 [email protected]
Dear Parents, Again this year the 5th grade students of MAES will have the chance to participate in beginning band. In order to better prepare students for middle school band, 5th graders will have to learn the basic skills associated with instrumental music. Students will also need to choose one of the woodwind, brass, and percussion instruments typically associated with middle school band. The students will be introduced to the instrument families and have an opportunity to try out various mouth pieces from the instruments to assist in instrument selection prior to the formal beginning band meeting with students and parents to be held on January 10th. In order to help you and your child know more about the band program at Marathon Schools, I have arranged for an informational meeting. A representative from Heid Music and I will meet with you and your child to help answer any questions you might have regarding participation in the band and instrument rental. You can also visit Heid music on-line and see their present rental programs at http://www.heidmusic.com. They are presently offering a buy one month rental receive two months free deal to all school rentals. The meeting will be held in the MAES Band Room on Thursday evening, January 10th, at 7:00 PM. Heid music has asked that I include the following information to make completion of the rental agreement easier on the night of the 10th.
“After the initial two month rental period, payments to Heid Music will be on a monthly automatic withdrawal from a credit card, savings account, or checking account. Please bring account information with you to this meeting in order to complete the rental agreement.”
Should it prove difficult for you to attend this meeting, and your child has expressed an interest in the band program, please feel free to contact me at school. The phone number is 443-2538 x129. Please call after 12:15 pm. I will be glad to answer any questions you have regarding the band program and your child’s interest. I look forward to meeting you and your child on January 10th. Sincerely, Mr. Brian Kray Instrumental Music 5-12 Marathon School District (715)443-2226 x164 – High School (714)443-2538 x129 – MAES [email protected]
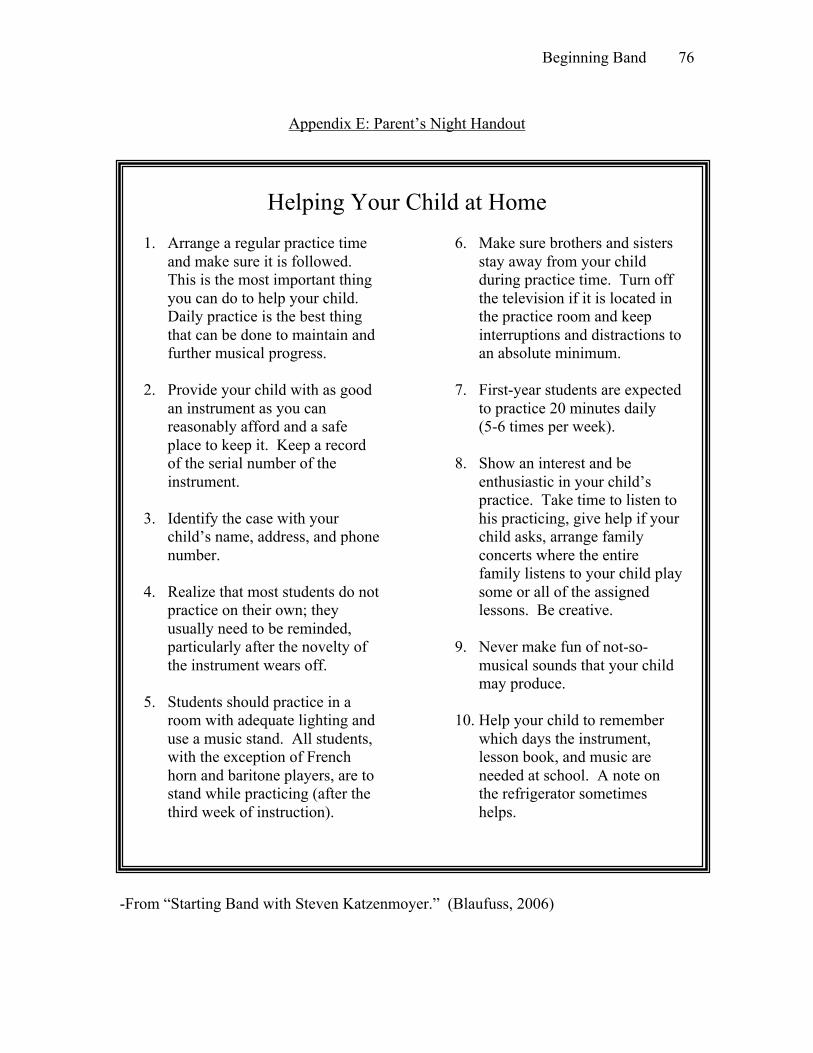
Beginning Band
76
Appendix E: Parent’s Night Handout
Helping Your Child at Home
1. Arrange a regular practice time and make sure it is followed. This is the most important thing you can do to help your child. Daily practice is the best thing that can be done to maintain and further musical progress.
2. Provide your child with as good
an instrument as you can reasonably afford and a safe place to keep it. Keep a record of the serial number of the instrument.
3. Identify the case with your
child’s name, address, and phone number.
4. Realize that most students do not
practice on their own; they usually need to be reminded, particularly after the novelty of the instrument wears off.
5. Students should practice in a
room with adequate lighting and use a music stand. All students, with the exception of French horn and baritone players, are to stand while practicing (after the third week of instruction).
6. Make sure brothers and sisters stay away from your child during practice time. Turn off the television if it is located in the practice room and keep interruptions and distractions to an absolute minimum.
7. First-year students are expected
to practice 20 minutes daily (5-6 times per week).
8. Show an interest and be
enthusiastic in your child’s practice. Take time to listen to his practicing, give help if your child asks, arrange family concerts where the entire family listens to your child play some or all of the assigned lessons. Be creative.
9. Never make fun of not-so-
musical sounds that your child may produce.
10. Help your child to remember
which days the instrument, lesson book, and music are needed at school. A note on the refrigerator sometimes helps.
-From “Starting Band with Steven Katzenmoyer.” (Blaufuss, 2006)
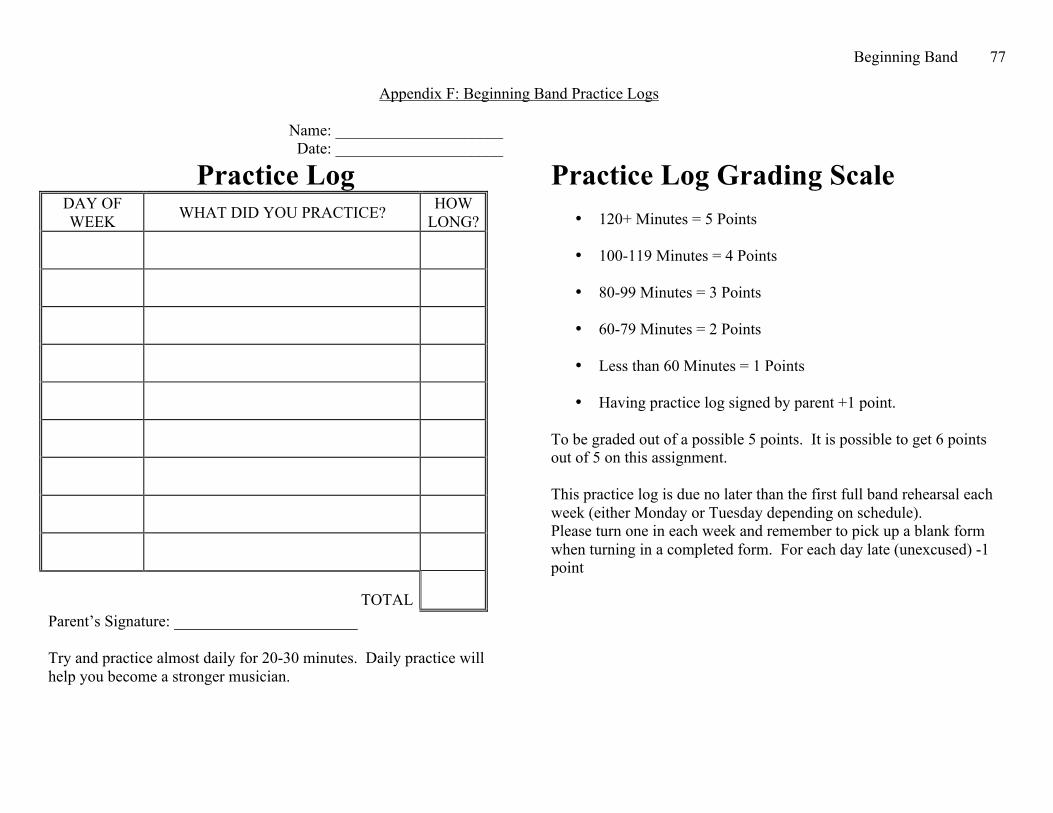
Beginning Band
77
Appendix F: Beginning Band Practice Logs
Name: _____________________ Date: _____________________
Practice Log DAY OF WEEK WHAT DID YOU PRACTICE? HOW
LONG?
TOTAL
Parent’s Signature: _______________________ Try and practice almost daily for 20-30 minutes. Daily practice will help you become a stronger musician.
Practice Log Grading Scale
• 120+ Minutes = 5 Points
• 100-119 Minutes = 4 Points
• 80-99 Minutes = 3 Points
• 60-79 Minutes = 2 Points
• Less than 60 Minutes = 1 Points
• Having practice log signed by parent +1 point. To be graded out of a possible 5 points. It is possible to get 6 points out of 5 on this assignment. This practice log is due no later than the first full band rehearsal each week (either Monday or Tuesday depending on schedule). Please turn one in each week and remember to pick up a blank form when turning in a completed form. For each day late (unexcused) -1 point
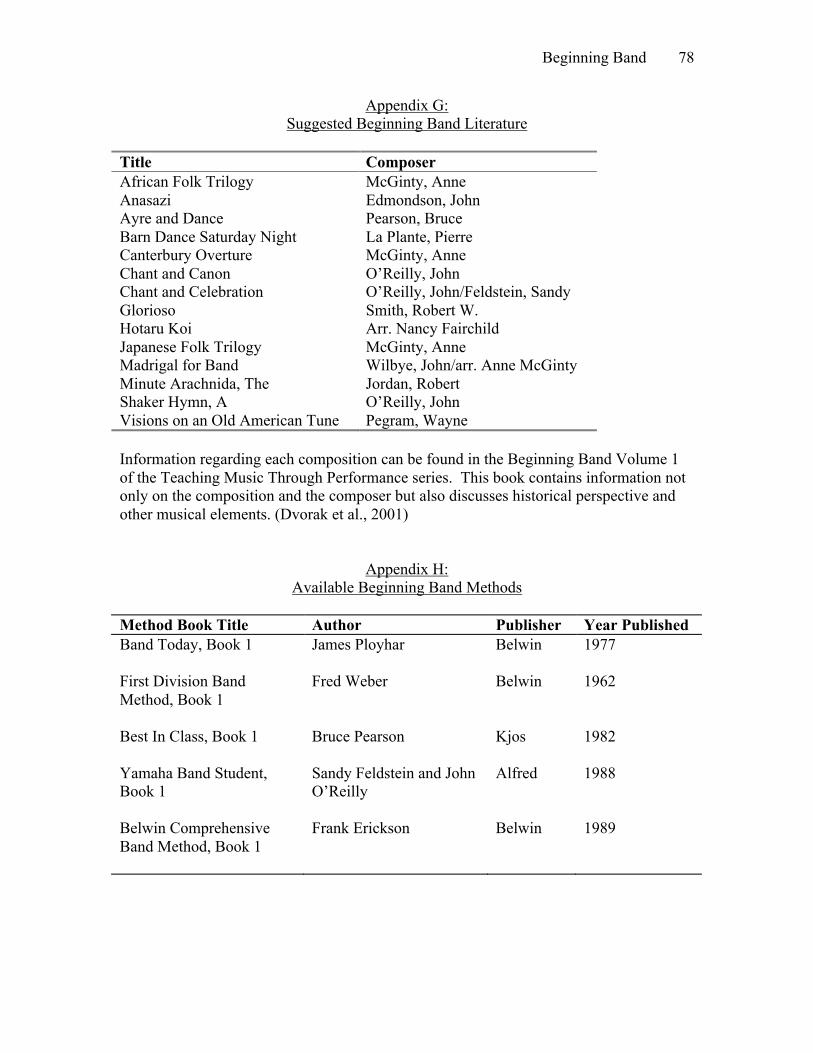
Beginning Band
78
Appendix G: Suggested Beginning Band Literature
Title Composer African Folk Trilogy McGinty, Anne Anasazi Edmondson, John Ayre and Dance Pearson, Bruce Barn Dance Saturday Night La Plante, Pierre Canterbury Overture McGinty, Anne Chant and Canon O’Reilly, John Chant and Celebration O’Reilly, John/Feldstein, Sandy Glorioso Smith, Robert W. Hotaru Koi Arr. Nancy Fairchild Japanese Folk Trilogy McGinty, Anne Madrigal for Band Wilbye, John/arr. Anne McGinty Minute Arachnida, The Jordan, Robert Shaker Hymn, A O’Reilly, John Visions on an Old American Tune Pegram, Wayne Information regarding each composition can be found in the Beginning Band Volume 1 of the Teaching Music Through Performance series. This book contains information not only on the composition and the composer but also discusses historical perspective and other musical elements. (Dvorak et al., 2001)
Appendix H:
Available Beginning Band Methods
Method Book Title Author Publisher Year Published Band Today, Book 1
James Ployhar Belwin 1977
First Division Band Method, Book 1
Fred Weber Belwin 1962
Best In Class, Book 1
Bruce Pearson Kjos 1982
Yamaha Band Student, Book 1
Sandy Feldstein and John O’Reilly
Alfred 1988
Belwin Comprehensive Band Method, Book 1
Frank Erickson Belwin 1989
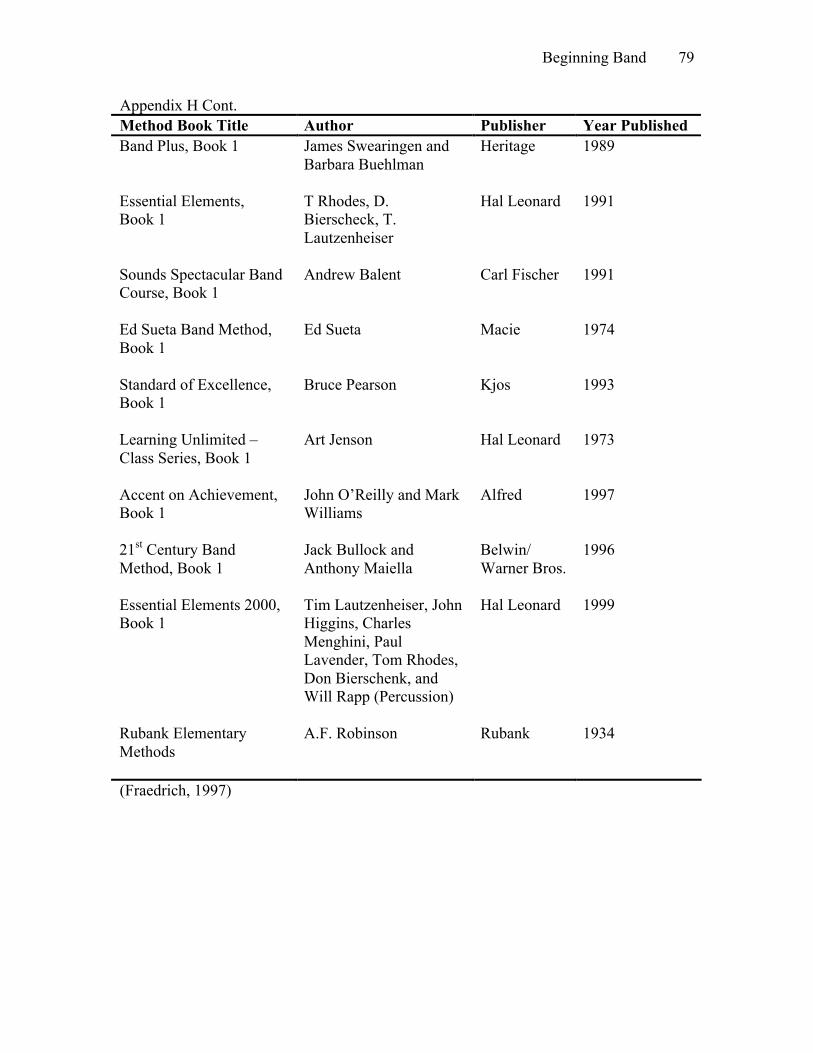
Beginning Band
79
Appendix H Cont. Method Book Title Author Publisher Year Published Band Plus, Book 1
James Swearingen and Barbara Buehlman
Heritage 1989
Essential Elements, Book 1
T Rhodes, D. Bierscheck, T. Lautzenheiser
Hal Leonard 1991
Sounds Spectacular Band Course, Book 1
Andrew Balent Carl Fischer 1991
Ed Sueta Band Method, Book 1
Ed Sueta Macie 1974
Standard of Excellence, Book 1
Bruce Pearson Kjos 1993
Learning Unlimited – Class Series, Book 1
Art Jenson Hal Leonard 1973
Accent on Achievement, Book 1
John O’Reilly and Mark Williams
Alfred 1997
21st Century Band Method, Book 1
Jack Bullock and Anthony Maiella
Belwin/ Warner Bros.
1996
Essential Elements 2000, Book 1
Tim Lautzenheiser, John Higgins, Charles Menghini, Paul Lavender, Tom Rhodes, Don Bierschenk, and Will Rapp (Percussion)
Hal Leonard 1999
Rubank Elementary Methods
A.F. Robinson Rubank 1934
(Fraedrich, 1997)