Embed Size (px)
Citation preview
TRAVEL-SMART PRO AWNING SERIESD
ocum
ent-N
o.: F
C-9
0065
-390
Issu
e:A
ugus
t 201
7
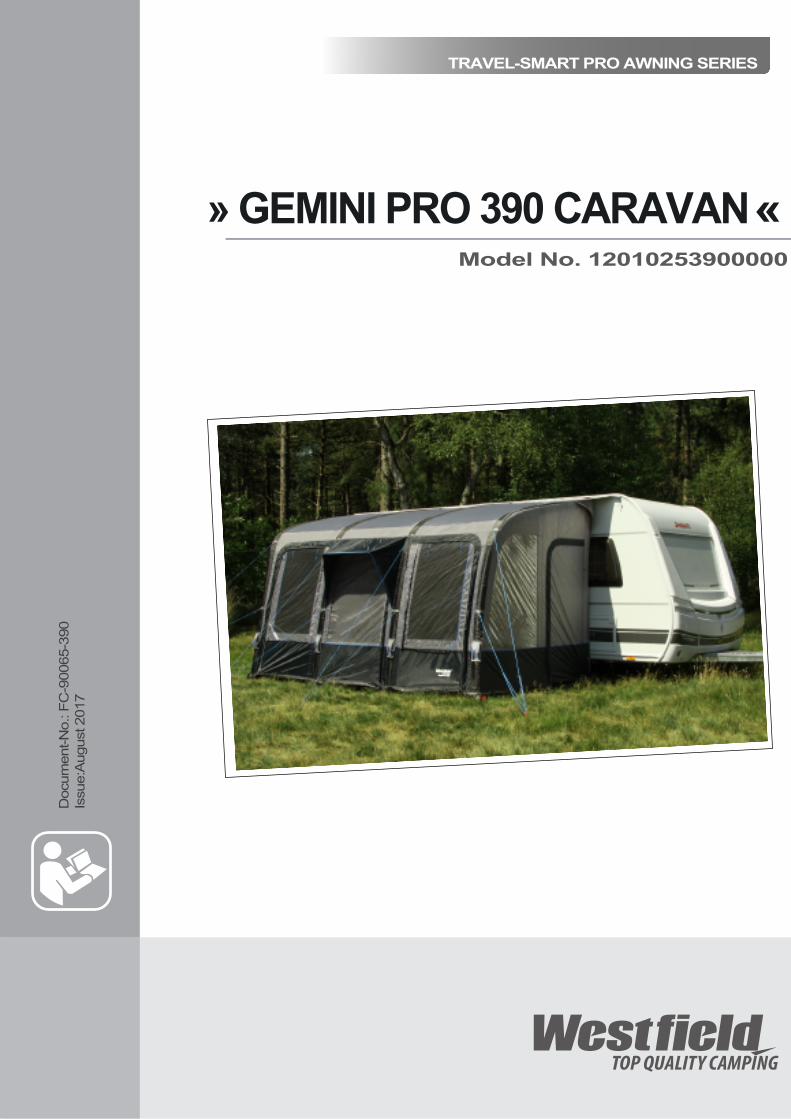
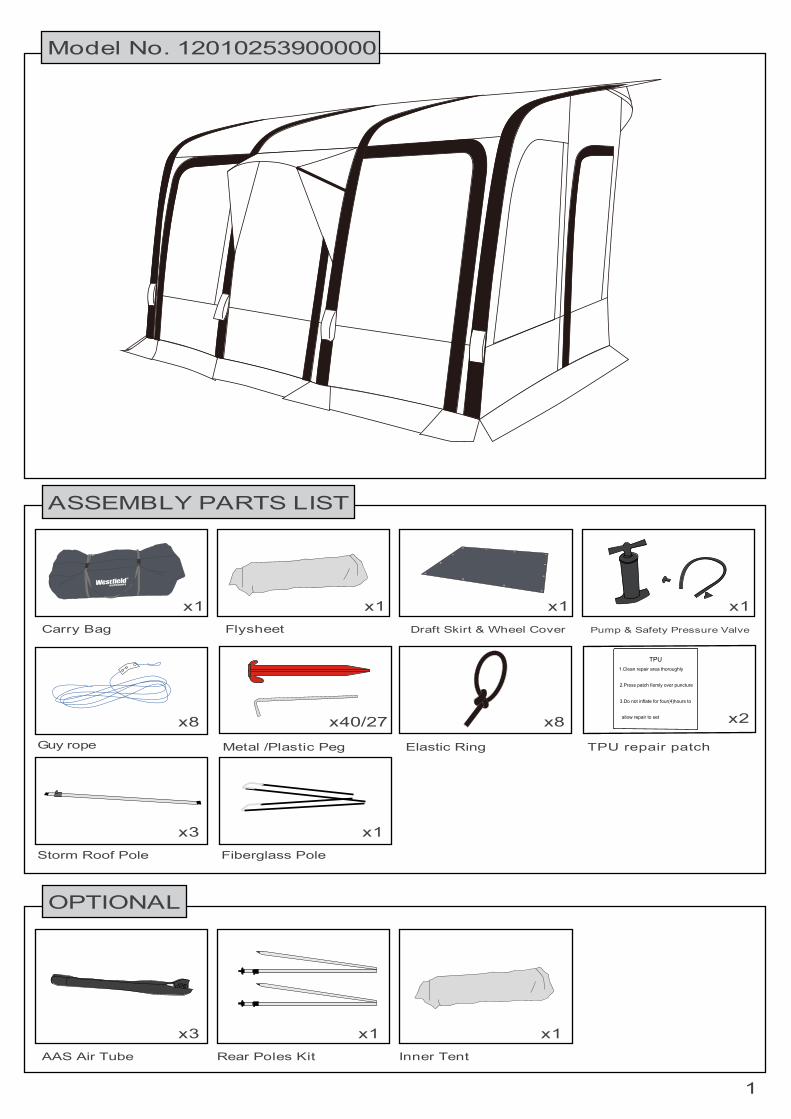
» GEMINI PRO 390 CARAVAN«Model No. 12010253900000
«
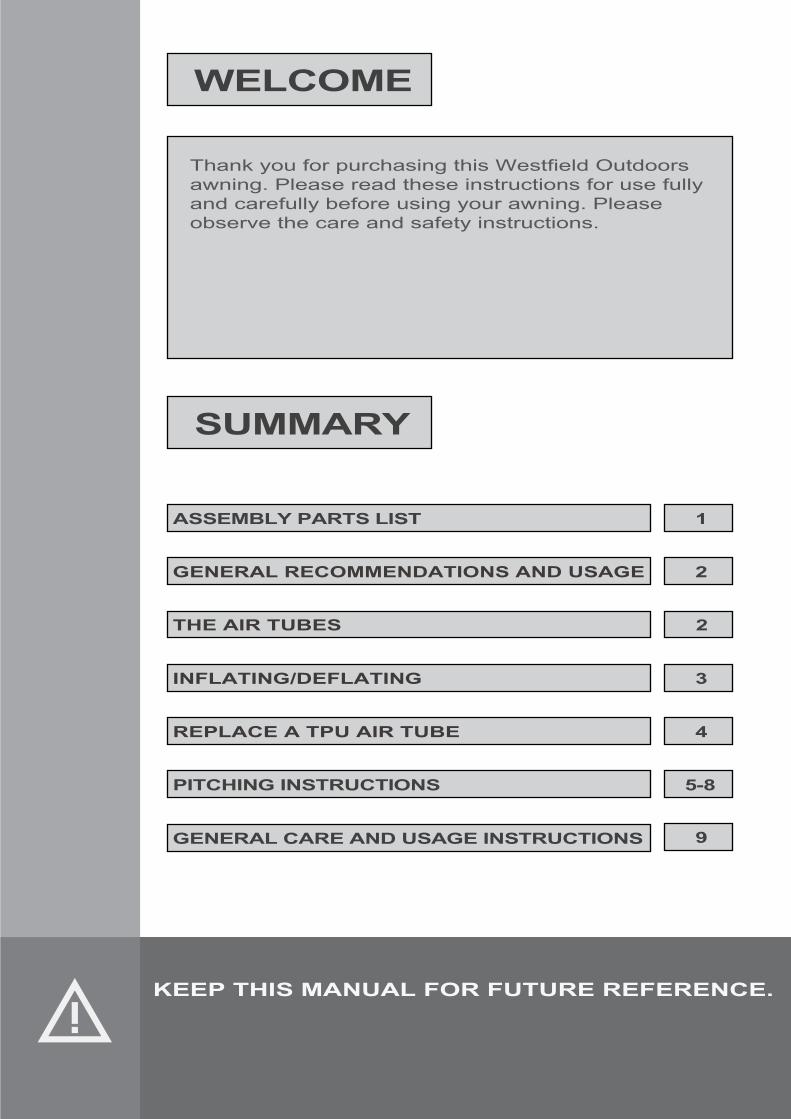
KEEP THIS MANUAL FOR FUTURE REFERENCE.
SUMMARY
WELCOME
THE AIR TUBES 2
2 GENERAL RECOMMENDATIONS AND USAGE
1 TSIL STRAP YLBMESSA
3 INFLATING/DEFLATING
4 REPLACE A TPU AIR TUBE
9
PITCHING INSTRUCTIONS 5-8
GENERAL CARE AND USAGE INSTRUCTIONS
Thank you for purchasing this Westfield Outdoors awning. Please read these instructions for use fully and carefully before using your awning. Please observe the care and safety instructions.
1
ASSEMBLY PARTS LIST
OPTIONAL
AAS Air Tube Rear Poles Kit
x3 x1Inner Tent
Carry Bag Flysheet Draft Skirt & Wheel Cover Pump & Safety Pressure Valve
x1 x1 x1 x1
Metal /Plastic Peg
x40/27
Model No. 12010253900000
x8 x8
x1
Guy rope Elastic Ring
x2
TPU repair patch
x3Storm Roof Pole
TPU1.Clean repair area thoroughly
2.Press patch fiemly over puncture
3.Do not inflate for four(4)hours to
allow repair to set
x1Fiberglass Pole
2
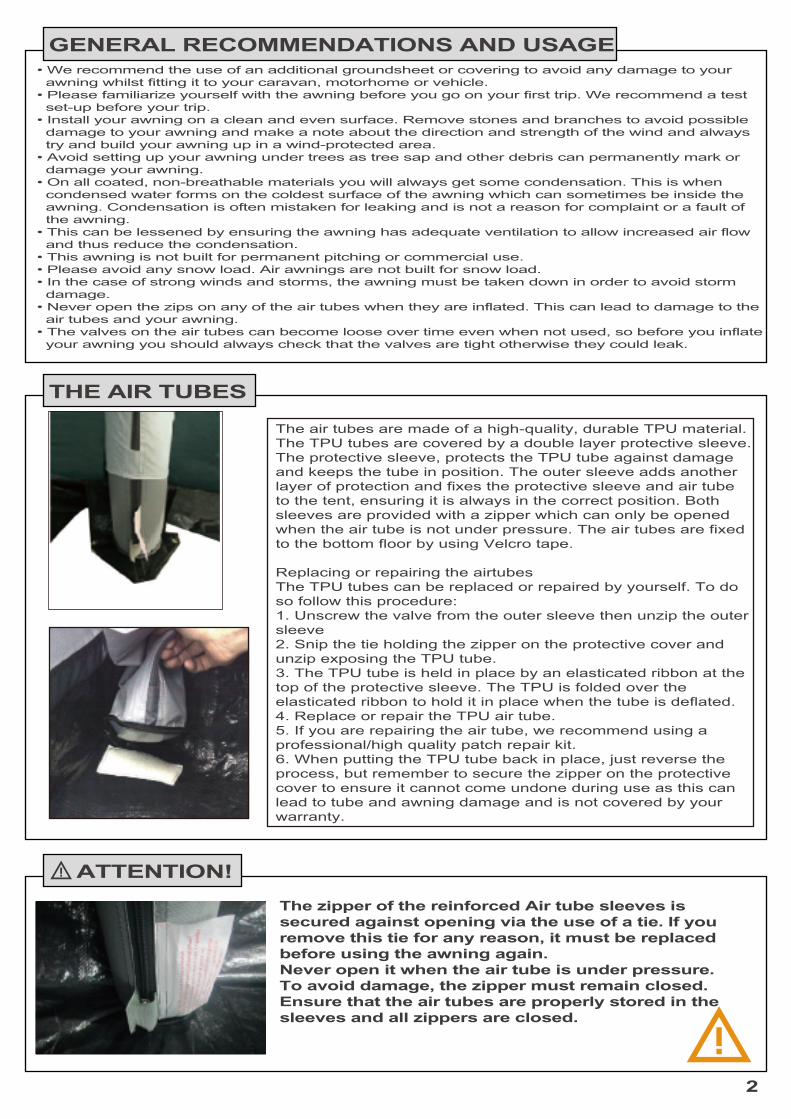
GENERAL RECOMMENDATIONS AND USAGE
THE AIR TUBES
The zipper of the reinforced Air tube sleeves is secured against opening via the use of a tie. If you remove this tie for any reason, it must be replaced before using the awning again.Never open it when the air tube is under pressure. To avoid damage, the zipper must remain closed. Ensure that the air tubes are properly stored in the sleeves and all zippers are closed.
The air tubes are made of a high-quality, durable TPU material. The TPU tubes are covered by a double layer protective sleeve. The protective sleeve, protects the TPU tube against damage and keeps the tube in position. The outer sleeve adds another layer of protection and fixes the protective sleeve and air tube to the tent, ensuring it is always in the correct position. Both sleeves are provided with a zipper which can only be opened when the air tube is not under pressure. The air tubes are fixed to the bottom floor by using Velcro tape.
Replacing or repairing the airtubesThe TPU tubes can be replaced or repaired by yourself. To do so follow this procedure:1. Unscrew the valve from the outer sleeve then unzip the outer sleeve2. Snip the tie holding the zipper on the protective cover and unzip exposing the TPU tube.3. The TPU tube is held in place by an elasticated ribbon at the top of the protective sleeve. The TPU is folded over the elasticated ribbon to hold it in place when the tube is deflated.4. Replace or repair the TPU air tube.5. If you are repairing the air tube, we recommend using a professional/high quality patch repair kit.6. When putting the TPU tube back in place, just reverse the process, but remember to secure the zipper on the protective cover to ensure it cannot come undone during use as this can lead to tube and awning damage and is not covered by your warranty.
ATTENTION!
• We recommend the use of an additional groundsheet or covering to avoid any damage to your awning whilst fitting it to your caravan, motorhome or vehicle.• Please familiarize yourself with the awning before you go on your first trip. We recommend a test set-up before your trip. • Install your awning on a clean and even surface. Remove stones and branches to avoid possible damage to your awning and make a note about the direction and strength of the wind and always try and build your awning up in a wind-protected area.• Avoid setting up your awning under trees as tree sap and other debris can permanently mark or damage your awning.• On all coated, non-breathable materials you will always get some condensation. This is when condensed water forms on the coldest surface of the awning which can sometimes be inside the awning. Condensation is often mistaken for leaking and is not a reason for complaint or a fault of the awning.• This can be lessened by ensuring the awning has adequate ventilation to allow increased air flow and thus reduce the condensation.• This awning is not built for permanent pitching or commercial use.• Please avoid any snow load. Air awnings are not built for snow load.• In the case of strong winds and storms, the awning must be taken down in order to avoid storm damage.• Never open the zips on any of the air tubes when they are inflated. This can lead to damage to the air tubes and your awning.• The valves on the air tubes can become loose over time even when not used, so before you inflate your awning you should always check that the valves are tight otherwise they could leak.
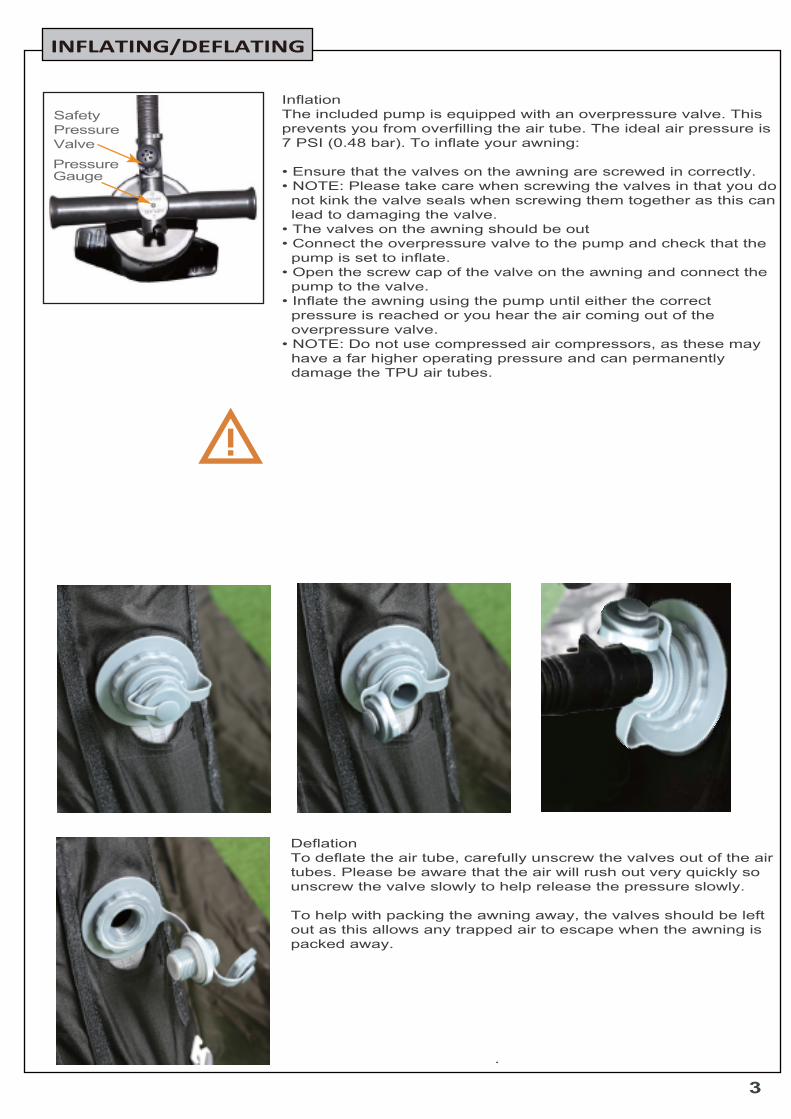
Safety PressureValve
PressureGauge
InflationThe included pump is equipped with an overpressure valve. This prevents you from overfilling the air tube. The ideal air pressure is 7 PSI (0.48 bar). To inflate your awning:
• Ensure that the valves on the awning are screwed in correctly. • NOTE: Please take care when screwing the valves in that you do not kink the valve seals when screwing them together as this can lead to damaging the valve.• The valves on the awning should be out• Connect the overpressure valve to the pump and check that the pump is set to inflate. • Open the screw cap of the valve on the awning and connect the pump to the valve. • Inflate the awning using the pump until either the correct pressure is reached or you hear the air coming out of the overpressure valve.• NOTE: Do not use compressed air compressors, as these may have a far higher operating pressure and can permanently damage the TPU air tubes.
DeflationTo deflate the air tube, carefully unscrew the valves out of the air tubes. Please be aware that the air will rush out very quickly so unscrew the valve slowly to help release the pressure slowly.
To help with packing the awning away, the valves should be left out as this allows any trapped air to escape when the awning is packed away.
INFLATING/DEFLATING
3

REPLACING A TPU AIR TUBE
4
Replacing or Repairing an Air Tube
Deflate the air tube fully. NEVER replace or repair a tube before deflating it fully.
Break the plastic ties on the sleeve of the air tube and unzip the sleeve. Then remover the protective cover and air tube from inside the sleeve. Break the plastic ties on the protective cover and unzip the protective cover. Remove the TPU blader from inside the protection cover.
Now simply replace the tube, place inside the protective cover being careful to ensure that is not twisted as a twist in the bladder could cause damage when it is inflated. Once the tube has been fitted zip the protective cover shut. YOU MUST THEN RELOCK THE ZIPS WITH NEW PLASTIC TIE OR SIMILAR SOLUTION. If you do not relock the zips then you could well cause damage to your awning when it is inflated.
3
2
1
5
PITCHING INSTRUCTIONS
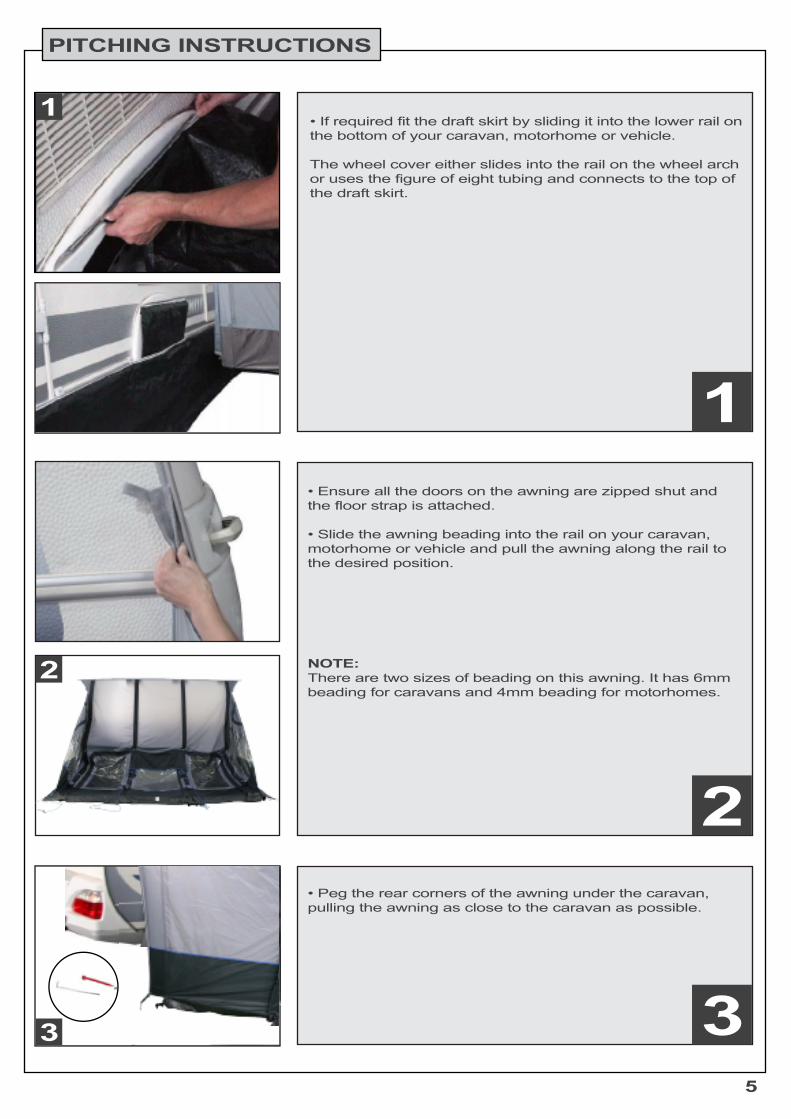
the bottom of your caravan, motorhome or vehicle.
The wheel cover either slides into the rail on the wheel arch or uses the figure of eight tubing and connects to the top of the draft skirt.
the floor strap is attached.
motorhome or vehicle and pull the awning along the rail to the desired position.
NOTE:There are two sizes of beading on this awning. It has 6mmbeading for caravans and 4mm beading for motorhomes.
pulling the awning as close to the caravan as possible.
1
2
3
4
6
PITCHING INSTRUCTIONS
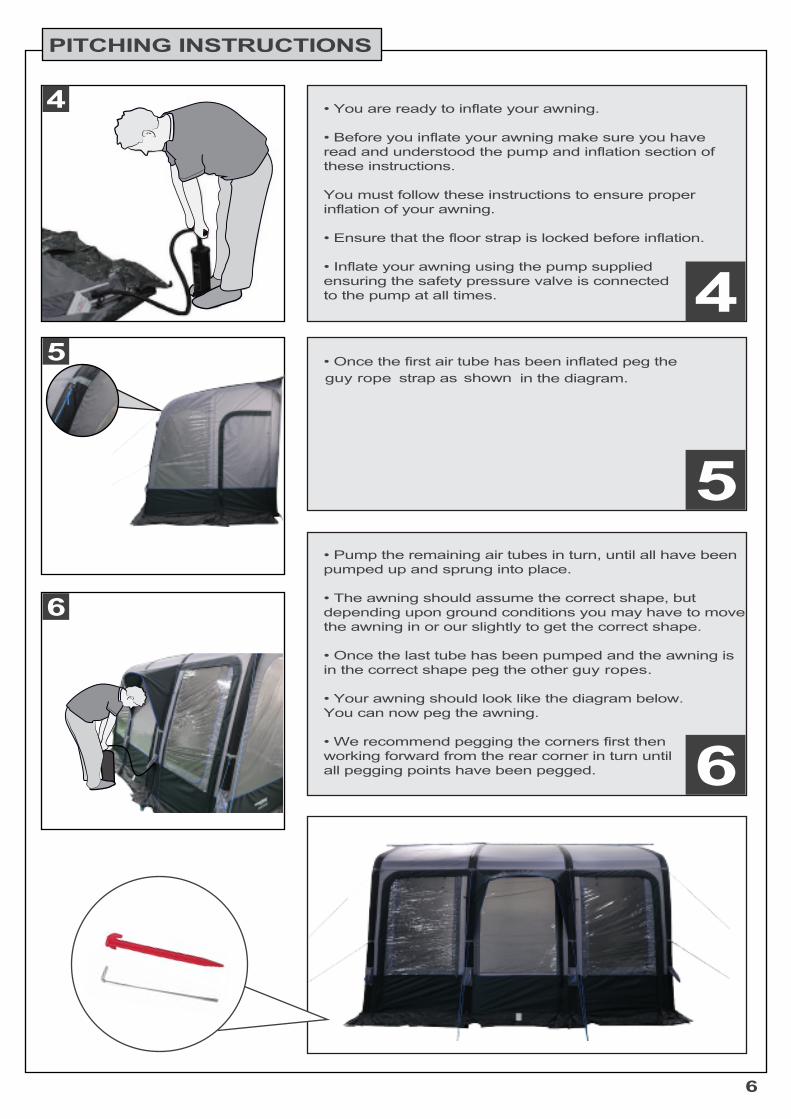
read and understood the pump and inflation section of these instructions.
You must follow these instructions to ensure proper inflation of your awning.
ensuring the safety pressure valve is connectedto the pump at all times.
4
5
strap as shown in the diagram.
5
6
pumped up and sprung into place.
depending upon ground conditions you may have to move the awning in or our slightly to get the correct shape.
in the correct shape peg the other guy ropes.
You can now peg the awning.
working forward from the rear corner in turn untilall pegging points have been pegged.
6
guy rope
7
PITCHING INSTRUCTIONS
PITCHING INSTRUCTIONS (OPTIONAL)
7
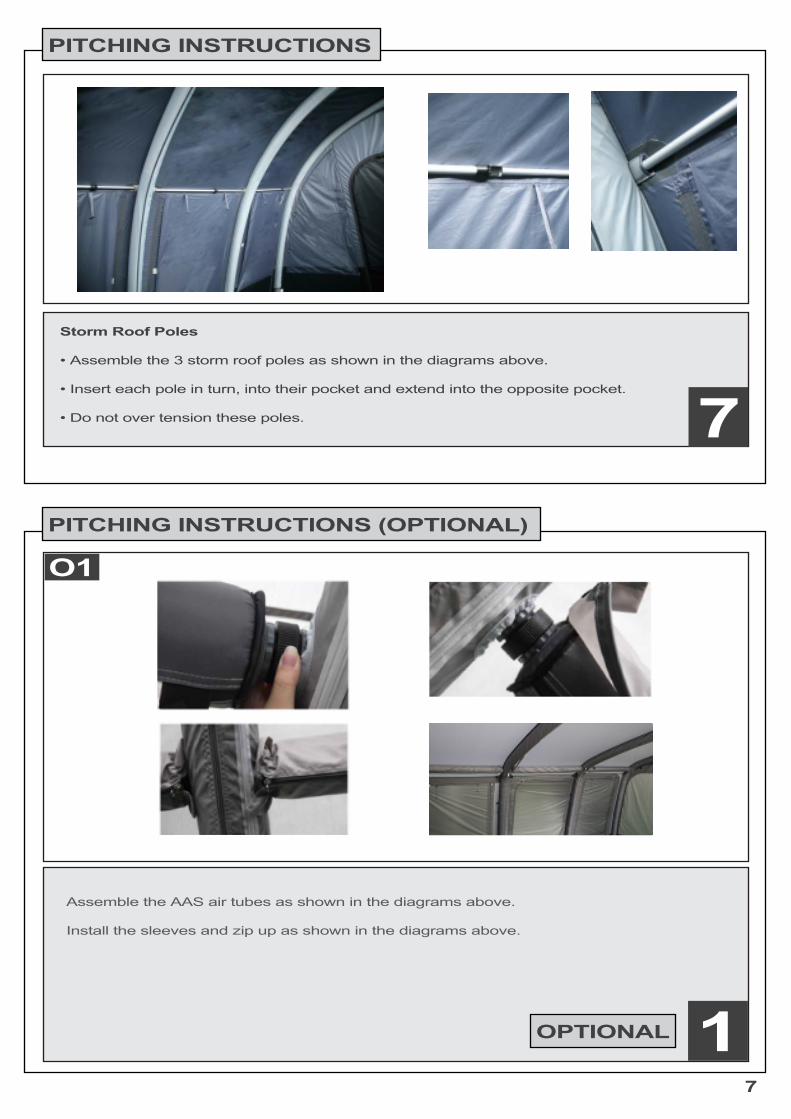
Storm Roof Poles
1
O1
OPTIONAL
Assemble the AAS air tubes as shown in the diagrams above.
Install the sleeves and zip up as shown in the diagrams above.
2
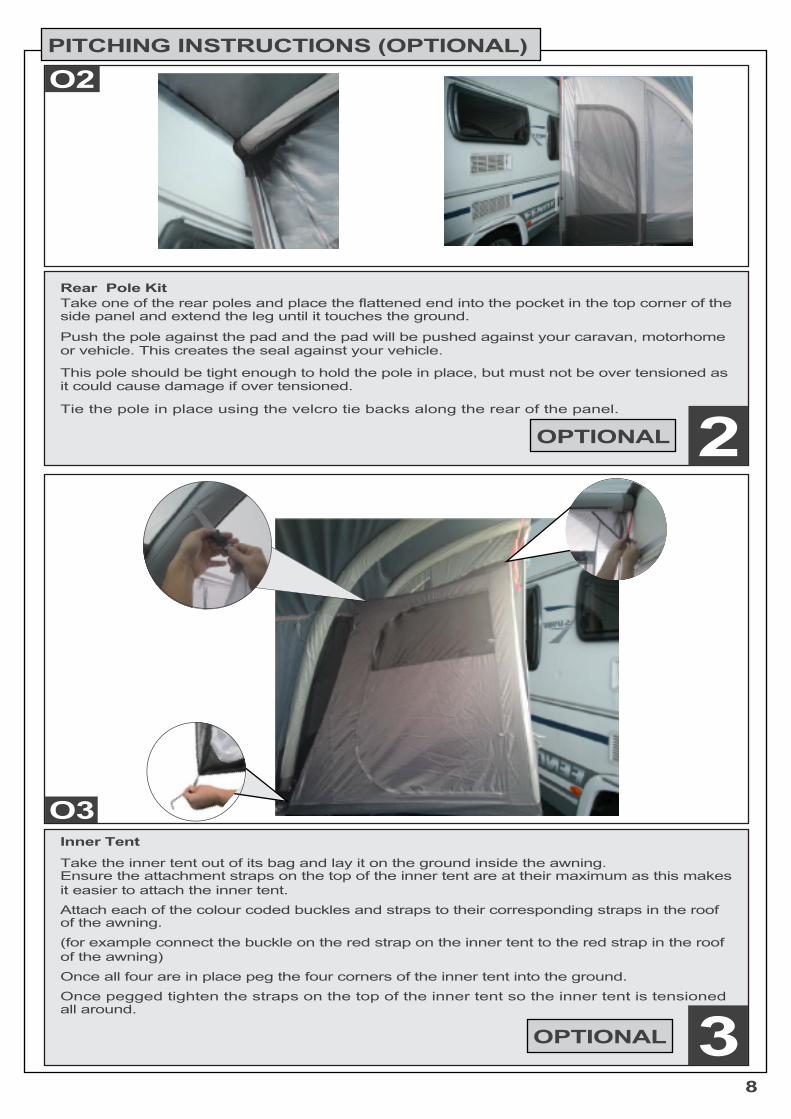
Rear Pole Kit
side p
Push the pole against the pad and the pad will be pushed against your caravan, motorhome
Take one of the rear poles and place the flattened end into the pocket in the top corner of theanel and extend the leg until it touches the ground.
or ve
This pole should be tight enough to hold the pole in place, but must not be over tensioned as
hicle. This creates the seal against your vehicle.
i
Tie the pole in place using the velcro tie backs along the rear of the panel.
t could cause damage if over tensioned.
O2
OPTIONAL
8
3
Inner Tent
EnTake the inner tent out of its bag and lay it on the ground inside the awning.
sure the attachment straps on the top of the inner tent are at their maximum as this makes it easier to attach the inner tent.
ofAttach each of the colour coded buckles and straps to their corresponding straps in the roof
the awning.(for example connect the buckle on the red strap on the inner tent to the red strap in the roof ofOnce all four are in place peg the four corners of the inner tent into the ground.
the awning)
aOnce pegged tighten the straps on the top of the inner tent so the inner tent is tensionedll around.
O3
OPTIONAL
PITCHING INSTRUCTIONS (OPTIONAL)
9
GENERAL CARE AND USAGE INSTRUCTIONS
Canvas SeamsThe main seams of this awning are taped to ensure water protection. These can become damaged over time but can be repaired and re-sealed by using seam sealer. For the best results, we recommend contacting your dealer to find out which products to use.
UV degradationUV degradation causes the material to go brittle, fade or change colour. The time it takes to do this will differ depending upon how often you use it and what the weather is like when you do. It is a natural process which affects all materials used outdoors. This awning is coated to help prevent this process, but it does not stop it, it only helps slow it down.You can help protect against this degradation by regular care and proofing of the awning. Theawning should be regularly cleaned and re-proofed to ensure that mold and mildew do not build up and damage the awning.After cleaning your awning, you should always reproof the awning as cleaning the awning will damage the UV coating on the material. For the best results, we recommend contacting your dealer to find out which products to use.Weathering due to excessive UV degradation is not covered by the warranty.
CondensationAll coated, non-breathing materials suffer from condensation. The amount of condensation depends upon the weather conditions and the environment (such as wet ground etc.). During condensation, water can collect on the fabric of the awning. If enough condensation forms this can run down the awning and drip off seams or any other stitching point.It can be lessened by ventilation. Ventilating your awning allows air to flow though the awning and lessens the buildup of condensation. Condensation is often mistaken for leaking and is not a reason for complaint or a fault of the awning.
UsageThis awning is designed for private and non-commercial use.This is a touring awning and is not suitable for permanent use.In case of storms or snowfall, the awning must be taken down to avoid damage.
Storage and cleaning
FIRE AND VENTILATION PRECAUTIONS
Please store your awning dry. If you must take your awning down when it is wet, you must unpackit within a week and allow it to dry out before packing it away. This is to ensure that mold and mildew do not build up as this can lead to damage on your awning and is not covered under yourwarranty.To clean this awning, we recommend using a specific tent or awning cleaner or just water and a soft cleaning cloth.Heavy soiling should be allowed to dry and brushed with a soft brush beforehand.After cleaning your awning, you should always reproof it as the UV coating on your awning could be damaged during cleaning. For the best results, we recommend contacting your dealer to find out which products to use.
Caution:
• If using gas or other combustion appliances additional ventilation is required• Do not place hot appliances near the walls, roof or curtains• Always observe the safety instructions for these appliances• Never allow children to play near hot appliances• Keep exits clear• Make sure you know the fire precaution arrangements on the site• Make sure ventilation openings are open all the time to avoid suffocation

Drawings in this manual are for illustration purposes only, actual product may vary. Manufacturer reserves the right to change any specification or features without prior notice. Should you have any questions about your product or experience any difficulties, please contact the retailer from which you purchased the product. Your local retailer is in the best position to promptly address any requirements.
www.westfieldoutdoors.eu
Westfield Outdoors GmbHSiemesdyk 6047807 KrefeldGermany