Embed Size (px)
Citation preview
1 – Top Pattern No.27www.empatterns.com E+M Patterns 2016
Top Pattern No.27
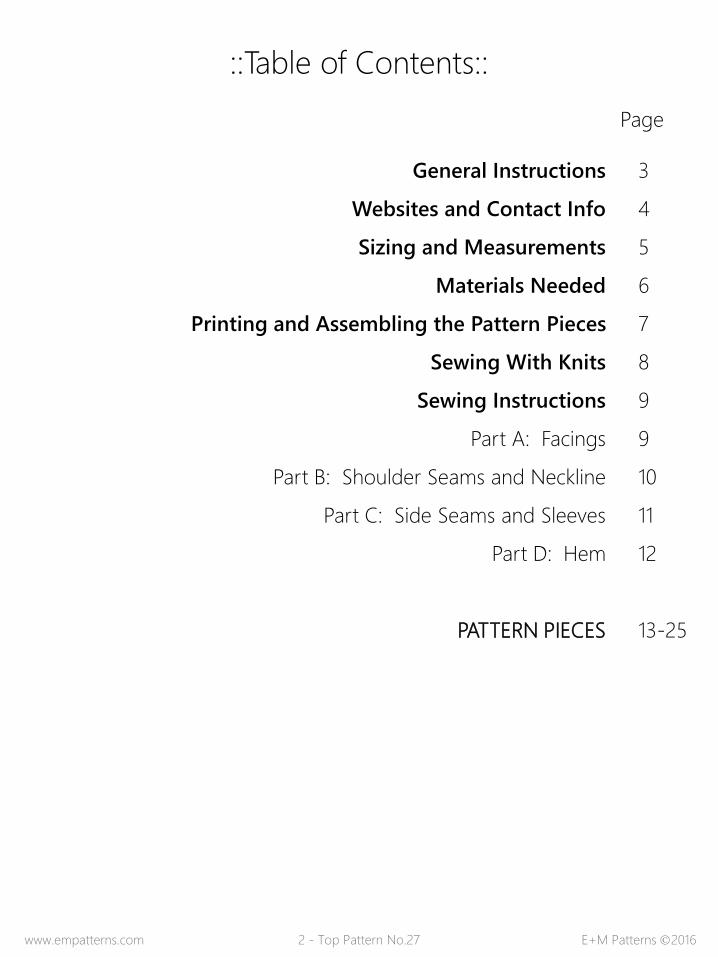
::Table of Contents::
General Instructions
Websites and Contact Info
Sizing and Measurements
Materials Needed
Printing and Assembling the Pattern Pieces
Sewing With Knits
Sewing Instructions
Part A: Facings
Part B: Shoulder Seams and Neckline
Part C: Side Seams and Sleeves
Part D: Hem
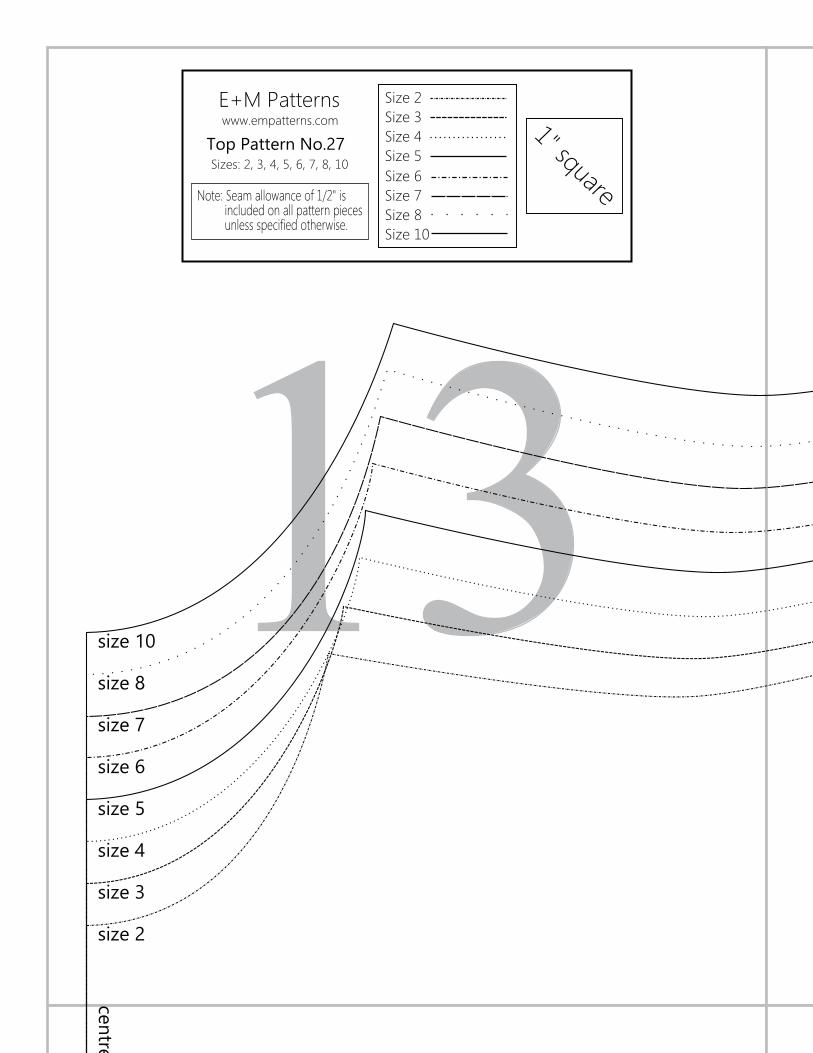
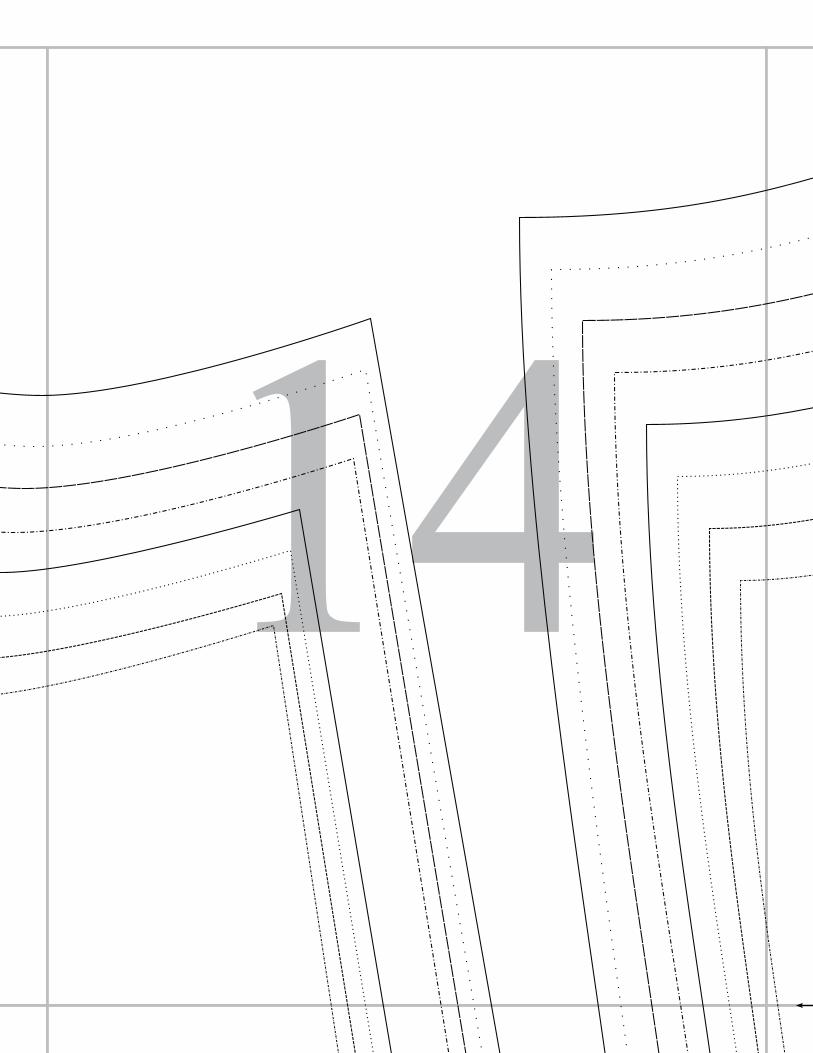
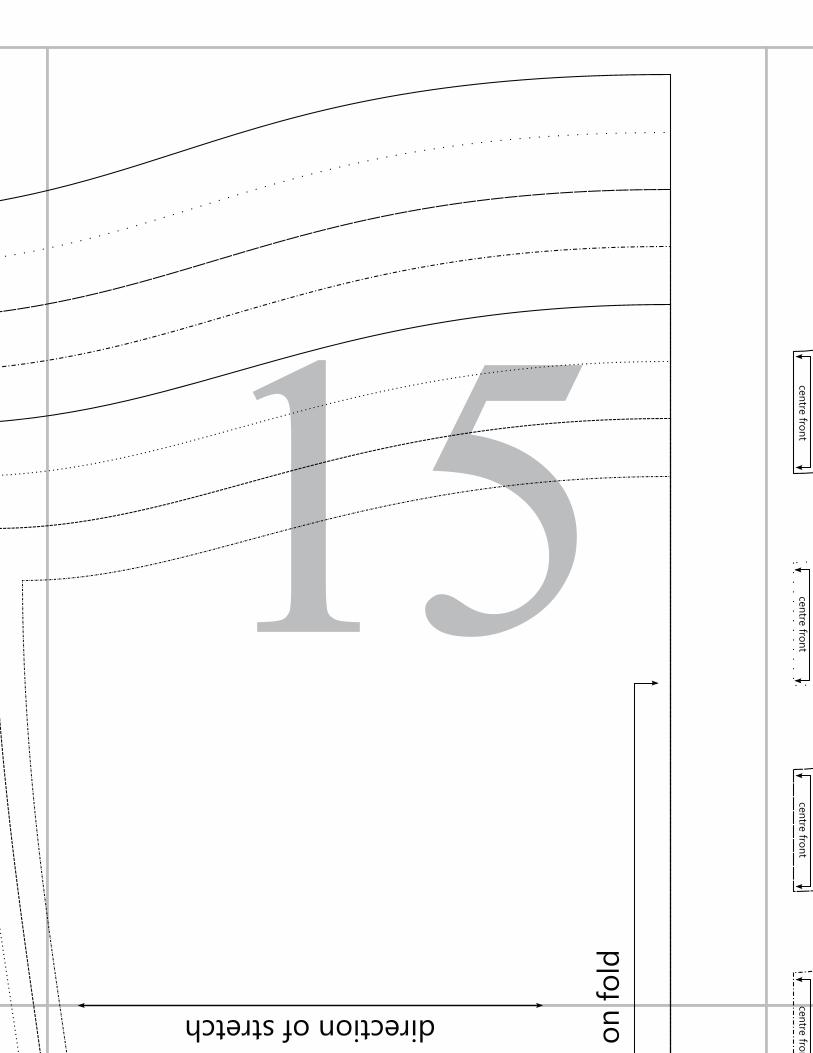
PATTERN PIECES
3
4
5
6
7
8
9
9
10
11
12
13-25
Page
2 - Top Pattern No.27www.empatterns.com E+M Patterns 2016
::General Instructions::
• Print page 1 of the pattern pieces before printing the entire file. Check that the 1” square
measures 1” on each of the four sides (outer edges) before printing all of the pages. This will
ensure that your pattern has printed correctly.
• This pattern does NOT include the “layers” option.
• Read all instructions carefully before you begin.
• For best results, create a muslin (test garment out of inexpensive fabric) to check for fit before
sewing with your final fabric.
• Pre-wash, dry, and iron all your fabric as you will care for the final garment before cutting and
sewing to allow for fabric shrinkage.
• Cut out the pattern pieces along the outside of the pattern lines and transfer any pattern
markings to the wrong side of the fabric (unless otherwise indicated).
• All seam allowances (SA) are 1/2” unless otherwise indicated.
Legal Mumbo Jumbo:
This pattern and tutorial belongs to E+M Patterns, so please don’t share, re-sell, or re-produce it,
either in whole or in part. That’s bad karma and is also illegal.
Items made from this pattern can be sold... I wish you all the success and happiness :)
I am often asked for finished products made from my patterns. I would love to promote you and
your business should anyone be looking for something that you make from my patterns. If you
decide to sell one of my garments online, let me know and I will spread the word. All I ask in
return is that you state in your listing somewhere that you’ve used an E+M Patterns pattern. That
seems like a pretty good trade, don’tcha think? ;)
3 - Top Pattern No.27www.empatterns.com E+M Patterns 2016
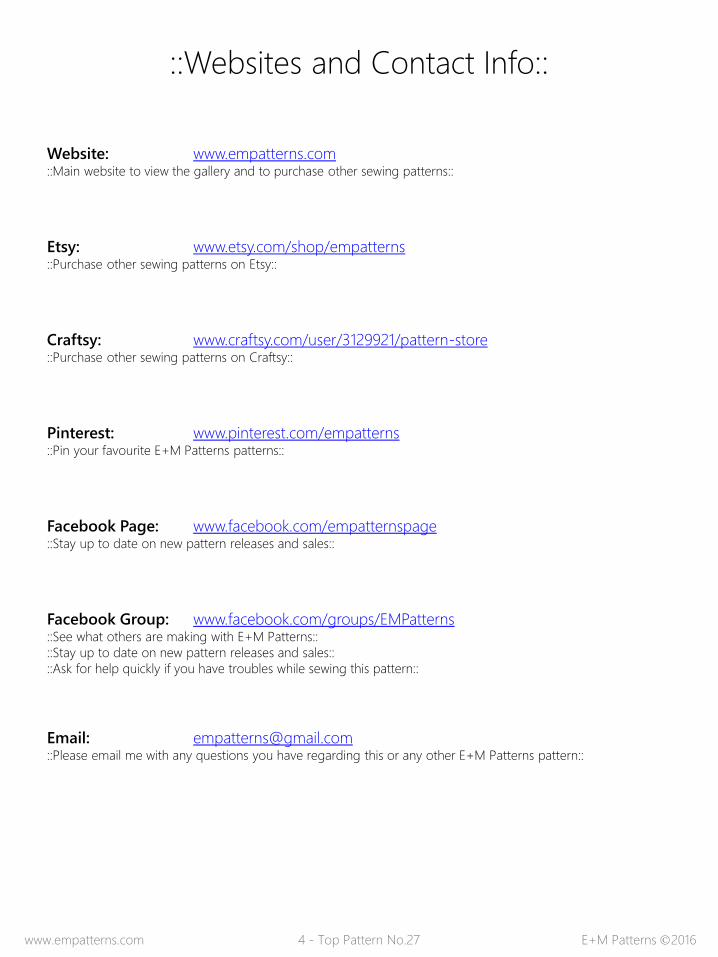
::Websites and Contact Info::
Website: www.empatterns.com::Main website to view the gallery and to purchase other sewing patterns::
Etsy: www.etsy.com/shop/empatterns::Purchase other sewing patterns on Etsy::
Craftsy: www.craftsy.com/user/3129921/pattern-store::Purchase other sewing patterns on Craftsy::
Pinterest: www.pinterest.com/empatterns::Pin your favourite E+M Patterns patterns::
Facebook Page: www.facebook.com/empatternspage::Stay up to date on new pattern releases and sales::
Facebook Group: www.facebook.com/groups/EMPatterns::See what others are making with E+M Patterns::
::Stay up to date on new pattern releases and sales::
::Ask for help quickly if you have troubles while sewing this pattern::
Email: [email protected]::Please email me with any questions you have regarding this or any other E+M Patterns pattern::
4 - Top Pattern No.27www.empatterns.com E+M Patterns 2016
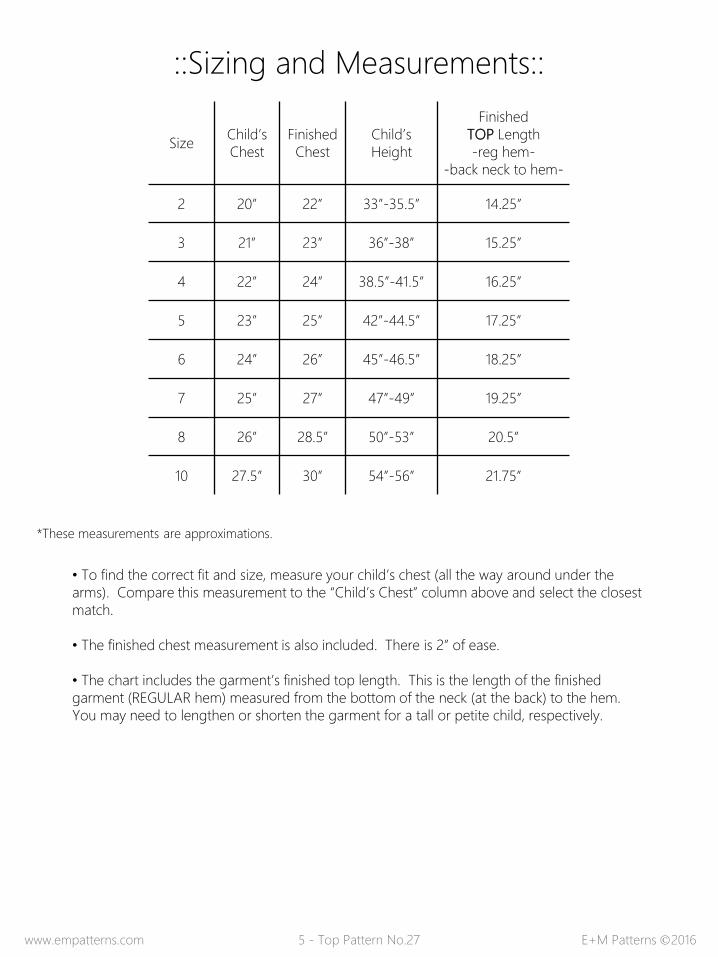
::Sizing and Measurements::
SizeChild’s
Chest
Finished
Chest
Child’s
Height
Finished
TOP Length
-reg hem-
-back neck to hem-
2 20” 22” 33”-35.5” 14.25”
3 21” 23” 36”-38” 15.25”
4 22” 24” 38.5”-41.5” 16.25”
5 23” 25” 42”-44.5” 17.25”
6 24” 26” 45”-46.5” 18.25”
7 25” 27” 47”-49” 19.25”
8 26” 28.5” 50”-53” 20.5”
10 27.5” 30” 54”-56” 21.75”
• To find the correct fit and size, measure your child’s chest (all the way around under the
arms). Compare this measurement to the “Child’s Chest” column above and select the closest
match.
• The finished chest measurement is also included. There is 2” of ease.
• The chart includes the garment’s finished top length. This is the length of the finished
garment (REGULAR hem) measured from the bottom of the neck (at the back) to the hem.
You may need to lengthen or shorten the garment for a tall or petite child, respectively.
*These measurements are approximations.
5 - Top Pattern No.27www.empatterns.com E+M Patterns 2016
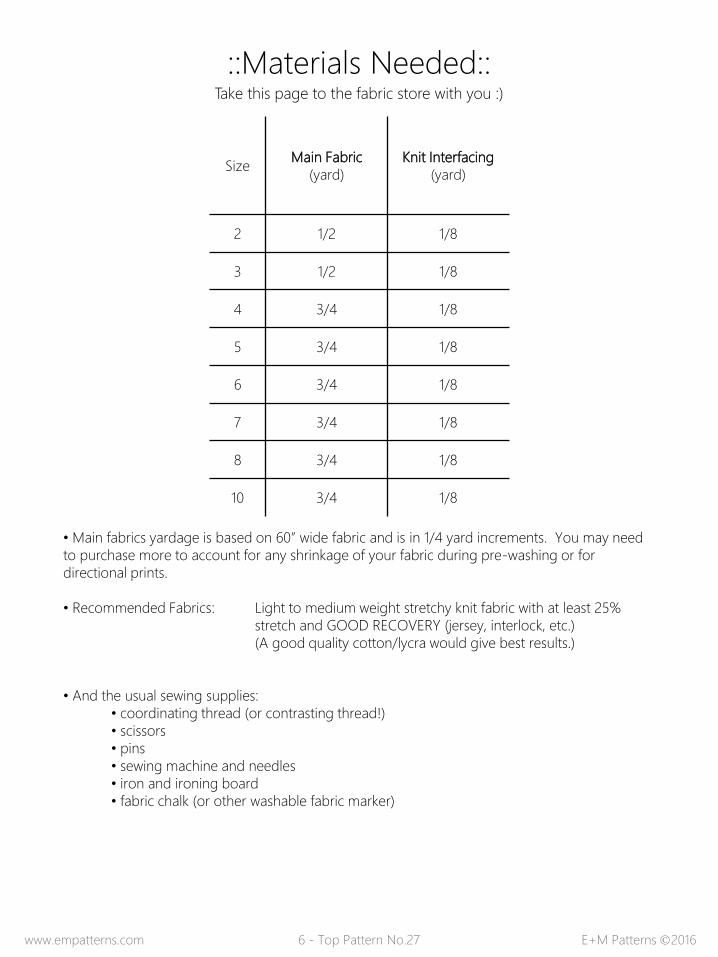
::Materials Needed::Take this page to the fabric store with you :)
SizeMain Fabric
(yard)
Knit Interfacing
(yard)
2 1/2 1/8
3 1/2 1/8
4 3/4 1/8
5 3/4 1/8
6 3/4 1/8
7 3/4 1/8
8 3/4 1/8
10 3/4 1/8
• Main fabrics yardage is based on 60” wide fabric and is in 1/4 yard increments. You may need
to purchase more to account for any shrinkage of your fabric during pre-washing or for
directional prints.
• Recommended Fabrics: Light to medium weight stretchy knit fabric with at least 25%
stretch and GOOD RECOVERY (jersey, interlock, etc.)
(A good quality cotton/lycra would give best results.)
• And the usual sewing supplies:
• coordinating thread (or contrasting thread!)
• scissors
• pins
• sewing machine and needles
• iron and ironing board
• fabric chalk (or other washable fabric marker)
6 - Top Pattern No.27www.empatterns.com E+M Patterns 2016
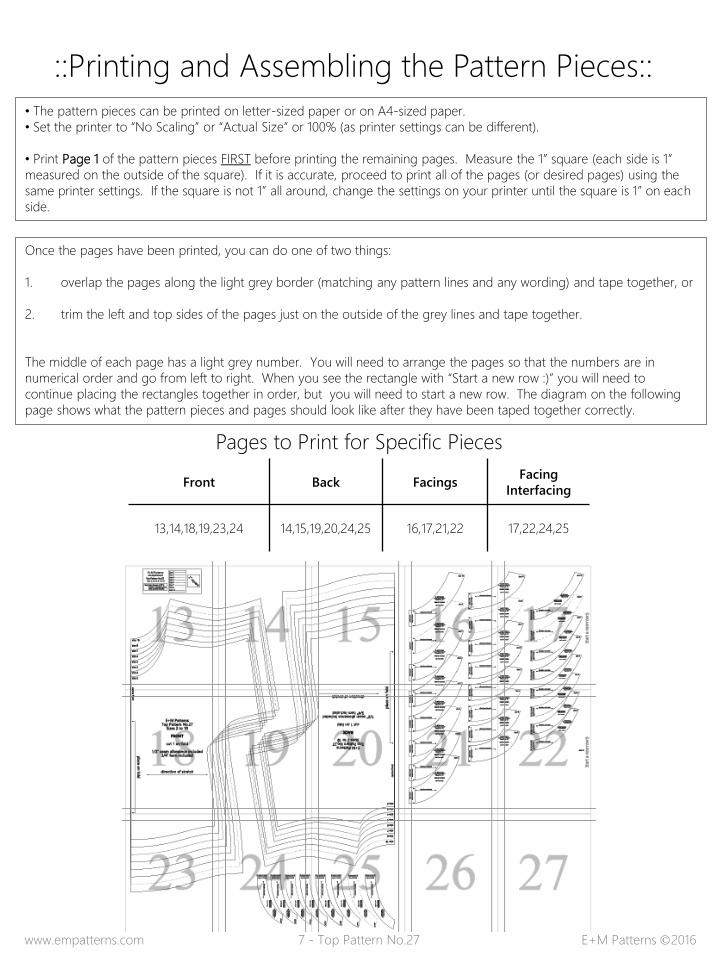
::Printing and Assembling the Pattern Pieces::
• The pattern pieces can be printed on letter-sized paper or on A4-sized paper.
• Set the printer to “No Scaling” or “Actual Size” or 100% (as printer settings can be different).
• Print Page 1 of the pattern pieces FIRST before printing the remaining pages. Measure the 1” square (each side is 1”
measured on the outside of the square). If it is accurate, proceed to print all of the pages (or desired pages) using the
same printer settings. If the square is not 1” all around, change the settings on your printer until the square is 1” on each
side.
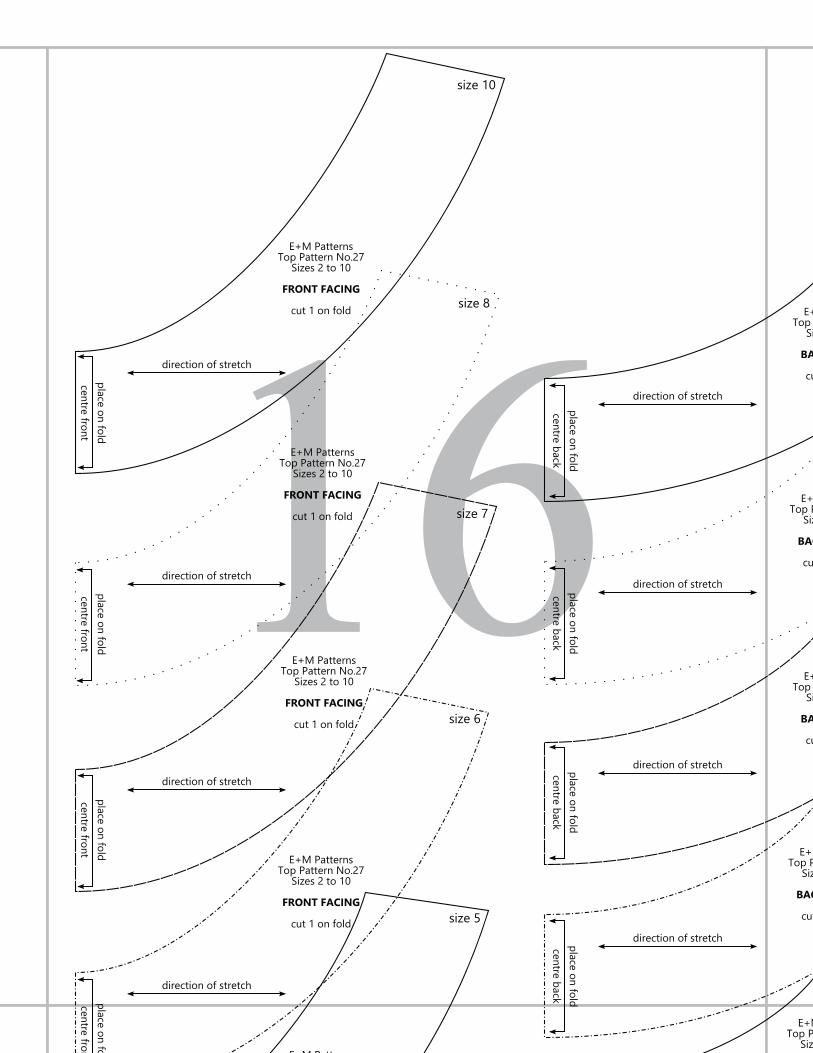
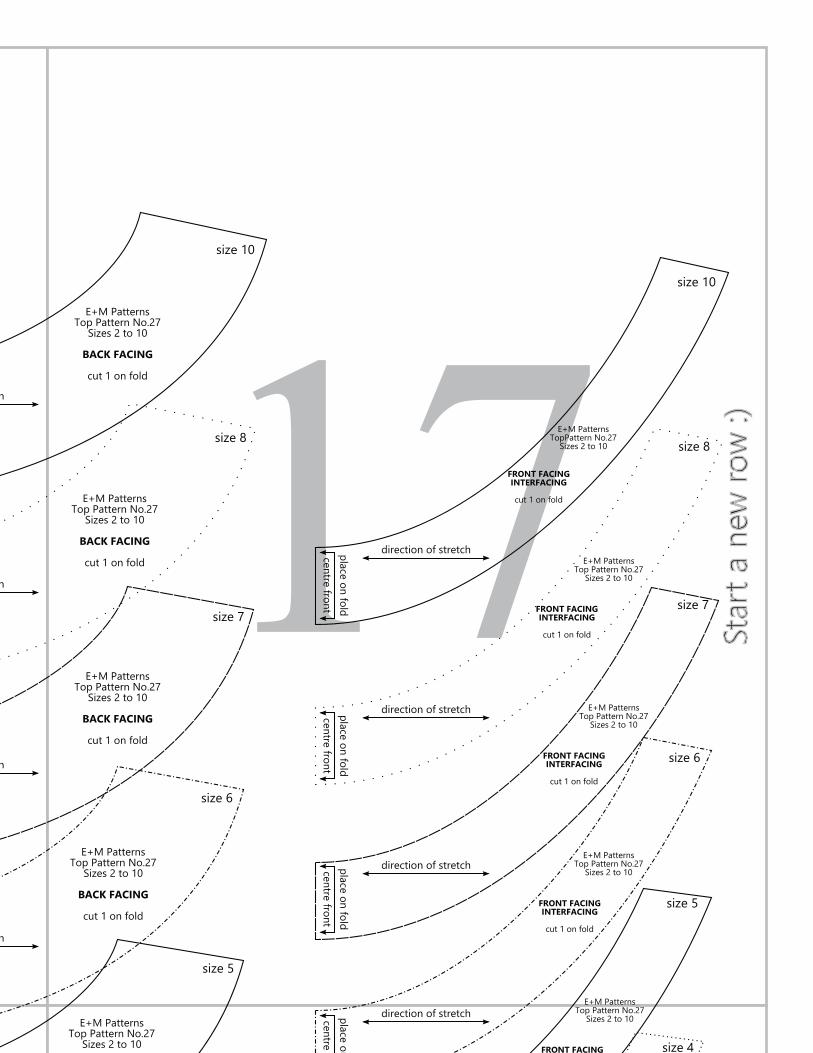
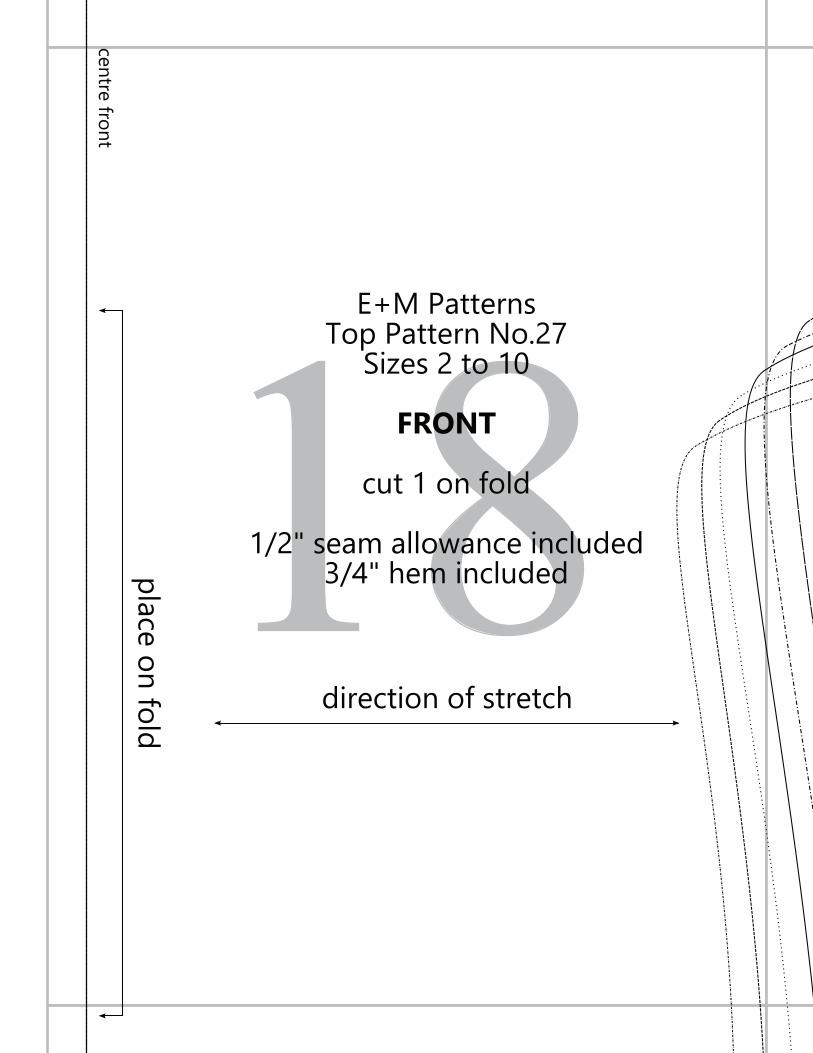
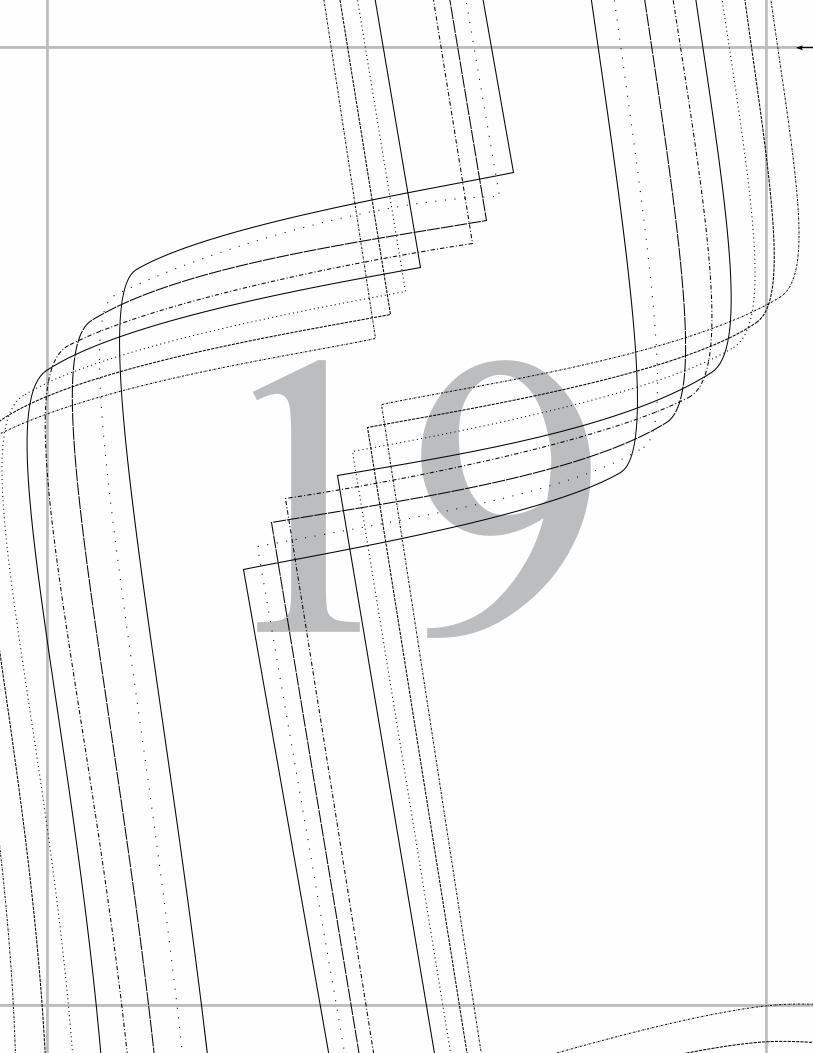
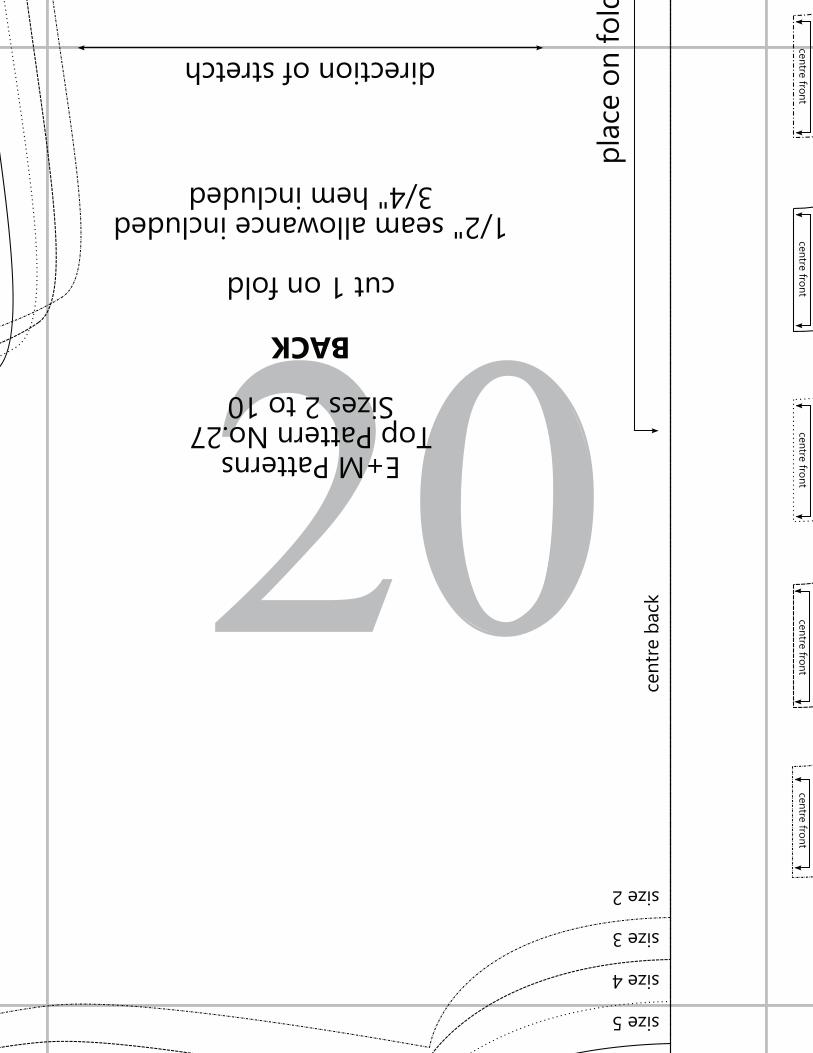
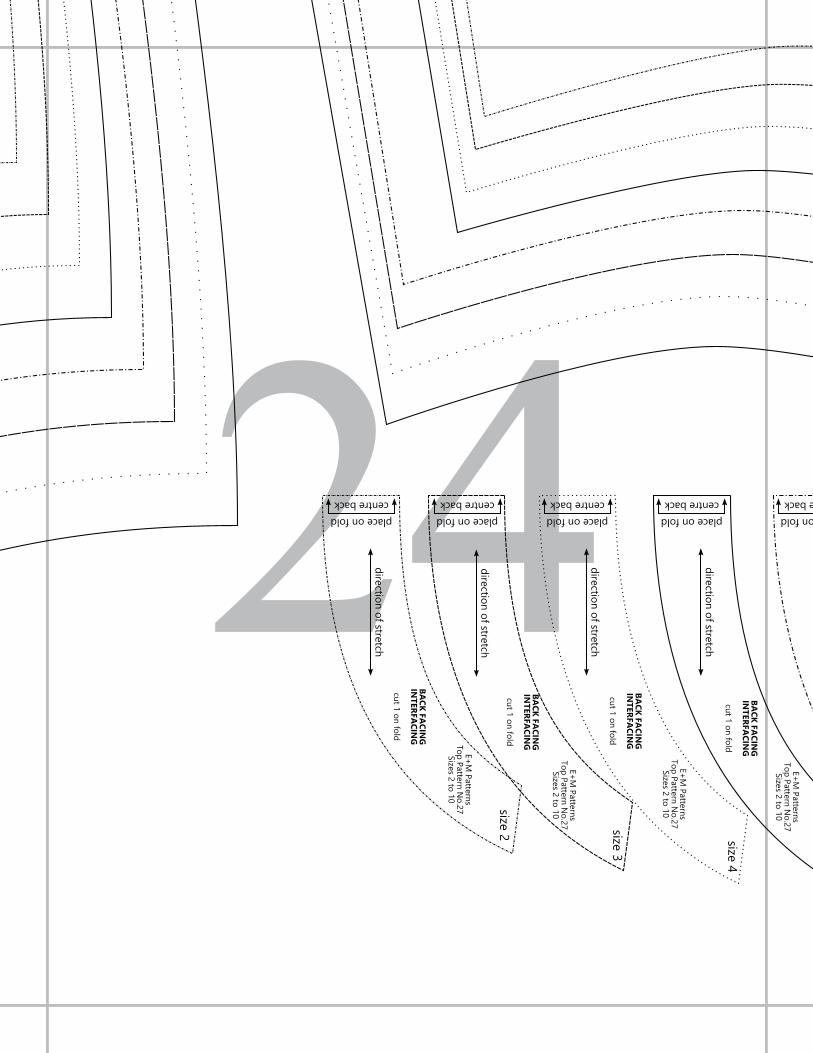
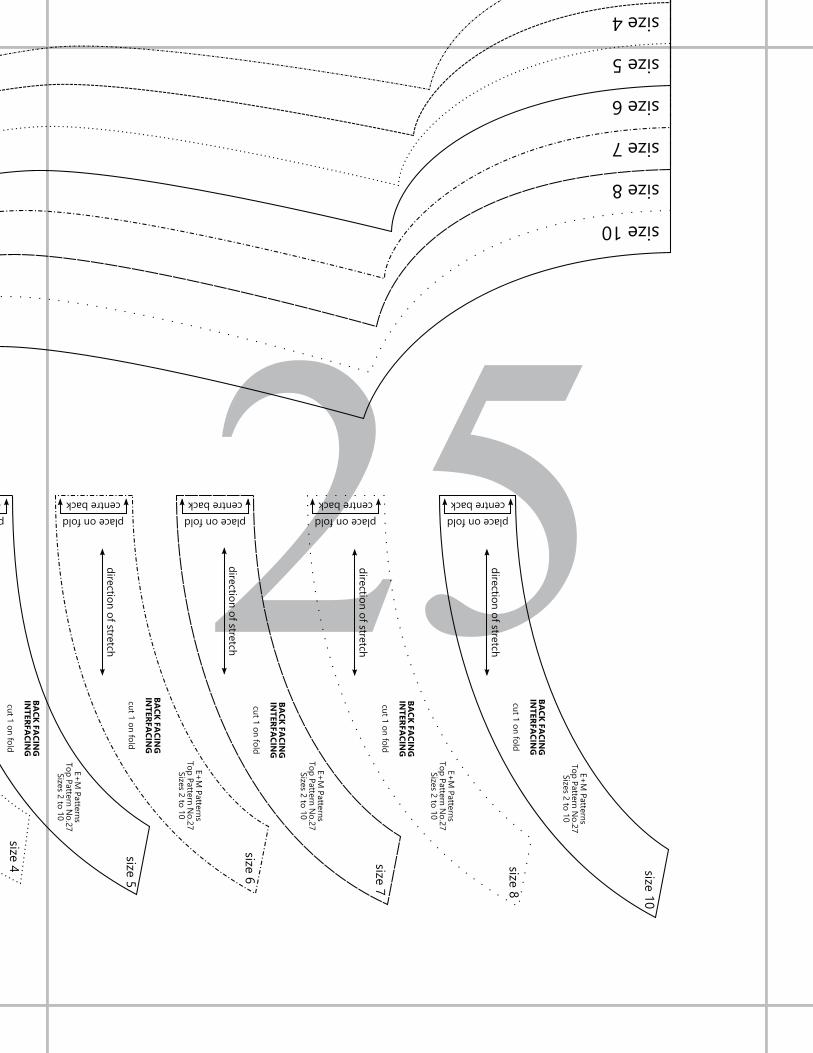
Pages to Print for Specific Pieces
Front Back FacingsFacing
Interfacing
13,14,18,19,23,24 14,15,19,20,24,25 16,17,21,22 17,22,24,25
Once the pages have been printed, you can do one of two things:
1. overlap the pages along the light grey border (matching any pattern lines and any wording) and tape together, or
2. trim the left and top sides of the pages just on the outside of the grey lines and tape together.
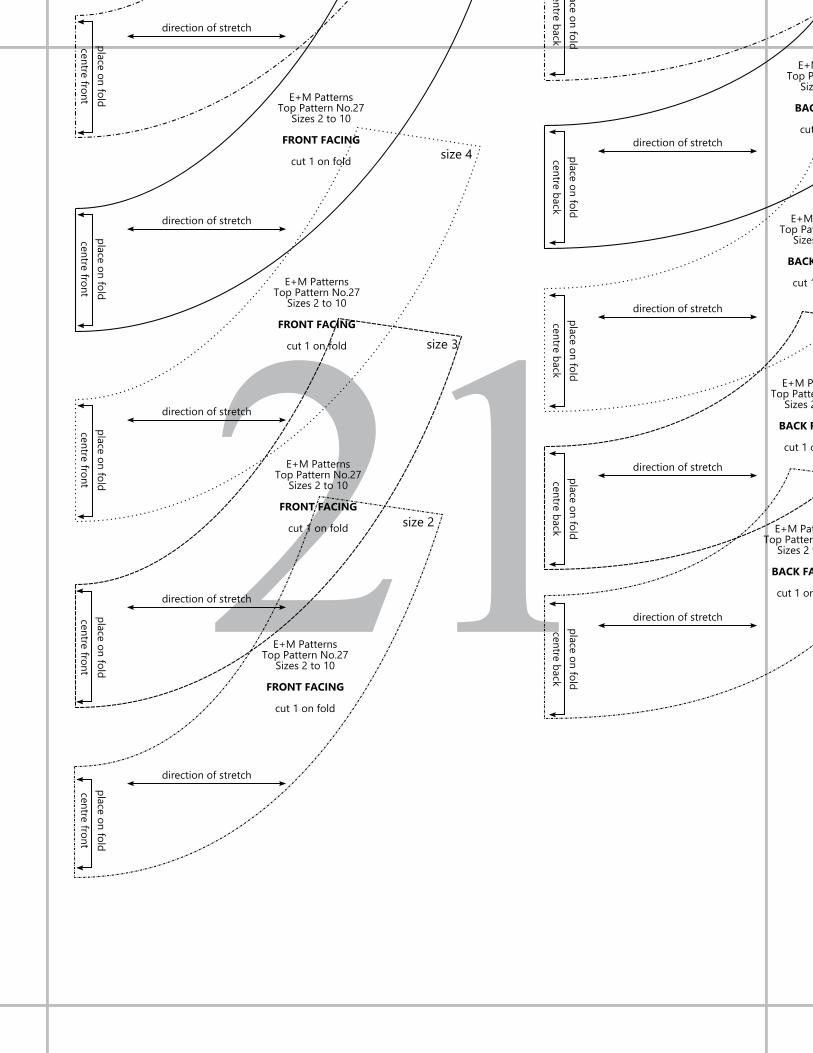
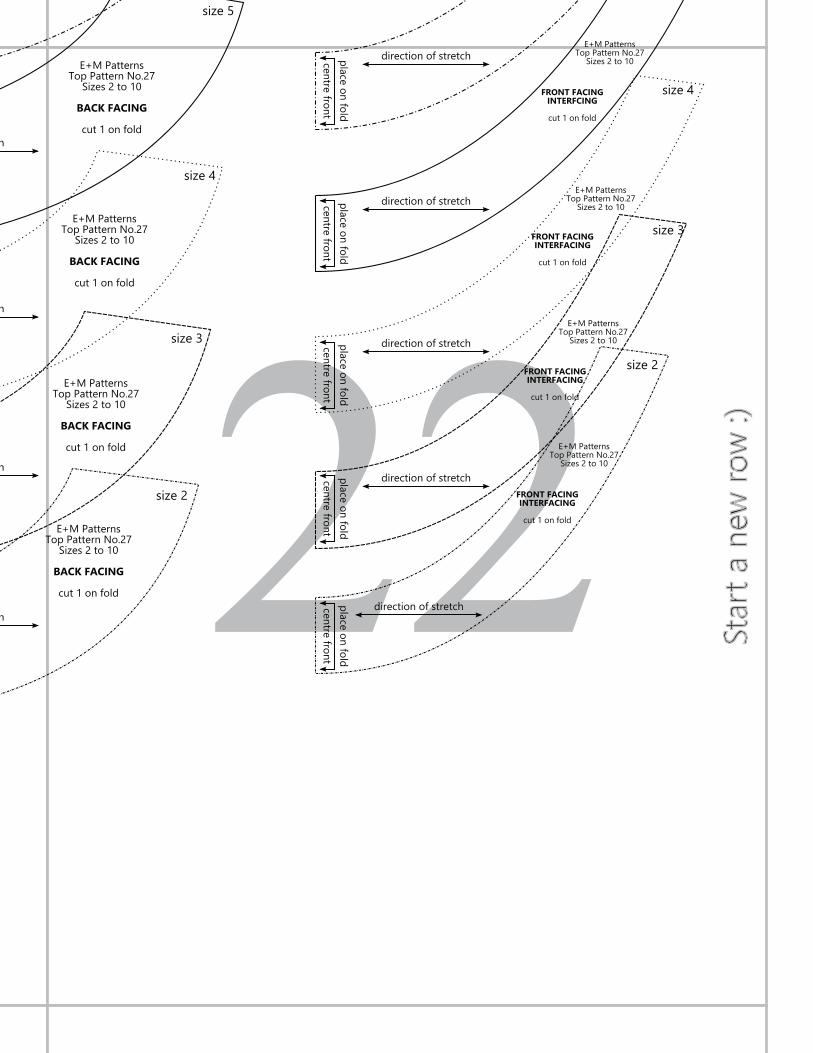
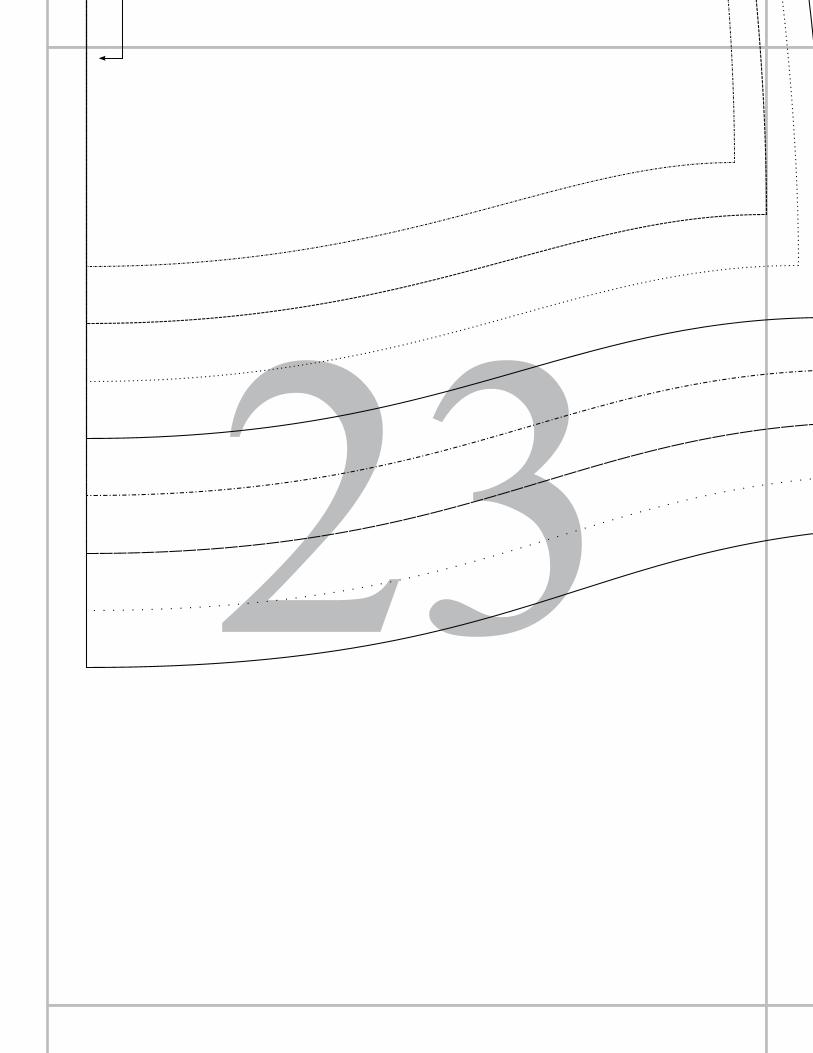
The middle of each page has a light grey number. You will need to arrange the pages so that the numbers are in
numerical order and go from left to right. When you see the rectangle with “Start a new row :)” you will need to
continue placing the rectangles together in order, but you will need to start a new row. The diagram on the following
page shows what the pattern pieces and pages should look like after they have been taped together correctly.
7 - Top Pattern No.27www.empatterns.com E+M Patterns 2016
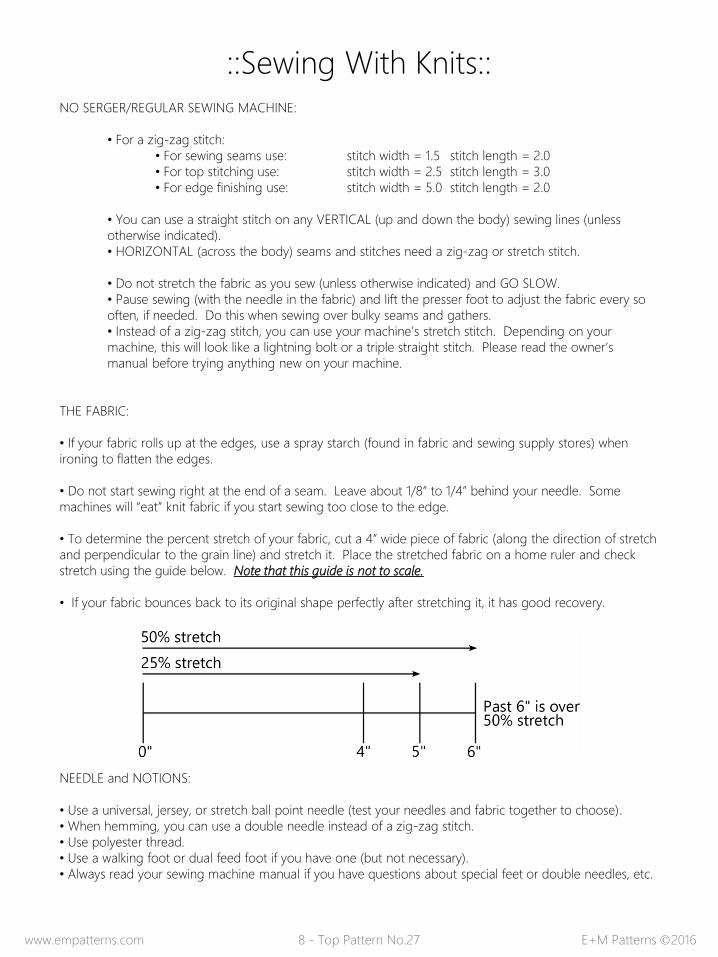
::Sewing With Knits::
NO SERGER/REGULAR SEWING MACHINE:
• For a zig-zag stitch:
• For sewing seams use: stitch width = 1.5 stitch length = 2.0
• For top stitching use: stitch width = 2.5 stitch length = 3.0
• For edge finishing use: stitch width = 5.0 stitch length = 2.0
• You can use a straight stitch on any VERTICAL (up and down the body) sewing lines (unless
otherwise indicated).
• HORIZONTAL (across the body) seams and stitches need a zig-zag or stretch stitch.
• Do not stretch the fabric as you sew (unless otherwise indicated) and GO SLOW.
• Pause sewing (with the needle in the fabric) and lift the presser foot to adjust the fabric every so
often, if needed. Do this when sewing over bulky seams and gathers.
• Instead of a zig-zag stitch, you can use your machine’s stretch stitch. Depending on your
machine, this will look like a lightning bolt or a triple straight stitch. Please read the owner’s
manual before trying anything new on your machine.
THE FABRIC:
• If your fabric rolls up at the edges, use a spray starch (found in fabric and sewing supply stores) when
ironing to flatten the edges.
• Do not start sewing right at the end of a seam. Leave about 1/8” to 1/4” behind your needle. Some
machines will “eat” knit fabric if you start sewing too close to the edge.
• To determine the percent stretch of your fabric, cut a 4” wide piece of fabric (along the direction of stretch
and perpendicular to the grain line) and stretch it. Place the stretched fabric on a home ruler and check
stretch using the guide below. Note that this guide is not to scale.
• If your fabric bounces back to its original shape perfectly after stretching it, it has good recovery.
NEEDLE and NOTIONS:
• Use a universal, jersey, or stretch ball point needle (test your needles and fabric together to choose).
• When hemming, you can use a double needle instead of a zig-zag stitch.
• Use polyester thread.
• Use a walking foot or dual feed foot if you have one (but not necessary).
• Always read your sewing machine manual if you have questions about special feet or double needles, etc.
8 - Top Pattern No.27www.empatterns.com E+M Patterns 2016
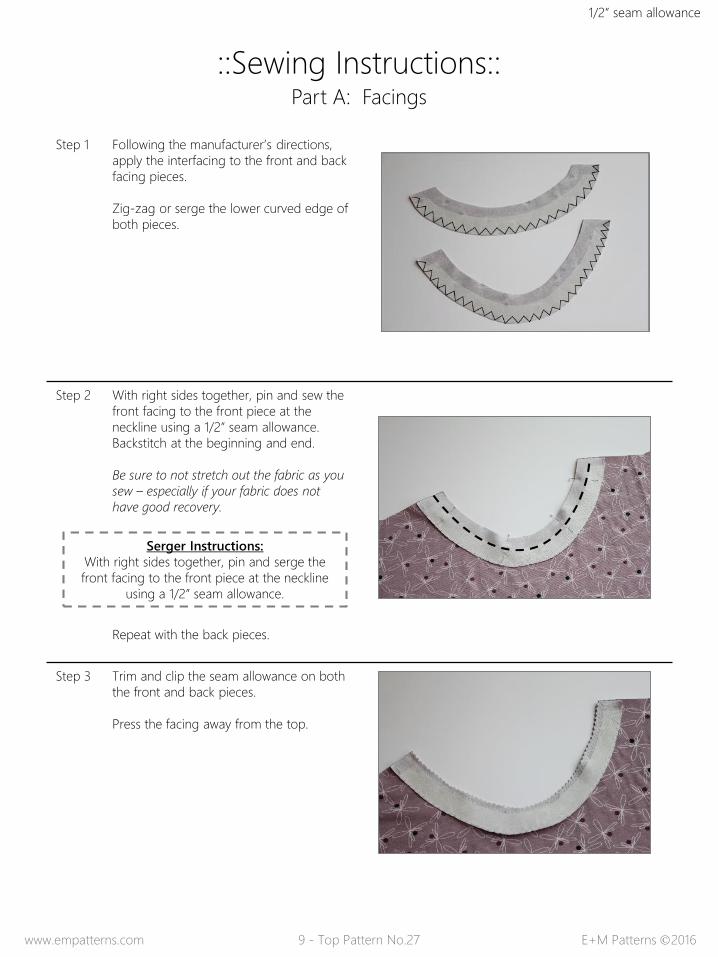
::Sewing Instructions::Part A: Facings
Step 1 Following the manufacturer’s directions,
apply the interfacing to the front and back
facing pieces.
Zig-zag or serge the lower curved edge of
both pieces.
Step 2 With right sides together, pin and sew the
front facing to the front piece at the
neckline using a 1/2” seam allowance.
Backstitch at the beginning and end.
Be sure to not stretch out the fabric as you
sew – especially if your fabric does not
have good recovery.
Repeat with the back pieces.
Step 3 Trim and clip the seam allowance on both
the front and back pieces.
Press the facing away from the top.
1/2” seam allowance
9 - Top Pattern No.27www.empatterns.com E+M Patterns 2016
Serger Instructions:
With right sides together, pin and serge the
front facing to the front piece at the neckline
using a 1/2” seam allowance.
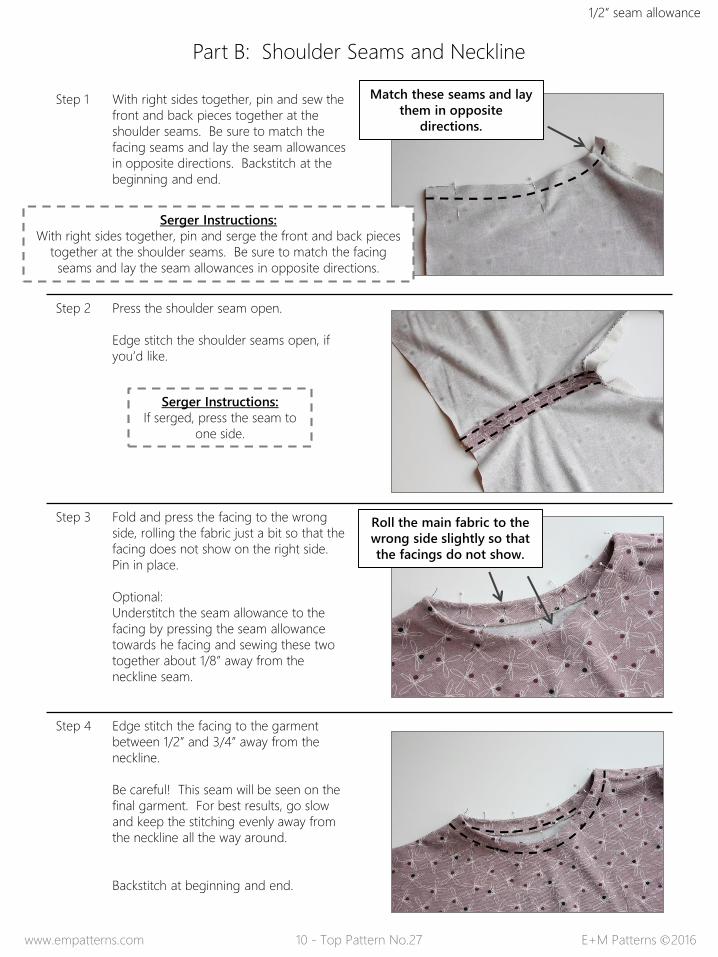
Part B: Shoulder Seams and Neckline
Step 1 With right sides together, pin and sew the
front and back pieces together at the
shoulder seams. Be sure to match the
facing seams and lay the seam allowances
in opposite directions. Backstitch at the
beginning and end.
Step 2 Press the shoulder seam open.
Edge stitch the shoulder seams open, if
you’d like.
Step 3 Fold and press the facing to the wrong
side, rolling the fabric just a bit so that the
facing does not show on the right side.
Pin in place.
Optional:
Understitch the seam allowance to the
facing by pressing the seam allowance
towards he facing and sewing these two
together about 1/8” away from the
neckline seam.
Step 4 Edge stitch the facing to the garment
between 1/2” and 3/4” away from the
neckline.
Be careful! This seam will be seen on the
final garment. For best results, go slow
and keep the stitching evenly away from
the neckline all the way around.
Backstitch at beginning and end.
1/2” seam allowance
10 - Top Pattern No.27www.empatterns.com E+M Patterns 2016
Serger Instructions:
With right sides together, pin and serge the front and back pieces
together at the shoulder seams. Be sure to match the facing
seams and lay the seam allowances in opposite directions.
Match these seams and lay
them in opposite
directions.
Roll the main fabric to the
wrong side slightly so that
the facings do not show.
Serger Instructions:
If serged, press the seam to
one side.
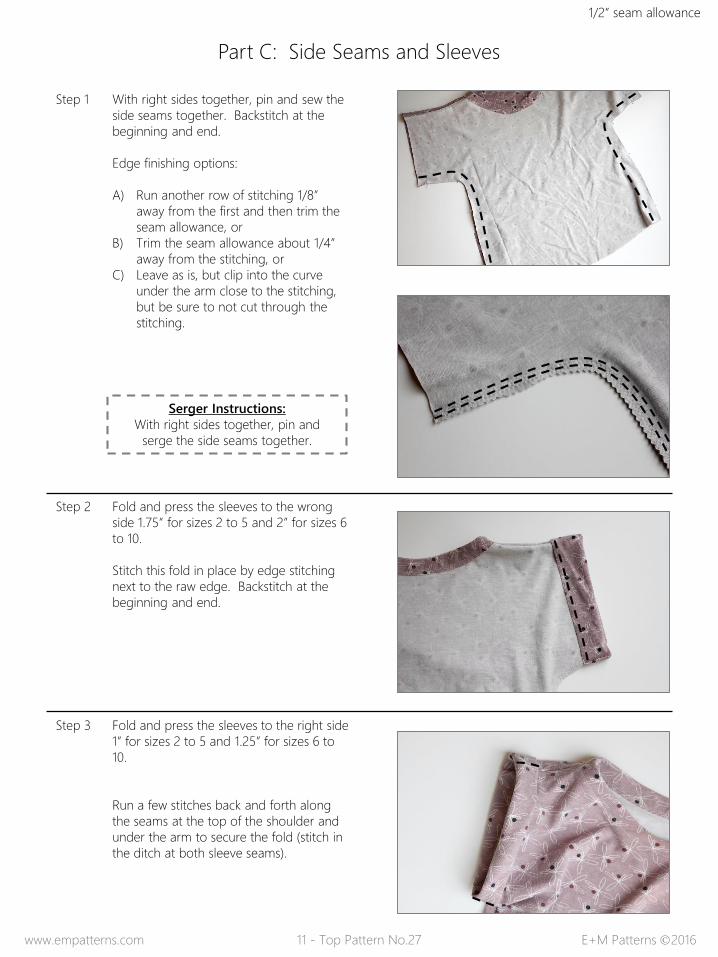
Part C: Side Seams and Sleeves
Step 1 With right sides together, pin and sew the
side seams together. Backstitch at the
beginning and end.
Edge finishing options:
A) Run another row of stitching 1/8”
away from the first and then trim the
seam allowance, or
B) Trim the seam allowance about 1/4”
away from the stitching, or
C) Leave as is, but clip into the curve
under the arm close to the stitching,
but be sure to not cut through the
stitching.
Step 2 Fold and press the sleeves to the wrong
side 1.75” for sizes 2 to 5 and 2” for sizes 6
to 10.
Stitch this fold in place by edge stitching
next to the raw edge. Backstitch at the
beginning and end.
Step 3 Fold and press the sleeves to the right side
1” for sizes 2 to 5 and 1.25” for sizes 6 to
10.
Run a few stitches back and forth along
the seams at the top of the shoulder and
under the arm to secure the fold (stitch in
the ditch at both sleeve seams).
1/2” seam allowance
11 - Top Pattern No.27www.empatterns.com E+M Patterns 2016
Serger Instructions:
With right sides together, pin and
serge the side seams together.
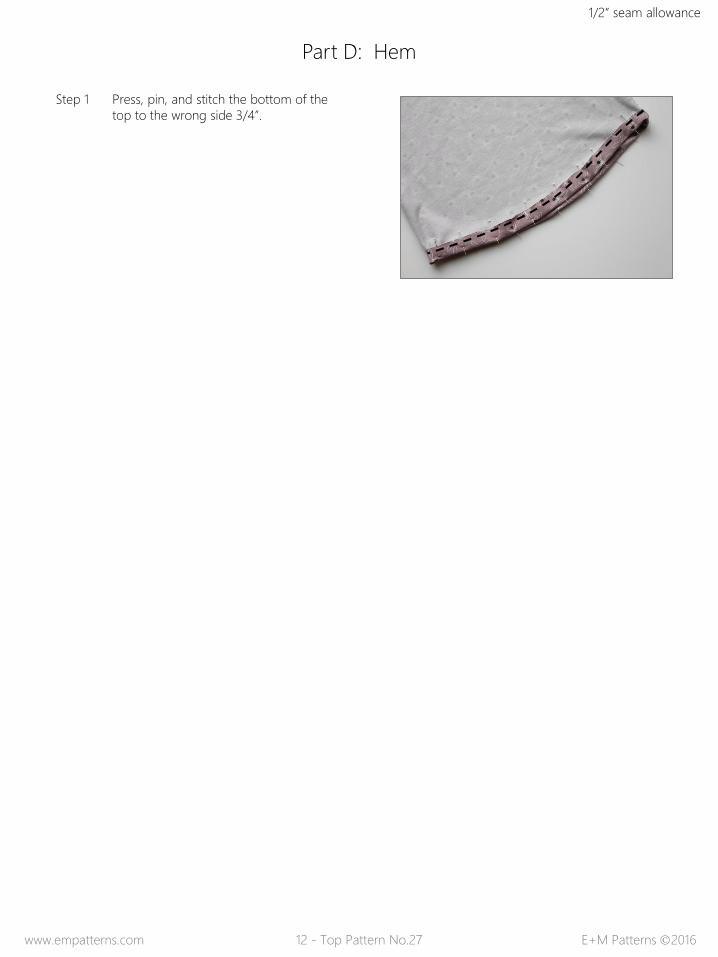
Part D: Hem
Step 1 Press, pin, and stitch the bottom of the
top to the wrong side 3/4”.
1/2” seam allowance
12 - Top Pattern No.27www.empatterns.com E+M Patterns 2016
13
13 14
14 15
15 16
16 17 Star
t a n
ew ro
w :)
18
18 19
19 20
20 21
21 22 Star
t a n
ew ro
w :)
23
23 24
24 25