Embed Size (px)
Citation preview
-
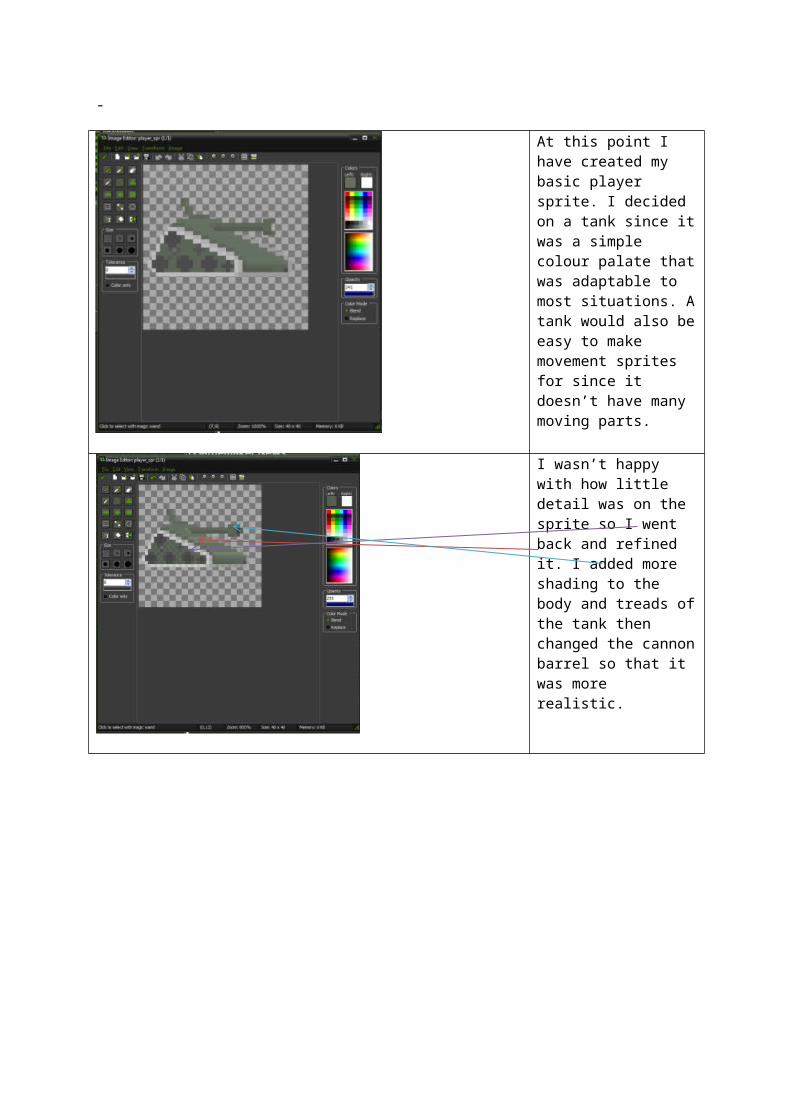
At this point I have created my basic player sprite. I decided on a tank since it was a simple colour palate that was adaptable to most situations. A tank would also be easy to make movement sprites for since it doesn’t have many moving parts.
I wasn’t happy with how little detail was on the sprite so I went back and refined it. I added more shading to the body and treads of the tank then changed the cannon barrel so that it was more realistic.
In the top window I have changed the “focal point” of the sprite to be the centre (20, 20) then moved into the bottom window to change the collision box on it so that it seems realistic by increasing the “alpha tolerance” to 80. If I were to improve this further I would remove the top of the hit box since the top hatch on a tank isn’t overly important.
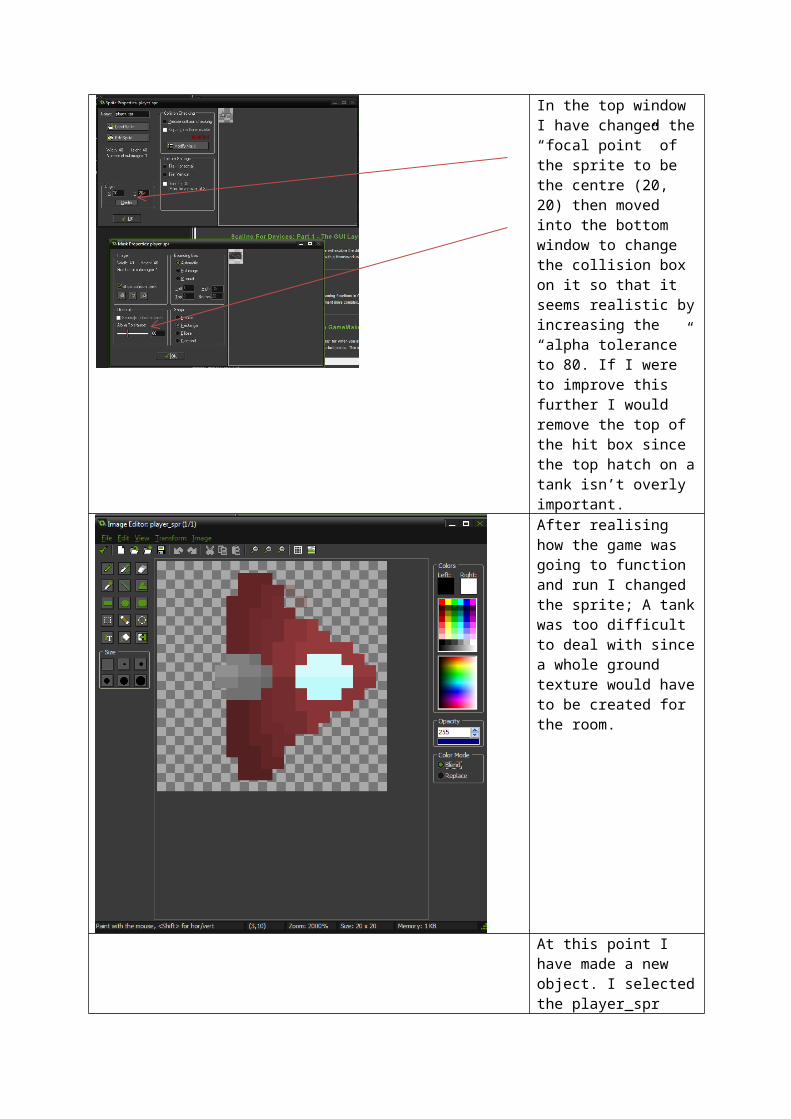
After realising how the game was going to function and run I changed the sprite; A tank was too difficult to deal with since a whole ground texture would have to be created for the room.
At this point I have made a new object. I selected the player_spr image for the sprite and made it a visible solid object. The next step is to add an event.
Now I’ve chosen the event to be a “step” even. The “movement” tab was discouraged so I have moved to the “control” tab.

I dragged and dropped an “execute code” from the code list into the actions space which opened up a window to type my coding into.
At this point I have coded the tank to be able to move left and right. I didn’t code for up and down since tanks can’t jump or duck. The coding that has “///” before it is a hint, and the coding that is between the “{“and “}” brackets is what happens when the orange writing is triggered. In this case it will make the sprite move certain amounts when the button (red text after orange text) is pressed.
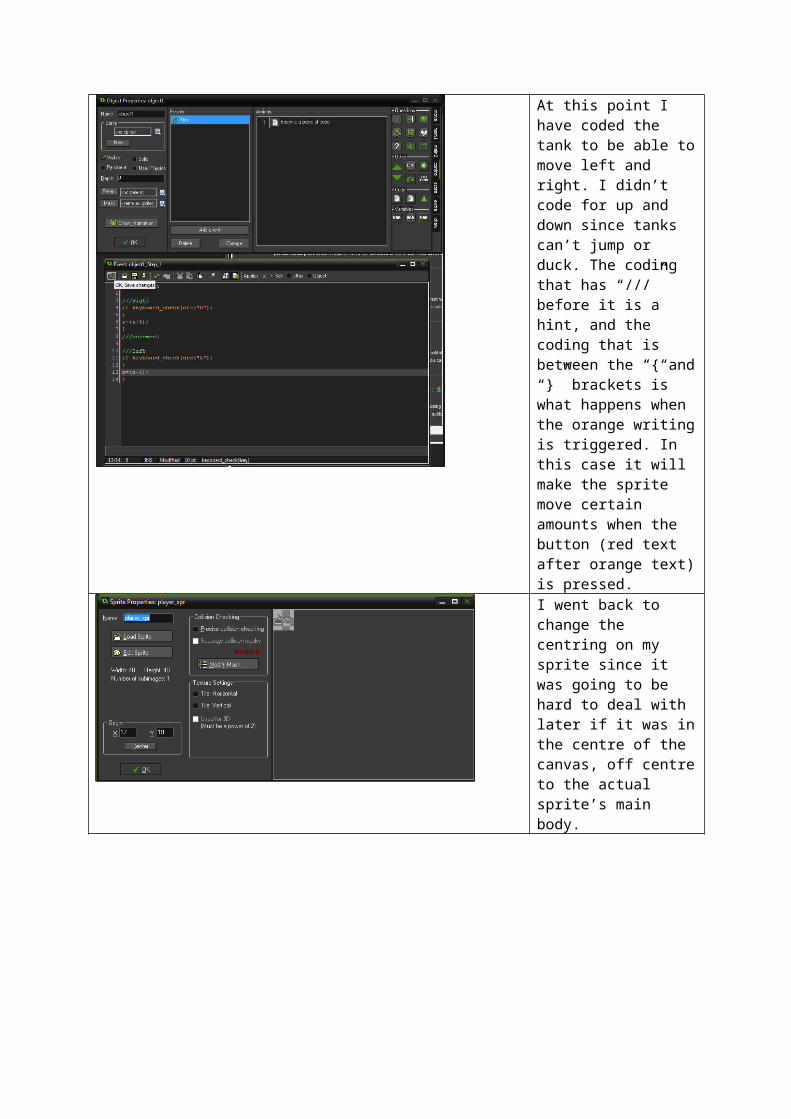
I went back to change the centring on my sprite since it was going to be hard to deal with later if it was in the centre of the canvas, off centre to the actual sprite’s main body.
At this point I have added a boundaries code to the movement step to stop the player1 object from going off of the screen. Just like the movement, I have used a hint and “{}” brackets to create code preventing the object from leaving the boundaries of the screen.
This is the background that will have no black on it. I added the black so the stars would be easier to see, and will remove it after I write this line.

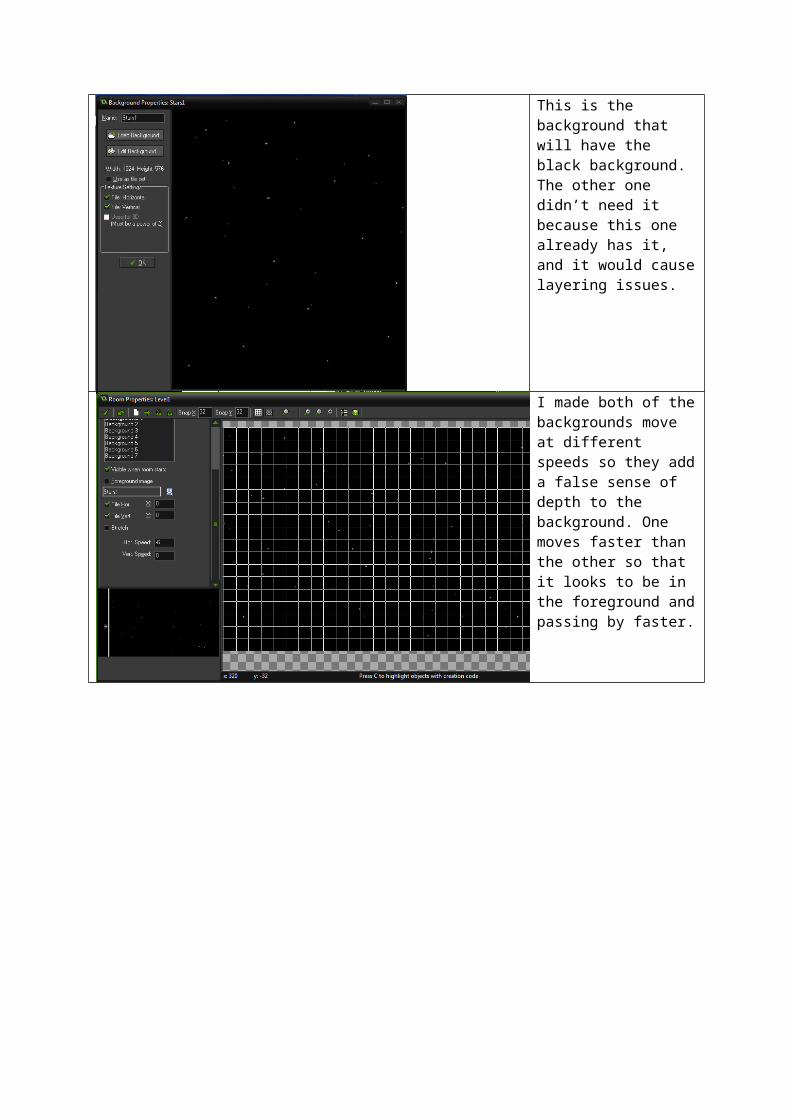
This is the background that will have the black background. The other one didn’t need it because this one already has it, and it would cause layering issues.
I made both of the backgrounds move at different speeds so they add a false sense of depth to the background. One moves faster than the other so that it looks to be in the foreground and passing by faster.
After I created the scrolling background I added a particle effect to the player1 object to make it look as if there was a stream of energy coming out of the engine at the back. I created a new object called “jet” and created a step event (above) and added a code action to it. Shown below is the code used to make the jet steam more exciting: gravitation, fade, and a sense of depth. This all resulted in a green jet steam coming out of the engine on my sprite that followed the ship around and got smaller and smaller till it faded away.
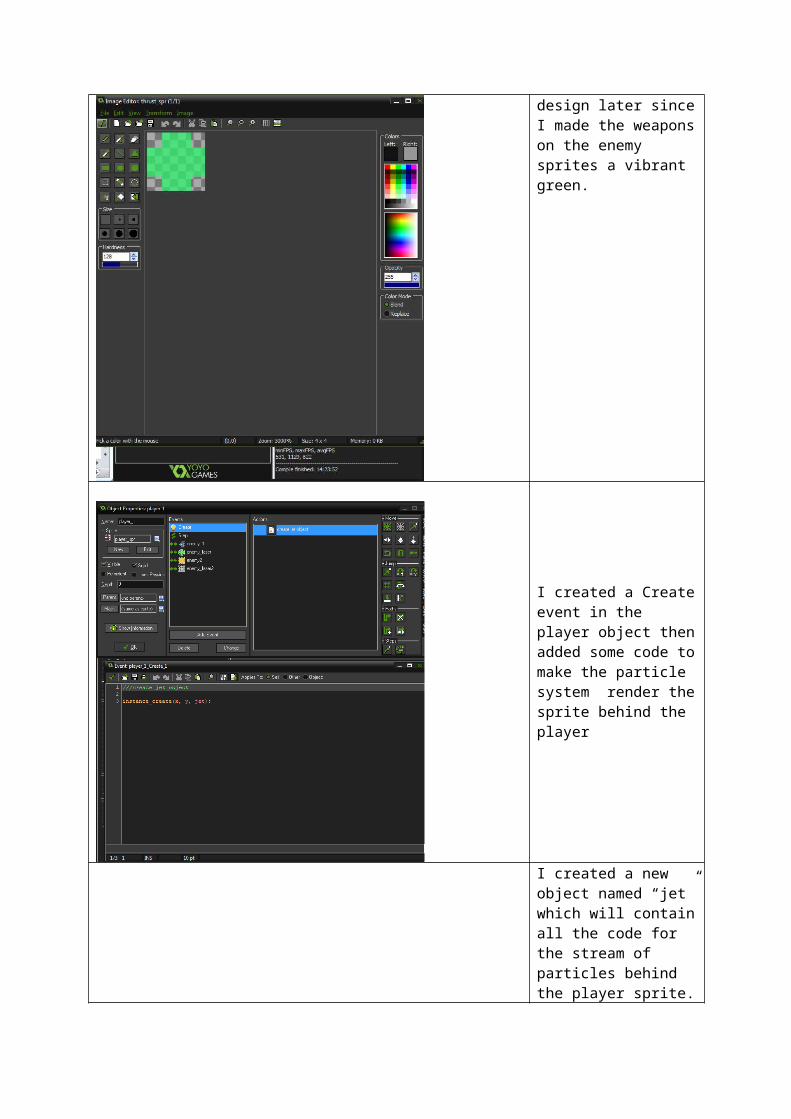
This is the sprite I used for the particle effect. I decided on green since it contrasted with the dark of space in the background and the dusty red of the player’s sprite. I might reconsider this design later since I made the weapons on the enemy sprites a vibrant green.

I created a Create event in the player object then added some code to make the particle system render the sprite behind the player
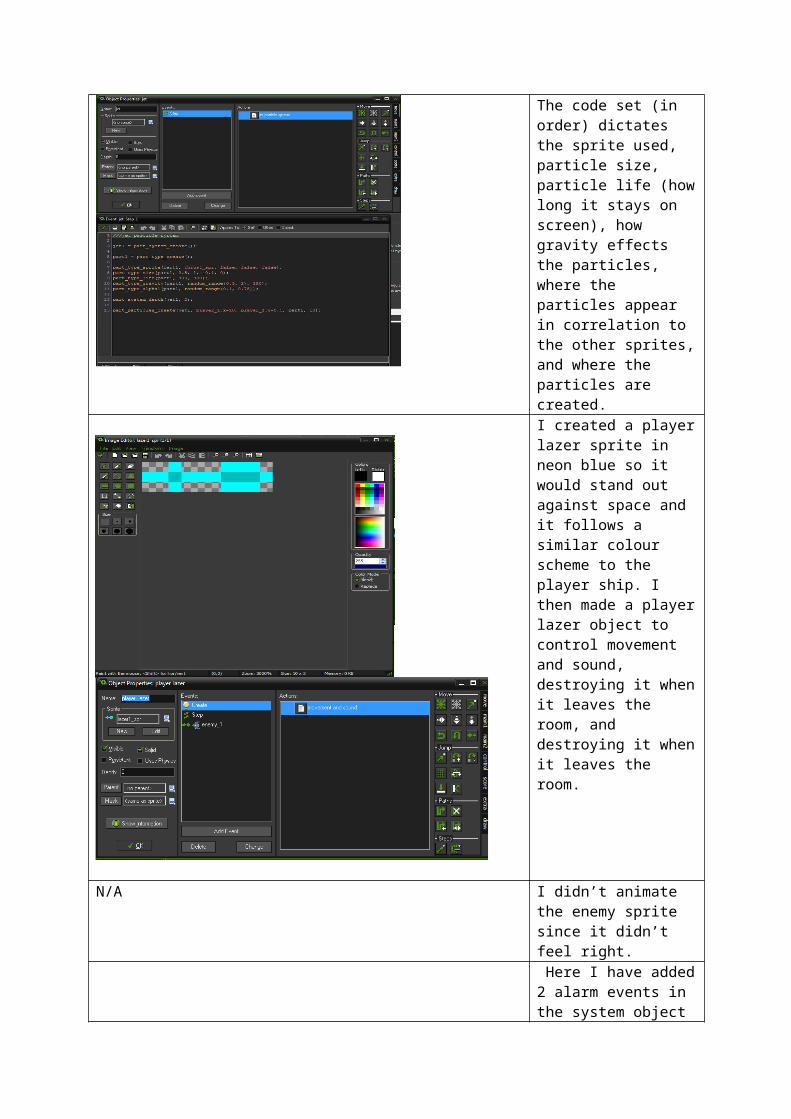
I created a new object named “jet” which will contain all the code for the stream of particles behind the player sprite. The code set (in order) dictates the sprite used, particle size, particle life (how long it stays on screen), how gravity effects the particles, where the particles appear in correlation to the other sprites, and where the particles are created.
I created a player lazer sprite in neon blue so it would stand out against space and it follows a similar colour scheme to the player ship. I then made a player lazer object to control movement and sound, destroying it when it leaves the room, and destroying it when it leaves the room.
N/A I didn’t animate the enemy sprite since it didn’t feel right.
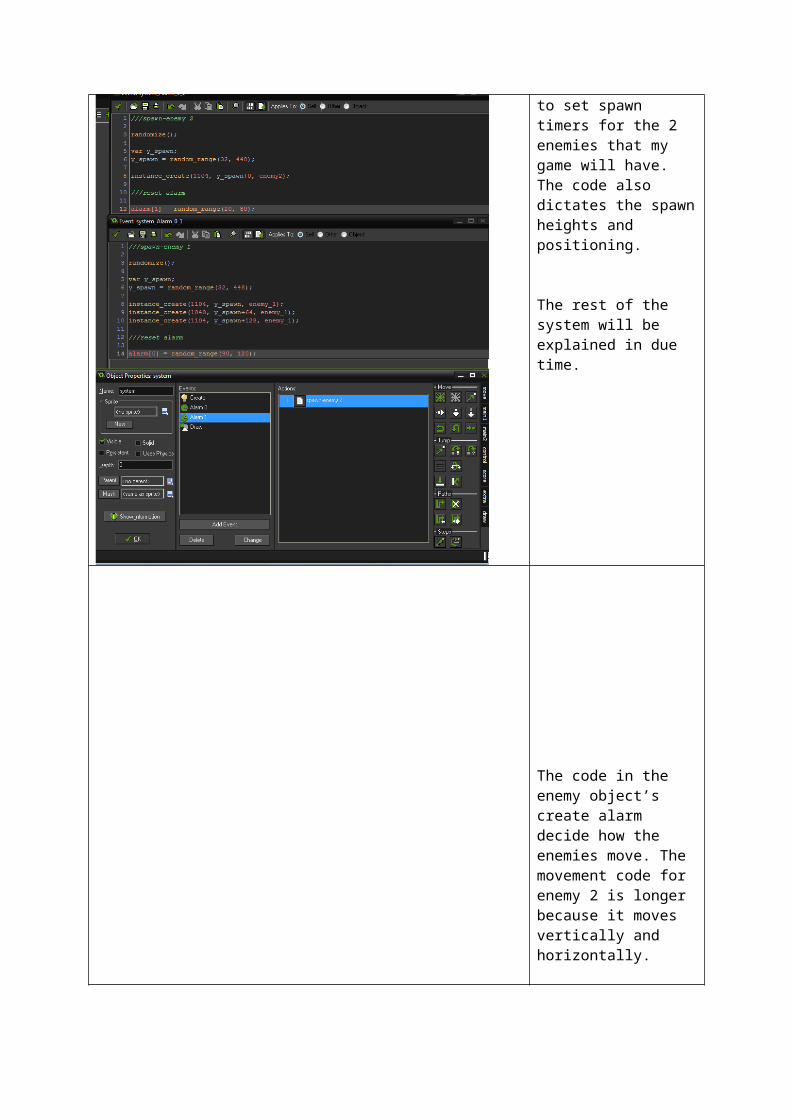
Here I have added 2 alarm events in the system object to set spawn timers for the 2 enemies that my game will have. The code also dictates the spawn heights and positioning.
The rest of the system will be explained in due time.
The code in the enemy object’s create alarm decide how the enemies move. The movement code for enemy 2 is longer because it moves vertically and horizontally.
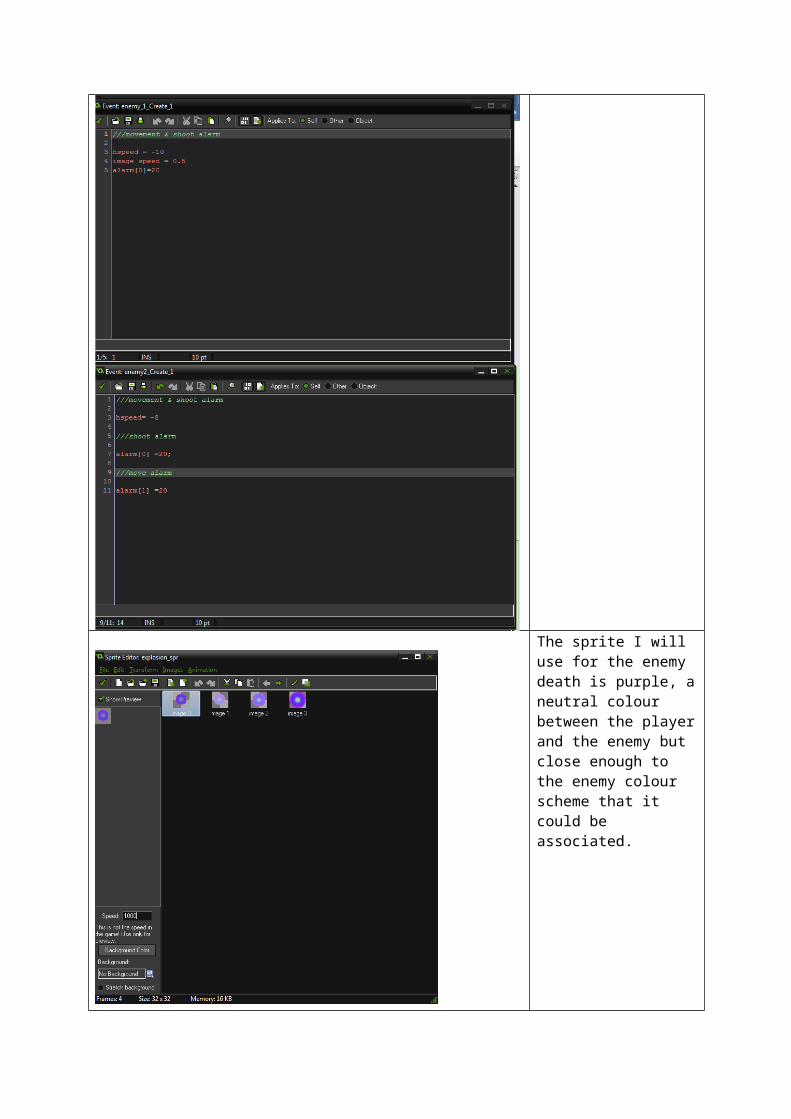
The sprite I will use for the enemy death is purple, a neutral colour between the player and the enemy but close enough to the enemy colour scheme that it could be associated.
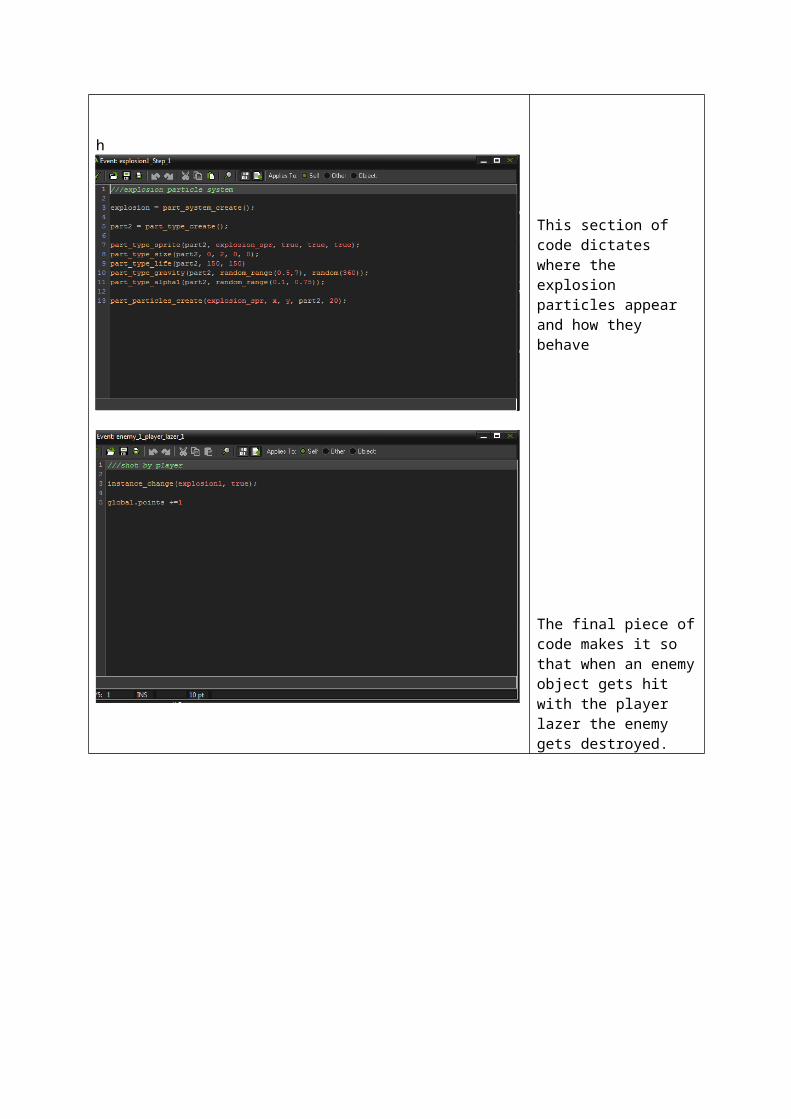
hThis section of code dictates where the explosion particles appear and how they behave
The final piece of code makes it so that when an enemy object gets hit with the player lazer the enemy gets destroyed.
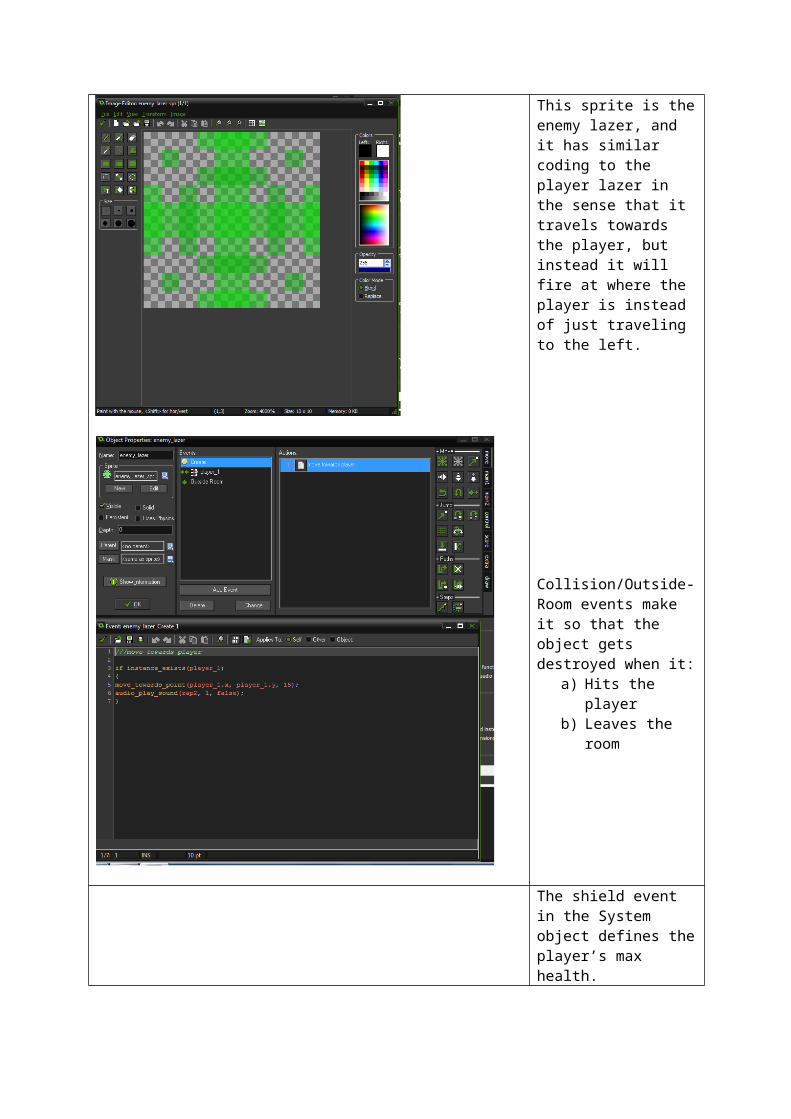
This sprite is the enemy lazer, and it has similar coding to the player lazer in the sense that it travels towards the player, but instead it will fire at where the player is instead of just traveling to the left.
Collision/Outside-Room events make it so that the object gets destroyed when it:
a) Hits the playerb) Leaves the room
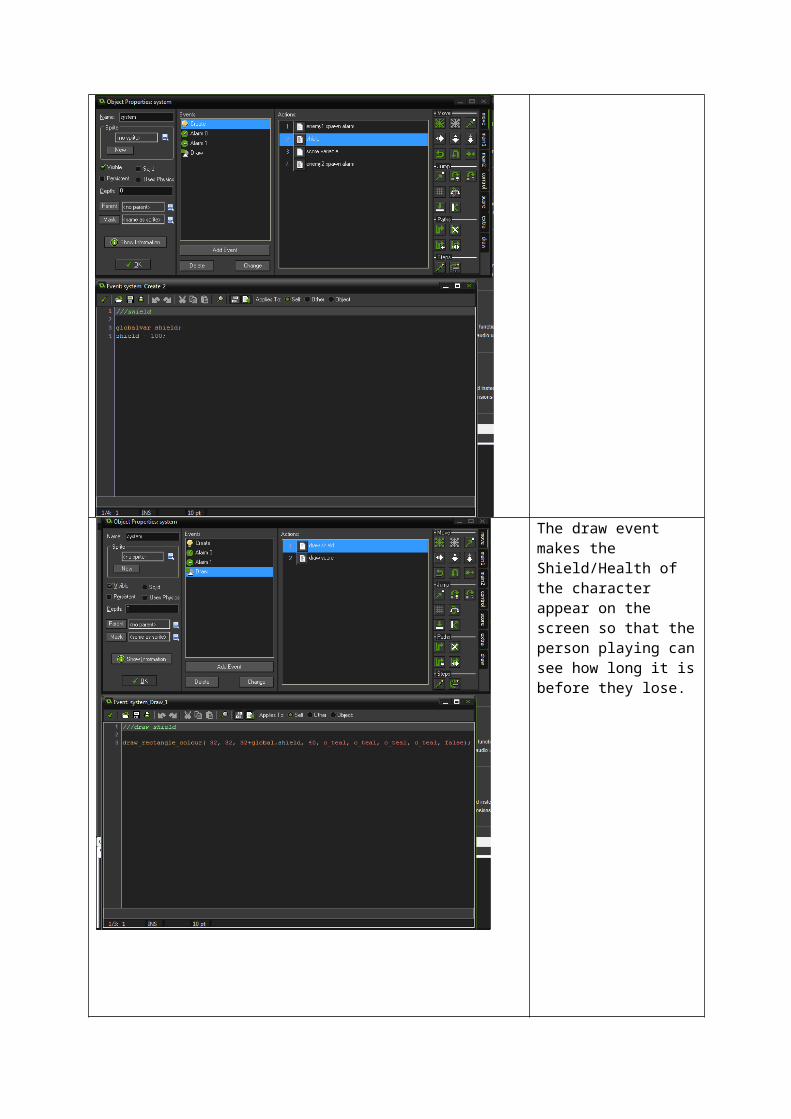
The shield event in the System object defines the player’s max health.
The draw event makes the Shield/Health of the character appear on the screen so that the person playing can see how long it is before they lose.
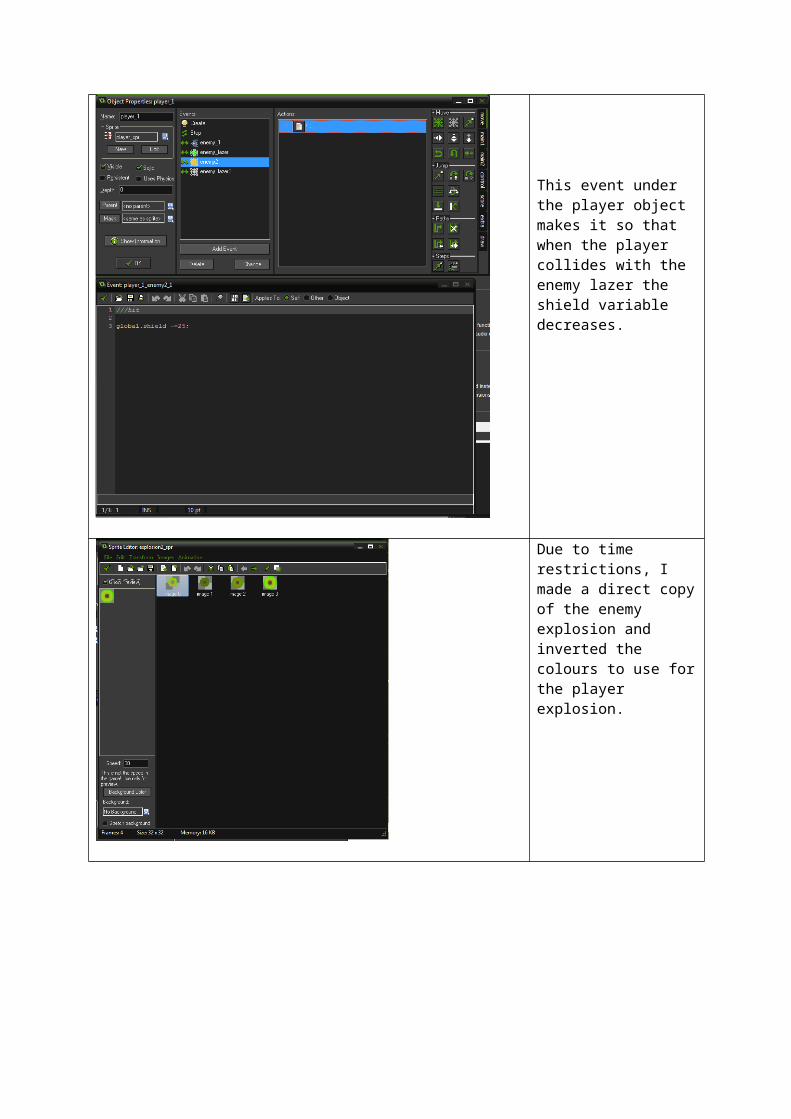
This event under the player object makes it so that when the player collides with the enemy lazer the shield variable decreases.
Due to time restrictions, I made a direct copy of the enemy explosion and inverted the colours to use for the player explosion.
This is the particle system for the player explosion and covers all of the variables the enemy explosion did.
This alarm function makes is so that when the alarm goes off, the explosion instance gets destroyed and the entire room is reset. If I wanted to take this code further and make it more advanced I could create a “Game Over” screen and make it display that.
This code sets how long the explosion lasts for and what noise is played when the alarm goes off.
I added a new piece of code in the player 1 object’s step event to determine when the alarm from explosion 2 gets triggered.
I added this code to the enemy object to prevent the enemy from shooting once the player is dead/gone.
This coding is in the system object and monitors the player’s score.
The top part of the picture is the font I will use for the score, and the second part is a draw event to make it so that the player can see their score.
This code increases the player’s score by 1 every time they destroy an enemy1 instance, and I did the same for the second enemy.

This is the sprite I will use for my second enemy. I decided on gold since it wouldn’t be overwhelming in mass amounts and added little bits of extra detail to the game.
I duplicated the enemy1 object for enemy2, but increased the spawn rate and removed all shooting code to balance it out a bit.