Embed Size (px)
Citation preview
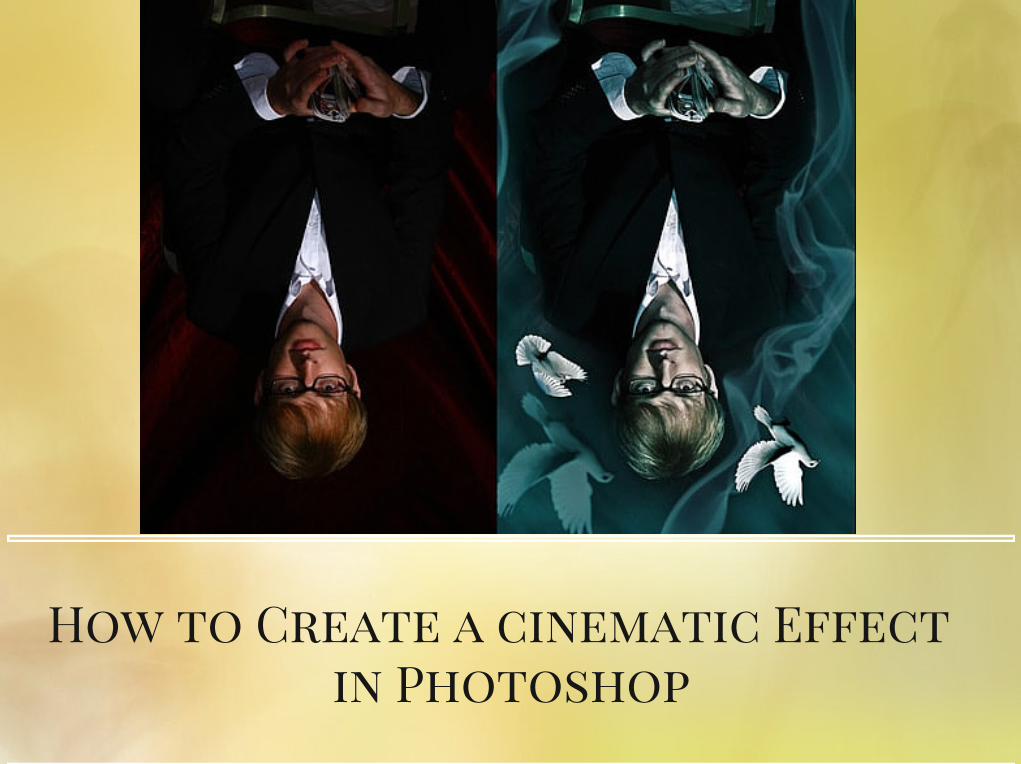
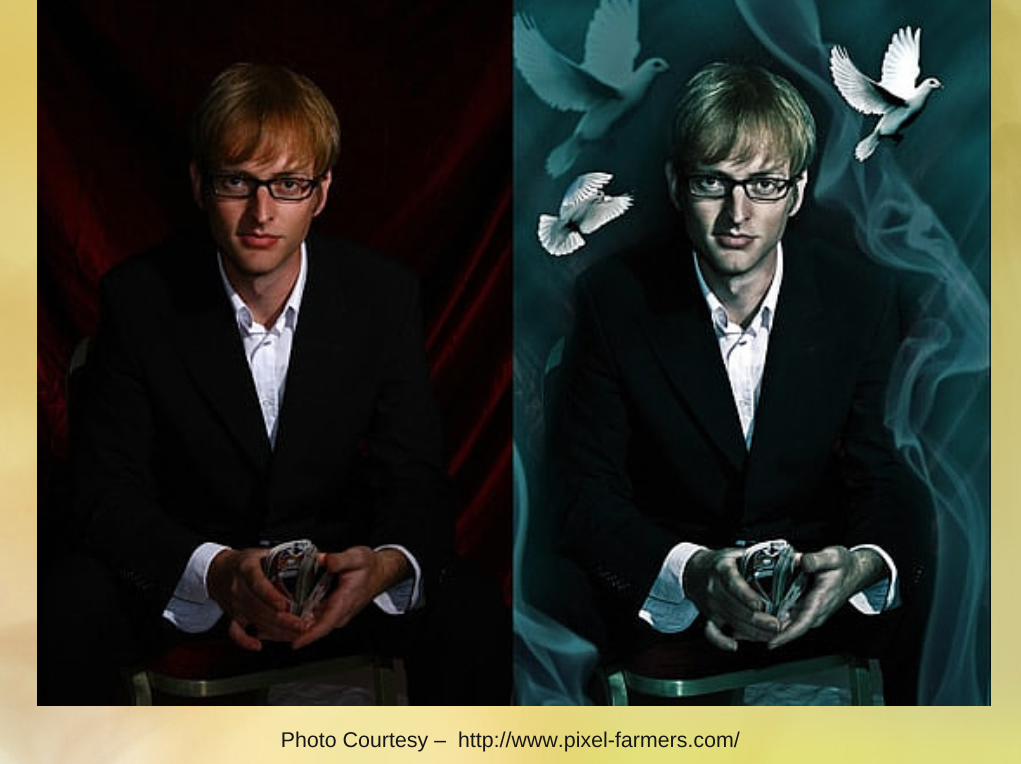
How to Create a cinematic Effect in Photoshop
In this tutorial, you will learn on how to create a cinematiceffect on your image in Photoshop.
It can be done using color curve layers with some shortcuts
using color adjustment layers and color lookup adjustment
layers.
Color grading is an adjustment that is often used in film to give
a particular cinematic effect.
This method is for creating an effect rather than correcting an
image that has a color cast.
Before you start color grading an image, make your
corrections and make sure your grays are neutral.
Color grading with color curve layers gives you the most
control and will give you the best final result but it can be a
bit daunting for those who are new to Photoshop.
If this method is overwhelming, start by mastering the use of
selective color adjustment layers or the presets in a color
lookup adjustment layer.
Create a curve layer for luminosity and set your blend modeto luminosity. Similarly, create a curve layer for color
adjustments and set your blend mode to color.
Begin with your luminosity layer and drag the point in the
shadows down to increase your shadows and drag your
highlights point up to increase your highlights.
This creates a higher contrast. Make some adjustments onthe luminosity and the contrast. Now move on to your color
curve layer and select the red channel.
Since you are adding red’s opposite (cyan) channel to your
shadows, drag the point in the graph in the lower left hand
corner to the right.
You can also adjust the red in your highlights by dragging the
point in the upper right hand corner to the left to increase the
amount of red in your highlights.
Afterwards, adjust your midtones in the center of your line
back to the middle. This protects your midtones from having a
color cast.

Next, you can do similar adjustments on the green channel
and the blue channel.
Drag the shadows up to add the color or to the right to add its
opposite in the shadows and drag the point left to add the
color or down to add its opposite.
Remember to fix your midtones after each adjustment.
If something like a skin tone has a color cast on it, like red,
this can be adjusted individually by going back to the red
channel and selecting the tone with the dropper and then
dragging the red channel down to decrease red in that color.
Lastly, open your channel mixer and choose a preset that
balances the contrast as you like it.
If you drag the opacity all the way off, you can then start to
bring it back until you reach your desired amount of contrast
and desaturation.
You can continue to play with the color channels until you reach
your desired effect. If you select black and then add cyan, you
can add this color to the shadows.
Similarly, you can add green and blue until you reach the
desired shade in your shadows.
Again, you can also add a channel mixer mask and adjust the
opacity until you reach your desired contrast and saturation
levels. That sums up the whole process.
To learn more about Photoshop Effects and other Image editing Tips & TricksVisit
clippingpathservice.com
metrodesk.com.bd
Follow us
Write [email protected]