Embed Size (px)
Citation preview
AR T 130 | INTRODUC TION TO GRAPHIC DESIGN PAGE 01AR T 130 | INTRODUC TION TO GRAPHIC DESIGN PAGE 01
I N S T R U C T I O N S
You must earn a 100% on this test to receive a passing grade in the class. You may repeat this test until you answer all questions correctly.
There are several art boards below that contain tasks for you to complete (18 tasks total). Please read and follow the directions carefully for each task.
You may look for information on-line to help you complete each task.
Save a PDF �le of this document. Make sure to save all the art boards in your �le. Use your full name as the �le name. Make sure that the Preserve Illustrator Editing Capabilities check box is selected in the Save options and then upload via the Illustrator Competency Test assignment link.
Illustrator Competency Test
YOUR NAMEYOUR NAME

AR T 130 | INTRODUC TION TO GRAPHIC DESIGN PAGE 02
2. Trace the outside of the butter�y shape using the pen tool. Use as few anchor points as possible. Match your pen tool lines as close to the butter�y shape edges as possible. Ignore the dot pattern in the image. Do not use the livetrace or livepaint tool. Please create a .5pt black stroke around your pen tool outline.
1. Basic Pen Tool forms:
a. Create the wave shape below using only 4 anchor points
b. Create the curve below using only 2 anchor points
The Pen ToolThe Pen Tool
CASEY HEYREND
AR T 130 | INTRODUC TION TO GRAPHIC DESIGN PAGE 03
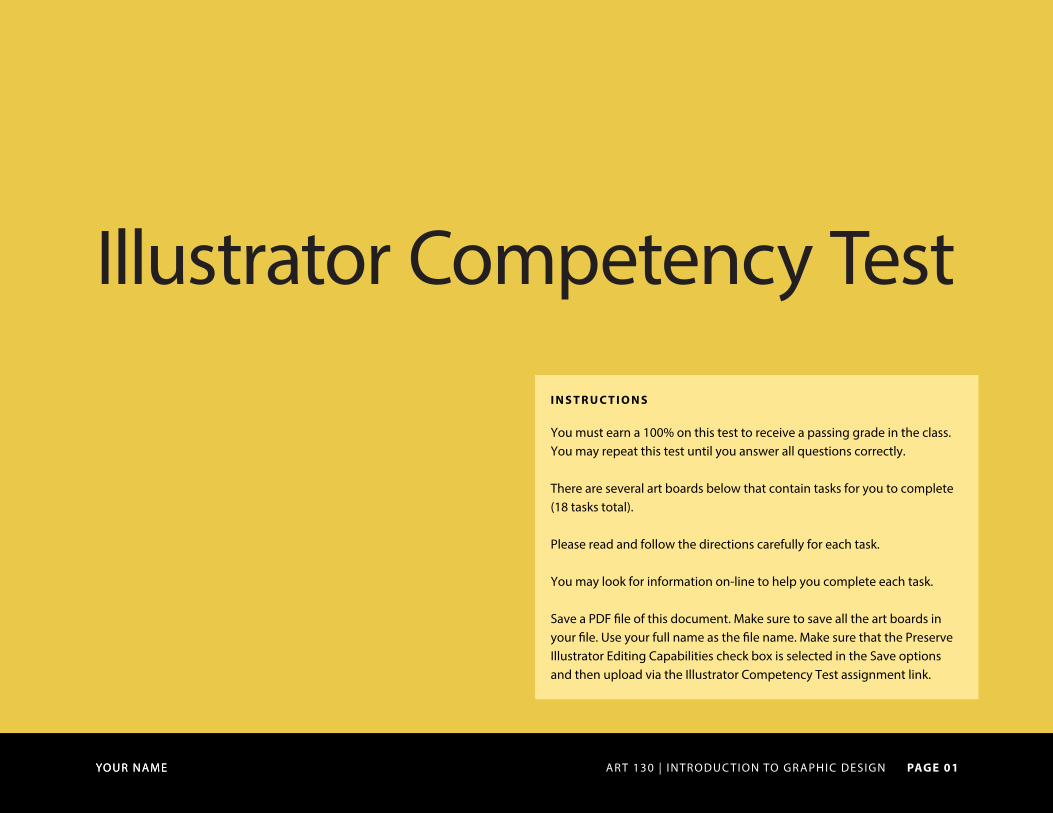
3. Select each of the following objects below and enlarge them so they �ll the box that surrounds them. Have each object touch all four sides of its surrounding box. You do not need to move the objects to complete this task, simply make them larger.
4. Using the scale tool, scale the shoe graphic up 300% making sure the stroke and e�ects are also scaled with the object.
The Scale Tool
5. Using the scale tool, scale the pattern within the T-shirt down 25% without changing the size of the object itself.
CASEY HEYREND
AR T 130 | INTRODUC TION TO GRAPHIC DESIGN PAGE 04
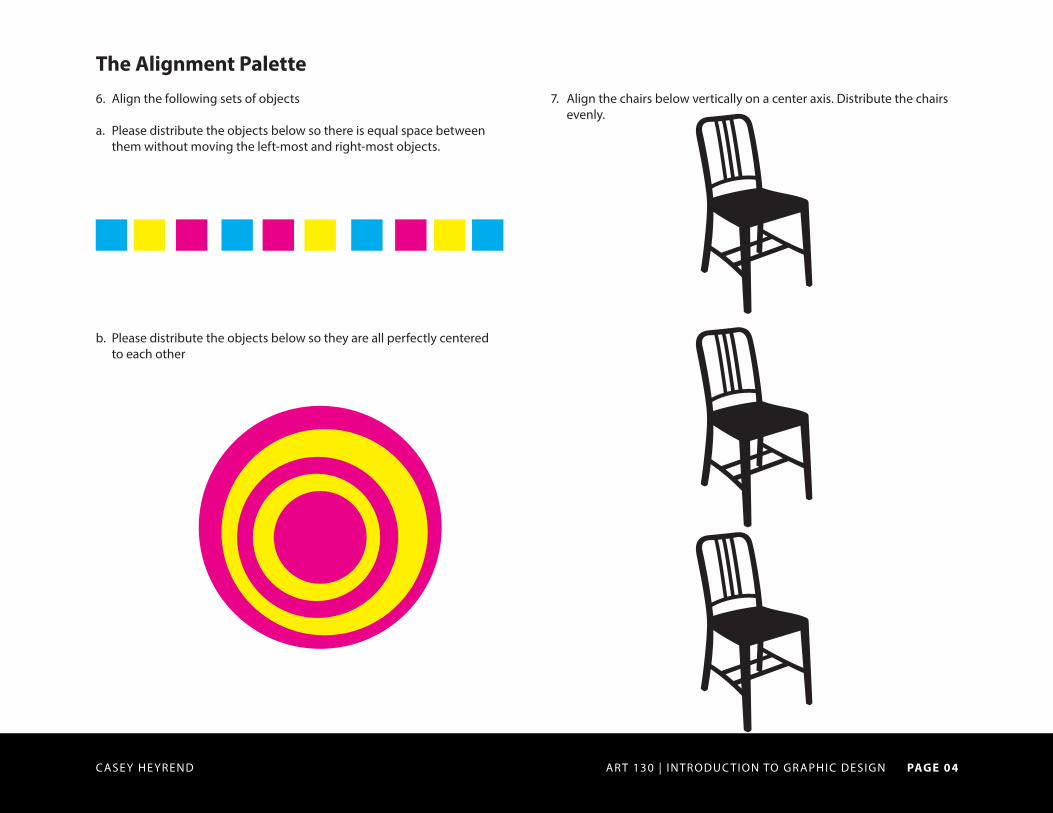
The Alignment Palette6. Align the following sets of objects
a. Please distribute the objects below so there is equal space between them without moving the left-most and right-most objects.
b. Please distribute the objects below so they are all perfectly centered to each other
7. Align the chairs below vertically on a center axis. Distribute the chairs evenly.
CASEY HEYREND
AR T 130 | INTRODUC TION TO GRAPHIC DESIGN PAGE 05
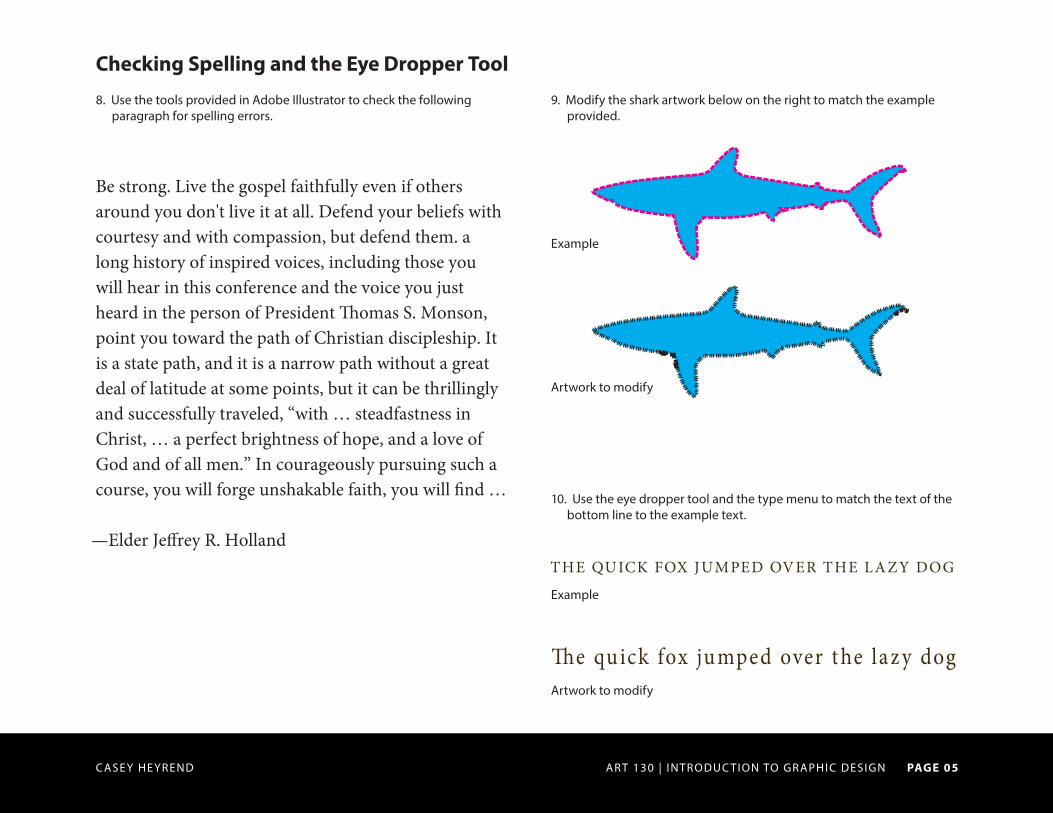
Checking Spelling and the Eye Dropper Tool
8. Use the tools provided in Adobe Illustrator to check the following paragraph for spelling errors.
9. Modify the shark artwork below on the right to match the example provided.
Example
Artwork to modify
10. Use the eye dropper tool and the type menu to match the text of the bottom line to the example text.
Example
Artwork to modify
CASEY HEYREND
THE QU ICK FOX JUMPED OVER THE LA Z Y DOG
�e quick fox ju mped over t he la z y dog
Be strong. Live the gospel faithfully even if others around you don't live it at all. Defend your beliefs with courtesy and with compassion, but defend them. a long history of inspired voices, including those you will hear in this conference and the voice you just heard in the person of President �omas S. Monson, point you toward the path of Christian discipleship. It is a state path, and it is a narrow path without a great deal of latitude at some points, but it can be thrillingly and successfully traveled, “with … steadfastness in Christ, … a perfect brightness of hope, and a love of God and of all men.” In courageously pursuing such a course, you will forge unshakable faith, you will �nd …
—Elder Je�rey R. Holland
AR T 130 | INTRODUC TION TO GRAPHIC DESIGN PAGE 06
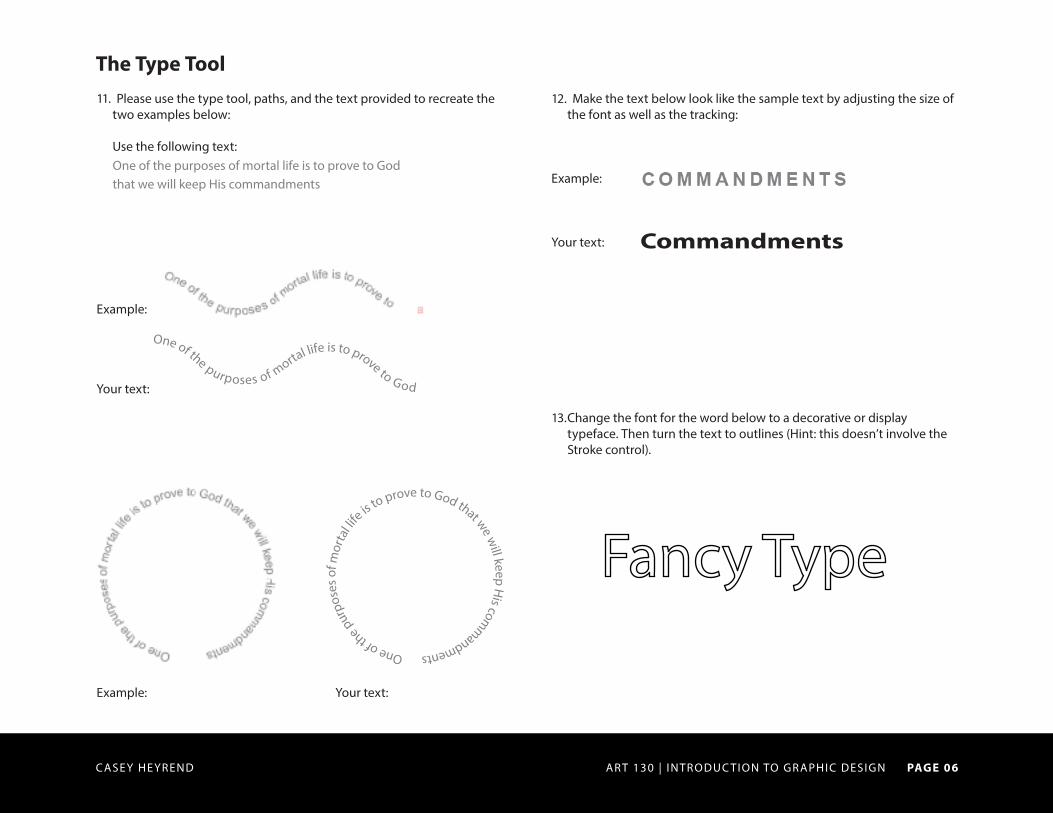
The Type Tool11. Please use the type tool, paths, and the text provided to recreate the
two examples below:
Use the following text:
12. Make the text below look like the sample text by adjusting the size of the font as well as the tracking:
Example:
Your text:
13. Change the font for the word below to a decorative or display typeface. Then turn the text to outlines (Hint: this doesn’t involve the Stroke control).
Example: Your text:
Your text:
Example:
CASEY HEYREND
Commandments
One of th
e pur
pose
s of m
orta
l life is to prove to God that we w
ill keep His com
mandmentsOne of the purposes of mortal life is to prove to God that we will keep His commandments
One of the purposes of mortal life is to prove to God
AR T 130 | INTRODUC TION TO GRAPHIC DESIGN PAGE 07
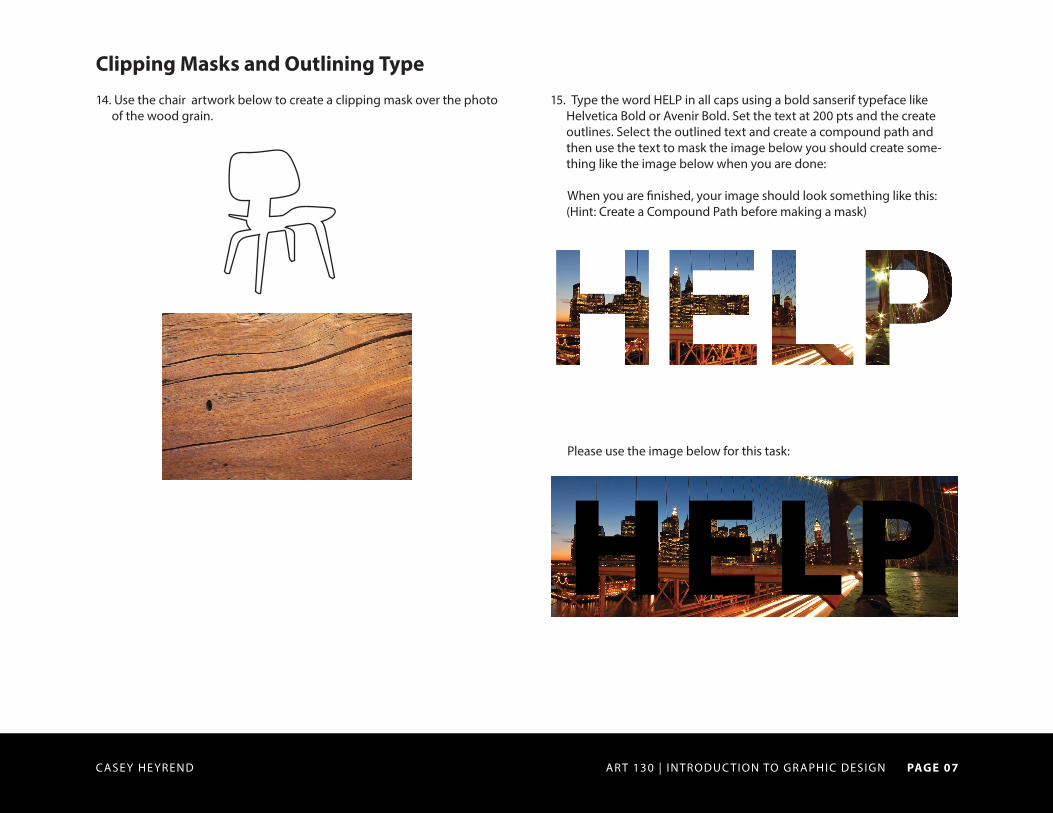
Clipping Masks and Outlining Type
14. Use the chair artwork below to create a clipping mask over the photo of the wood grain.
15. Type the word HELP in all caps using a bold sanserif typeface like Helvetica Bold or Avenir Bold. Set the text at 200 pts and the create outlines. Select the outlined text and create a compound path and then use the text to mask the image below you should create some-thing like the image below when you are done:
When you are �nished, your image should look something like this: (Hint: Create a Compound Path before making a mask)
Please use the image below for this task:
CASEY HEYREND
AR T 130 | INTRODUC TION TO GRAPHIC DESIGN PAGE 08
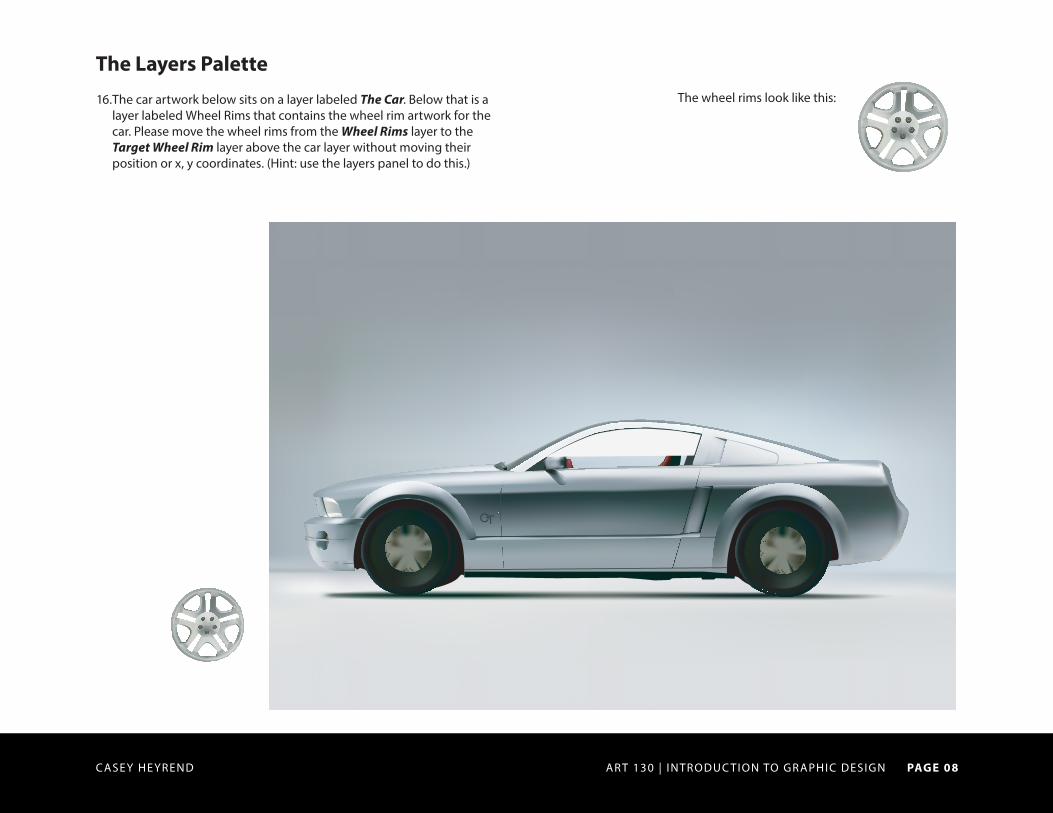
The Layers Palette
16. The car artwork below sits on a layer labeled The Car. Below that is a layer labeled Wheel Rims that contains the wheel rim artwork for the car. Please move the wheel rims from the Wheel Rims layer to the Target Wheel Rim layer above the car layer without moving their position or x, y coordinates. (Hint: use the layers panel to do this.)
The wheel rims look like this:
CASEY HEYREND
AR T 130 | INTRODUC TION TO GRAPHIC DESIGN PAGE 09
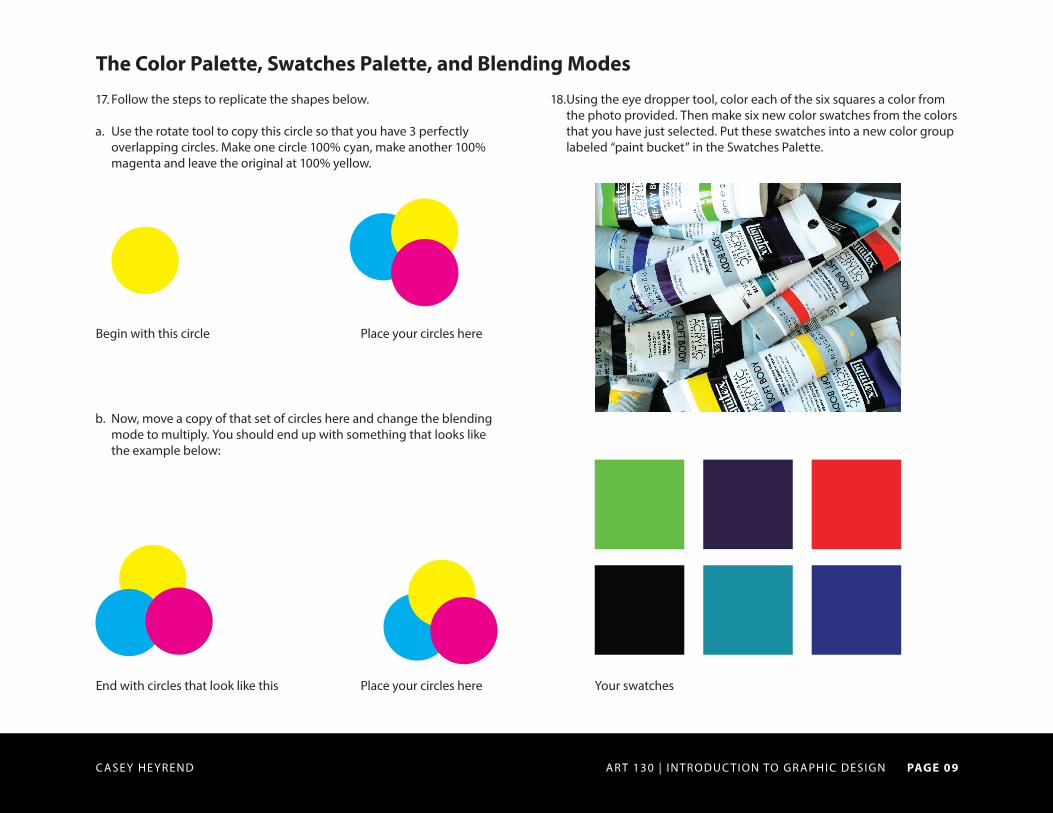
The Color Palette, Swatches Palette, and Blending Modes
17. Follow the steps to replicate the shapes below.
a. Use the rotate tool to copy this circle so that you have 3 perfectly overlapping circles. Make one circle 100% cyan, make another 100% magenta and leave the original at 100% yellow.
b. Now, move a copy of that set of circles here and change the blending mode to multiply. You should end up with something that looks like the example below:
18. Using the eye dropper tool, color each of the six squares a color from the photo provided. Then make six new color swatches from the colors that you have just selected. Put these swatches into a new color group labeled “paint bucket” in the Swatches Palette.
Begin with this circle
End with circles that look like this Place your circles here Your swatches
Place your circles here
CASEY HEYREND