Embed Size (px)
Citation preview
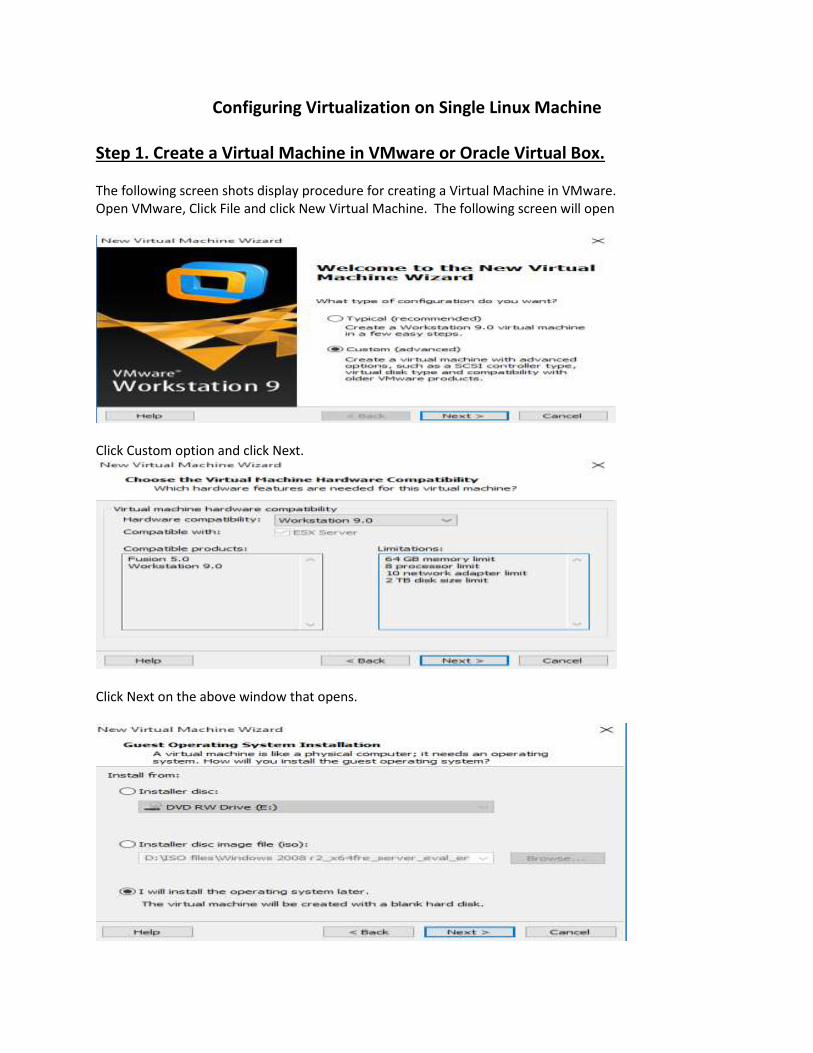
Configuring Virtualization on Single Linux Machine
Step 1. Create a Virtual Machine in VMware or Oracle Virtual Box. The following screen shots display procedure for creating a Virtual Machine in VMware. Open VMware, Click File and click New Virtual Machine. The following screen will open
Click Custom option and click Next.
Click Next on the above window that opens.

On the above screen that is displayed click to select “I will install the operating system later”. Then click Next.
On the above screen select the OS that will be installed. Click Next.
On the above screen that appears, provide the name for the virtual machine and path to directory where this virtual machine files will be stored. Then click Next.
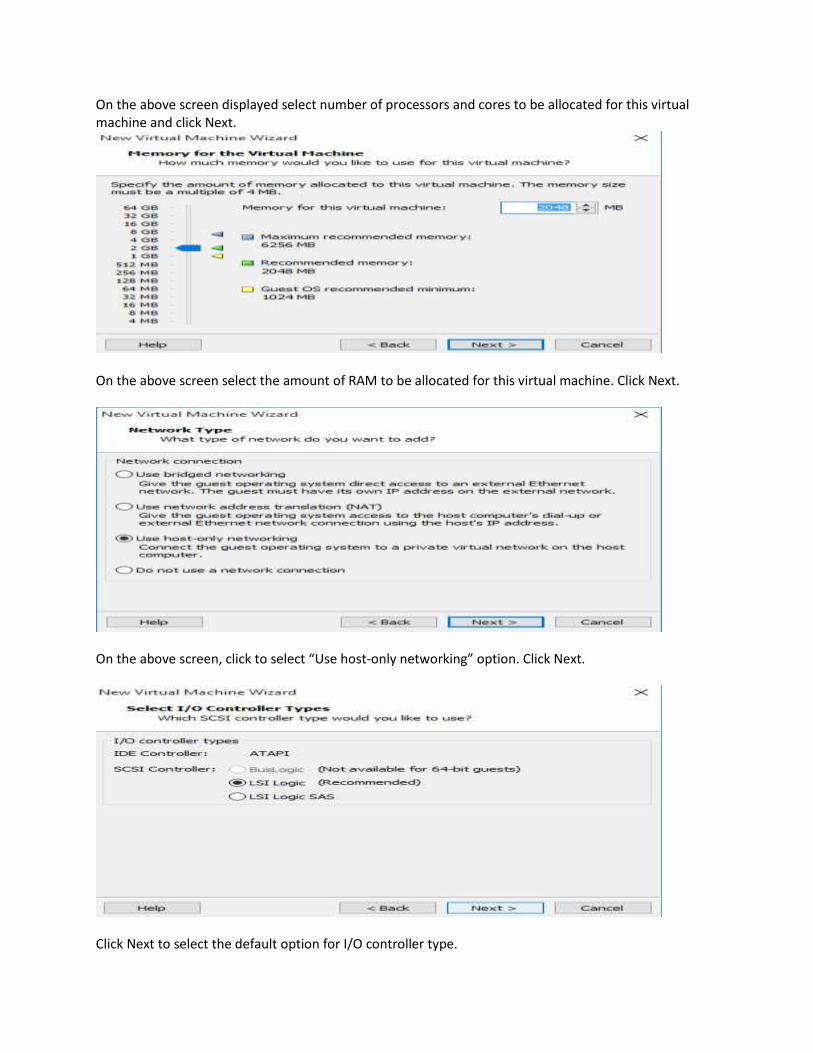
On the above screen displayed select number of processors and cores to be allocated for this virtual machine and click Next.
On the above screen select the amount of RAM to be allocated for this virtual machine. Click Next.
On the above screen, click to select “Use host-only networking” option. Click Next.
Click Next to select the default option for I/O controller type.

Click Next with Create a new Virtual Disk option selected.
Click Next to select default SCSI option.
Specify the size of the hard disk and select “Store virtual disk as a single file” option. Click Next.
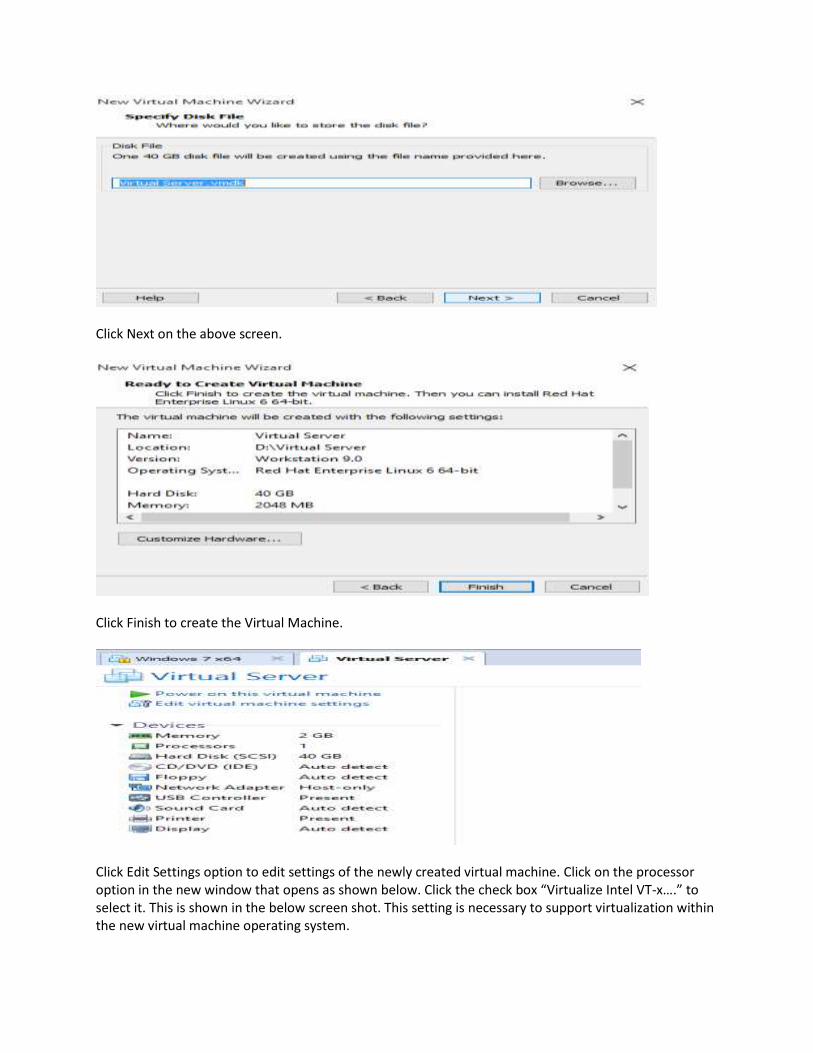
Click Next on the above screen.
Click Finish to create the Virtual Machine.
Click Edit Settings option to edit settings of the newly created virtual machine. Click on the processor option in the new window that opens as shown below. Click the check box “Virtualize Intel VT-x….” to select it. This is shown in the below screen shot. This setting is necessary to support virtualization within the new virtual machine operating system.
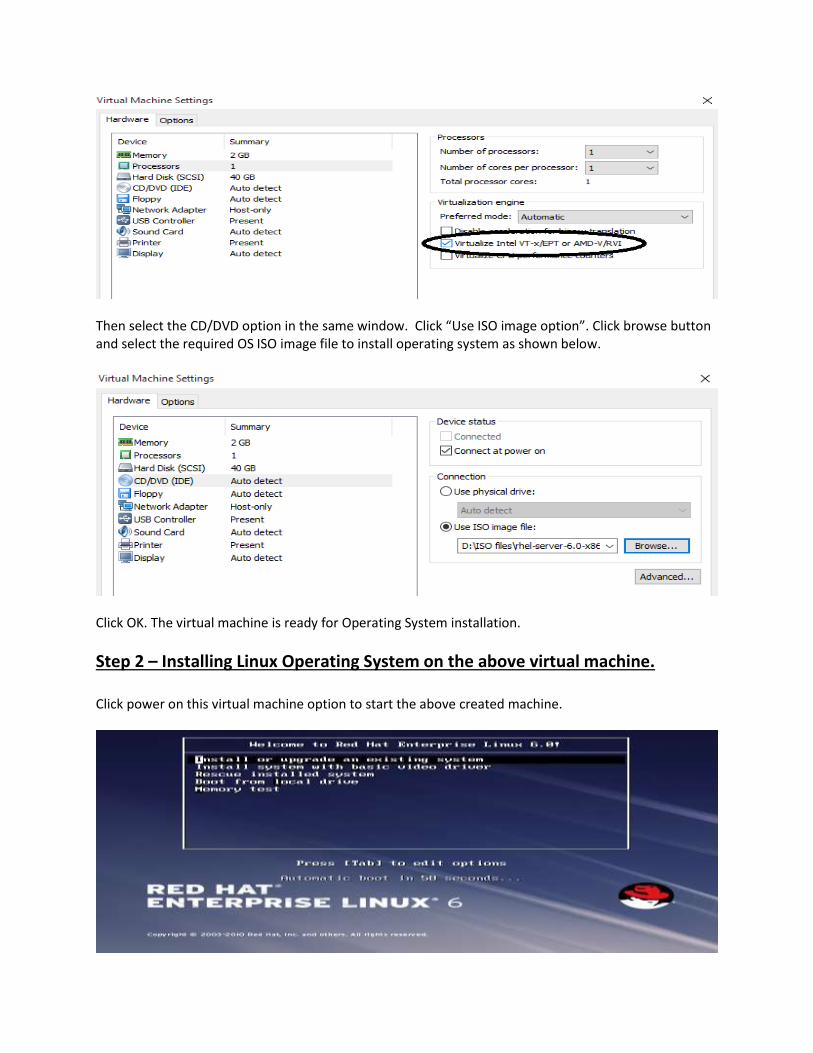
Then select the CD/DVD option in the same window. Click “Use ISO image option”. Click browse button and select the required OS ISO image file to install operating system as shown below.
Click OK. The virtual machine is ready for Operating System installation.
Step 2 – Installing Linux Operating System on the above virtual machine. Click power on this virtual machine option to start the above created machine.

In the above screen click on it and press “I”. Press Enter with “Install and upgrade an existing system” option selected.
On the above screen use side arrow key to select skip option and press Enter.
On the above screen click Next.
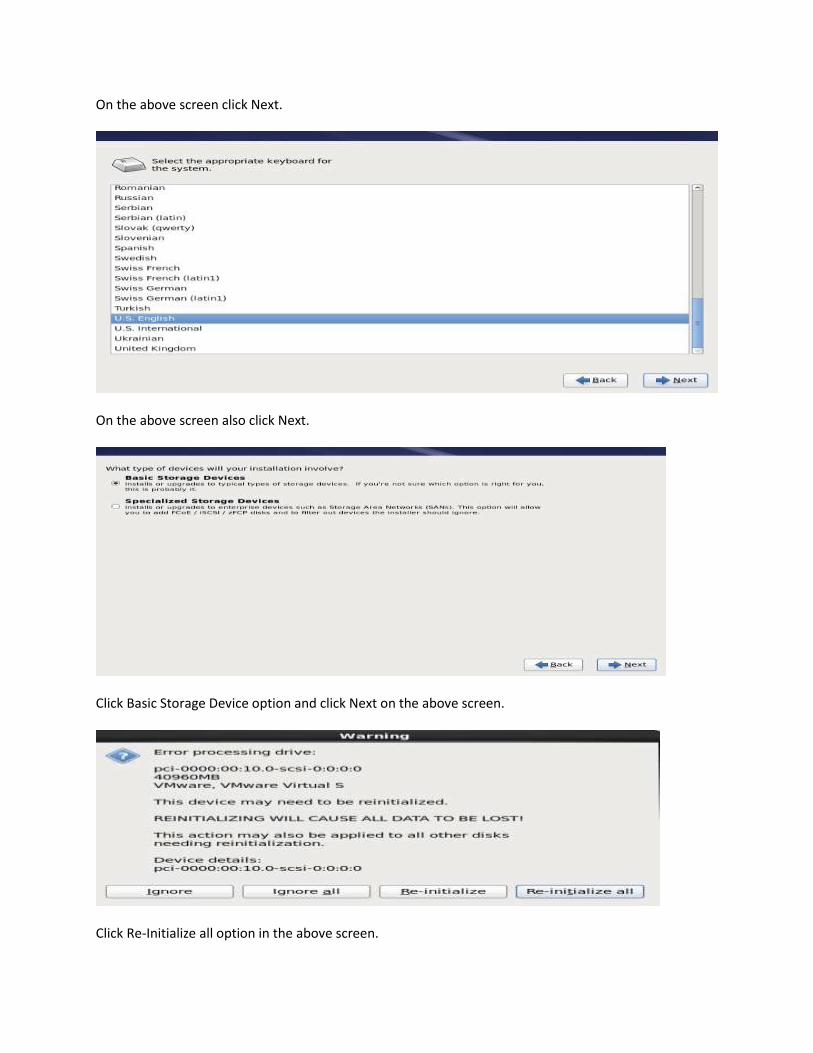
On the above screen click Next.
On the above screen also click Next.
Click Basic Storage Device option and click Next on the above screen.
Click Re-Initialize all option in the above screen.
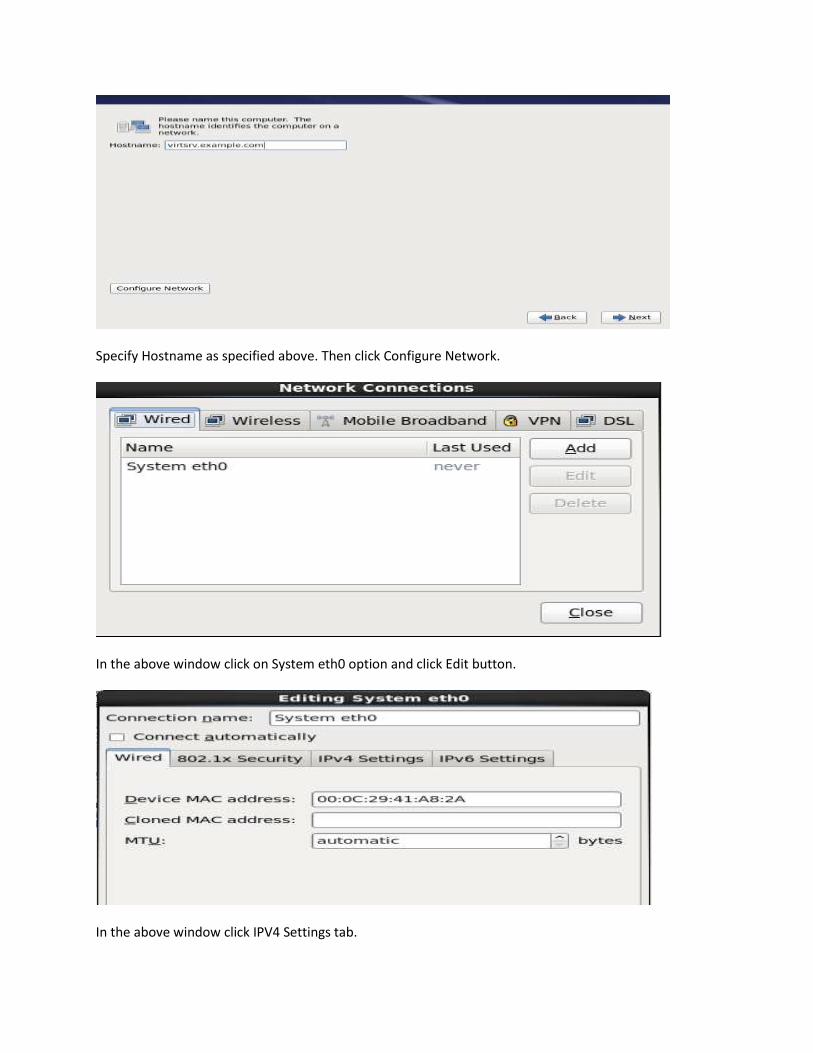
Specify Hostname as specified above. Then click Configure Network.
In the above window click on System eth0 option and click Edit button.
In the above window click IPV4 Settings tab.
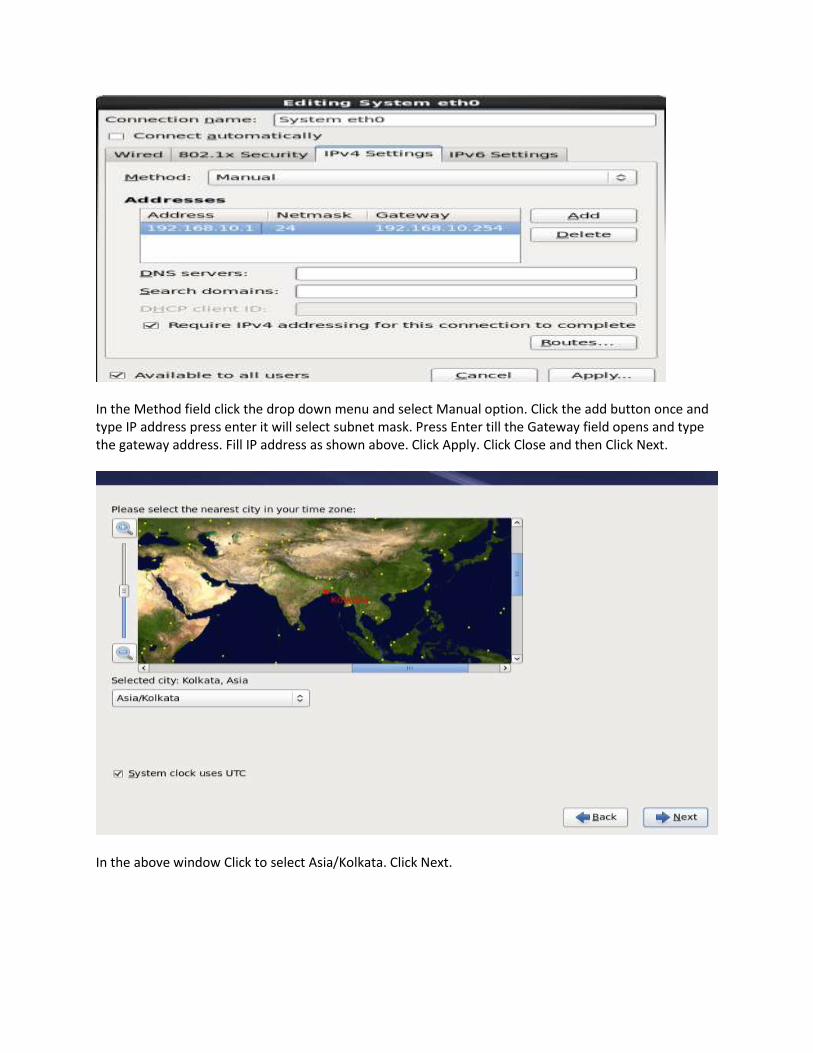
In the Method field click the drop down menu and select Manual option. Click the add button once and type IP address press enter it will select subnet mask. Press Enter till the Gateway field opens and type the gateway address. Fill IP address as shown above. Click Apply. Click Close and then Click Next.
In the above window Click to select Asia/Kolkata. Click Next.
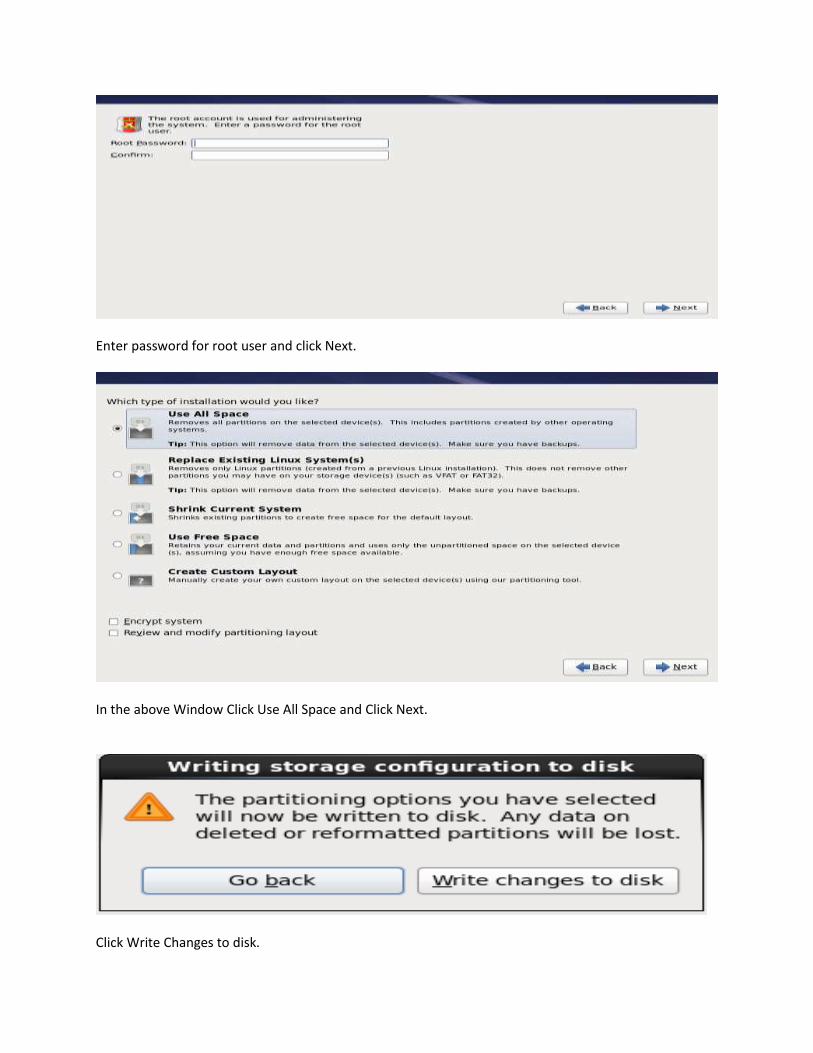
Enter password for root user and click Next.
In the above Window Click Use All Space and Click Next.
Click Write Changes to disk.
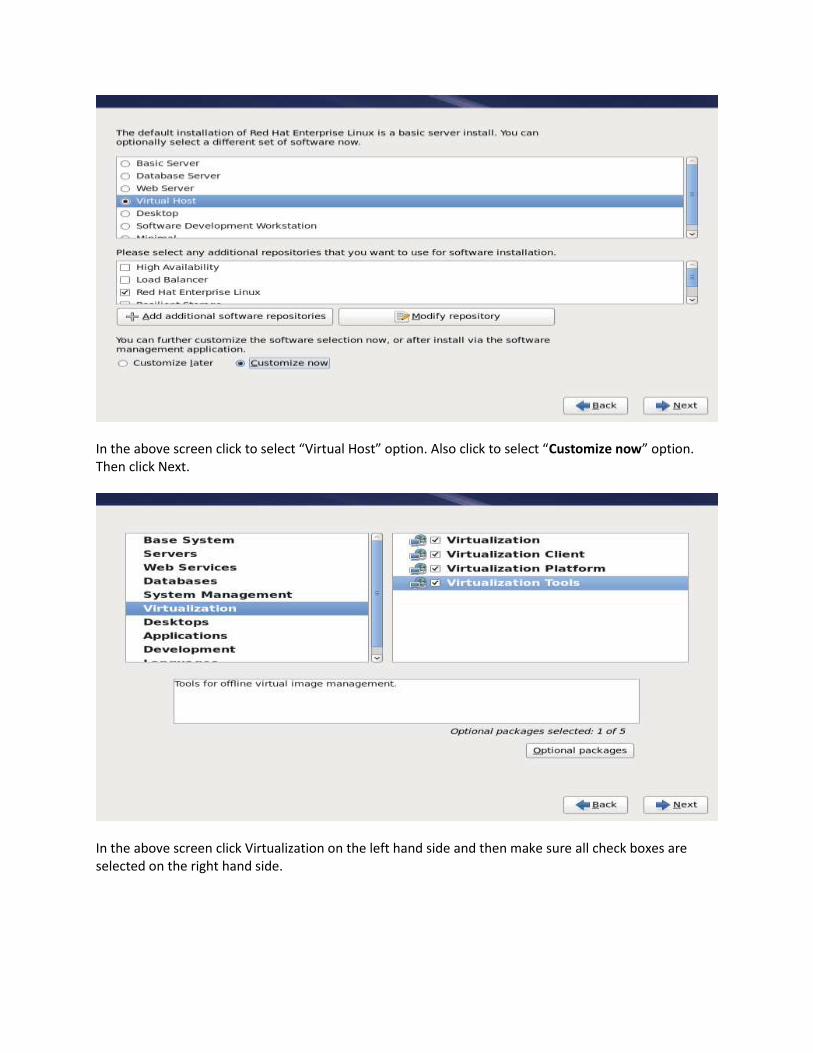
In the above screen click to select “Virtual Host” option. Also click to select “Customize now” option. Then click Next.
In the above screen click Virtualization on the left hand side and then make sure all check boxes are selected on the right hand side.
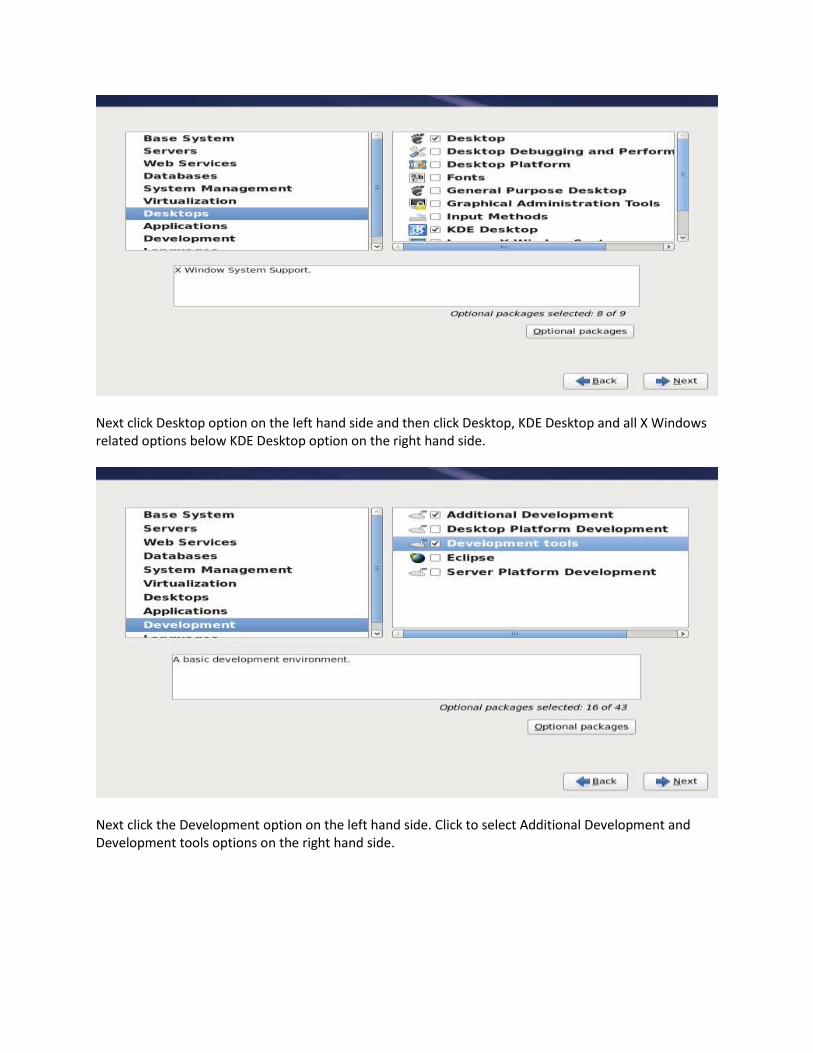
Next click Desktop option on the left hand side and then click Desktop, KDE Desktop and all X Windows related options below KDE Desktop option on the right hand side.
Next click the Development option on the left hand side. Click to select Additional Development and Development tools options on the right hand side.
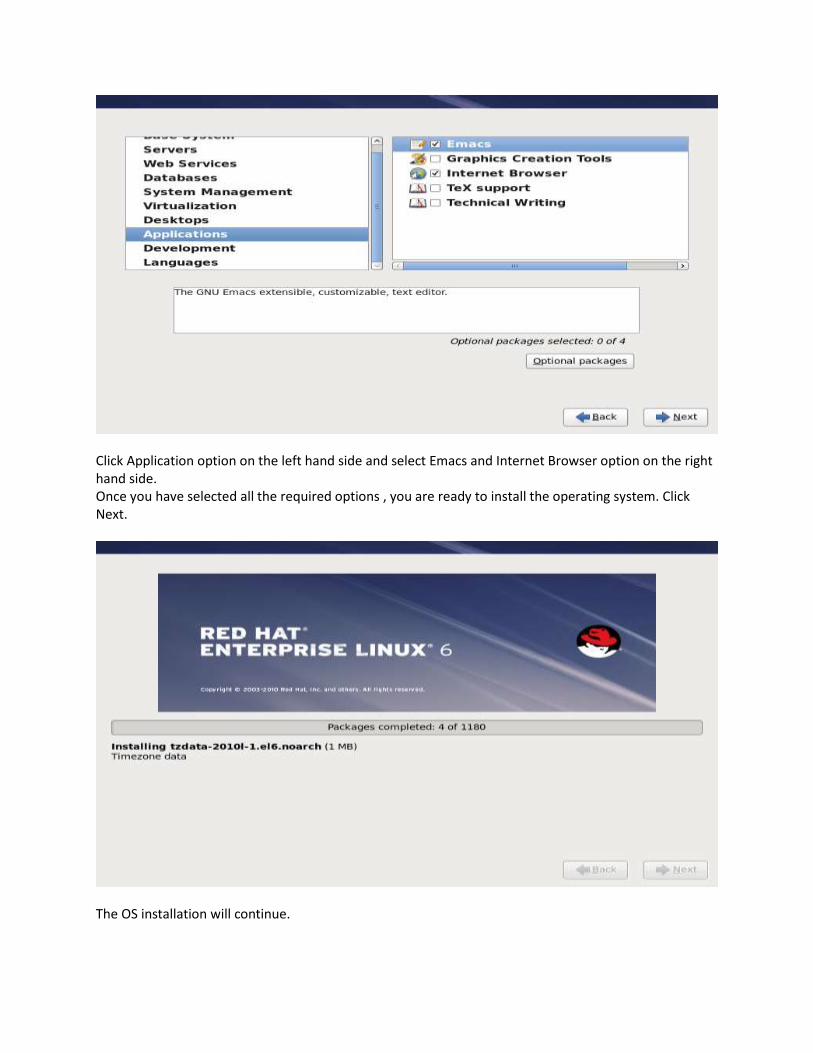
Click Application option on the left hand side and select Emacs and Internet Browser option on the right hand side. Once you have selected all the required options , you are ready to install the operating system. Click Next.
The OS installation will continue.
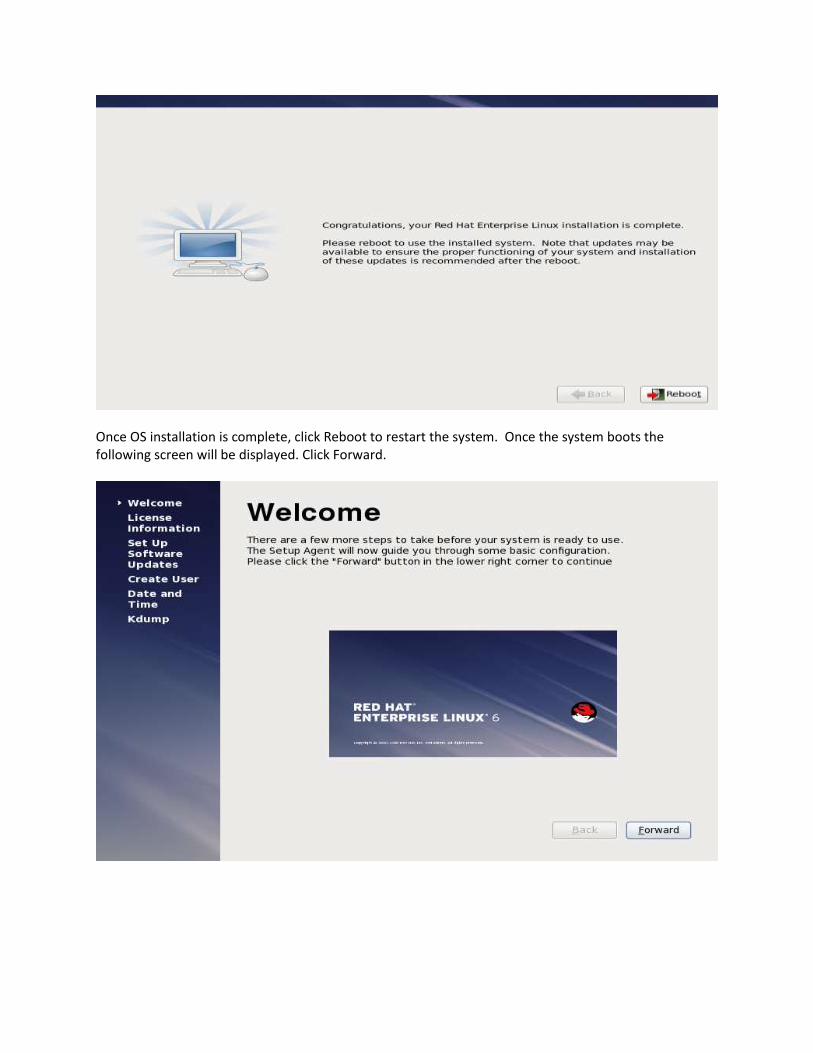
Once OS installation is complete, click Reboot to restart the system. Once the system boots the following screen will be displayed. Click Forward.
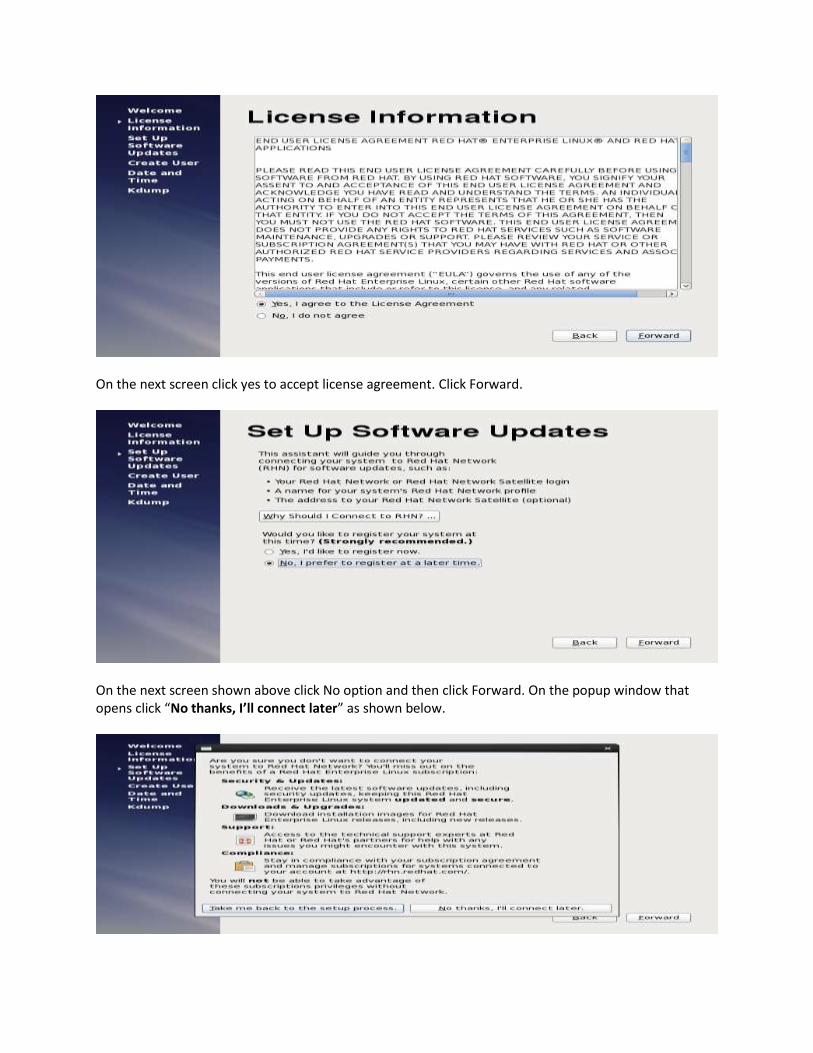
On the next screen click yes to accept license agreement. Click Forward.
On the next screen shown above click No option and then click Forward. On the popup window that opens click “No thanks, I’ll connect later” as shown below.
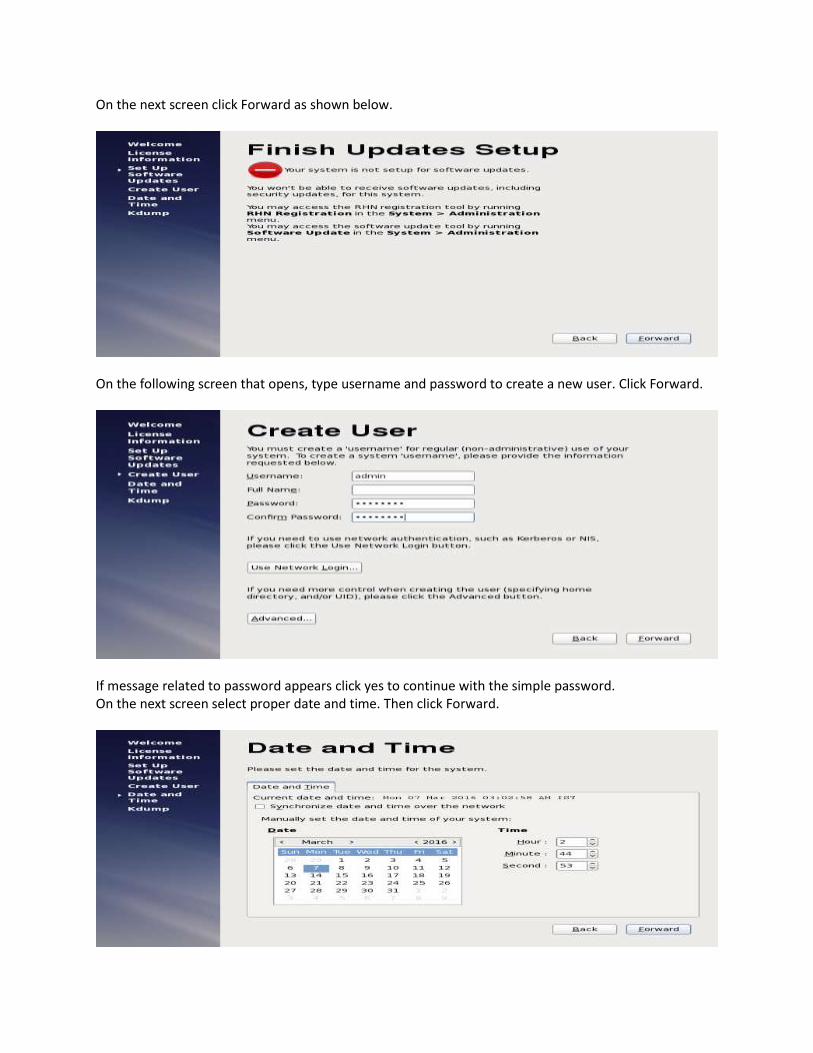
On the next screen click Forward as shown below.
On the following screen that opens, type username and password to create a new user. Click Forward.
If message related to password appears click yes to continue with the simple password. On the next screen select proper date and time. Then click Forward.
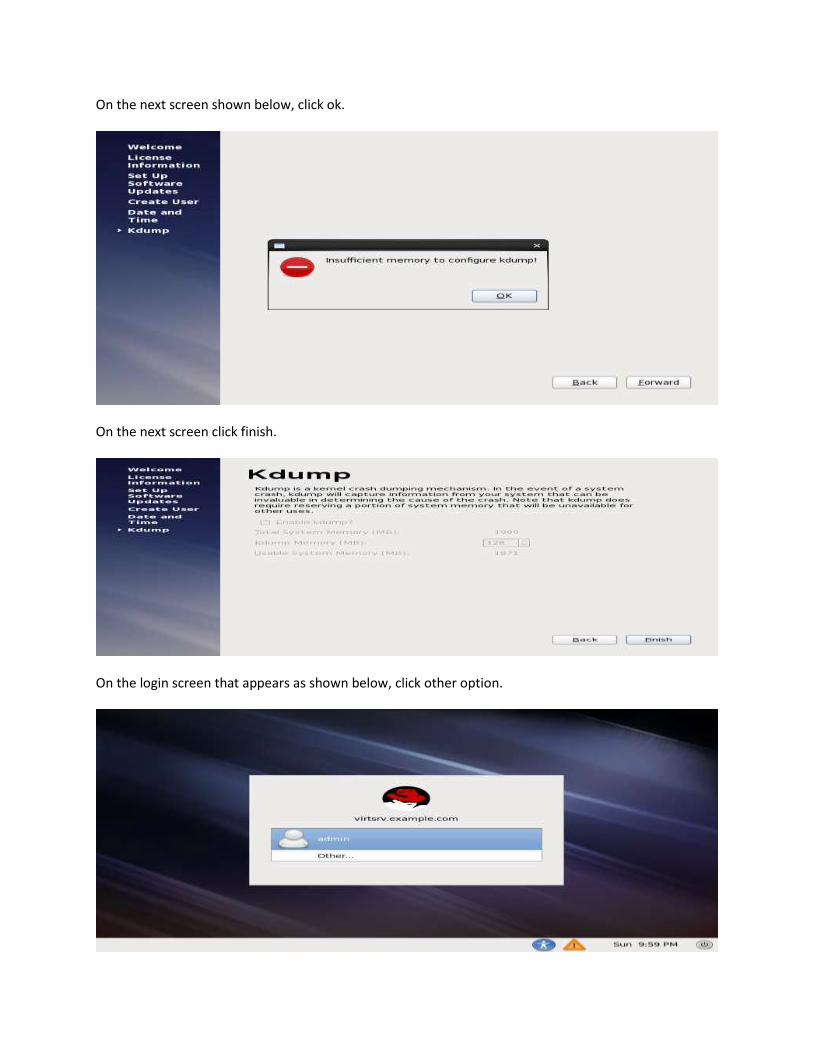
On the next screen shown below, click ok.
On the next screen click finish.
On the login screen that appears as shown below, click other option.
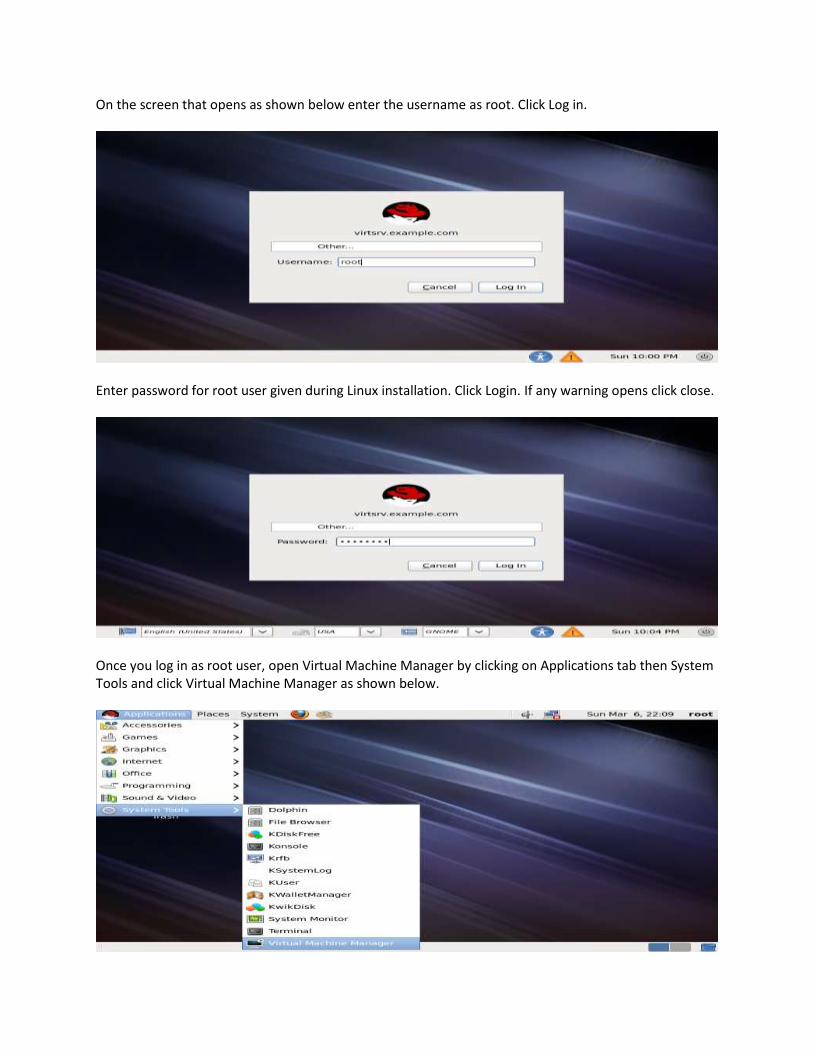
On the screen that opens as shown below enter the username as root. Click Log in.
Enter password for root user given during Linux installation. Click Login. If any warning opens click close.
Once you log in as root user, open Virtual Machine Manager by clicking on Applications tab then System Tools and click Virtual Machine Manager as shown below.
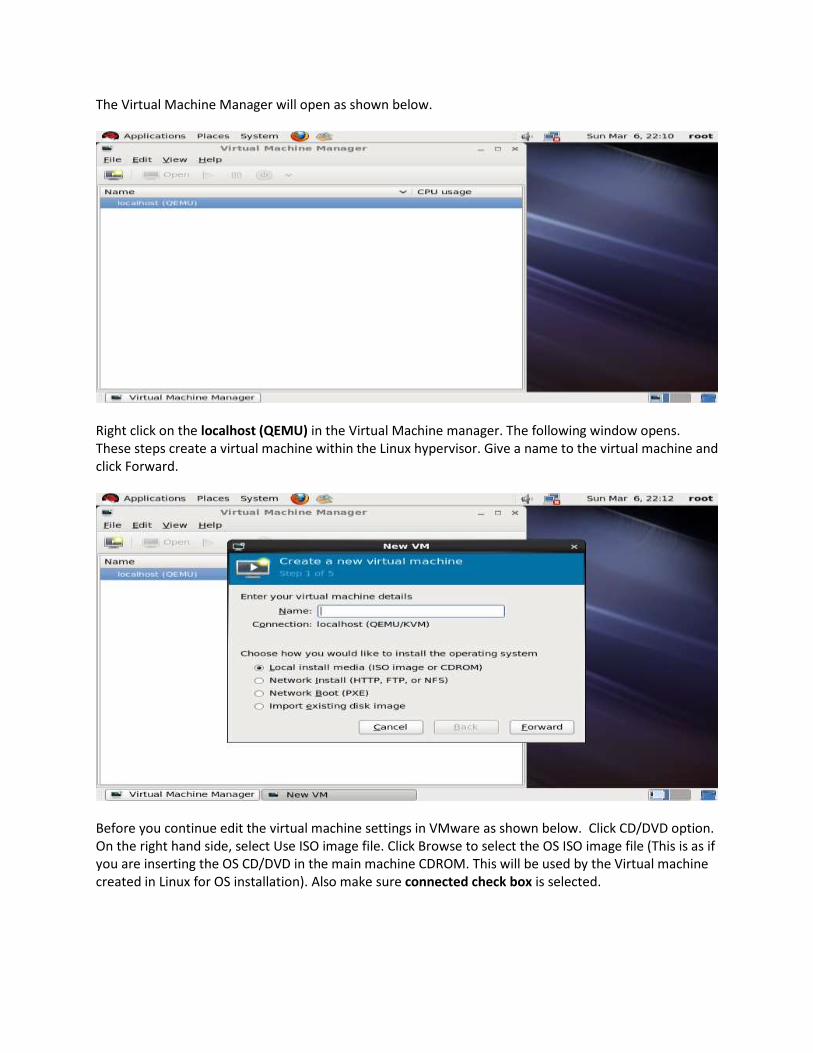
The Virtual Machine Manager will open as shown below.
Right click on the localhost (QEMU) in the Virtual Machine manager. The following window opens. These steps create a virtual machine within the Linux hypervisor. Give a name to the virtual machine and click Forward.
Before you continue edit the virtual machine settings in VMware as shown below. Click CD/DVD option. On the right hand side, select Use ISO image file. Click Browse to select the OS ISO image file (This is as if you are inserting the OS CD/DVD in the main machine CDROM. This will be used by the Virtual machine created in Linux for OS installation). Also make sure connected check box is selected.
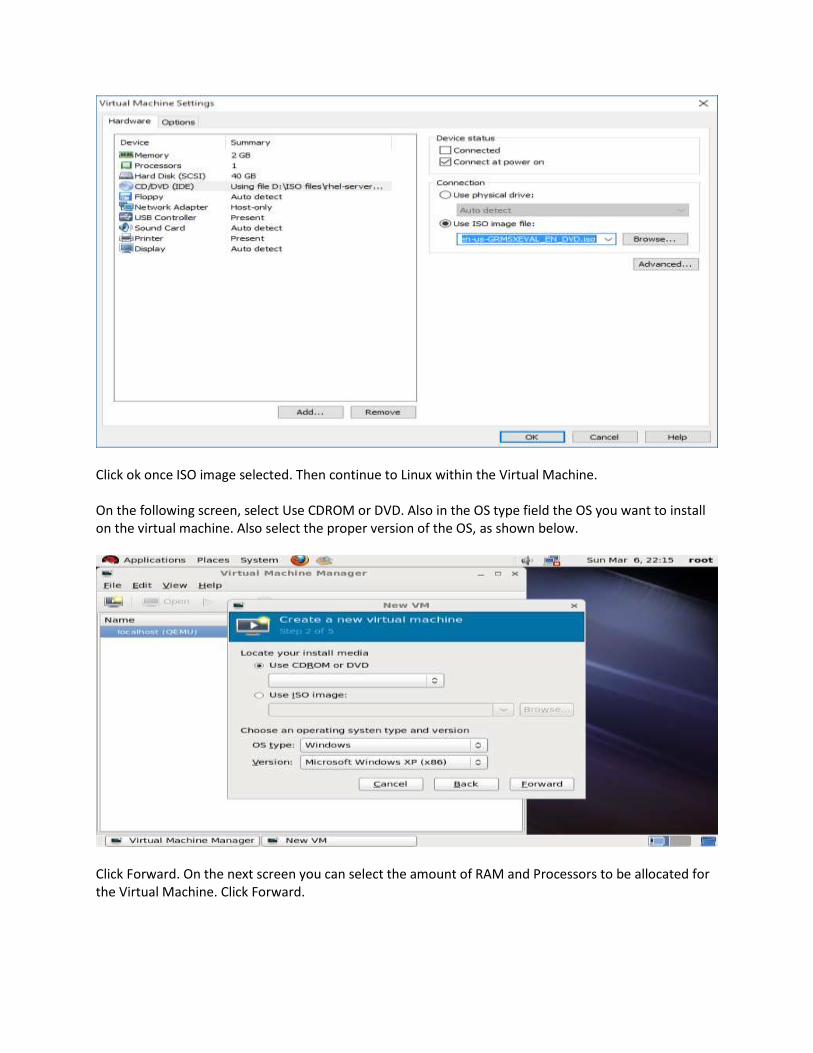
Click ok once ISO image selected. Then continue to Linux within the Virtual Machine. On the following screen, select Use CDROM or DVD. Also in the OS type field the OS you want to install on the virtual machine. Also select the proper version of the OS, as shown below.
Click Forward. On the next screen you can select the amount of RAM and Processors to be allocated for the Virtual Machine. Click Forward.
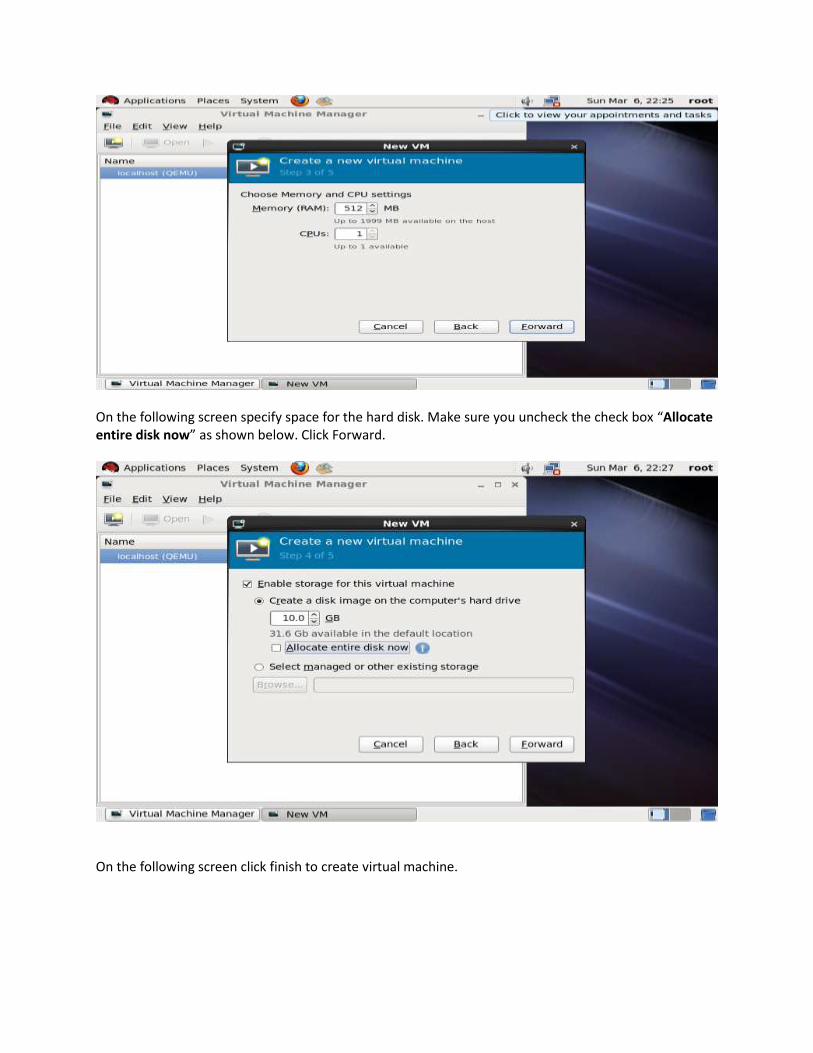
On the following screen specify space for the hard disk. Make sure you uncheck the check box “Allocate entire disk now” as shown below. Click Forward.
On the following screen click finish to create virtual machine.
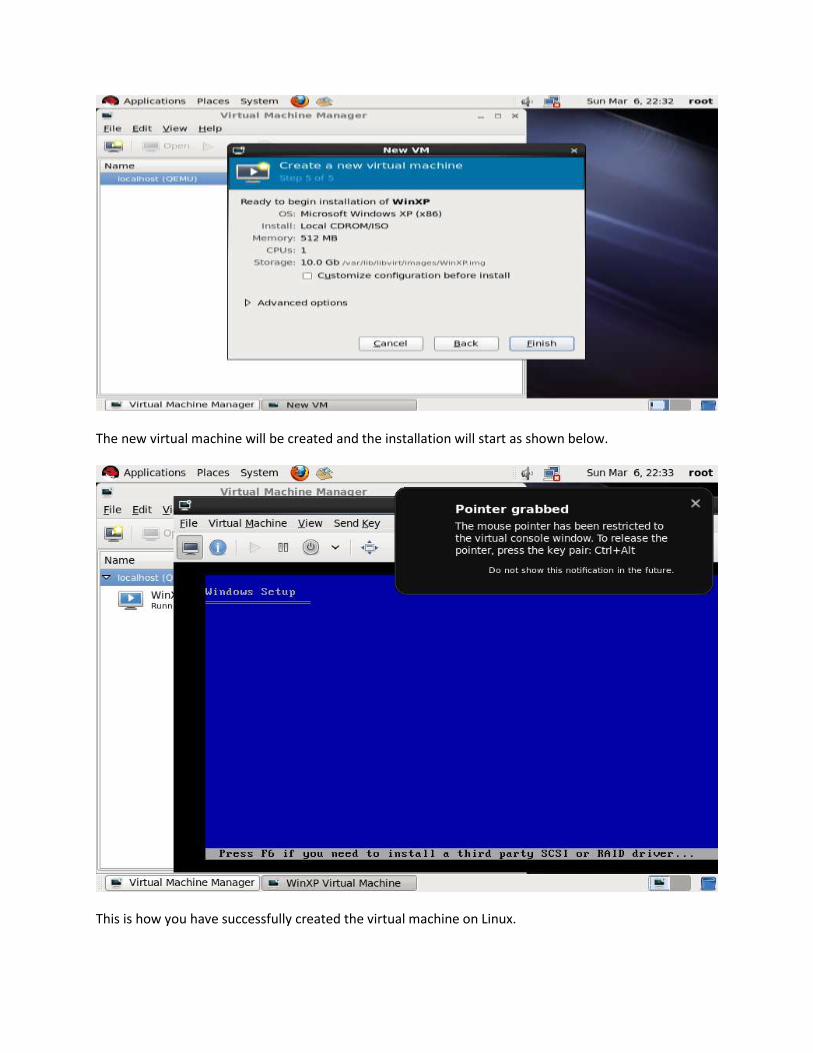
The new virtual machine will be created and the installation will start as shown below.
This is how you have successfully created the virtual machine on Linux.