Embed Size (px)
Citation preview

©Pole Star 2013 - All Rights Reserved
How to collect data and test NAO Campus?
2 ©Pole Star 2013 - All Rights Reserved 21/07/2014
You are halfway to setting up NAO Campus Indoor Location solution.
Venue modeling done. Data collection to do.

3 ©Pole Star 2013 - All Rights Reserved 21/07/2014
The aim is to create a positioning database (PDB)
from the collected sensory data of the whole venue.
e.g : Wi-Fi or Bluetooth Low Energy (BLE) power levels

4 ©Pole Star 2013 - All Rights Reserved 21/07/2014
For positioning on Android,
existing Wi-Fi infrastructure can be used
For positioning on iOS,
our BLE beacons are required
Our BLE beacons can also be used
if your Wi-Fi network is not dense enough.
BLE-based positioning only works on Android 4.3+

5 ©Pole Star 2013 - All Rights Reserved 21/07/2014
You can order BLE Beacons on NAO Cloud

6 ©Pole Star 2013 - All Rights Reserved 21/07/2014
Once your Wi-Fi and/or BLE infrastructure is ready.
You can go collect measurements in the building.
7 ©Pole Star 2013 - All Rights Reserved 21/07/2014
To collect measurements,
you’ll walk everywhere in the building
twice (forth, back, forth, back)
with our setup mobile app running on your smartphone

8 ©Pole Star 2013 - All Rights Reserved 21/07/2014
The app displays the floor plans.
While walking, every once in a while,
place a waypoint at your current location on the floor plans.
The system will associate the sensory data collected along the way
with your locations and will generate a Positioning Database.
9 ©Pole Star 2013 - All Rights Reserved 21/07/2014
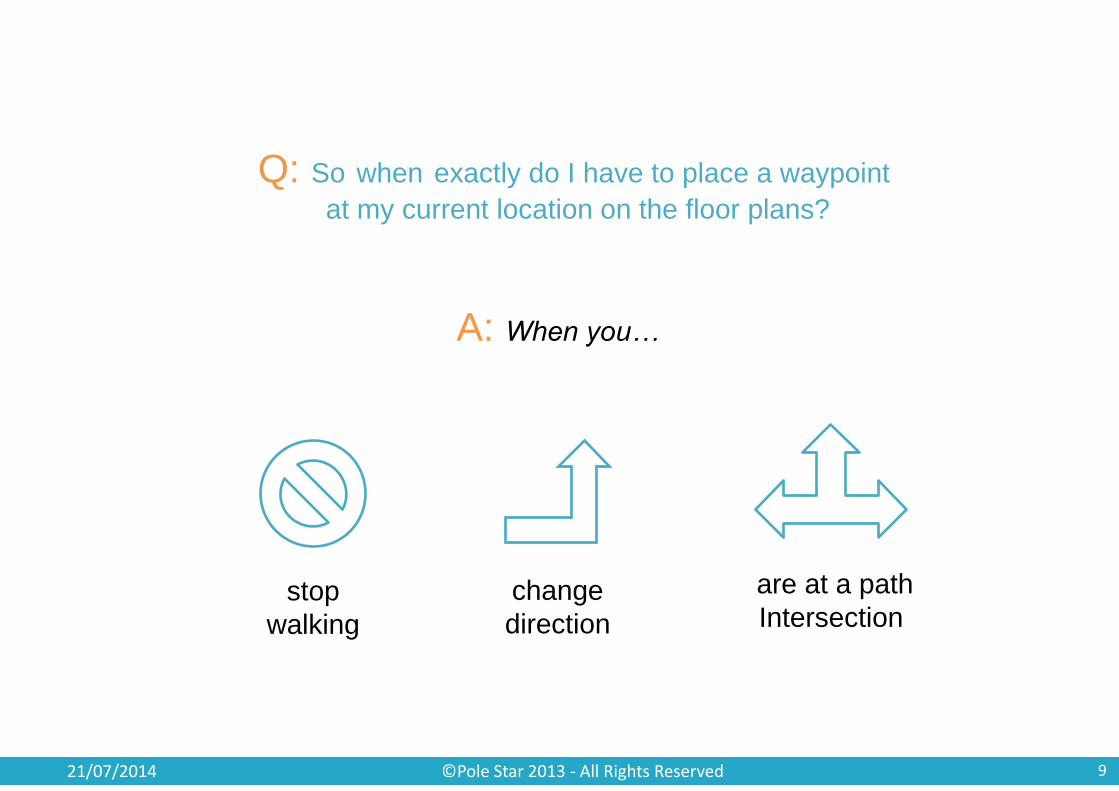
A: When you…
Q: So when exactly do I have to place a waypoint
at my current location on the floor plans?
stop
walking
change
direction
are at a path
Intersection
10 ©Pole Star 2013 - All Rights Reserved 21/07/2014
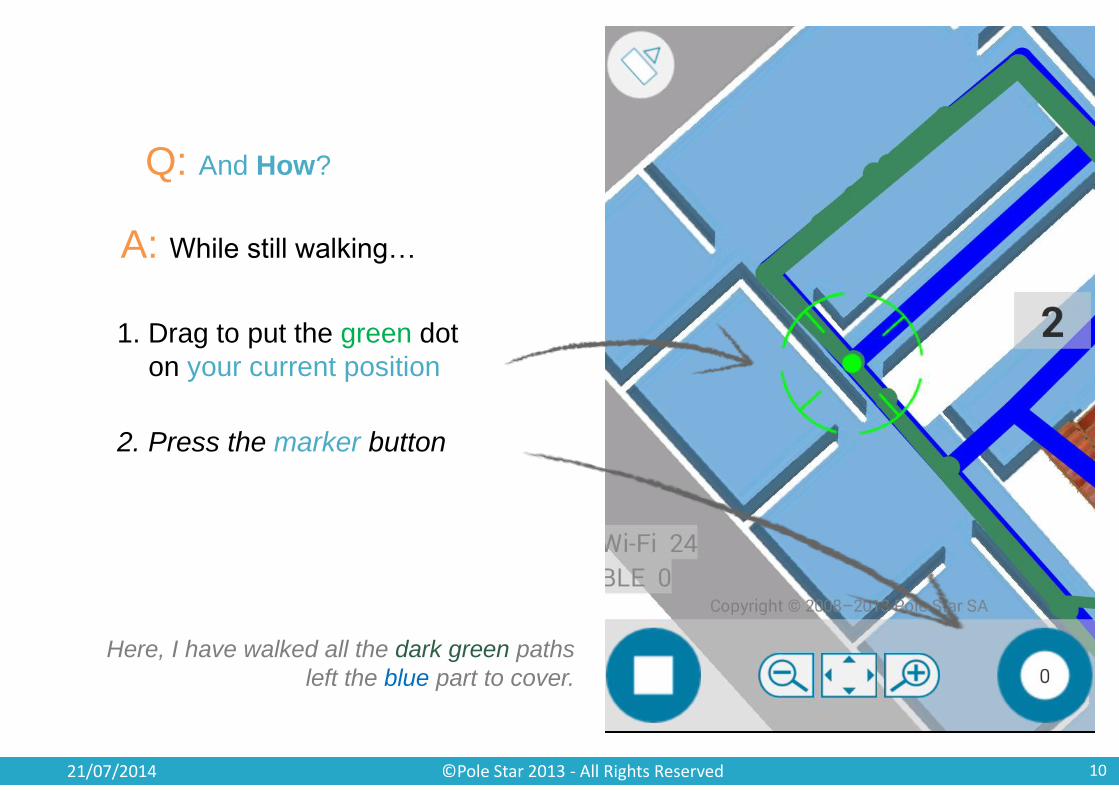
A: While still walking…
Q: And How?
2. Press the marker button
1. Drag to put the green dot
on your current position
Here, I have walked all the dark green paths
left the blue part to cover.

11 ©Pole Star 2013 - All Rights Reserved 21/07/2014
Our setup mobile app is called NAO Logger,
available on Google Play and Apple App Store
The one on Google Play can be used for both Wi-Fi and BLE deployment.
The one on Apple App Store only is used for BLE deployment.

12 ©Pole Star 2013 - All Rights Reserved 21/07/2014
1. Authenticate yourself 2. Select your venue 3. Let it download itself 0. Install then launch
NAO Logger
Then we arrive at the main screen…

13 ©Pole Star 2013 - All Rights Reserved 21/07/2014
Number of BLE or
Wi-Fi beacons detected
Start or stop collecting data
Downstairs maps
Level number
Synchronize data
with server
For data collection
For positioning testing
Path left to walk
Path already
walked
14 ©Pole Star 2013 - All Rights Reserved 21/07/2014
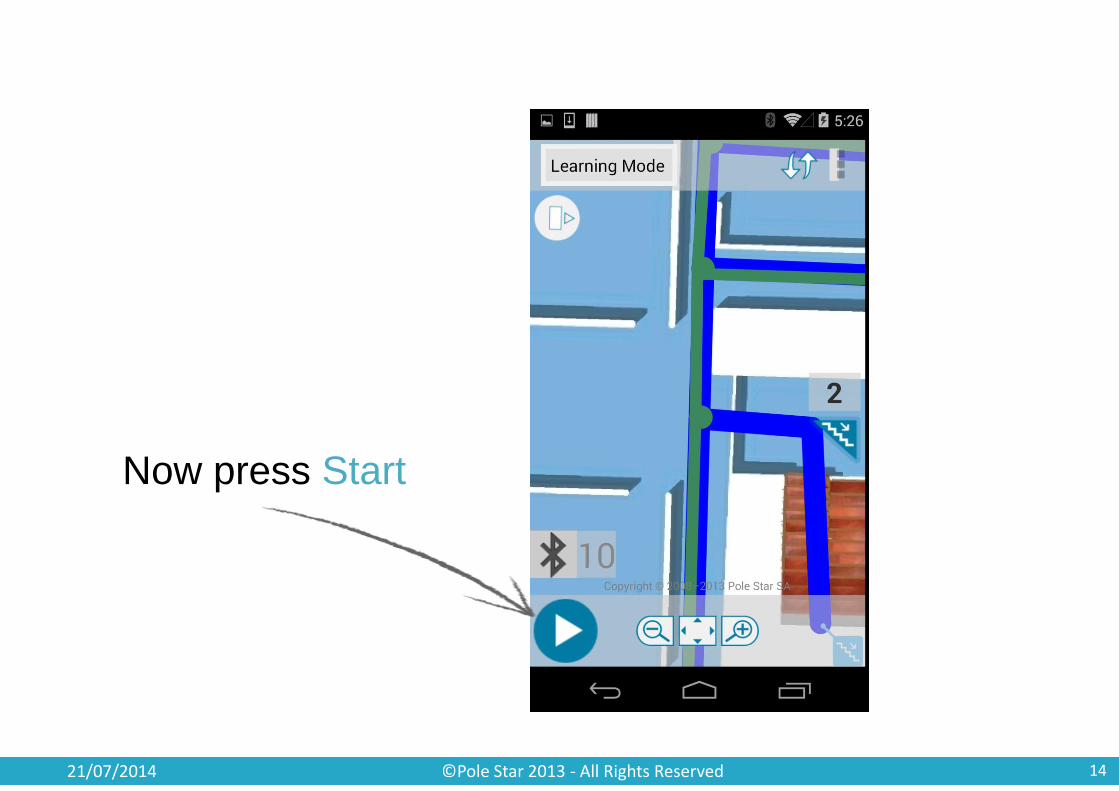
Now press Start

15 ©Pole Star 2013 - All Rights Reserved 21/07/2014
The Start button
changed to Stop
The Marker button
appeared
The green dot should be
your current location
when you press the
Marker button

16 ©Pole Star 2013 - All Rights Reserved 21/07/2014
Now, imagine right now your are at A
and you want to collect data
from A to B
17 ©Pole Star 2013 - All Rights Reserved 21/07/2014
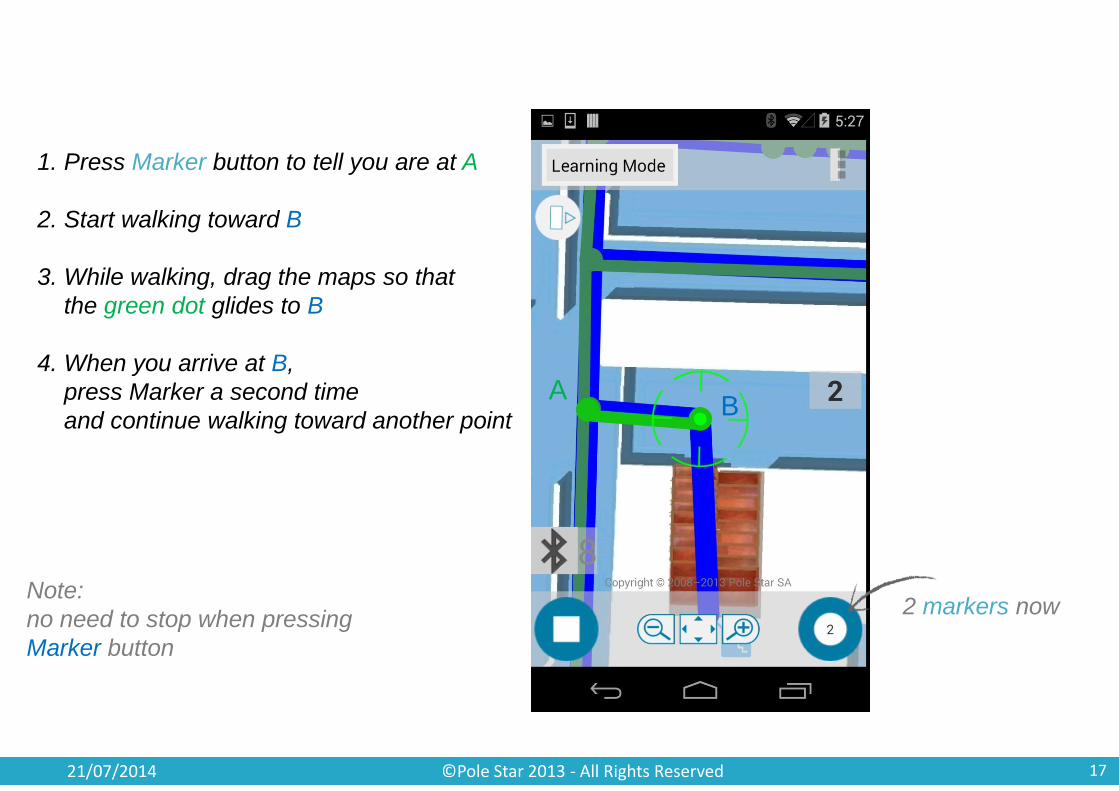
2 markers now
1. Press Marker button to tell you are at A
2. Start walking toward B
3. While walking, drag the maps so that
the green dot glides to B
4. When you arrive at B,
press Marker a second time
and continue walking toward another point
Note:
no need to stop when pressing
Marker button
A B

18 ©Pole Star 2013 - All Rights Reserved 21/07/2014
The blue path is walked one way (A to B)
If you now collect data from B to A,
the blue path will be entirely covered in green
A B
19 ©Pole Star 2013 - All Rights Reserved 21/07/2014
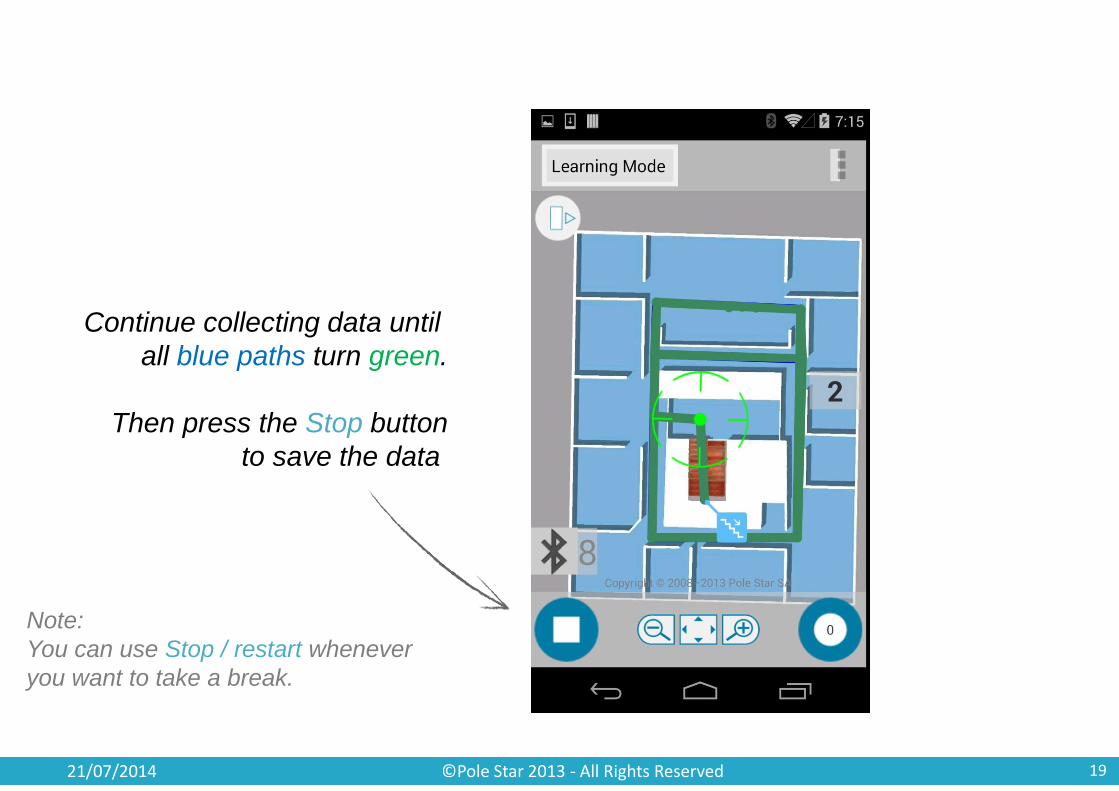
Continue collecting data until
all blue paths turn green.
Then press the Stop button
to save the data
Note:
You can use Stop / restart whenever
you want to take a break.
20 ©Pole Star 2013 - All Rights Reserved 21/07/2014
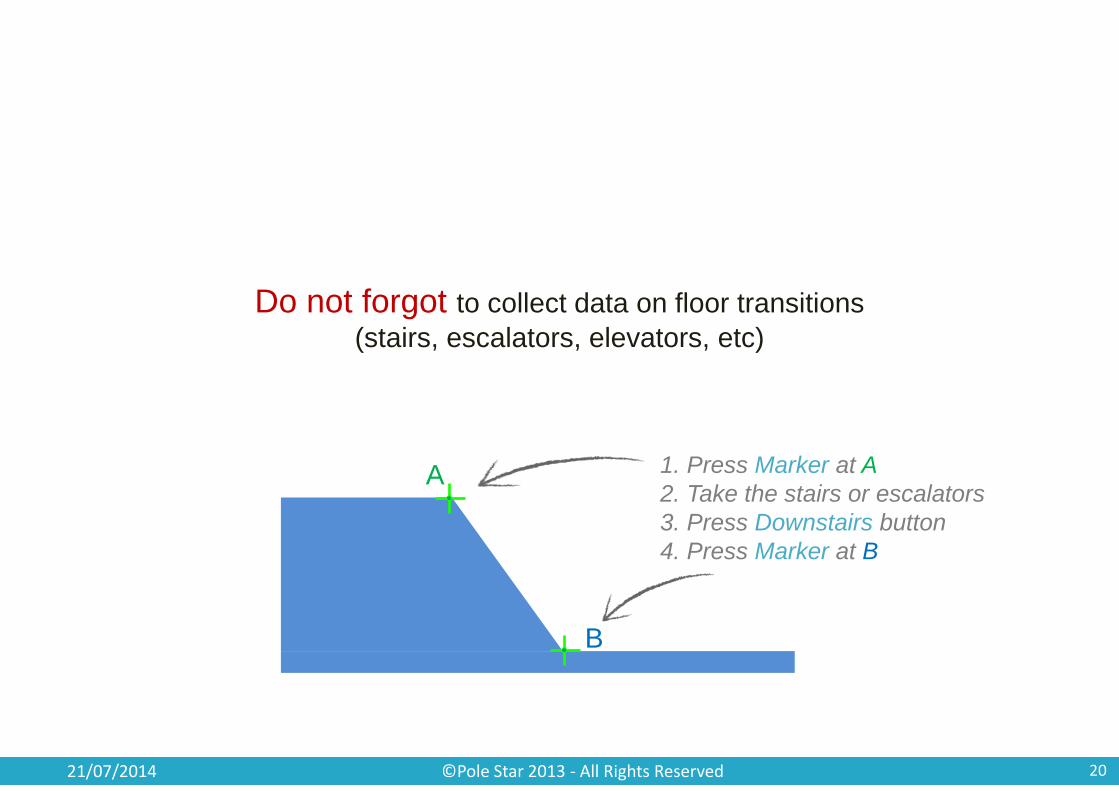
Do not forgot to collect data on floor transitions
(stairs, escalators, elevators, etc)
A
B
1. Press Marker at A
2. Take the stairs or escalators
3. Press Downstairs button
4. Press Marker at B

21 ©Pole Star 2013 - All Rights Reserved 21/07/2014
Once all the walkable paths are green,
press Synchronize to send
collected data to the server.
22 ©Pole Star 2013 - All Rights Reserved 21/07/2014
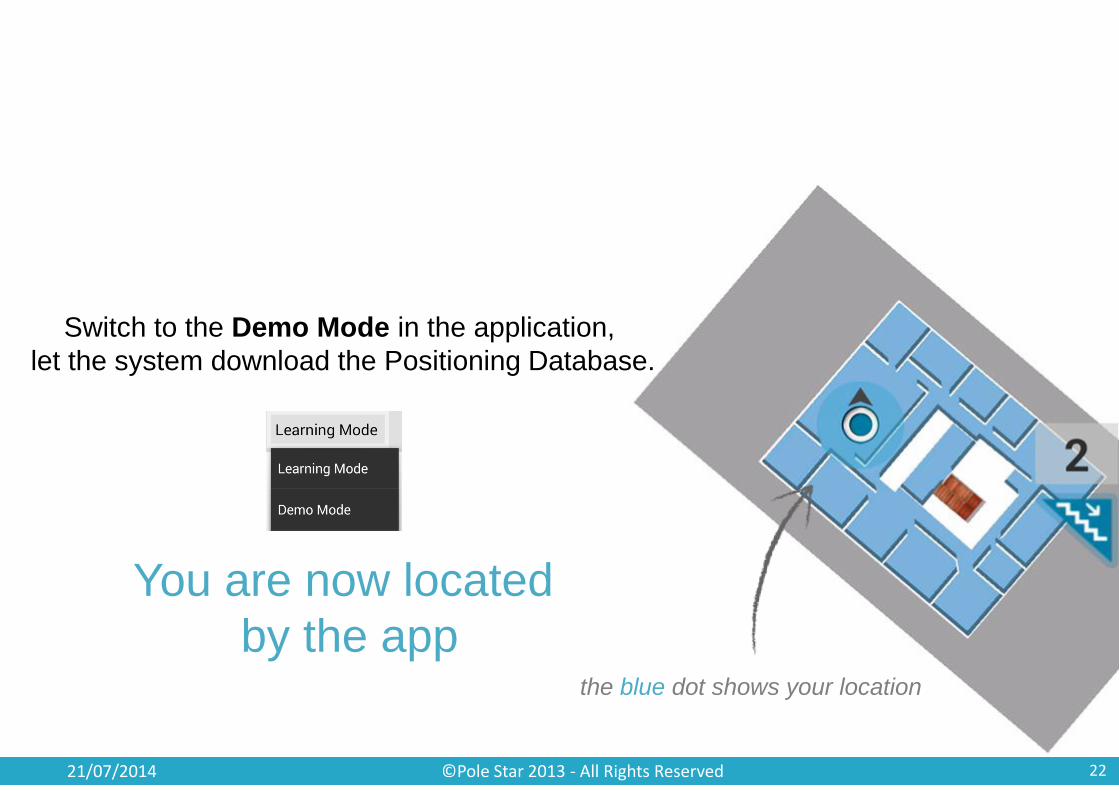
Switch to the Demo Mode in the application,
let the system download the Positioning Database.
You are now located
by the app the blue dot shows your location