Embed Size (px)
Citation preview
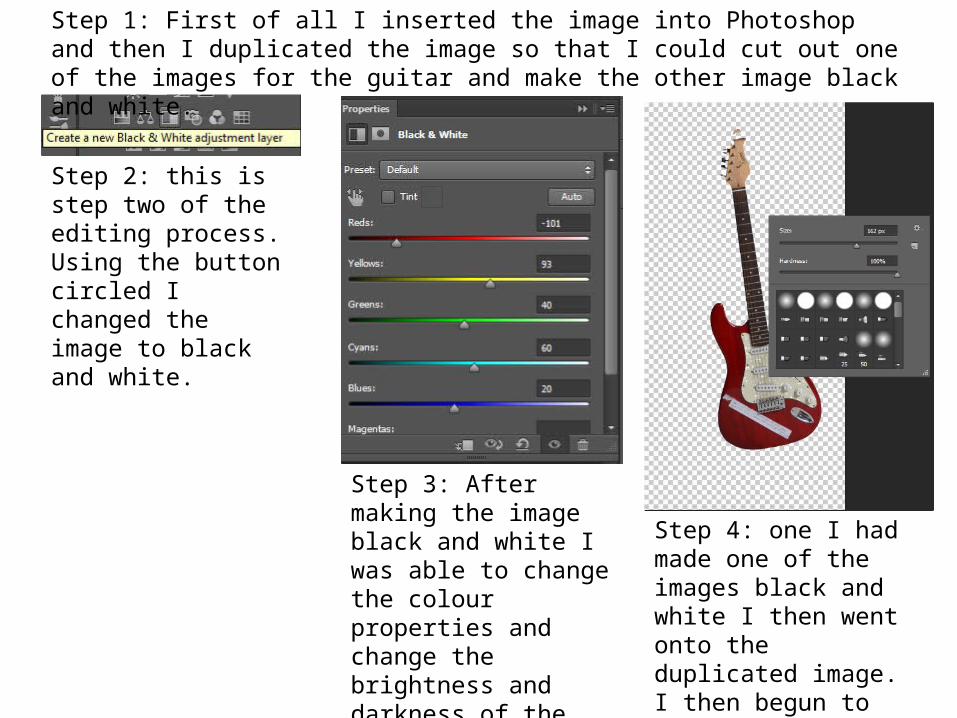
Step 2: this is step two of the editing process. Using the button circled I changed the image to black and white.
Step 1: First of all I inserted the image into Photoshop and then I duplicated the image so that I could cut out one of the images for the guitar and make the other image black and white.
Step 3: After making the image black and white I was able to change the colour properties and change the brightness and darkness of the image.
Step 4: one I had made one of the images black and white I then went onto the duplicated image. I then begun to cut out the guitar from the image. Using the rubber tool shown above.
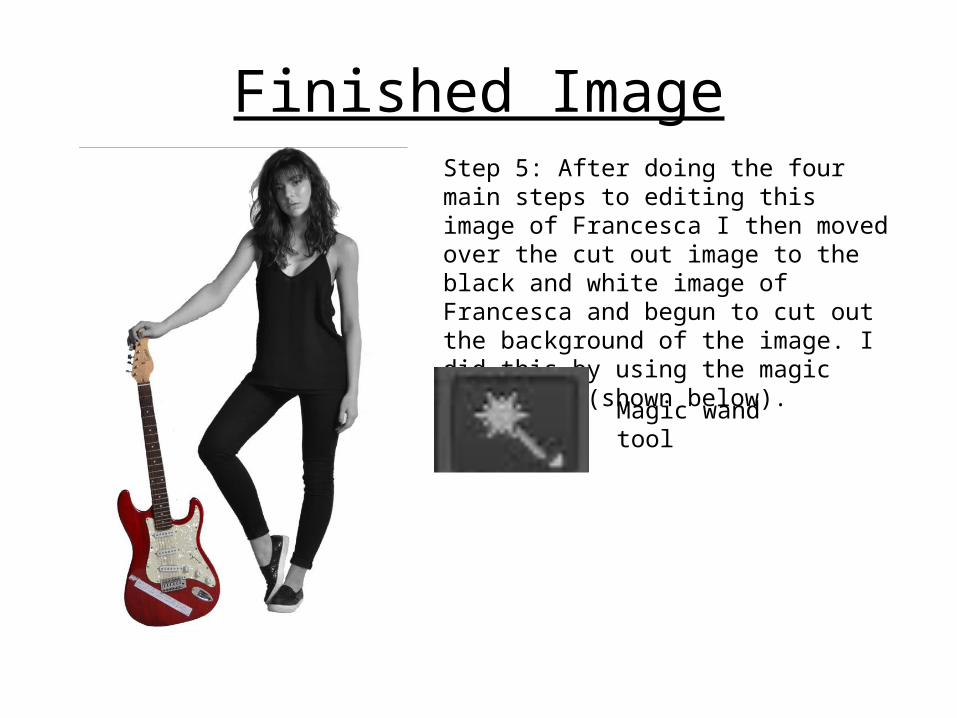
Finished ImageStep 5: After doing the four main steps to editing this image of Francesca I then moved over the cut out image to the black and white image of Francesca and begun to cut out the background of the image. I did this by using the magic wand tool (shown below).
Magic wand tool